Blighted Village is one of the early-game hostile areas in Baldur’s Gate 3. This goblin stronghold is located west of Emerald Grove and east of Goblin camp. Under the guidance of their ruthless leaders, goblins have extended their control to the east with the help of ogres.
There are a lot of activities, quests, and secrets for you to explore in the Blighted Village. Some of these quests have a direct impact on your story progression. As it is among the very first areas of the Wilderness, we don’t want you to miss out on anything. In this guide, we will cover every major activity that you can do in the Blighted Village.
Blighted Village location in Baldur’s Gate 3
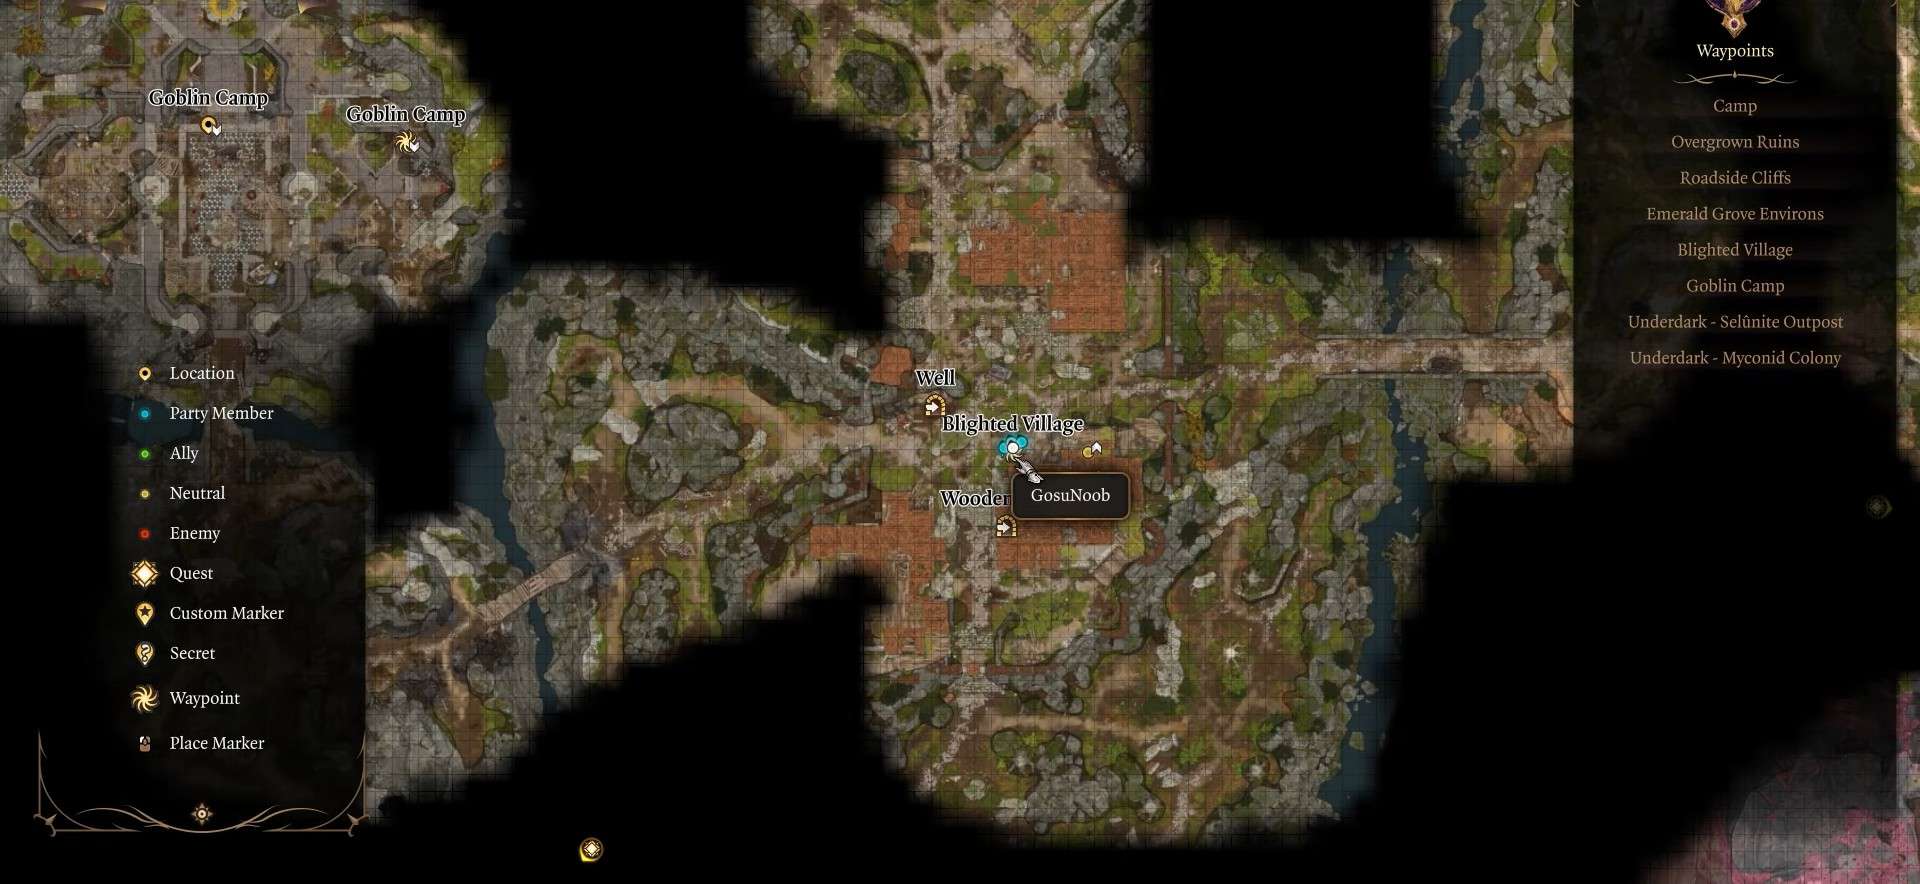
Blighted Village is located to the West of Druid Grove, and its entrance is at (X: 125, Y: 445). Simply follow the road west until you find a dead Tiefling and a horse cart. If your character passes the perception check after using the Speak with the Dead spell, they will tell you of the village ahead.
It is an extremely hostile area teeming with goblins. If you want to enter the Blighted Village peacefully, we recommend creating a Drow character. As one of the goblin leaders, Minthara is a Drow. This gives you a free access pass. You can also go North of the main entrance to find some Knotted Vines. Climb them to enter the Blighted Village stealthily.
Confront the Goblins at the entrance
There are various groups of Goblins and Ogres scattered throughout the Blighted Village. The first one you will encounter is near the entrance. These goblins are not friendly, and you need to deceive them to enter the village peacefully. You can also use your Illithid Powers to control their leader.
If you fail to persuade the goblins, the only solution is killing them. This fight can be brutal in the early stages of the game. Keep the fight contained, as the noise will attract the other goblins nearby, making the encounter downright impossible.
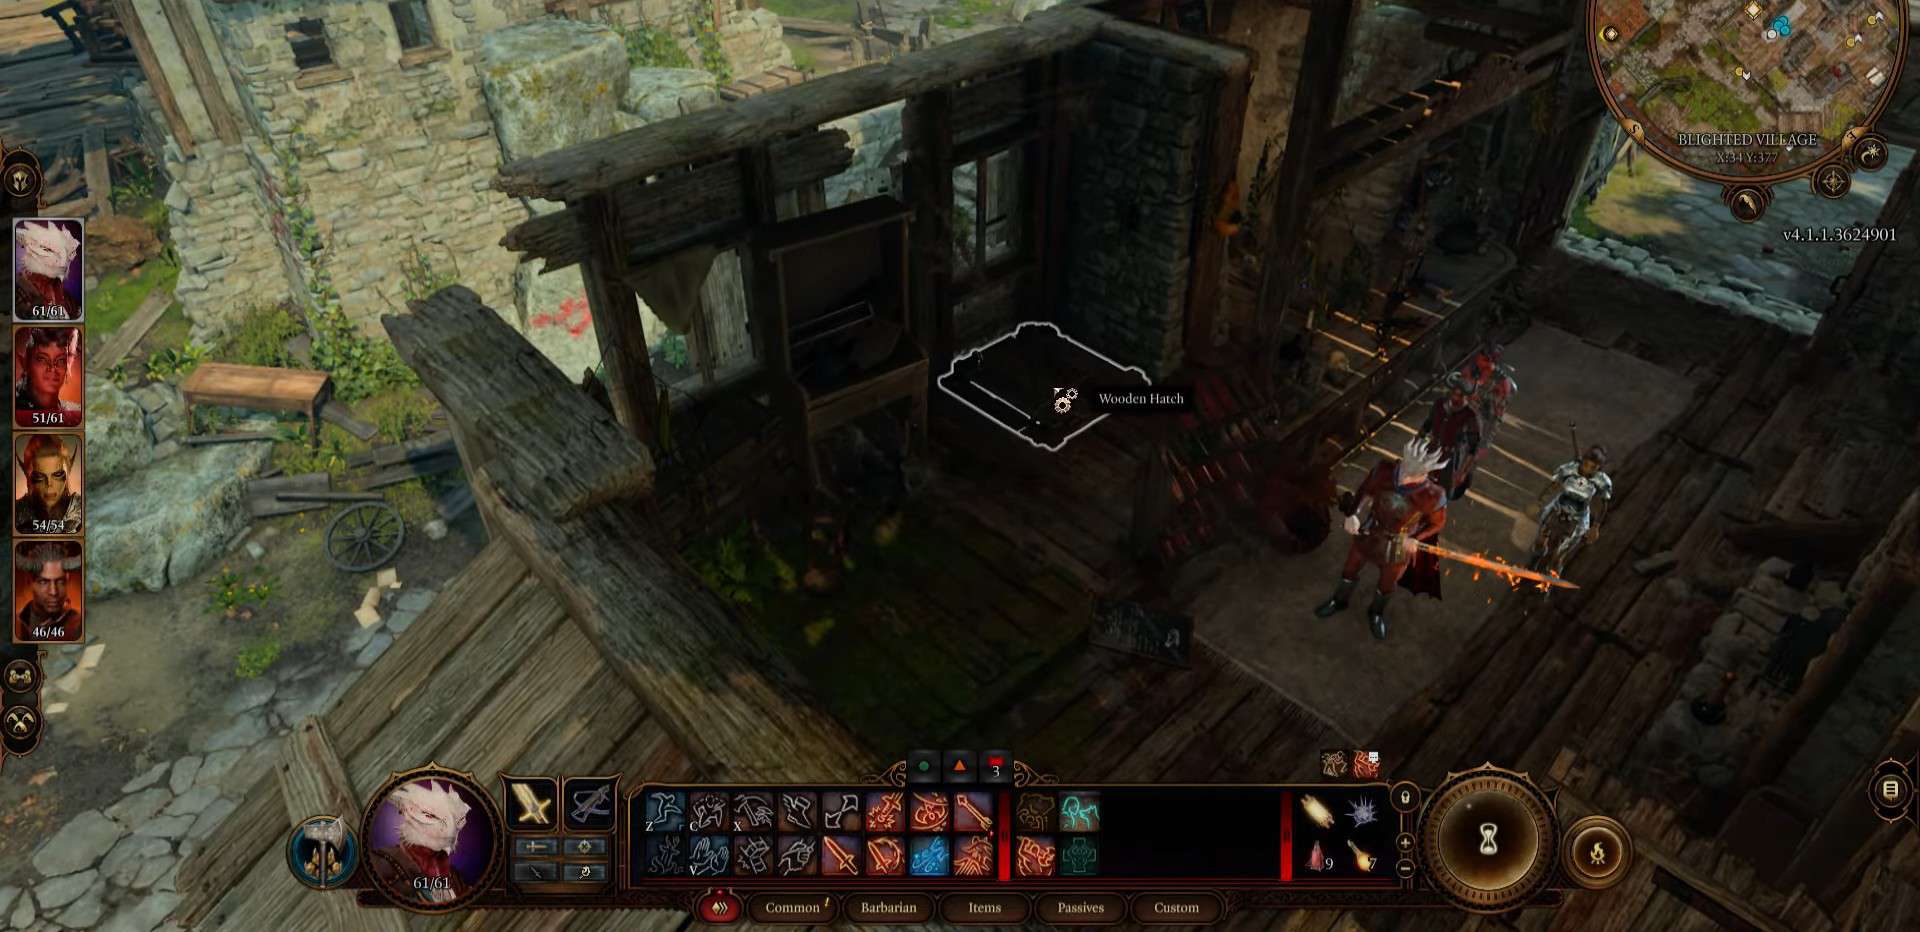
Necromancer’s Basement and Necromancy of Thay
Here is a destroyed house directly left of the main entrance of the Blighted Village. This house contains a secret basement, which you can access through a hatch (X: -33, Y: 377). This basement is full of loot and a unique secret.
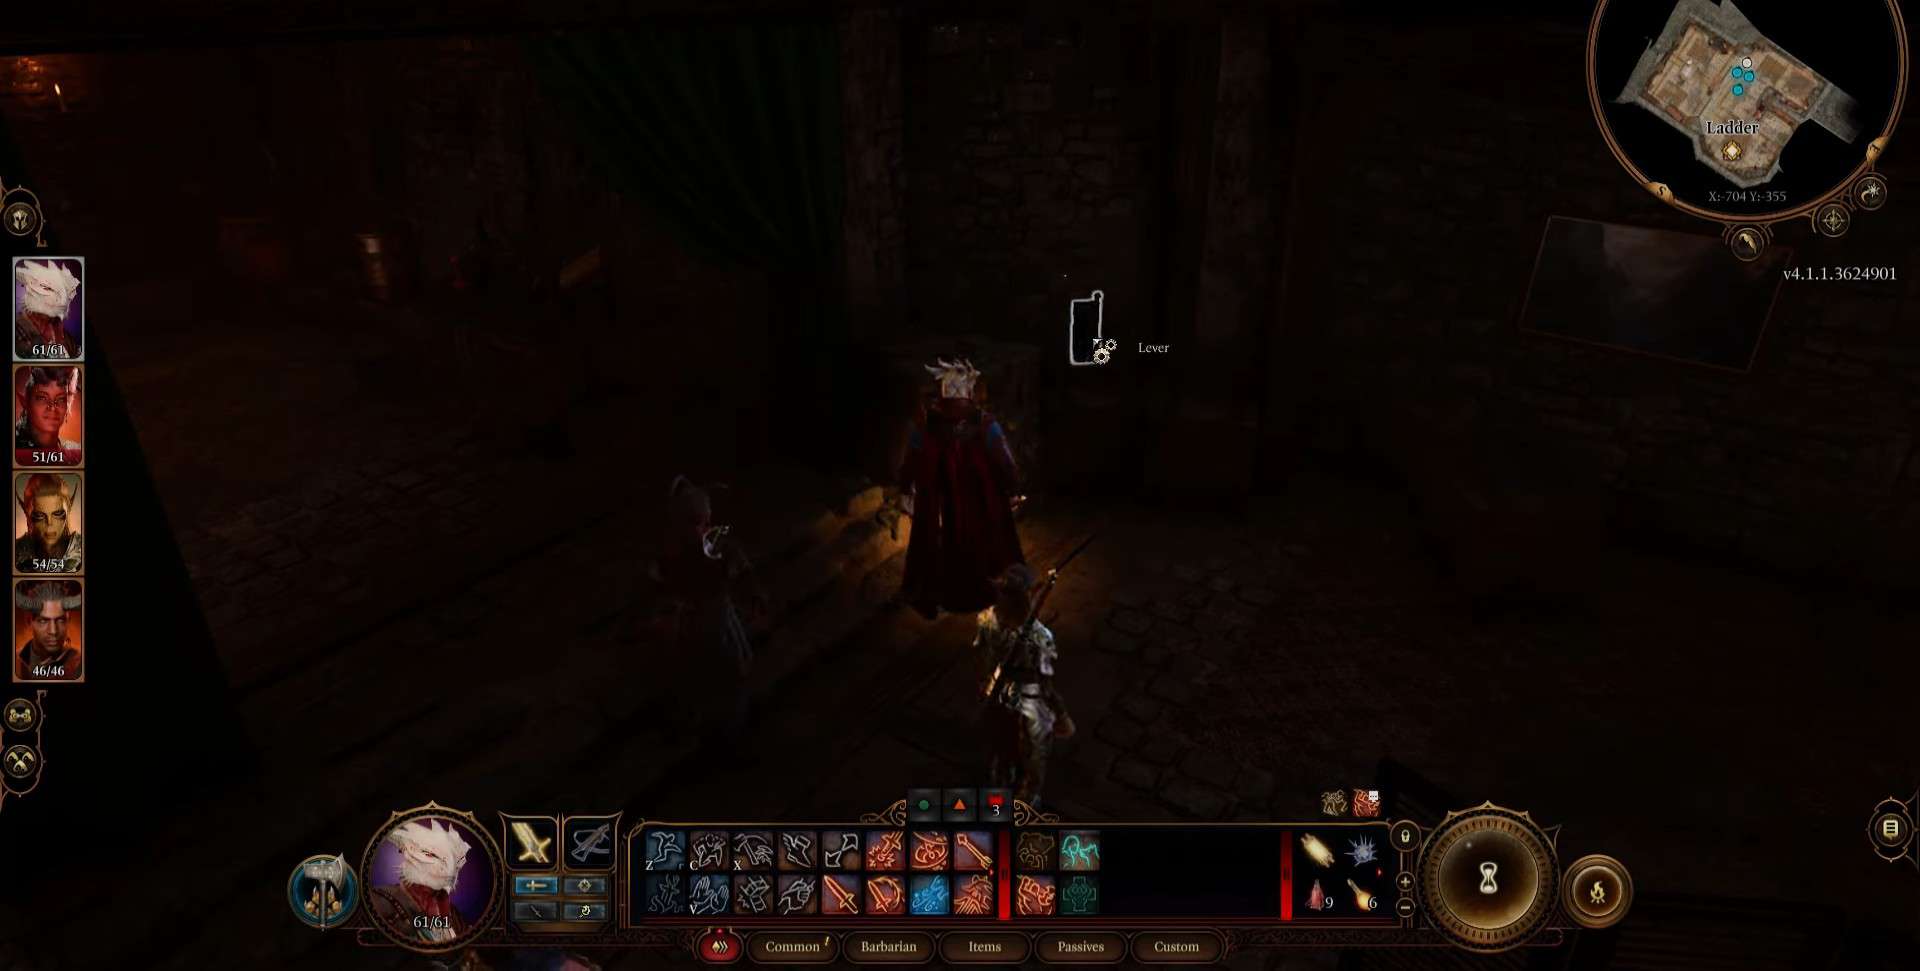
Go to the Northwest corner of the basement (X: -702, Y: -355) to find three boxes. Remove these boxes to locate a hidden lever. Pull it to remove a bookshelf and find a hidden path. Here, you can find and read the Dark Journal to start Search the Cellar side quest.
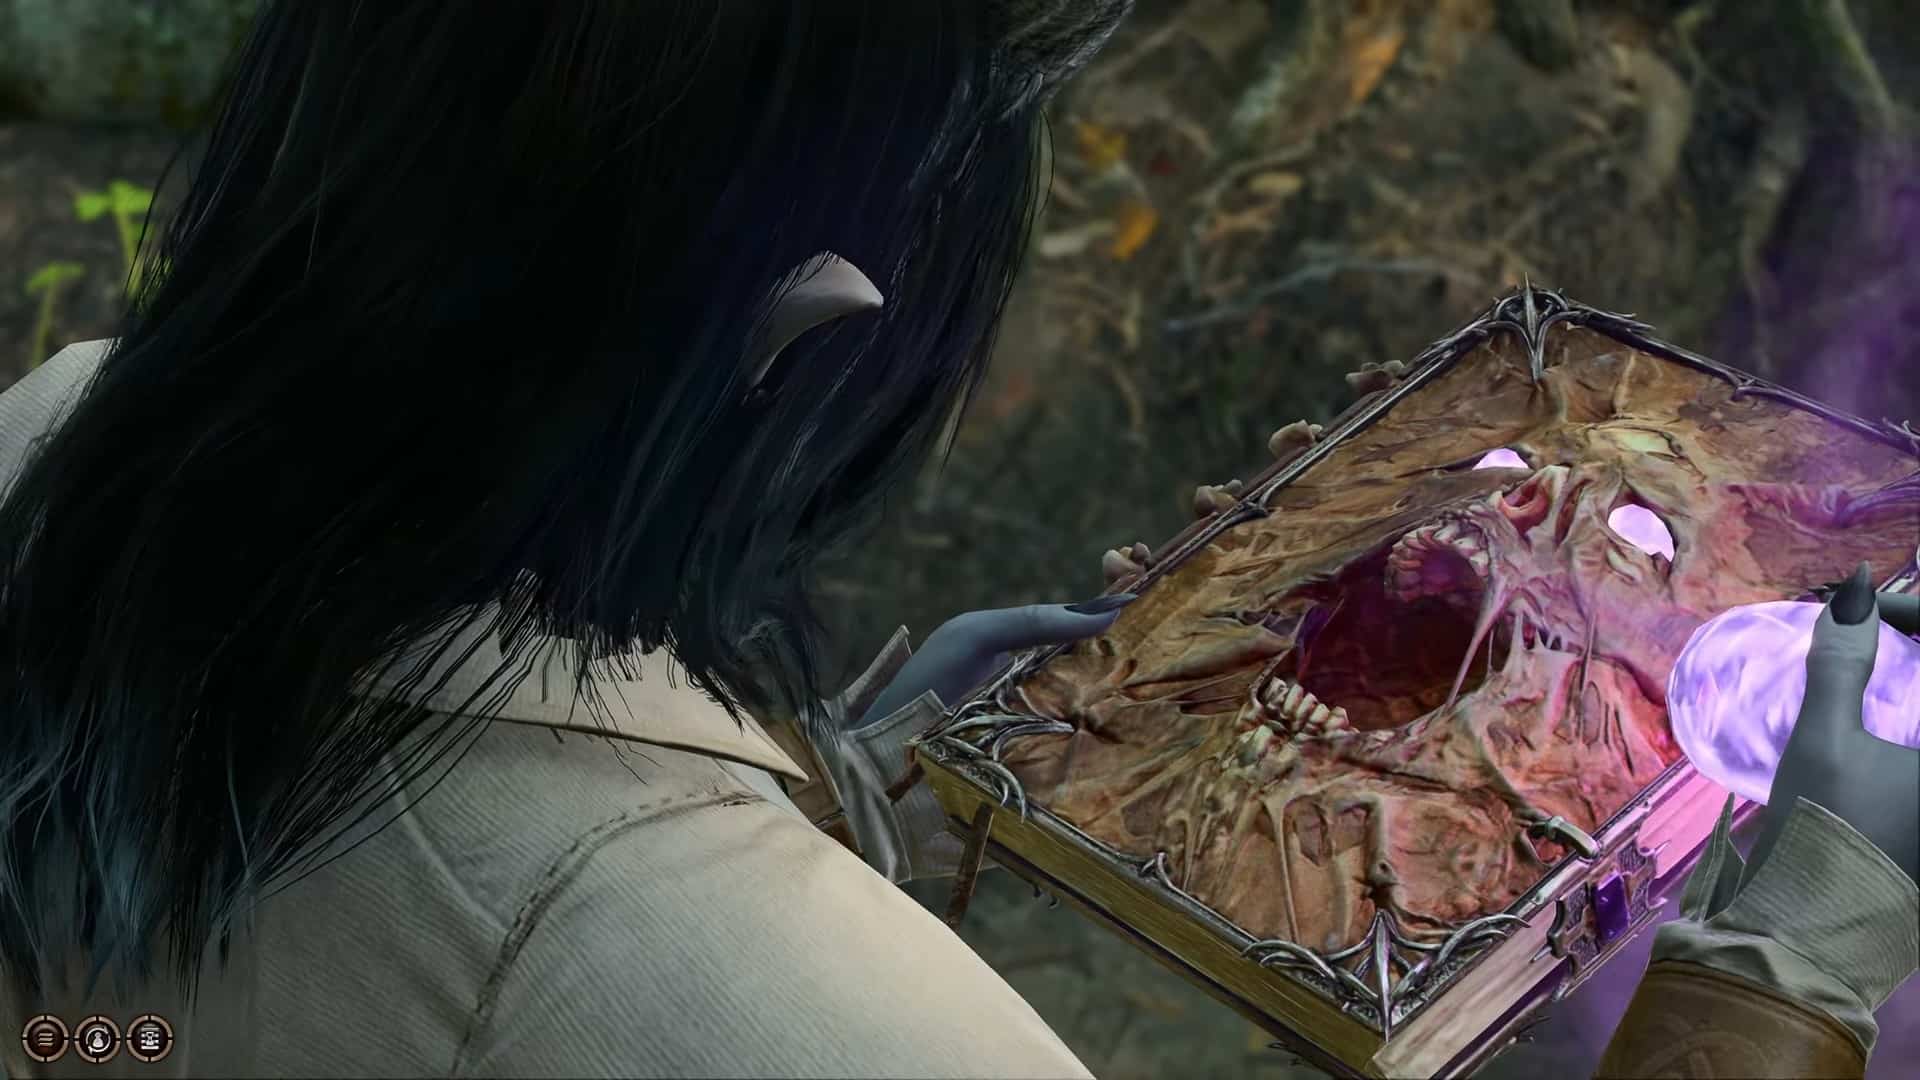
Proceed through the cellar and defeat the enemies to find an Ornate Mirror. This mirror is a sentient being and will ask you a few questions. Make sure you reply with the following answers.
- Tell it your name
- Yes, I am an ally of your master.
- Szass Tam is a wretched soul.
- To clean wounds.
- I would look for a spell to cure the worm inside my brain.
Go further down into the cellar to find a laboratory. Take the rusted key and use it to open a trapped, locked room containing Necromancy of Thay. This book can be opened by using Dark amethyst. However, you need to pass three increasing Wisdom difficulty checks to read it (10 -> 15 -> 20). Read Necromancy of Thay allows you to learn to Speak with the Dead spell.
Rescue the Gnome
Rescue the Gnome is a side quest in the northern part of the Blighted Village, near the windmill. There is a gnome, Barcus Wroot, tied to the wings of the windmill and is being guarded by the goblins. You can persuade the goblin leader, Frezzer, to leave or kill the goblins to rescue the gnome.
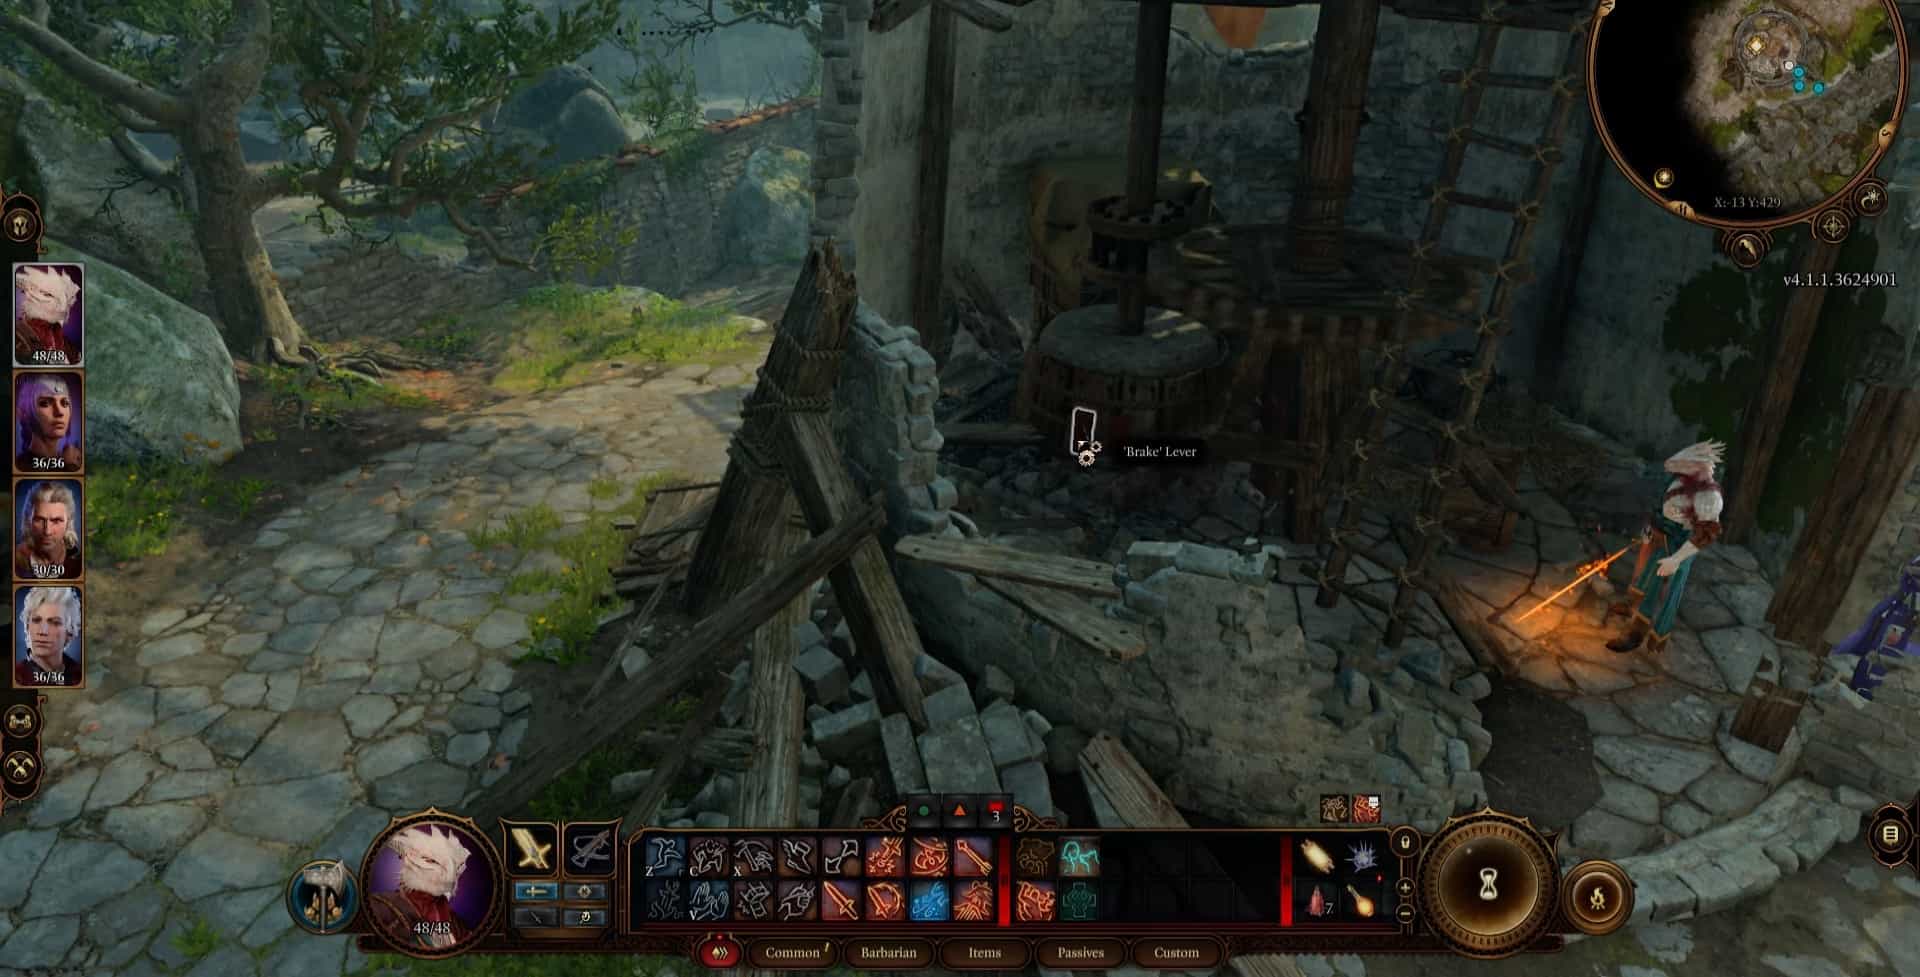
Once you have dealt with the goblins in one way or another, go around the windmill to find a cracked wall leading inside. Stop the windmill by either pulling the lever or destroying its gears. Now, you are all set to free the gnome of its shackles. You will meet Barcus Wroot again during Acts 2 and 3.
Whispering Depths Entrance locations
Two hidden paths in the Blighted Village lead to the Whispering Depths, home to Phase Spider Matriarch in Baldur’s Gate 3. You can defeat her to obtain Dark Amethyst. However, this cave is strictly a no-go for beginners as it contains Phase Spiders.
- The first entrance to the Whispering Depths is through the Blacksmith’s Workshop. This shop is in the Northeast corner, right of the main entrance. Once you enter Blacksmith’s shop, loot two treasure chests to obtain Infernal Iron and Highcliff’s Journal. This will start the Finish the Masterwork Weapon side quest. You can use the Blacksmith’s blueprints and combine them with the Sussur Bark to forge Sussur dagger, Sussur Sickle, and/or Sussur Greatsword. Now, pass a perception check to find two cracked walls in the house. Use a blunt weapon or a powerful spell to break the walls and find the entrance to Whispering Depths dungeon.
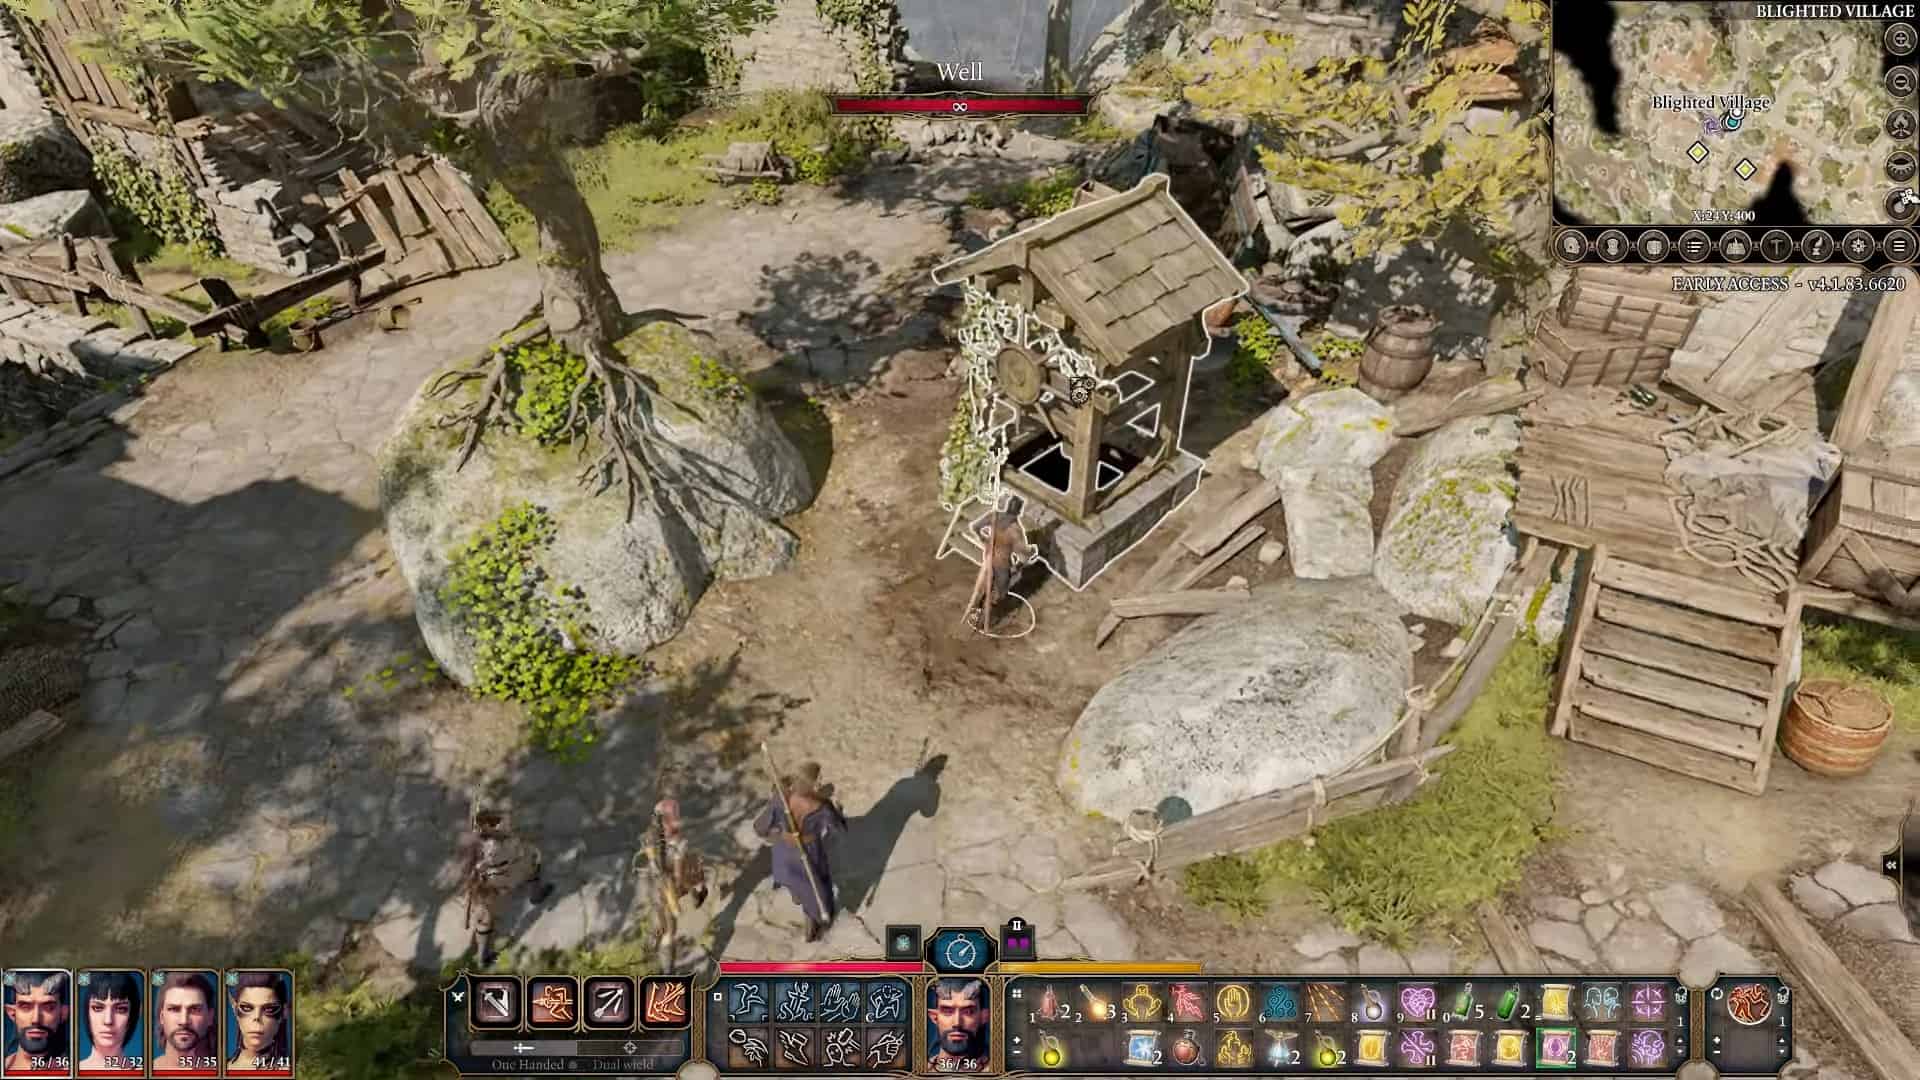
- There is a well near the entrance of the Blighted Village (Southwest of the waypoint). If you pass the perception check, your character will make a note of it. Jump down the well to reach the Whispering Depths dungeon.
Deal with the Ogres
Lump is an enlightened ogre who you can find alongside two more Ogres looking at the corpses (X: 15, Y: 375). Once you interact with him, he will demand that you produce the mark of the Absolute.

Roll a successful deception check and pay him 1000 gold, or use persuasion to earn Lump’s horn. This item allows you to call Lump and his friend Ogres to your aid immediately or during any fight sequence. Lump and his gang do a lot of damage to enemies; however, you will need to pay an additional 5000 gold to use the horn again. If you don’t pay Lump, you must fight the Ogres on the spot.
If you fail the deception check, the Ogres will attack you. This is an extremely difficult fight as all the Ogres have 23 Strength. Any hit from their clubs can knock your party members out cold. If you want to kill the Ogres in the Blighted Village, place your party members on the roof and rafters before initiating the talk. This will allow you to win the fight, as ranged combat is the way to go against the Ogres.
Whether you kill the Ogres is up to you, but we recommend acquiring Lump’s Horn peacefully, as you can always kill them later.
Kill Buthir and Grukkoh in the Barn or not
There is something very embarrassing going on in a barn to the North of Blighted Village. Your party members will make a note of it, and Shadowheart will ask you to leave it be. However, if you peek inside, you will notice Buthir, an Ogress, making love to an Owlbear, Grukkoh. If you open the door, they will attack you instantly, leading to a bloody confrontation.
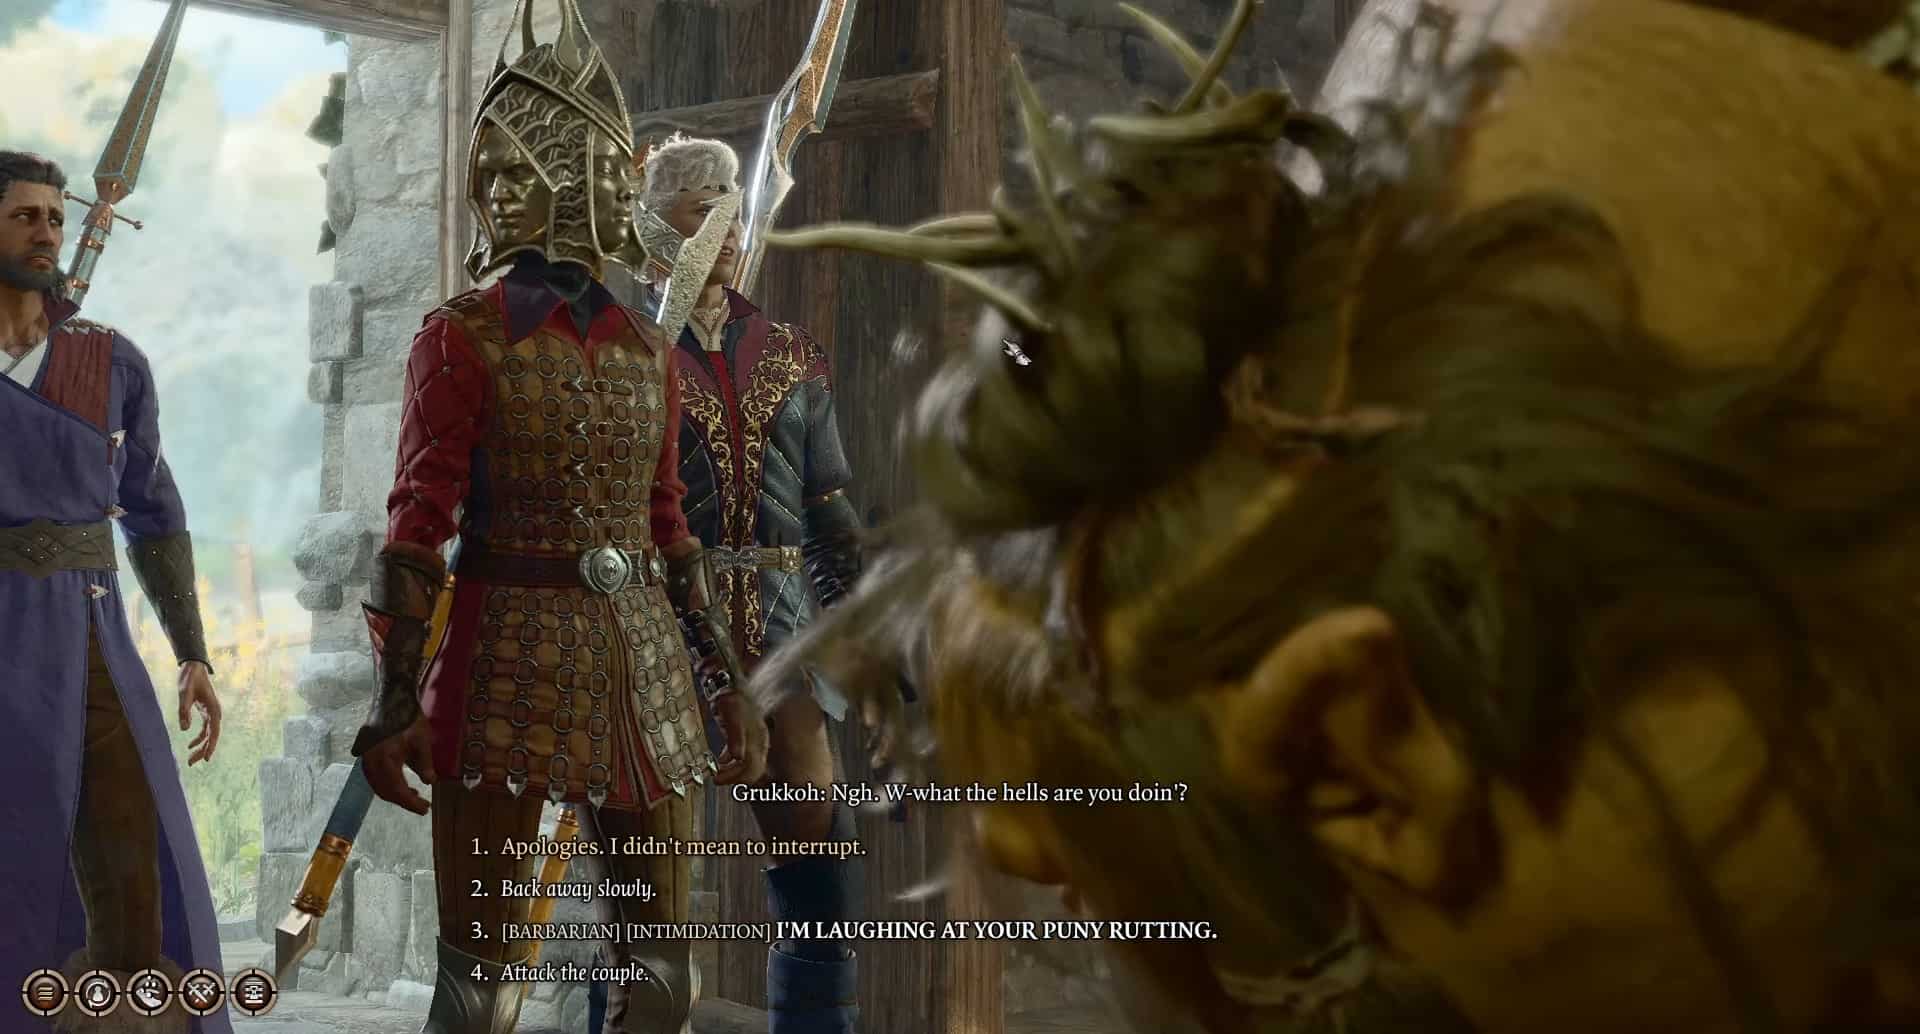
There are only two ways to avoid this battle. Either use a Bard (make them feel okay) or a Barbarian (shame them) to avoid the confrontation. You need to pass either Deception or Intimidation checks to be successful. However, if any roll ends in a failed check, be ready for the battle and take down both.