
Goblin Leaders are the biggest threat and the first major roadblock during your journey through Baldur’s Gate 3. While you can befriend these monsters to annihilate the poor Tieflings, you will need to kill them all if you want a good run.
Most of Act 1 revolves around saving the Tiefling refugees, who are sandwiched between Goblins and Druids. To provide them with a safe passage to Baldur’s Gate, you need to clear the area of the goblin threat. This can only be achieved if you kill all three of their leaders.
Goblin Leaders Location in Baldur’s Gate 3
You can find all three goblin leaders inside the Shattered Sanctum region of the Goblin Camp. However, entering the camp is not that easy. You will not be welcomed, and there is a chance of sudden hostility towards you. There are three ways to enter peacefully and make your way North to find the Shattered Sanctum.
- Save the Goblin Sazza from Druid Grove and then make a deal with her. She will vouch for you at the gate of the camp.
- Create a character with a Drow race, as one of the goblin leaders is herself a Drow.
- Deceiving goblins into thinking you are a true follower of the absolute and carry important information for their leaders.
We recommend starting any fights as you will be immediately outnumbered, and goblins will destroy you instantly.
How to defeat all Goblin leaders in Baldur’s Gate 3
The order in which you kill the Goblin Leaders is as important as the strategy itself. They are not created equal, and you will end up alerting the whole camp if you are not extra careful. While we have detailed boss guides for each Goblin Leader, we will cover both methods of killing each, with and without combat.
How to Kill True Soul Gut
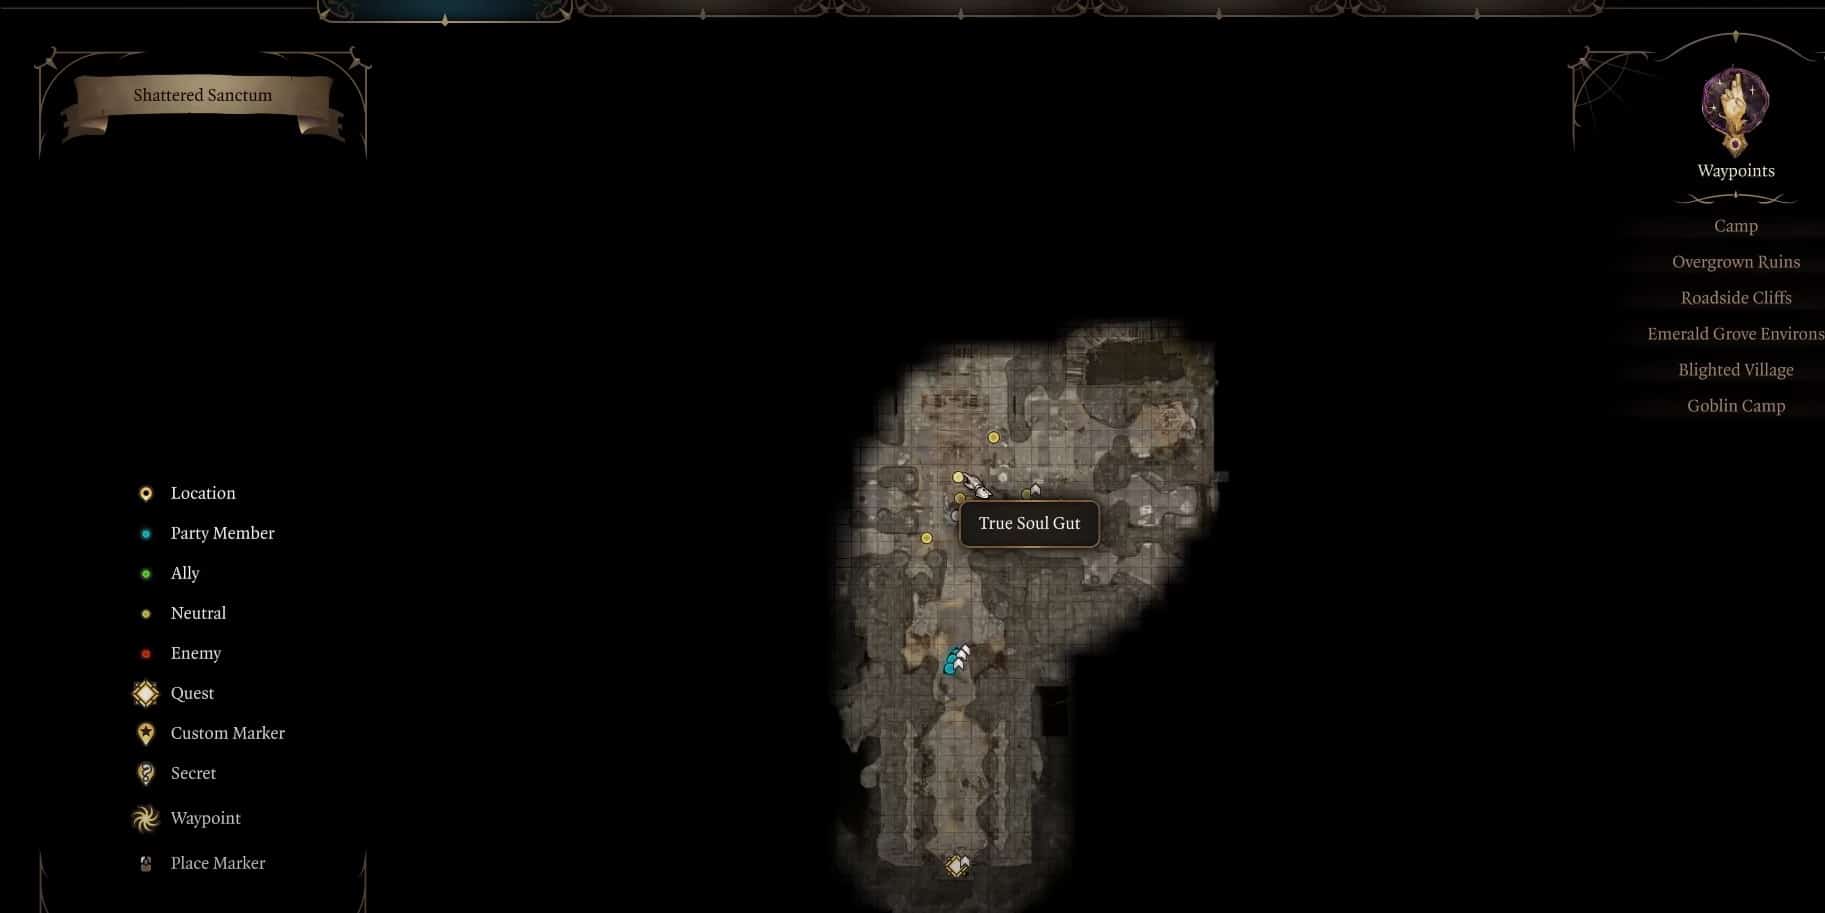
High Priestess or True Soul Gut is the first Goblin Leader you will encounter as soon as you enter the Shattered Sanctum. She will be branding people on a stage and will invite you. Let her brand you and then accept her invite to follow the Priestess to her chambers.
You will find her in the middle section of the Goblin camp (Shattered Sanctum). Once you interact with her, she exclaims that you must be branded to show your true allegiance to their side.
After you select the first option, she will ask you to follow her to her chambers. Once inside, a cut scene will play in which she will offer you a potion to drink. That potion of werejackal blood will put you to sleep unless you are an Elf or Half-Elf (Drows are Half-Elfs, too).
You will faint, and the next time you wake up, you will be inside the Defiled Temple area beneath her chambers. Select “Preserve your strength,” and True Soul Gut will try to execute you. Korrilla will appear behind her and slit her throat. This way, you will kill True Soul Gut without fighting her.
If you want to fight True Soul Gut, attack her as soon as you enter her chambers. It would be wise to put a silent condition on her when using any Sussur weapon. Ensure you don’t allow her to call for reinforcements and shut the door behind you when you enter the room.
She is an easy boss with only 36HP, and you can finish her in just one turn with a four-on-one battle. Once you kill her, loot her body to obtain her key (required to bypass the Defiled Temple Moon puzzle), Padlock Key, Onyx, 34 gold, and some healing potions.
How to Kill Nightwarden Minthara
Once you have dealt with the first Goblin leader, you can set your sights on eliminating the second Goblin leader, who happens to be Nightwarden Minthara in Baldur’s Gate 3.
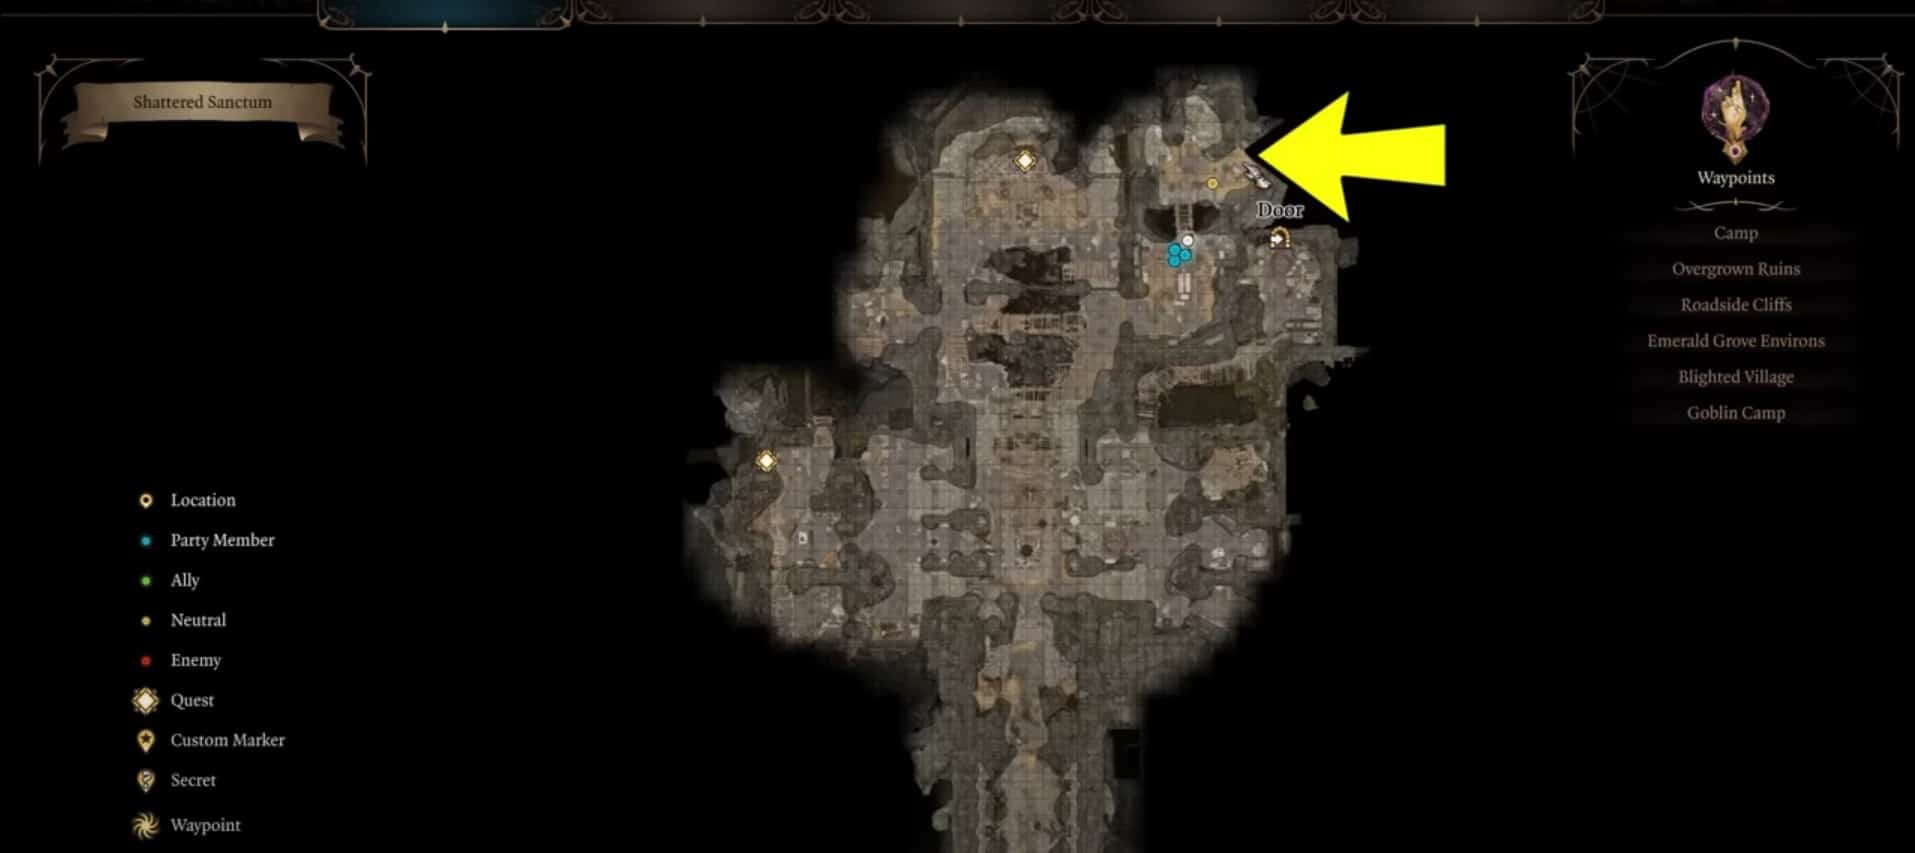
She is on the northeastern side of the Shattered Sanctum, past Dror Ragzlin chambers. Follow the goblin Rozzak and make your way to her. He will tell her that the scouting party is missing. Hearing that the Goblin leader will enrage and threaten the goblin.
After this conversation, she will turn to you, her thoughts will mingle with yours, and she will recognize you as a true soul.
The Nightwarden Minthara will then ask whether you are here to join her hunt. You can then inquire what they are hunting. She possesses the weapon, so the cultist should not discover that the weapon they seek is right in their grasp.
Furthermore, she will also mention torturing the Druid Halsin and that they are on the verge of breaking him. Then, she will ask you to speak, and you can choose the second option to gain her trust. After this, you can say that you know the location of Druid Grove. Hearing this, the Nightwarden Minthara will be pleased and demand that you show it to her.
Then, she will order you to go back and open the gates from the inside. You should select the option to do her bidding. After the dialogue session ends, the Nightwarden Minthara will accompany Rozzak to prepare the warband.
Just as she is about to cross the wooden bridge, aim at the bridge to destroy it. Make sure to save beforehand in case you miss the attack roll. This way, the bridge will break, Nightwarden Minthara will fall to her death, and you will get rid of the second of the three Goblin Leaders in Baldur’s Gate 3. However, you won’t get any loot in this case.

If you want to fight Minthara, climb the stairs outside her chambers and go on the rafters above. Dedicate one of your party members to handle the Scurry Eye, as it will call for reinforcements.
You need good, ranged strikers and spellcasters to deal massive damage from a distance. Fighting Minthara head-on at levels below 5 is a death sentence. She heals herself and makes multiple attacks on her opponents. She can cover the distance with the Misty Step and more than wipe your party in two turns.
Minthara has 70HP, and you need to chip it down from afar. Upon death, she drops the Xyande, Spidersilk Armor, Studded Shield, and Amulet of Misty Steps.
How to Kill Dror Ragzlin
Dror Ragzlin is undoubtedly the strongest of the three Goblin Leaders and is surrounded by many of his followers. To kill him without fighting, you must first drink the Potion of Invisibility and push Dror Ragzlin down the hole.
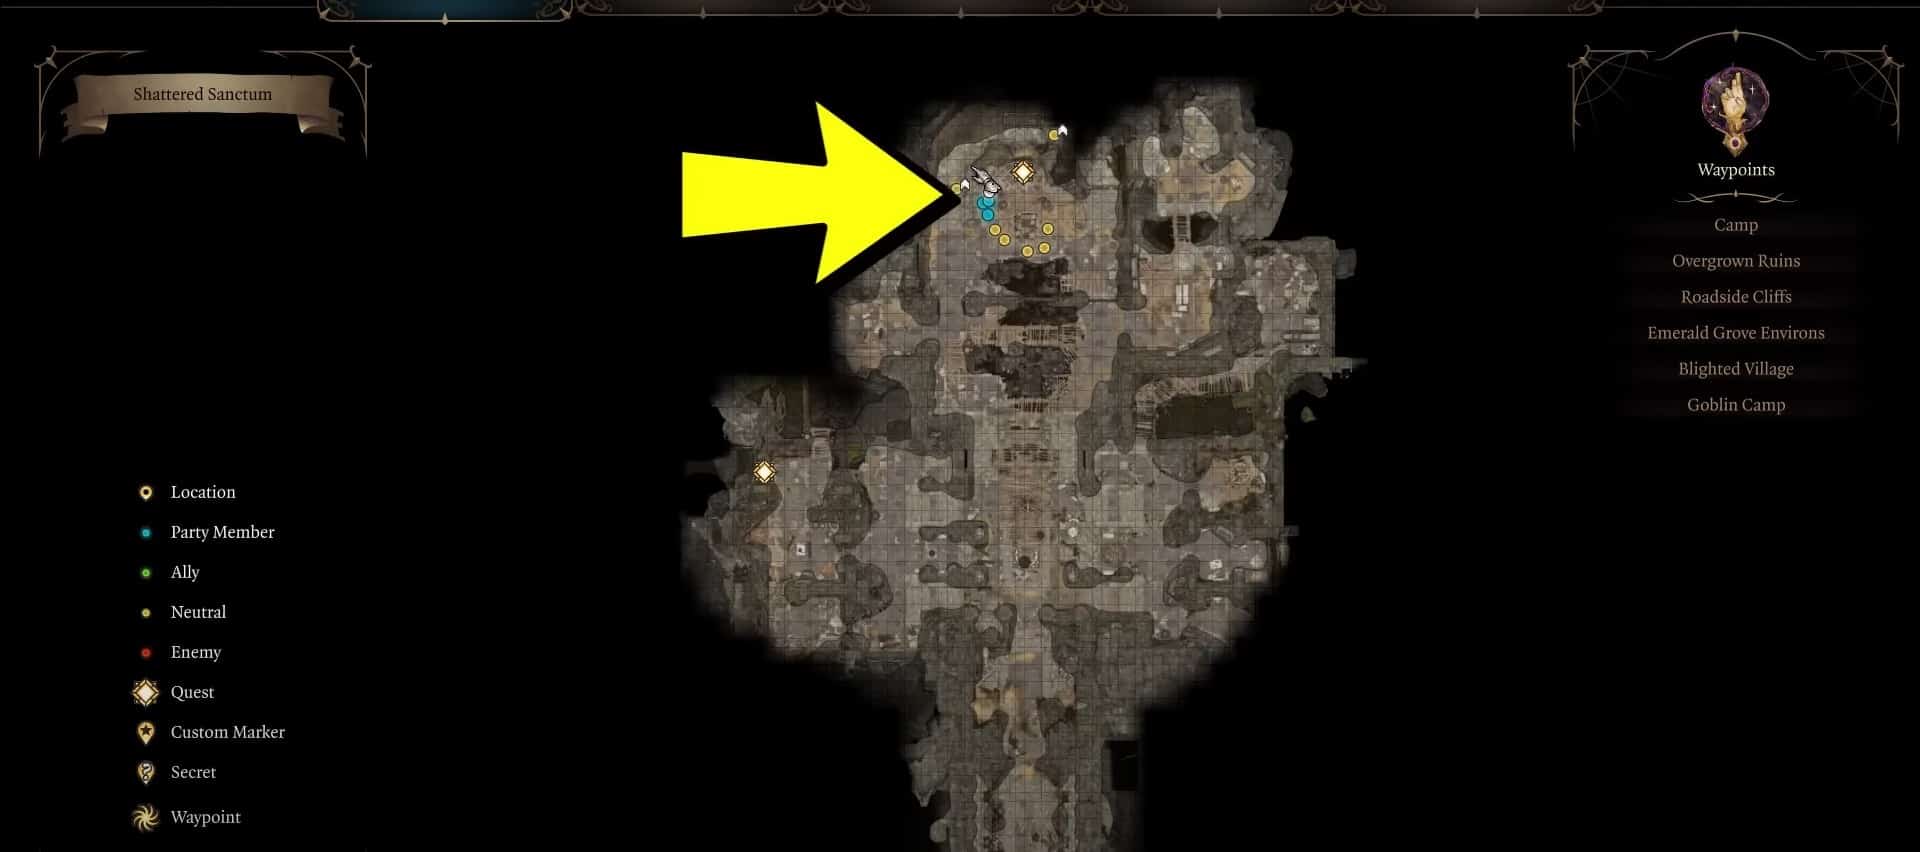
You will encounter this Goblin leader and his horde of goblins in the north section of the Shattered Sanctum. Enter the area with stealth and move back. Drink a Potion of Invisibility or cast any Invisibility spell on you. As Dror Ragzlin moves towards the center of his throne, go behind him and push him into the hole. Drink another potion to leave the area undetected.
This hole is full of spiders, and they will kill Dror Ragzlin upon his fall. However, you will miss out on any loot in this case.
To kill him in battle, ensure you obtain Lump’s Horn or Spider Egg Sac. Sneak all your party into his chambers and place them on the rafters. Use the ladder near his throne to climb up. Use Lump’s horn to summon three ogres; they will handle the rest.
You can rescue Halsin right before this fight, and he will wreak havoc on the goblin party. Maintain your distance and shove down any goblin that climbs the ladder beside you. After killing Dror, you can loot his body to obtain his key and Faithbreaker weapon. Use his key to open the treasury behind his throne. You can get an Infernal Iron and some gold and goodies from there.