Having a hard time finding Illusory walls and accessing the secret paths in Elden Ring? Well, not anymore! In this detailed guide for Elden Ring, we’ll be jumping into all the Illusory Walls locations and the treasures locked behind them. So without further ado, let’s begin!
What are Illusory Walls?
Illusory Walls are hidden walls scattered throughout the lands of Elden Ring. Just as they sound, these illusion walls act as an artificial barrier between secret paths and rooms that lead to treasures, special weapons, and dangerous bosses.
What’s interesting about these walls is that it’s tough to tell which wall is Illusory and which is not. This is because they look identical to all the walls in the room; hence it becomes easy to miss one.
One way to find these hidden walls in Elden Ring is to always check in crowded rooms. There are higher chances of them acting as a real wall in crowded rooms than appearing alone in an empty one.
The second way is to read player messages. I know what you’re thinking, there are dozens of player messages near walls that are often lies and just lead to you clunking a random wall with your weapon.
Most of the lies are obvious and you never know when one of the more possible ones could be true, so whack away ye Tarnished!
How to Open Illusory Walls in Elden Ring
To open an Illusory Wall in Elden Ring, all you need to do is attack the wall with a weapon or spell. You can also roll into them. Doing so will force the illusion to dissipate. Hence, revealing a secret path (or room) behind with probable items, weapons, and bosses lying in wait.
There is also a way to reveal an Illusory Wall by using the Law of Regression spell. When used, the spell dispels all illusions such as statues, messages, and walls.
Here are the locations of every Illusory Wall that we have discovered in Elden Ring.
- Limgrave Illusory Wall Locations
- Liurnia of the Lakes Illusory Wall Locations
- Raya Lucaria Academy Illusory Wall Locations
- Caelid Illusory Wall Locations
- Altus Plateau Illusory Wall Locations
- Mountaintops of the Giants Illusory Wall Locations
Limgrave Illusory Wall Locations
Although Limgrave is a big region in Elden Ring, there is only one illusory wall here found in Wichbane Ruins.
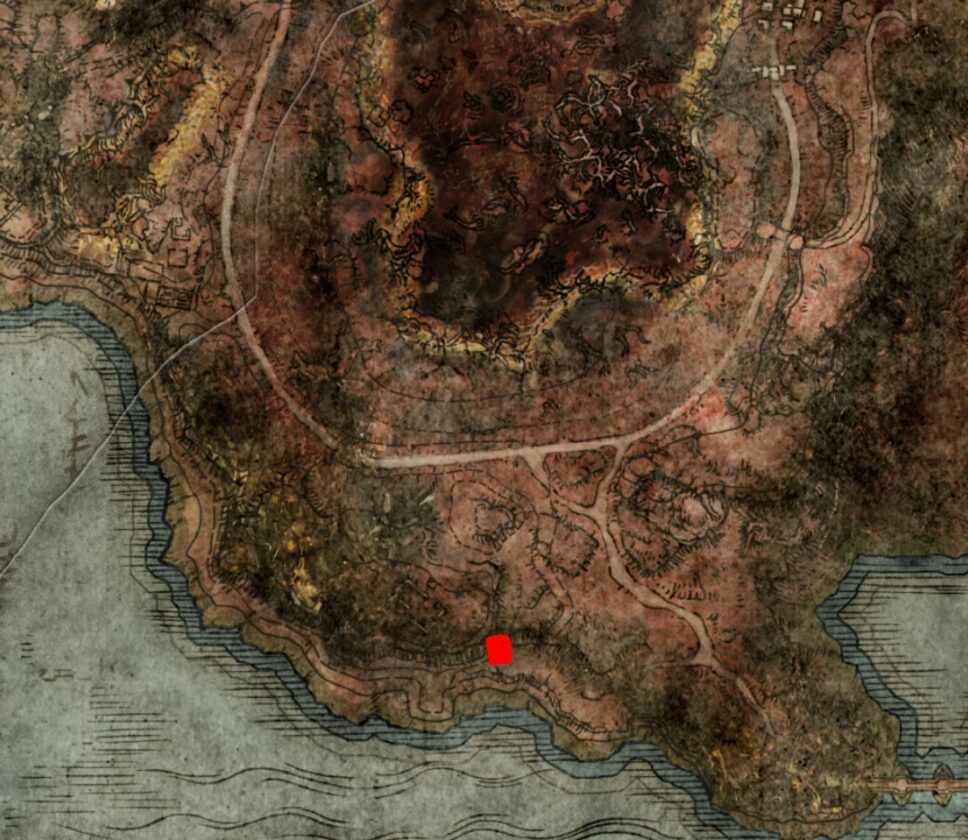
Wichbane Ruins Illusory Wall
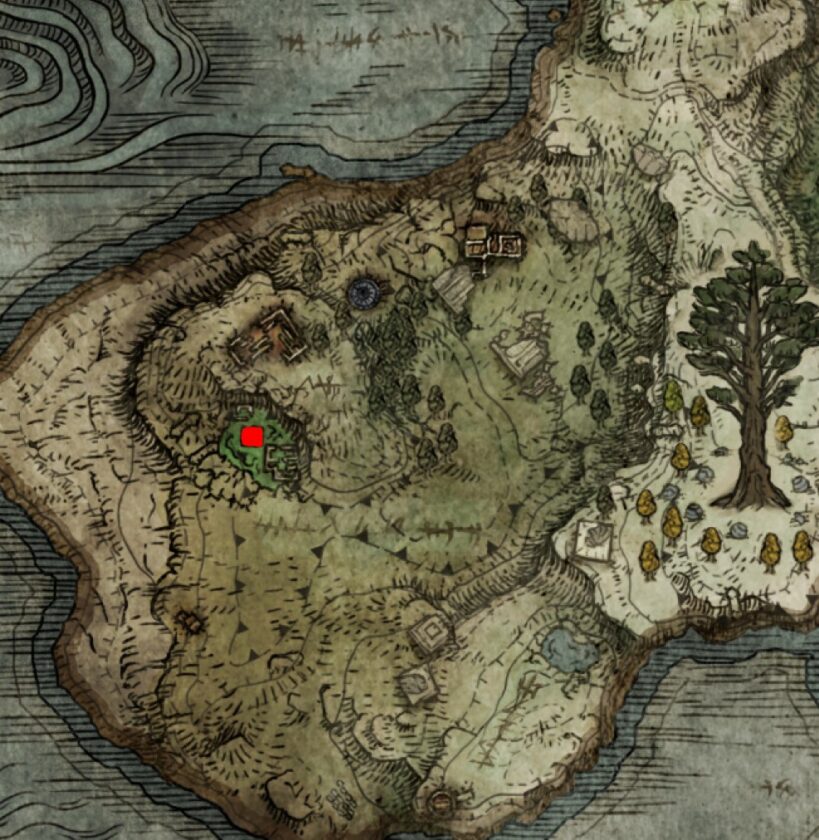
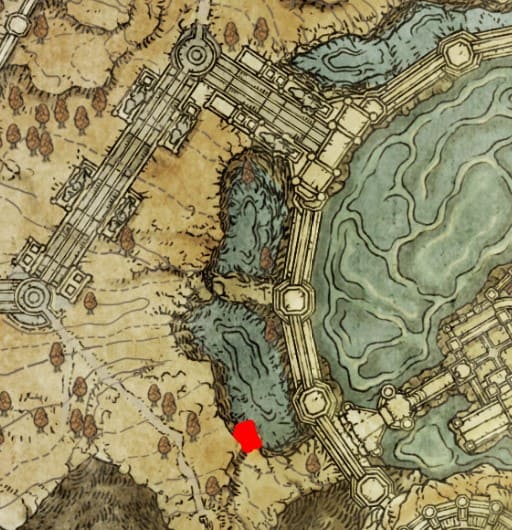
This illusory wall can be found in the Weeping Peninsula, in Witchbane Ruins, located in the western Weeping Peninsula, south of the Fourth Church of Marika.
The illusory wall here is on the floor so most users have termed it as “Illusory Floor”. Hit the stone floor in an open broken area to reveal the path leading into an underground chamber.
Liurnia of the Lakes Illusory Wall Locations
We were able to find 6 Illusory Walls in the Liurnia region. One area can have more than one illusory walls so you should keep that in mind as well.
Road’s End Catacombs Illusory Walls
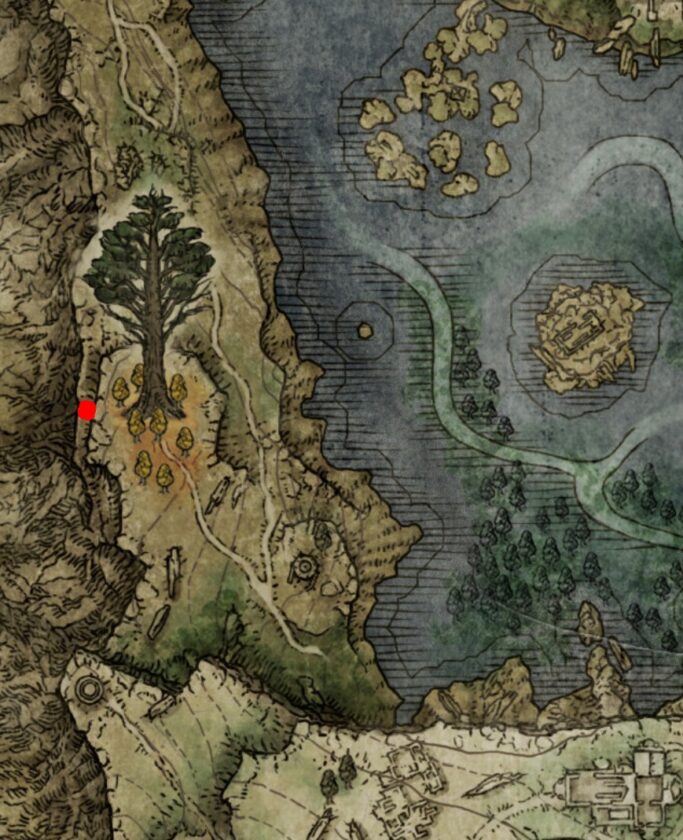
Road’s End Catacombs can be found northwest of the Converted Tower Site of Grace, west of the Minor Erdtree. It is located at the cliff’s end, so you need to go around the cliff on which the Minor Erdtree is located to get to the catacombs.
Inside the catacombs, players need to get to the summoning pool. Here, head inside the arching alcove next to the stairs and you can find an illusory wall here.
The second illusory wall in the catacomb is directly ahead of the first illusory wall. Follow the path you have newly revealed, and you will come across two skeletons. Fight and defeat them and at the dead end, you’ll find another illusory wall.
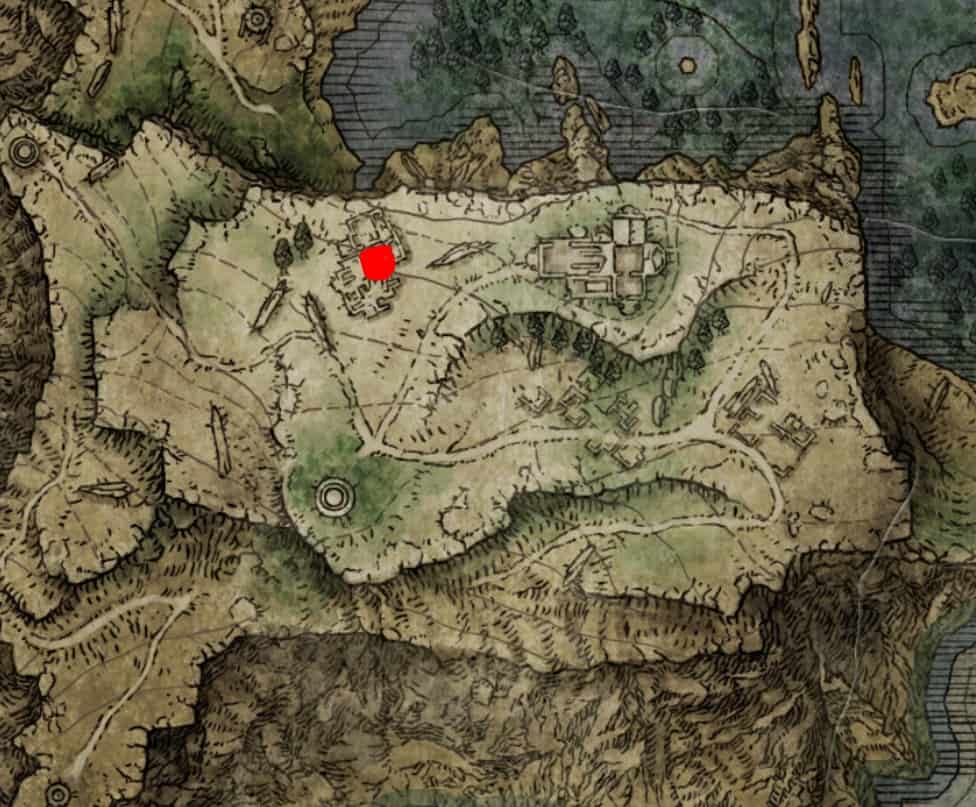
Kingsrealm Ruins Illusory Wall
The Kingsrealm Ruins can be found south of Caria Manor. The first illusory wall is quite obvious, as it is found right on the road and you can easily spot it.
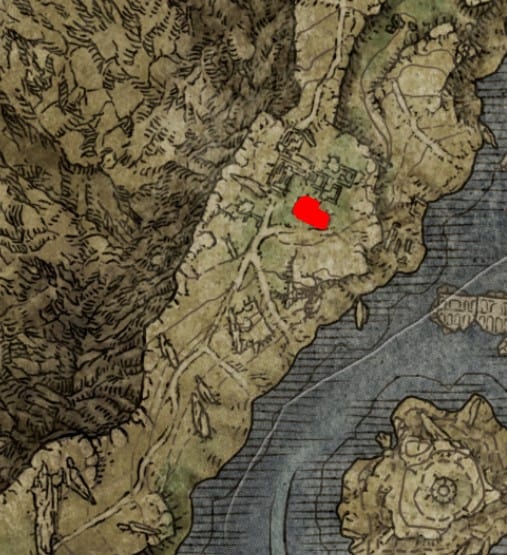
The second illusory wall is found in the southern area of the Kingsrealm Ruins. You can hit the small patch of different stone floors to reveal the path, and this will lead you to a secret boss fight.
Moonfolk Ruins Illusory Wall
The Moonfolk Ruins can be accessed after you emerge from the Deep Ainsel Well. On your way to the Cathedral of Manus Sellus, the ruins can be found north of the path leading to the cathedral.
The hidden path is located in the main hall of the ruins and leads you to a Somber Smithing Stone.
Three Sisters Illusory Wall
This illusory wall can be found in the ruins in the middle of the Three Sisters. The Three Sisters area can be accessed after clearing Caria Manor and defeating Royal Knight Loretta.
Black Knife Catacombs Illusory Wall
Black Knife Catacombs can be found near the eastern Minor Erdtree in Liurnia. The path leading north from east of the Minor Erdtree will directly lead you to the Black Knife Catacombs.
Progress through the catacombs until you reach the three falling blades. There is a small path in the wall here, that you can access by riding up the second blade. Follow this path to the end, and you can hit the wall at the dead end to reveal a boss fight.
Raya Lucaria Academy Illusory Wall Locations
Raya Lucaria Academy is a trich region and to make it more tricky, FromSoftware has included some of those Illusory Walls here as well. Following are the Illusory Walls we were able to locate in Raya Lucaria.
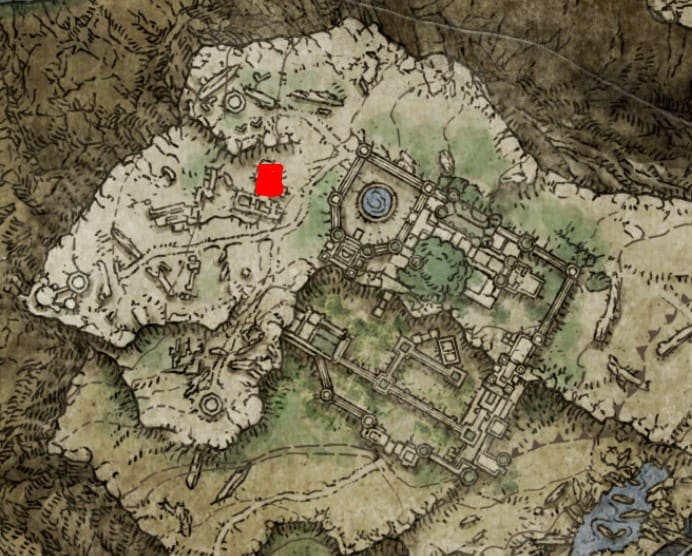
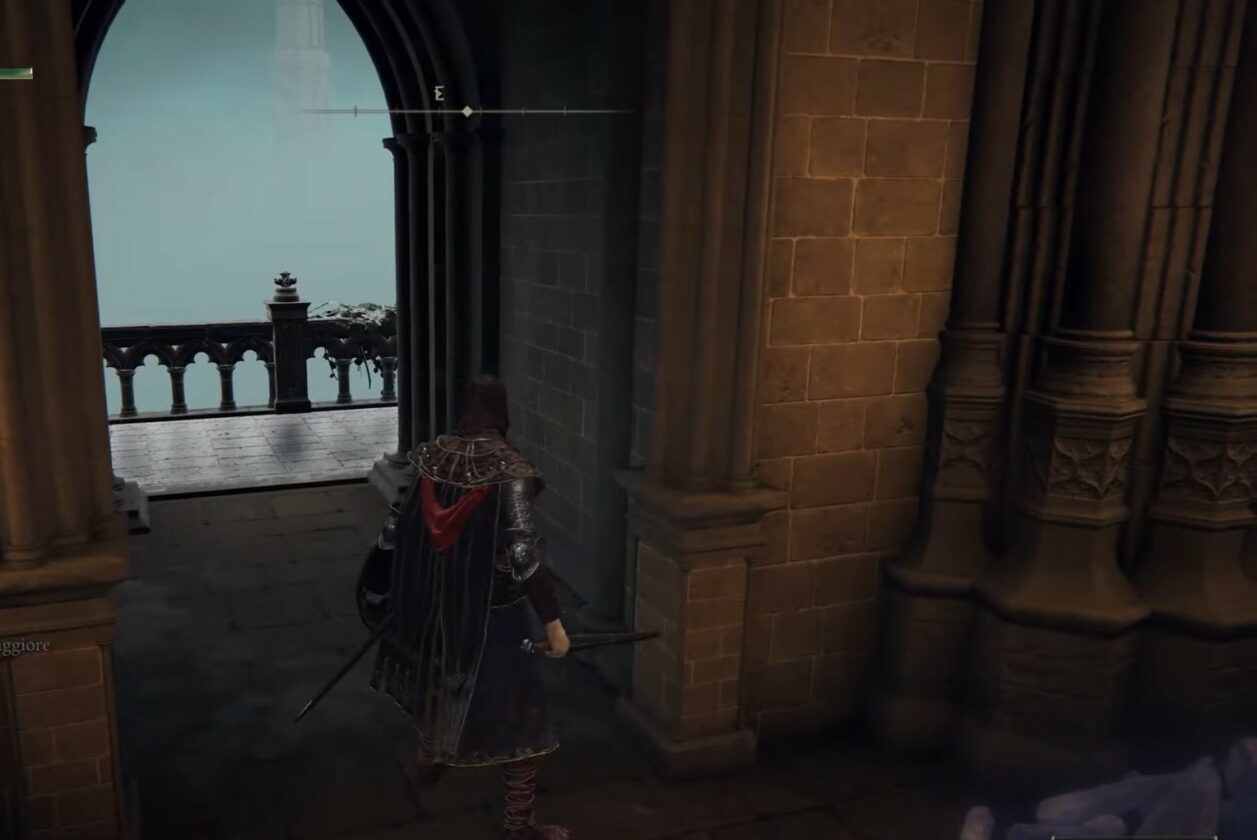
Schoolhouse Classroom Illusory Wall
From the Schoolhouse Classroom Site of Grace, players can hit the walls of the classroom opposite to the entrance of the room to reveal an illusory wall leading to a balcony.
Debate Parlor Illusory Wall
From the Schoolhouse Classroom Site of Grace, exit the classroom and continue right. In the debate parlor, take the stairs and turn right. Continue to the end where, and hit the wall on top of the left staircase to open the illusory wall.
Caelid Illusory Wall Locations
Caelid in Elden Ring is not only home to the unforgiving creatures, it also houses a lot of hidden things. Illusory Walls ofcourse is one of the them and we are here to tell you how can you find those walls.
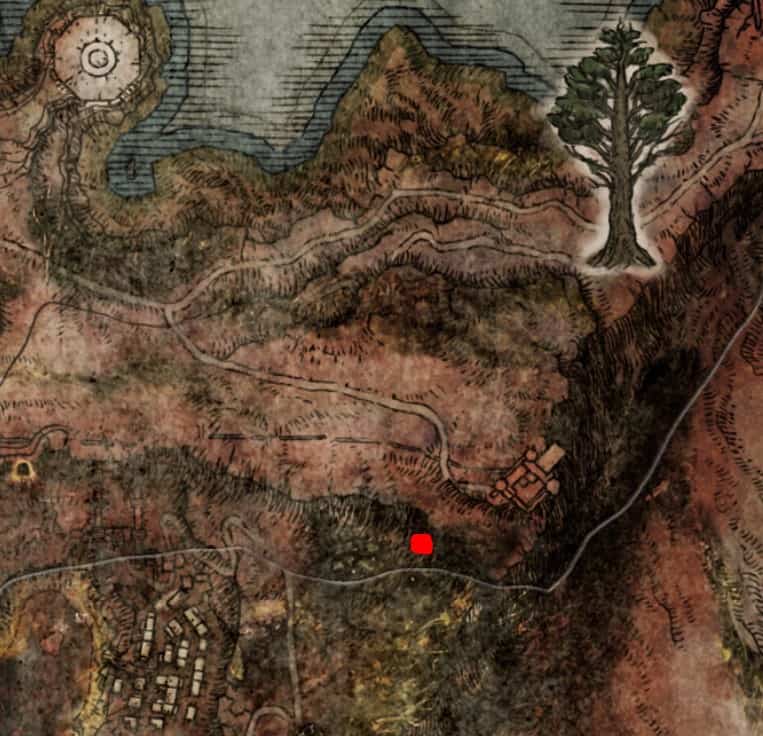
Selia Hideaway Illusory Wall
The entrance to Selia Hideaway itself is a secret Illusory wall. The wall can be found directly south from Fort Faroth. Get down the cliff, and look for a small graveyard from where the skeletons will spawn. Behind the large tombstone of this graveyard is a peculiar rock, that you can hit to reveal the entrance to Selia Hideaway.
Caelid Catacombs Illusory Wall Locations
Caelid Catacombs is found in south Caelid, directly east of Cathedral of Dragon Communion.
Progress into the catacombs until you get to the boss room. The door is locked, so turn around and hit the wall in the center of the room. This is the secret door that will lead you to the lever that will unlock the boss room.
Altus Plateau Illusory Wall Locations
How could FromSoftware leave Altus Plateau without mysteries? Althought there are different types of mysteries in this region, for this guide, we are going to keep our focus to Illusory Walls.
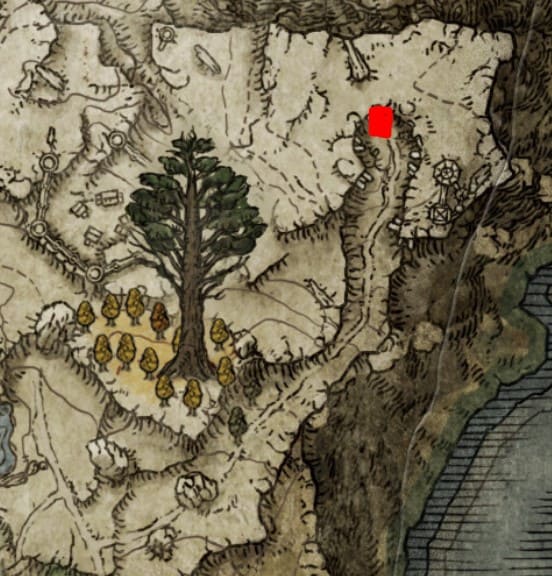
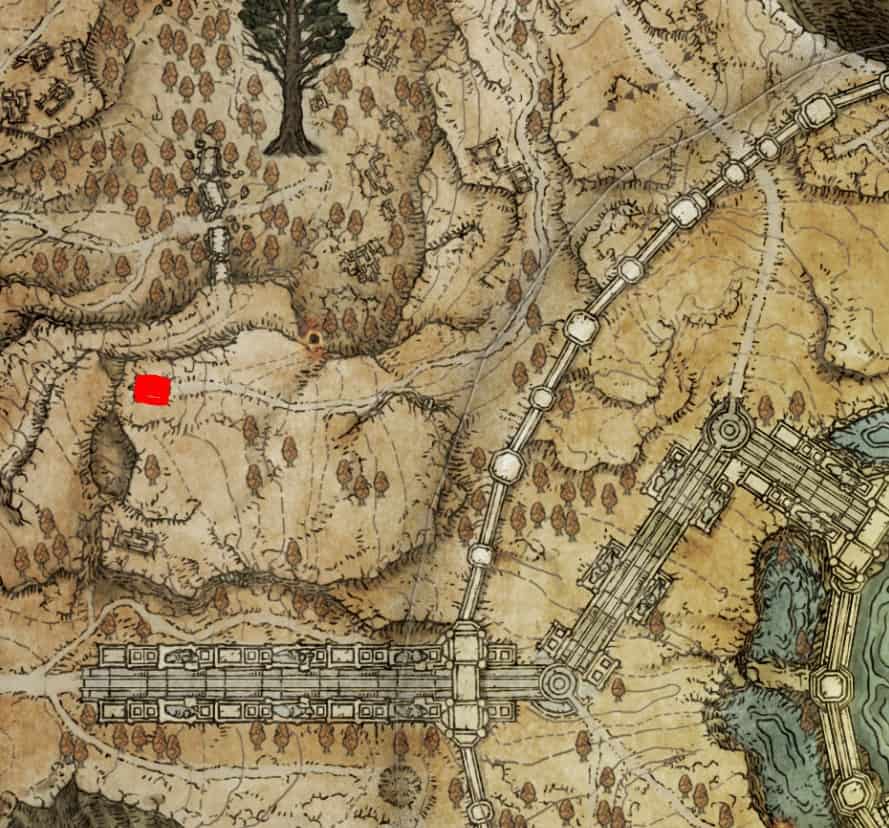
Sainted Hero’s Grave Illusory Wall
Sainted Hero’s Grave can be found south of the Minor Erdtree outside the walls of Leyndell. You need to go around the entire area to get to the hero’s grave.
After you defeat those Wraith-Caller creatures, take the stairs behind them and on the top of the stairs, you will be able to hit an Illusory Wall.
Sealed Tunnel Illusory Wall
Sealed Tunnel can be found north of the Minor Erdtree Church. You need to go down into the canyon to get to the entrance of Sealed Tunnel.
Inside the Sealed Tunnel, head west from the summoning room and you can find a hidden path leading deeper into the tunnel. Continue in Sealed Tunnel. You’ll find the chest that contains the Smithing-Stone Miner’s Bell Bearing. The second illusory wall is behind this chest.
Continue further deep in the tunnel, and descend using the lift. Here, look for the large root, and you can hit the wall next to it to reveal the secret door. There is a stack of crates behind this illusory wall, and behind these crates is another illusory wall.
From the room you enter after the fourth hidden path, you can find the last wall at the end of this room.
Volcano Manor Illusory Wall
Volcano Manor can be found in the center of Mt. Gelmir. Inside Volcano Manor, you can enter Rya’s room, and hit the top right corner of the room to reveal the hidden path behind the Illusory Wall.
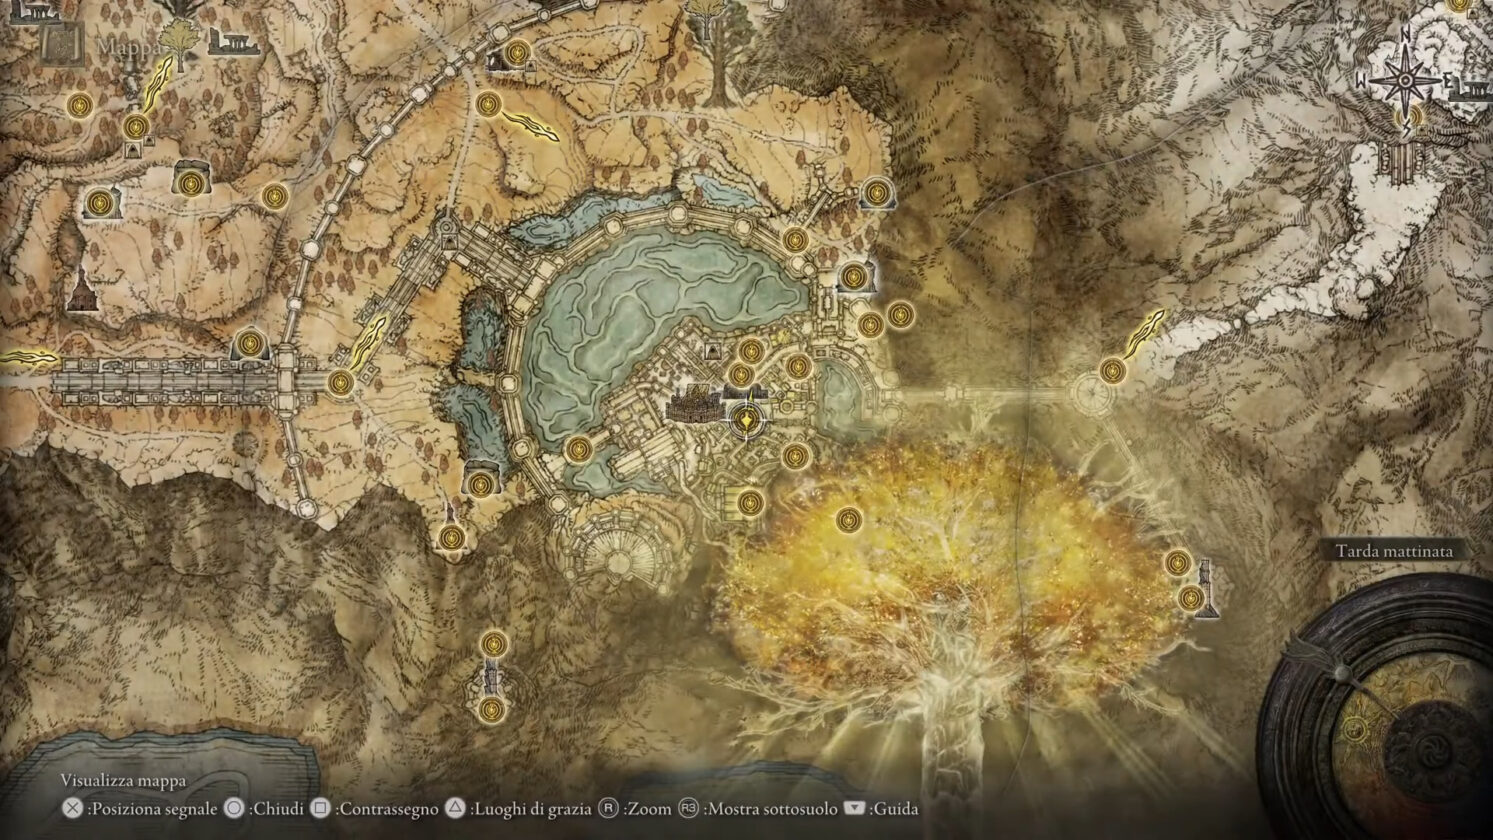
Leyndell Catacombs Illusory Wall
Lyndell catacombs can be found inside the Leyndell, Royal Capital, directly opposite to the Avenue Balcony Site of Grace. Descend in the catacombs, and continue along the long corridor.
At the end of this corridor, players can find a staircase. The hidden path is below the staircase.
Mountaintops of the Giants Illusory Wall Locations
This Snowy and somewhat scary region in Elden Ring also features some Illusory walls which most players can miss on a normal playthrough. We were able to discover the following Illusory Walls in Mountaintops of the Giants.
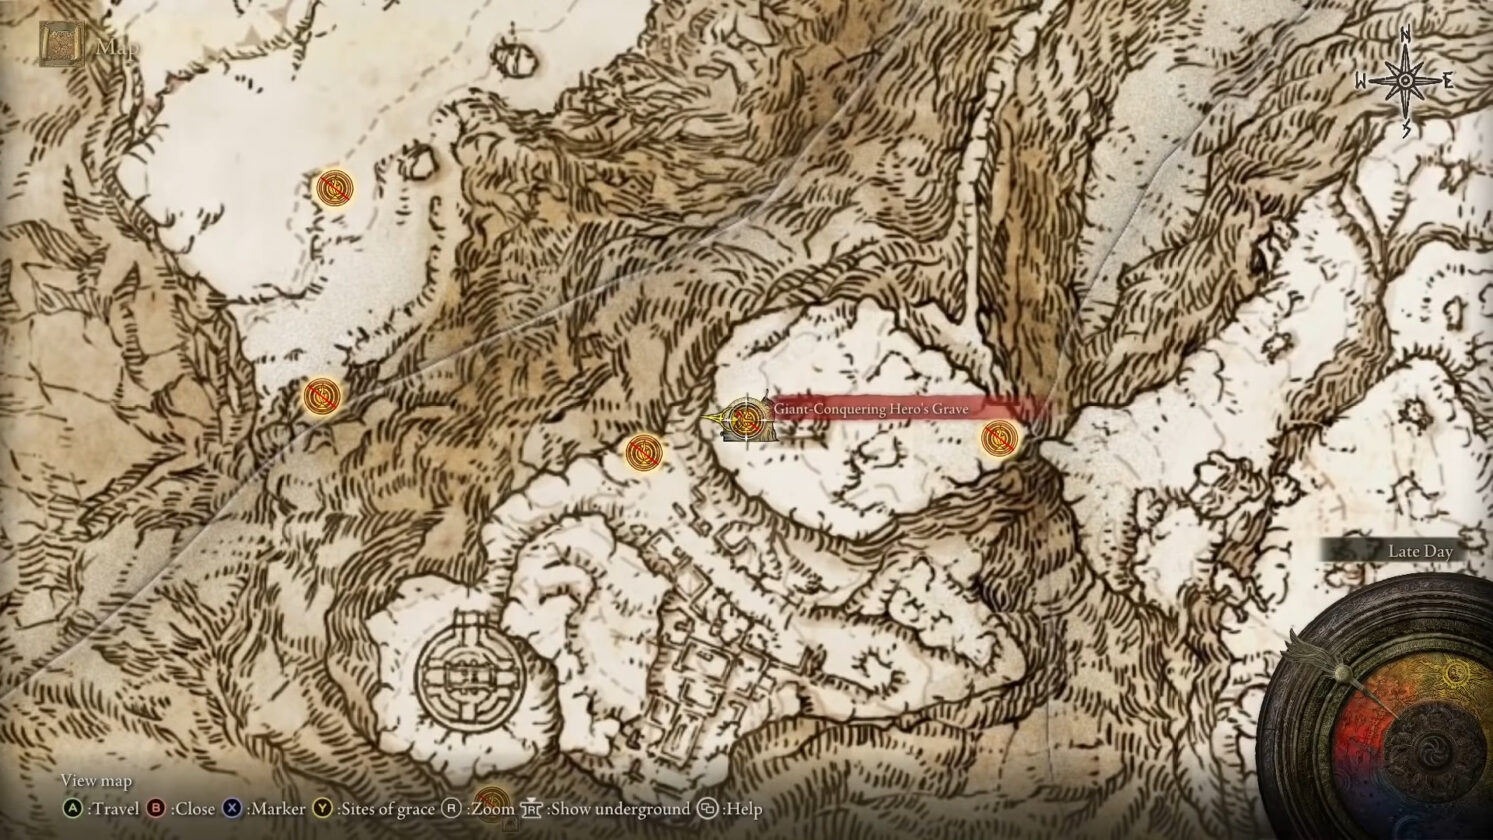
Giant-Conquering Hero’s Grave Illusory Wall
From the start of the Giant-Conquering Hero’s Grave, head deeper into the grave until you come to the fire monk enemy. Defeat the enemy, and look on the wall with two archways. One of these archways is hiding an illusory wall.
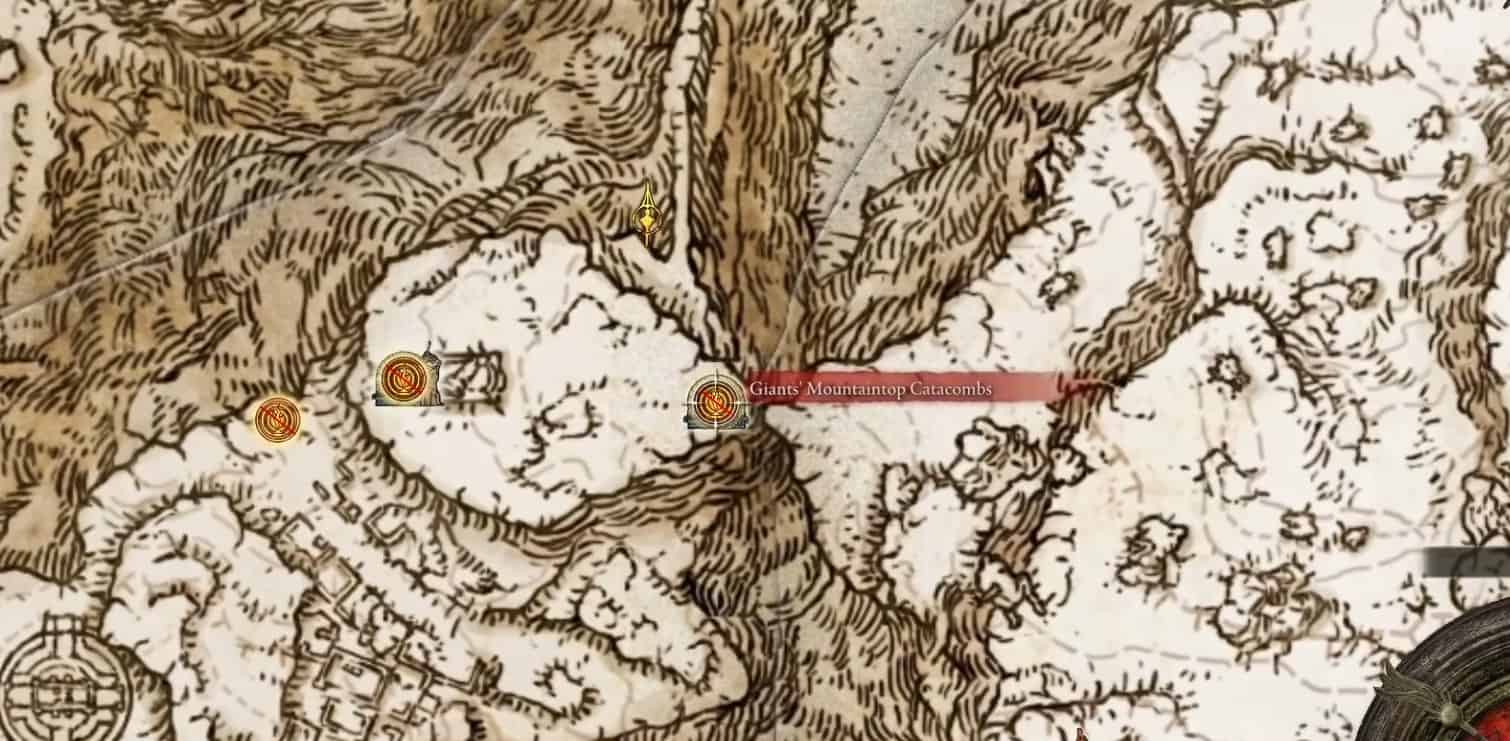
Giants’ Mountaintops Catacombs Illusory Wall
In Giants’ Mountaintops Catacombs, ride down the first elevator, and once you reach the bottom, send it back up. This reveal another elevator under the first one that can be used to descend further in the catacombs.
At the bottom, follow the corridor until you get to the frost spewing statue. Shot it or hit it to get it to lower, and then do the same for the second pillar behind it.
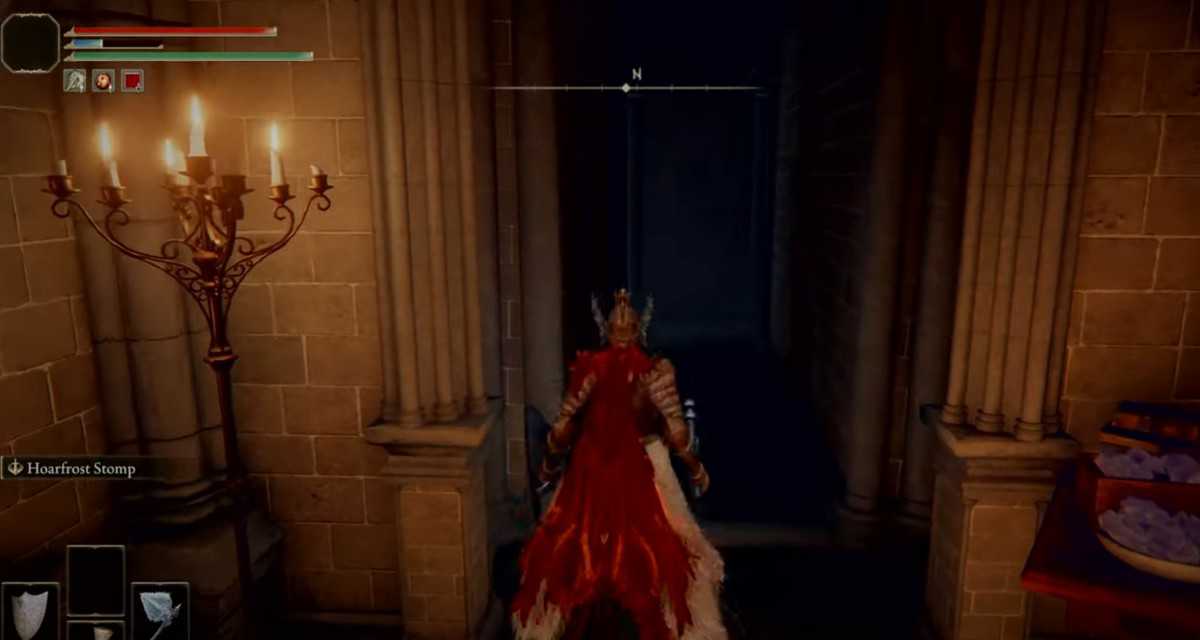
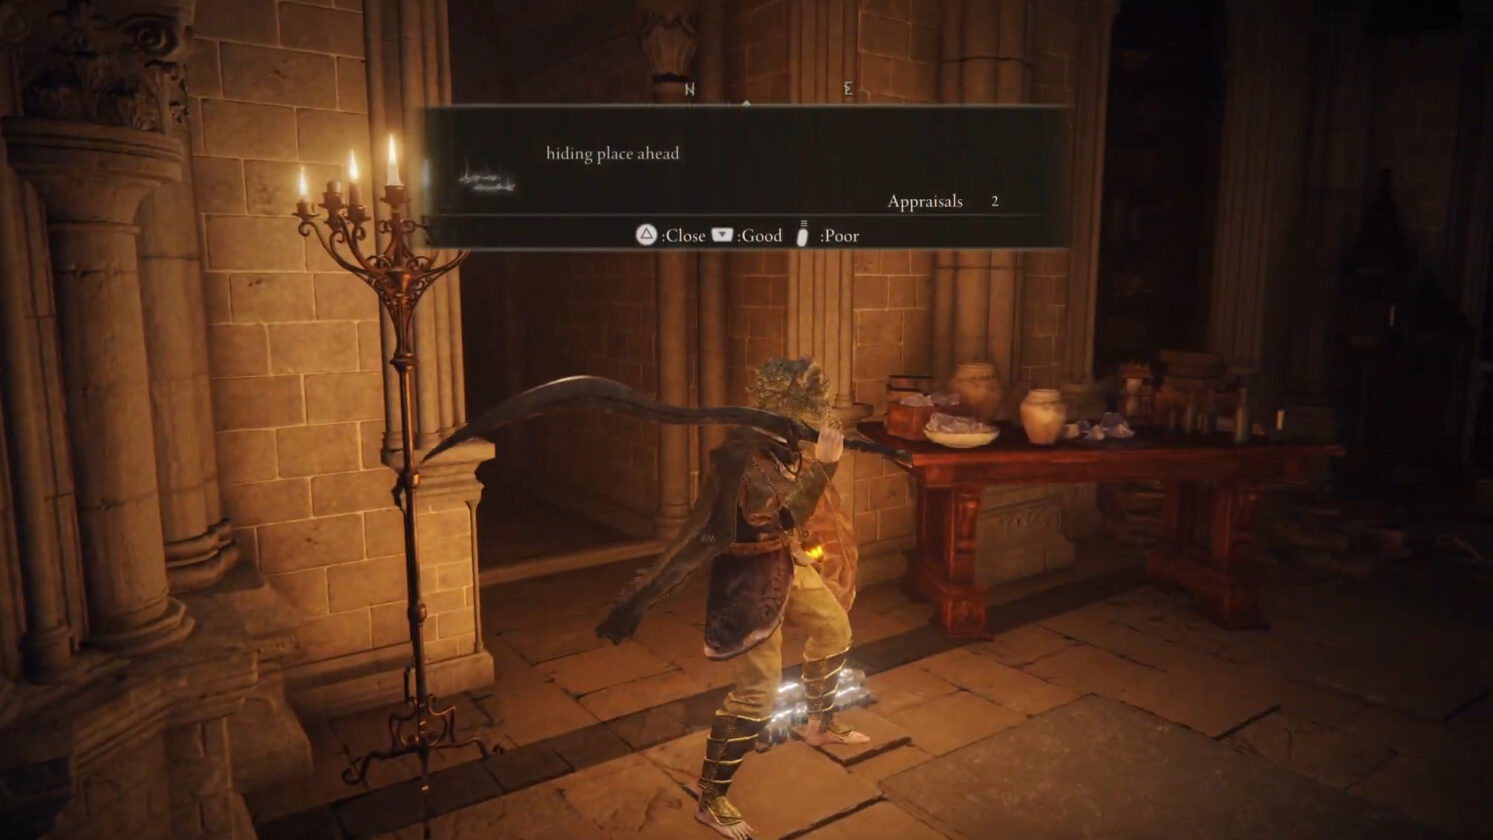
From here, turn right and continue. Along the corridor, you will come to random candles on two archways. The wall behind these two is the illusory wall.
Haligtree Illusory Wall
There is a single illusory wall on your path to Haligtree. From the Path to Haligtree area, can jump down the ledge onto the invisible part. From here, players can head south to another secret area. from here, you can turn right and hit the wall at the end to remove the illusory wall.
