“Guidance From Ages Past” is part of the main storyline, Crysis at Hyrule Castle, and a rather long quest to complete in Zelda: Tears of the Kingdom. After finding out that the Princess Zelda you are seeing across Hyrule is fake and that there is a secret Fifth Sage, you will be tasked with discovering their identity by navigating the surface, skis, and depths of Hyrule.
In Guidance From Ages Past, you will have to solve several puzzles and get a chance to ride a large Construct as well. Below is a complete walkthrough of each objective of the questline in Tears of the Kingdom.
How to start Guidance from Ages Past
Guidance From Ages Past is part of the much larger quest: Find the Fifth Sage. Once you complete the Regional Phenomena main quest and discover that there is a fifth sage, you will be taken to the Dragonhead Isles to complete the Secret of the Ring Ruins quest.
Upon completing the Secret of the Ring Ruins quest, you will find a strange relic from the past, and Guidance From Ages Past will start automatically.
How to complete “Guidance From Ages Past” in Zelda: TotK
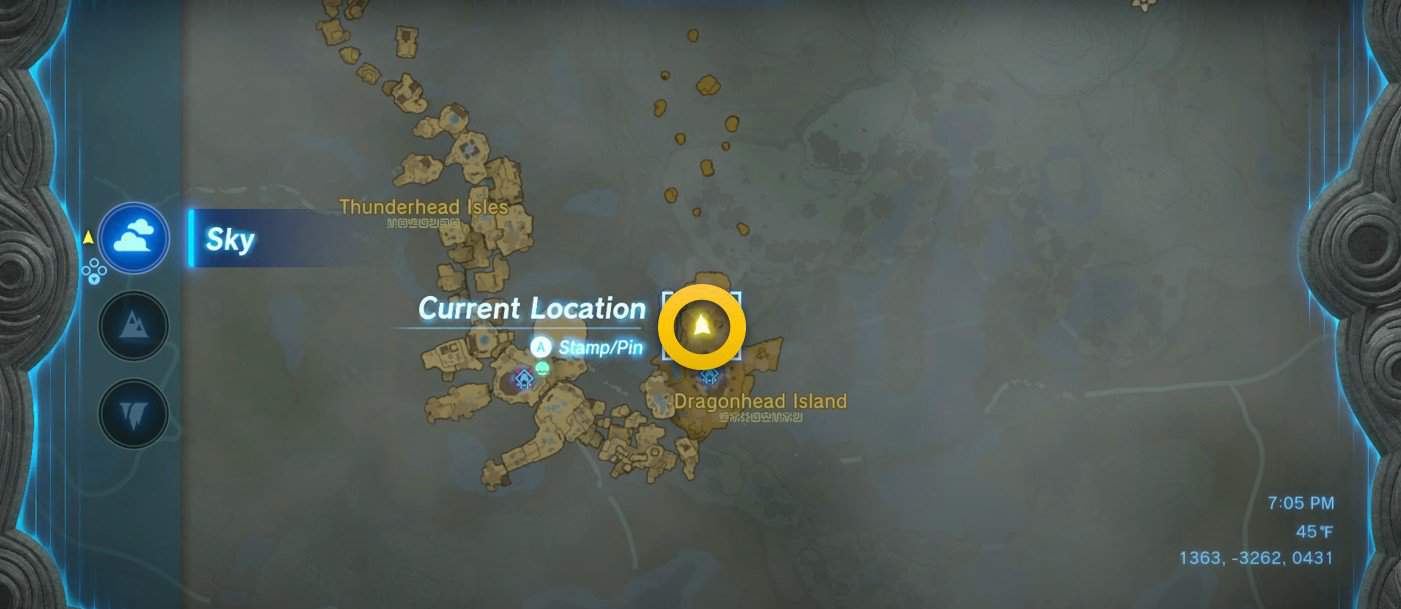
So to complete the quest Guidance From Ages Past, you will have to finish the objectives one by one on the Dragonhead Island in Tears of the Kingdom. The precise coordinates for this location are 1363,-3262, 0431.
Follow the Light
The first part of this quest is simply to pick up the object that happens to be a strange relic and follow the light down the path in Totk. Once you reach the end, you can turn right and proceed toward the large object that turns out to be part of a flying machine.
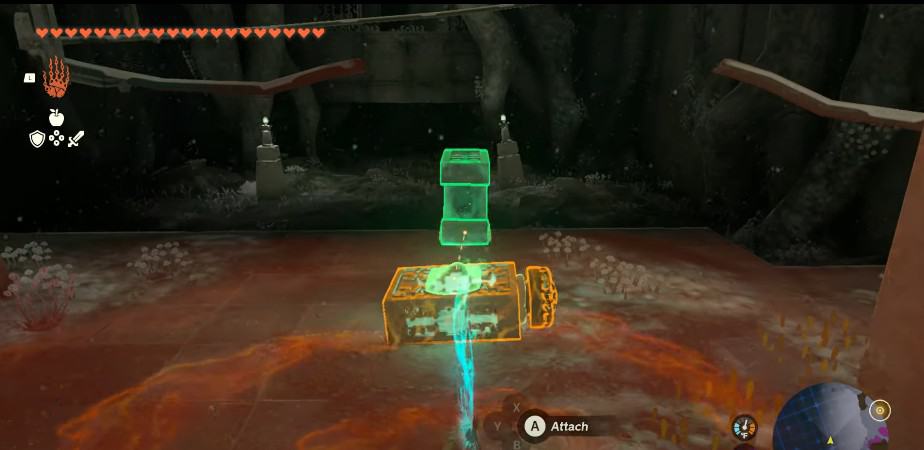
Upon reaching it you can use Ultrahand to attach the strange relic to the machine there. Similarly, you will find three fans and a central device on the right side as well.
You can select two fans, rotate them vertically, and then attach them to the machine. Then you can attach the Steering Stick to complete the machine.

The last piece would be to power that machine, so you can use the Big Battery from your inventory in Totk for that. After you have attached that as well, you can select the whole machine and then carry it to the stone ramp.
There, you can select the option control to operate that machine and hover it in the air, avoiding the flying rocks. After navigating that machine, you will finally reach a large bird statue by following the green light originating from the relic, which will have some drawings on it in Zelda: Totk.
Land the machine there and then detach the relic from it. Next, you will have to place the relic on the pedestal. In doing so, it will glow, and a shortcut scene will play next.
The bird statue will lift, revealing a hidden path, and the relic will also shoot a light. Then, you can pick the relic up and follow the light again in Tears of the Kingdom.
Construct Factory
Following the light, you will enter Tobio’s Hollow Chasm. Carry on until you reach the giant octagon at the end. There, you can place the relic on the small stand, and it will connect automatically.
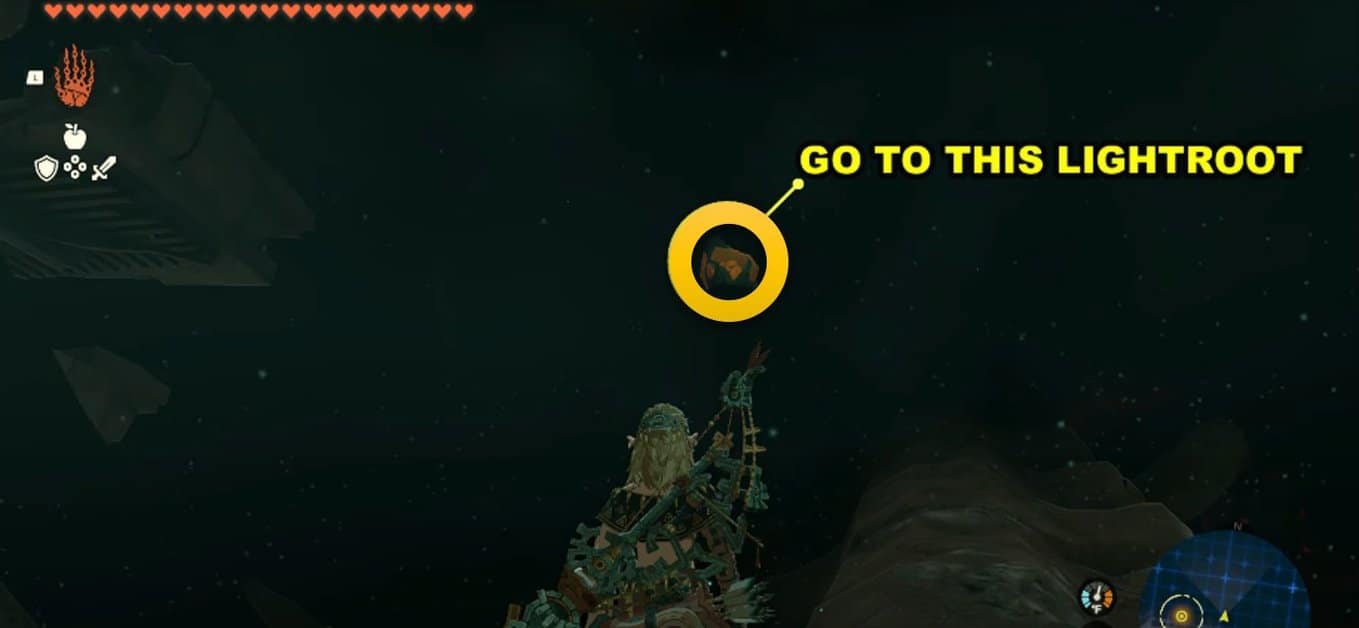
The octagon platform starts to descend and brings you to the lower level. From there, you can go towards the backside and glide to reach the Muokuij Lighroot in Zelda: Tears of the Kingdom.
You will spot a green glowing light there that needs to be examined. It will somewhat light up the place, so you can go back to the relic and pick it up.
Follow the straight path and at the end, you will see an incomplete construct. Therefore you can use Link’s ability Ultrahand to attach the relic to the construct head in Totk.
Build a Body for Mineru
After you have attached the relic and completed the construct, it will speak to you, stating its name as Mineru, the Fifth Sage. It will claim to be the sage of spirit and instruct you to visit each of the four storehouses.
Your next objective in “Guidance From Ages Past” will be to assemble a piece of the body from each storehouse to complete a body that can house Mineru’s spirit.
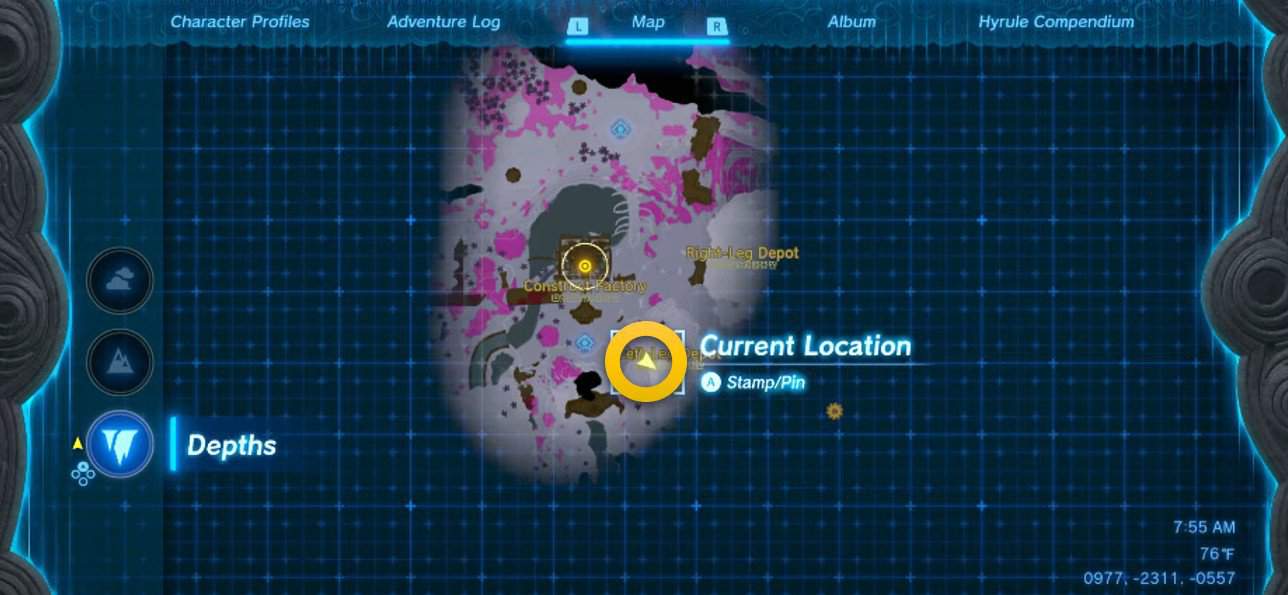
Reach Right-Leg Depot
You can go right towards the dark side and then use the Brighbloom Seed paired with an arrow to light the way ahead in Tears of the Kingdom. On your left side, you will see a Lightroot, so make your way toward it.
To reach the Lightroot, you can simply use the Brightbloom Seed to light up the path. Then, follow the giant skeleton path to reach the Lightroot at the end.
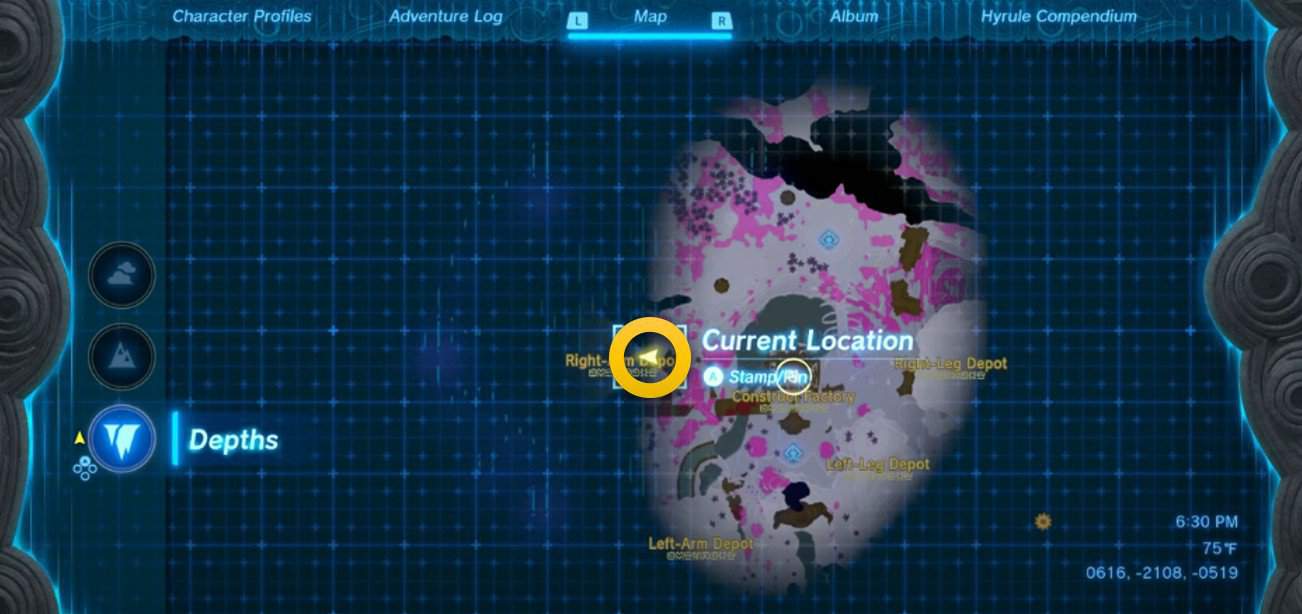
Upon reaching the Lightroot you can use Ascend to go up and then reach the Uisihcoj Lightroot in Legend of Zelda: Tears of the Kingdom. Then you can examine it and while you do that it will dispel the darkness surrounding you and brighten the area. You can examine this on the map as well in Totk.
After that, you can run up to the ledge on the left side, ignore the flying monsters, and then jump from the ledge on the right side to reach the lower level in Totk.
From there, you will see an entrance below with two green lights on each side.
How to solve the Right-Leg Depot puzzle
So once you glide towards it, you will reach the Right-Leg Depot, which lies in the West Necluda Depth in Tears of the Kingdom. Inside, you can find a green altar if you travel straight ahead.
Interact with it, and it will light the giant pillar behind it, which will then produce a giant rectangular glowing box. Moreover, the entrance behind you will be locked in Totk.
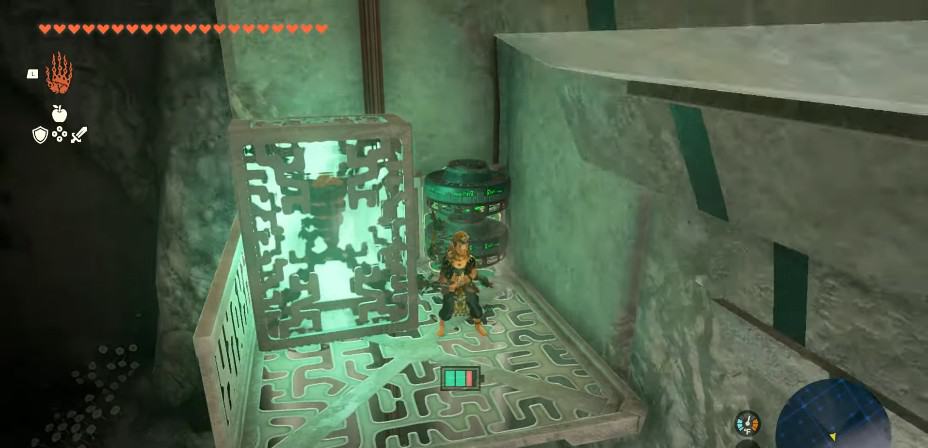
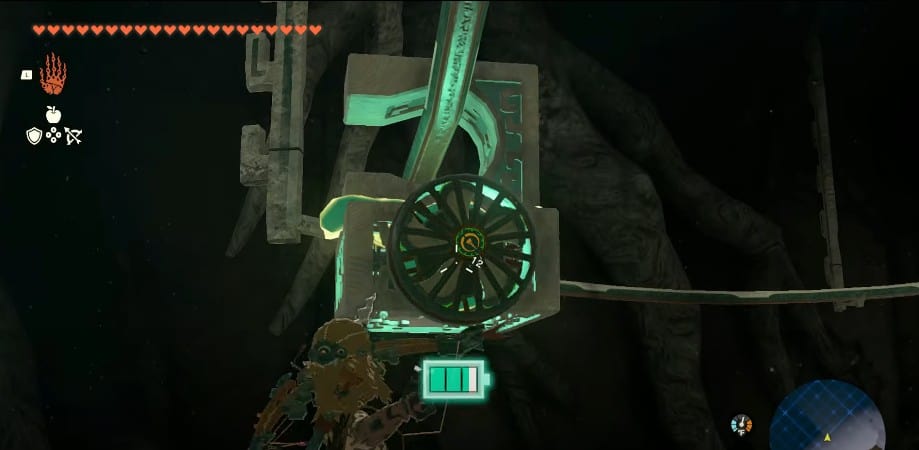
So, using Ultrahand, you can move the box to the right side near the pair of motor fans. Then, you can place the box there, slash the fan to operate it, and move towards the upper level.
After reaching the top side, select the box and move it towards the right side, attaching one of the turbine motors to it as well. You will notice a broken rail up ahead with a backward C-shaped rectangular piece hanging on the left side.
Select that piece, rotate it, and bring it near the rectangular box to attach it. Then, you can proceed to select the whole thing and place it on the rail.
Next, you can hit the turbine fan that you connected to it to make it operational. This will cause the box to start moving on the railing ahead.
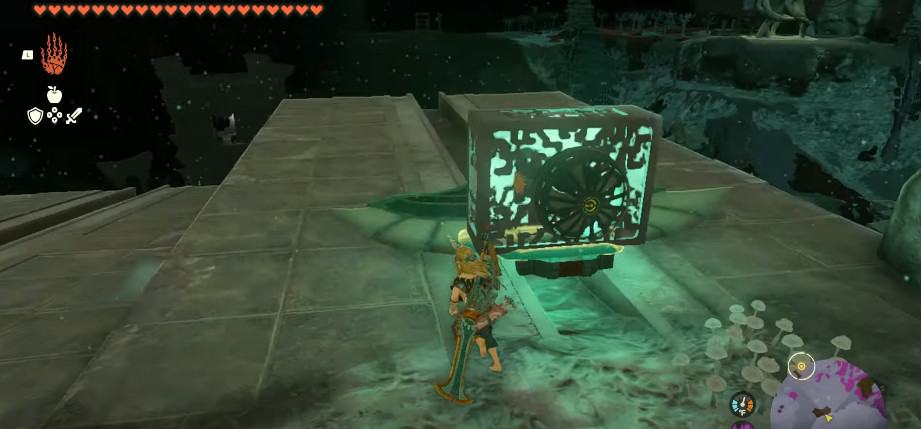
Follow the path on your right side, and once you reach the end, use Ascend to go up. On the top side, you will find the rectangular box that you loaded on the railing.
Select it and carry it to the small platform with the pair of turbines on your right side. Place it there and start the turbine by slashing it to go up.
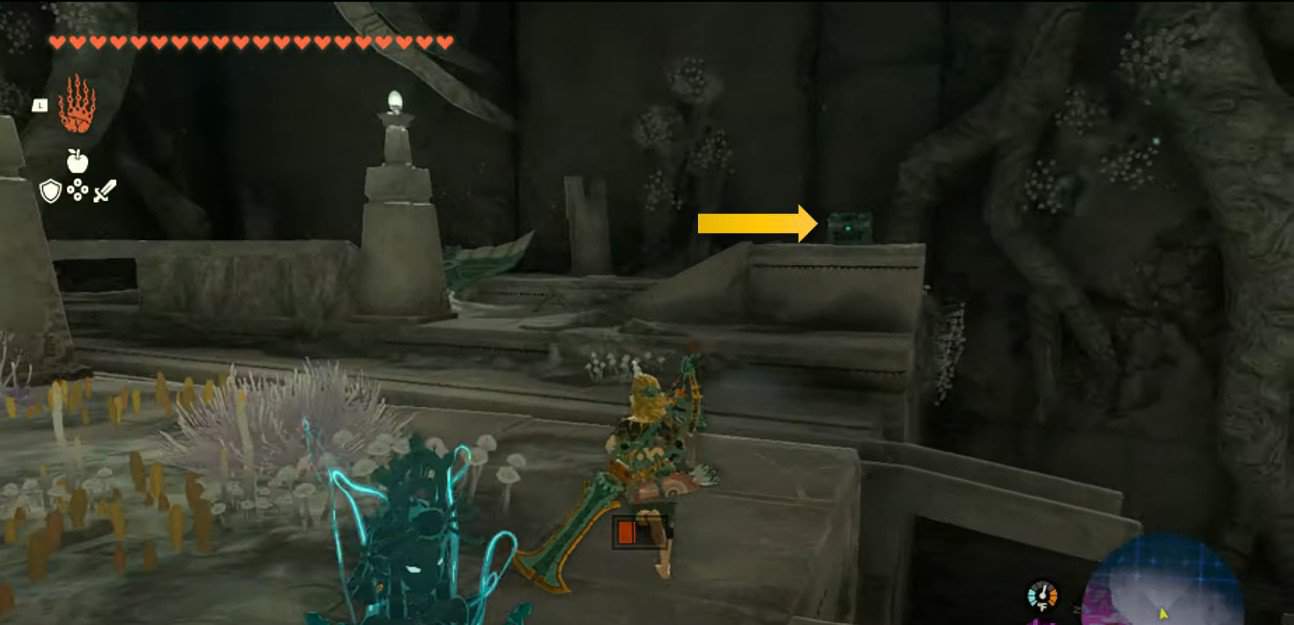
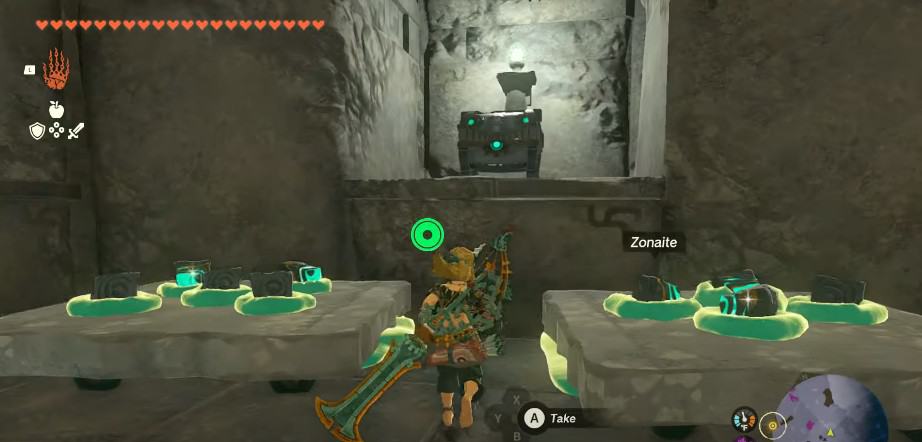
On the top side, you can simply head right climb the wall and find a chest on the opposite side. This specific chest will contain Zonaite (x3), which you can acquire in Totk.
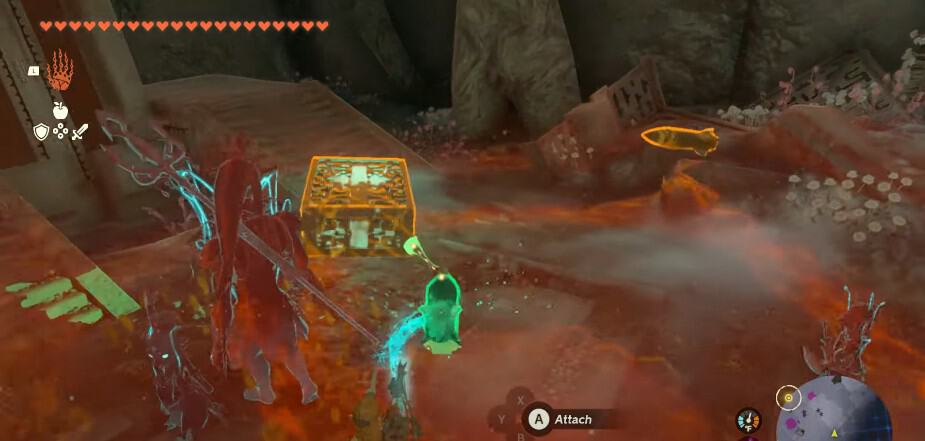
If you look on the left side, you will find a ramp next to a handle. Attach them together using Ultrahand. Then, bring it down to the level where you brought the rectangular box. If you look towards your right there you will find some turbines as well.
Next, load the rectangular box on this machine and attach it. Then, you can attach one of the turbines to the backside of this box. After that, operate this machine by starting the turbine fan to move it in Totk.
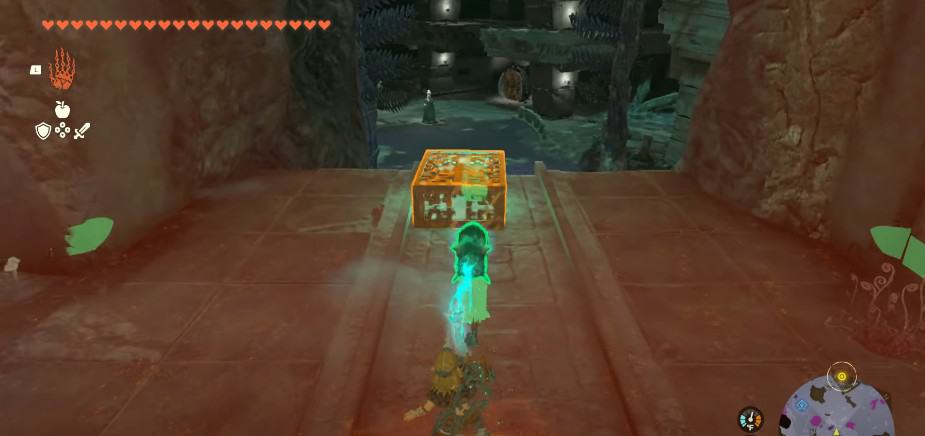
Then, you can maneuver the machine to go to the lower levels and reach the Construct Factory point in Tears of the Kingdom. Once you land there, detach the box and carry it to Mineru Construct.
After placing it near the construct, the box will break open automatically, revealing the right leg of the construct. You can then proceed to select that piece and place it in the lower left corner of the incomplete construct.
Once you attach the first piece, Mineru will speak, stating that you must bring the other three parts here as well. This is the end of the first depot puzzle in Guidance From Ages Past in Tears of the Kingdom.
How to solve the Left-Leg Depot puzzle
With the first piece attached, you can go right towards the Left-Leg Depot, which resides in the Faron Grassland Depths. Once inside, you can head down the stairs to find another green altar ahead.
Examining it, the pillar being it will glow and reveal another rectangular box. Like before, the entrance behind you will be locked, whereas the one above you on the upper level will be unlocked in TotK.
So use Ultrahand to select the rectangular box and go left to diagonal the platform with two rocket-shaped machines on each side in Tears of the Kingdom.
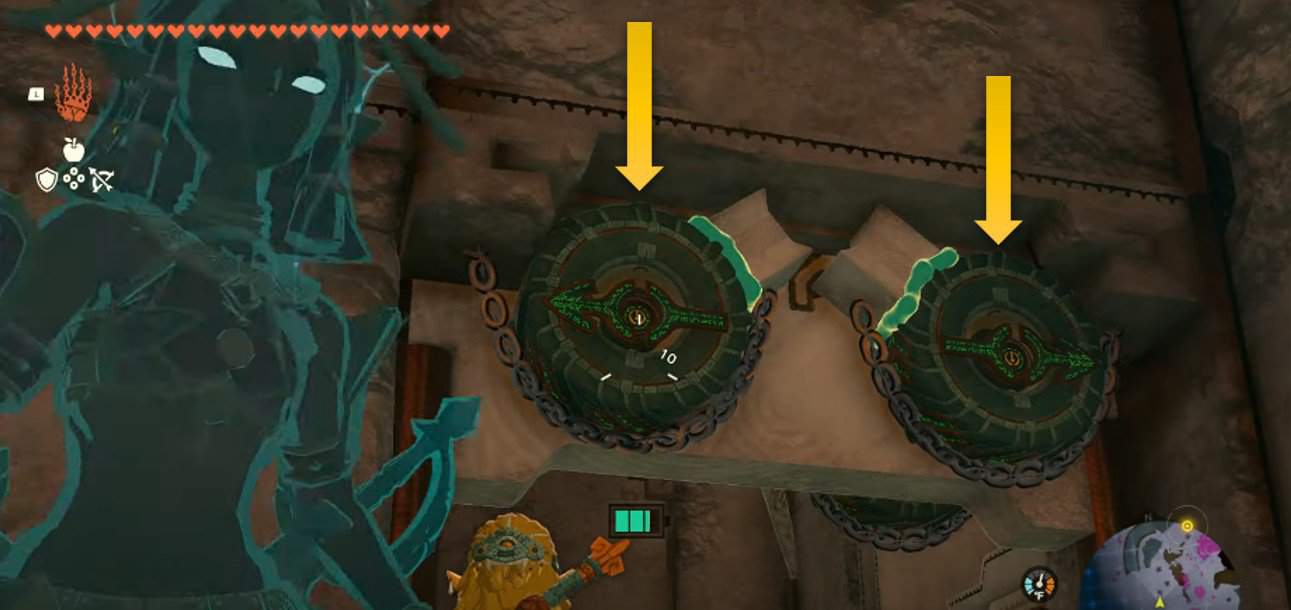
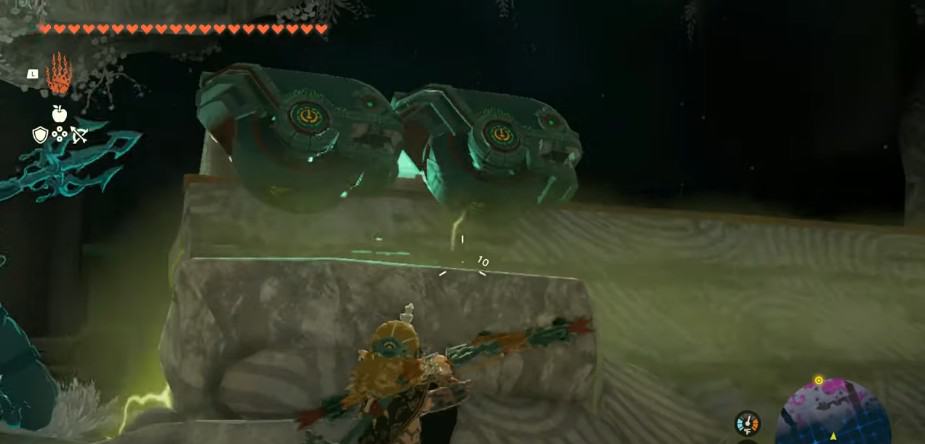
Once you hit the rockets, they will activate, moving the platform up. On the upper level, two rockets lie on the ground on your right.
Using Ultrahand, attach one of these behind the rectangular box. Similarly, on the left side, you will find a large rotating lever, so go to it and interact with it by pushing one of the handles clockwise.
This way, the ramp on the right will tilt downwards at a diagonal angle. So, using the Ultrahand ability, place the rectangular box with the rocket attached on this diagonal ramp. Then, attack the rocket to activate it. Doing so, the rectangular box will fly to the upper level ahead in Totk.
So now you can simply follow to reach the top using Link’s Ascend ability.
Once above, find the box first, bring it near the ledge, and then go to the small stairs on your right. There, you can spot a rocket, so proceed to use Ultrahand to attach it to the box next.
Before leaving that place, you can follow the larger passage on your right side, which has a five-layered electrical blockage. You can go through that by equipping yourself with Prince Sidon’s ability.
Inside, you will find Zonaite (x8) alongside the chest to your left. By opening it, you will receive a large Zonaite in Legend of Zelda: Totk.
Then, you can make your way back to the rectangular box that you attached to the missile before and proceed down to the level of Mineru’s incomplete construct. Like before, once you bring the box near it, the box will shatter, revealing the Left Leg piece of Mineru’s Construct.
So place that piece on the lower right side of the construct to solve the second puzzle in Guidance From Ages Past in Tears of the Kingdom
How to solve the Left-Arm Depot puzzle

So now you need to get the remaining two pieces to complete the construct. Therefore for the third piece, you can turn back and then go towards the right side to reach the Left arm Depot which is present in the Faron Grassland Depth in Zelda: TotK.
To start the puzzle there, you can simply go left to find the green altar and examine it. Like before, the pillar behind will activate and reveal another rectangular box, and the entrance will be blocked as usual in Totk.
On your right side, you will find a circular device you can operate by slashing it with your weapon. The door next to it will open, so use ultra hand to bring the rectangular box along with you this way.
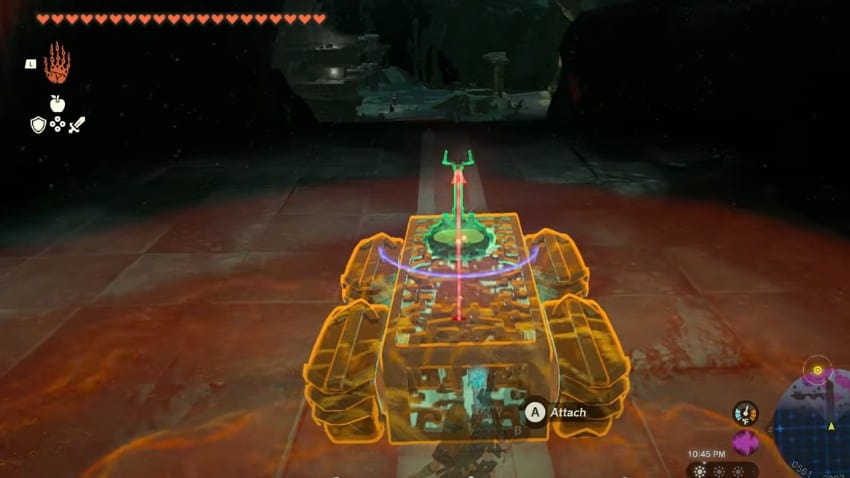
Inside, you will find the passage ahead littered with a lava flow, rendering you unable to cross it. Therefore, you can use the circular gears on the door on your right. Using Ultrahand, you can fit the circular gears on both sides of the rectangular box, forming wheels for it in Totk.
After attaching them you can proceed to attach the handle next in the middle of that rectangular box. This way you can operate this newly formed vehicle can across the lava fold ahead easily in Tears of the Kingdom. Reaching the other end you can detach the rectangular box and place it horizontally in the lava pit on your left side in Totk.
Then, you can turn back, go to the wall, and use Ascension to reach the upper level. Above, you will find a chest that you can unlock to receive the Steering Stick (x5).
After that, you can glide down over the short lave path and then use Ultrahand to bring the rectangular box towards that side.
Now you will find a stone door on your right, which you can move with Ultrahand, but here you will also have to use Link’s other ability, Recall, on it as well. This way you can pass through it with the rectangular box.
On the other side, you will observe two giant fans on your right, so make your way toward them.

You will find one turbine near each of these fans and the second fan will also have a chest on one of its wings as well. You can detach that chest and unlock it to receive the Zonaite (x3).
Then you can attach the motor fan to the rectangular box along with the handle that is also present on the right side. You can use Ultrahand to place this newly constructed vehicle on the ledge next to the water path.
All that is left next is to ride the box by simply attacking the motor. This way you can reach the lower level and make your way toward the Mineru construct. Once the rectangular box is placed near it will disintegrate and reveal another relic piece.
You can proceed with using Ultrahand to fit this on the right side, forming Mineru’s left hand for Guidance From Ages Past in Legend of Zelda: Tears of the Kingdom.
How to solve the Right-Arm Depot puzzle
To get the last piece to complete Mineru construct, you can go left through the passage, and at the end use Ascension to reach the top.
Up there, you can enter the Right-Arm Depot, which can be found in the West Necluda Depth in Zelda: Tears of the Kingdom.
So like always, find the Green Altar in there and examine it. It will reveal the challenge by locking the door behind. Moreover, the pillar behind will activate, revealing the last rectangular box.
Use Link’s ability Ultrahand to load the rectangular box on the moving path on the right side. Then you can follow to reach the floor above.
Once above, you will find three motors, two of which you can attach to the right side of the rectangular box. Then, you can use Ultrahand again to place the rectangular box on an electrically slanted pillar on the left side.
Then, you can fire an arrow to start the motors attached to the box, which will move the rectangular box to the other side in TotK.
You can follow by gliding to the other side. Then, you can place the rectangular box horizontally and attach two more motors on its left side.
This way, you will form a four-wheeled vehicle so after attaching the handle, you can ride it all the way back to the Construct Factory for Guidance From Ages Past in Tears of the Kingdom
After that, detach the rectangular box, and once it is brought near the construct, it will explode like the rest of the boxes you brought earlier in Totk.
Furthermore, it will reveal the last piece of the Mineru Construct, so use Ultrahand to fit this relic piece on the left side, completing Mineru Construct in Legend of Zelda: Tears of the Kingdom.
After that, a cutscene will ensue, with the construct being operational via Mineru spirit. She will state the last task, which will involve finding Mineru’s secret stone in Totk.
Reach Spirit Temple to recover Secret Stone
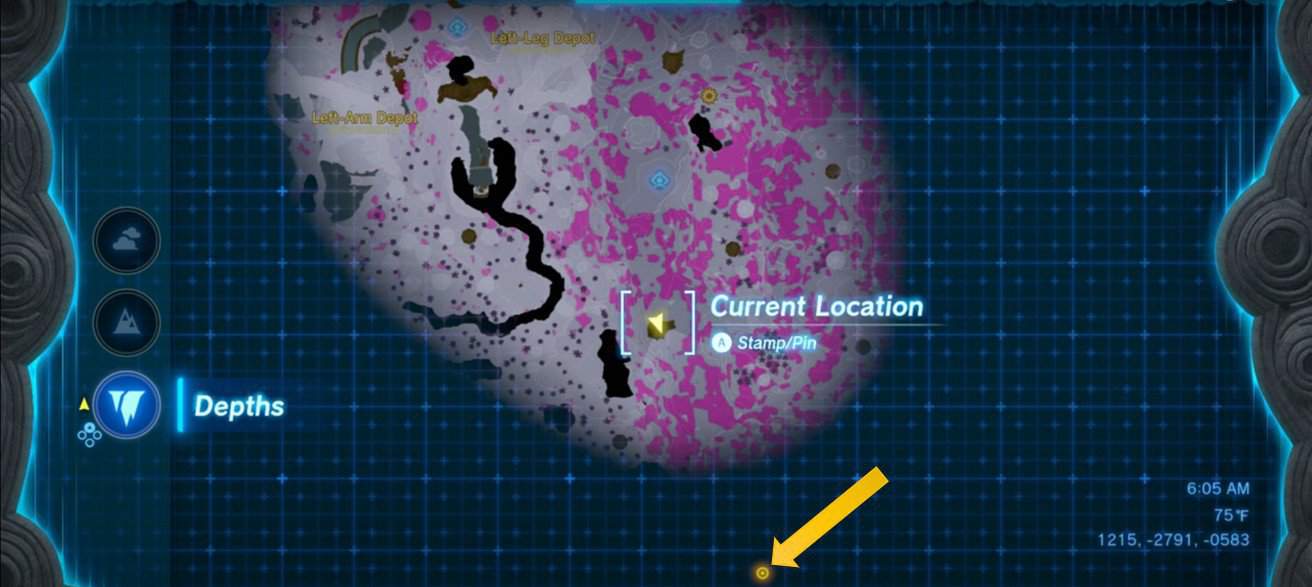
Mineru will mark the location of the secret stone on your map. To recover the spirit stone, you can begin by riding the Large construct and making your way to the middle of the octagon site.
You can select the Spiked iron ball from the armory shelves on your left hand and the Shock Emitter on your right hand.
Then, you can proceed to the right side of the Construct Factory. There, you will find another armory with two stone shelves. From there, you can attach the Fan to the back part of your construct.
You can continue moving left until you reach the armory at the Left-Leg Depot in Tears of the Kingdom. There, you can switch the Flame emitter with the Cannon on your right hand, enabling you to direct ranged shots at your enemies.
So go right from that place next, and after traveling some distance, you will reach the Sijotu Lightroot. After examining it, you can dispel the darkness in that area. So get back on your construct, and along the way, you will encounter the enemy Blue Hinox
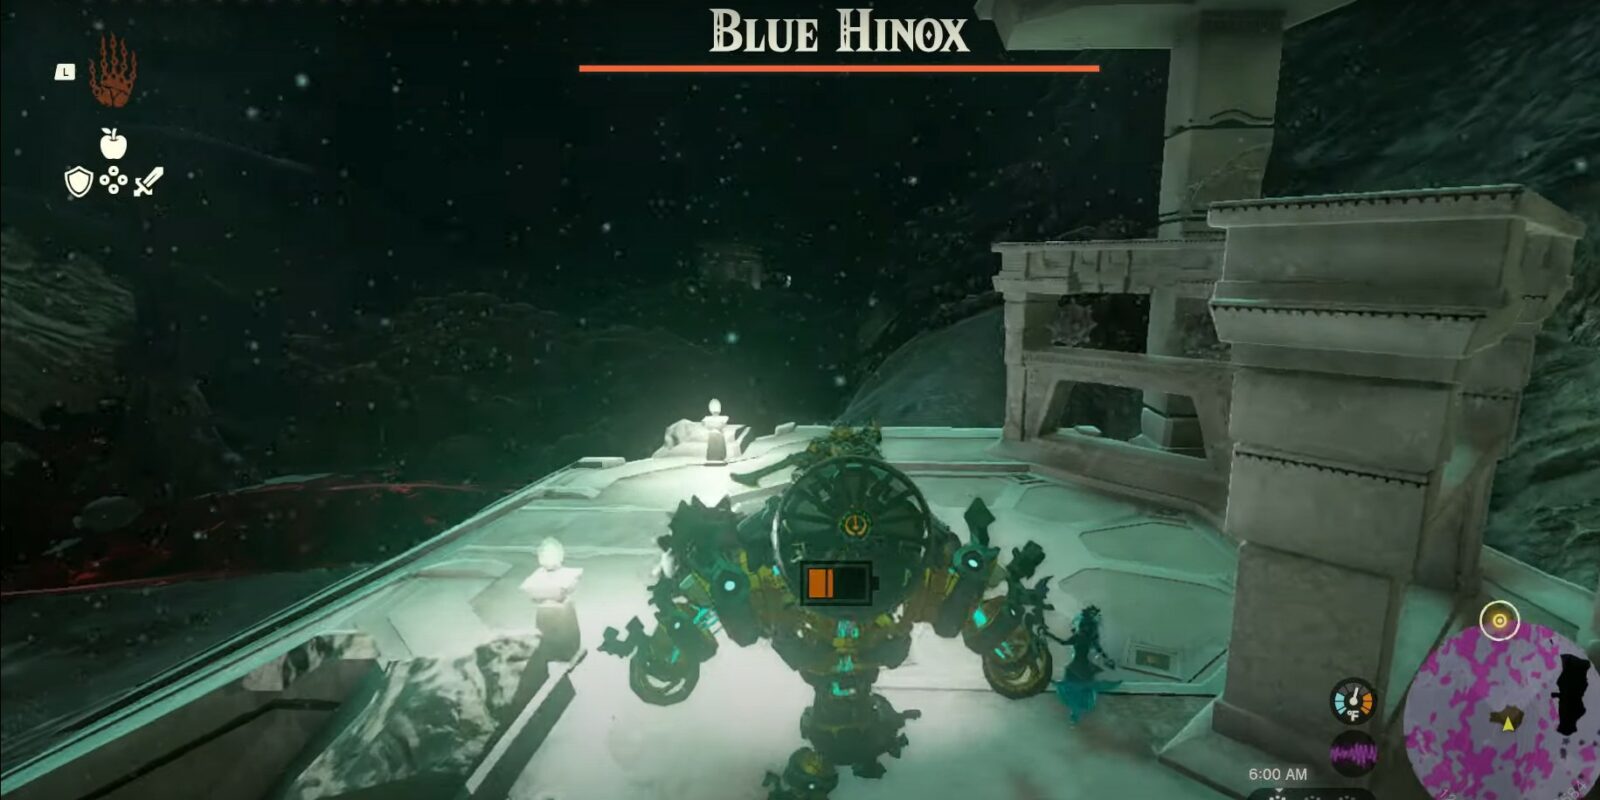
It is up to you whether you want to fight it or simply evade it and make your way to the armory up ahead in TotK. As you reach that armory, Mineru will mention that you are close to the secret stone. So now you can equip the spiked iron ball on both hands and go forth to the location of the spirit stone.
After crossing the rocky terrain, your path will be blocked by boulders, which you can smash using the spiked iron ball in Tears of the Kingdom.
Once you clear the way, you can move forward and light the dark path ahead using Brightbloom seeds. Furthermore, you will also see another armory down below.
How to enter Spirit Temple
At the armory, you will see the spirit temple above the cliff, and the stairway connecting them is broken midway. So Mineru will mention that the construct can’t get there. To solve this, you can fit a Rocket on the back part of the construct in Legend of Zelda: TotK.
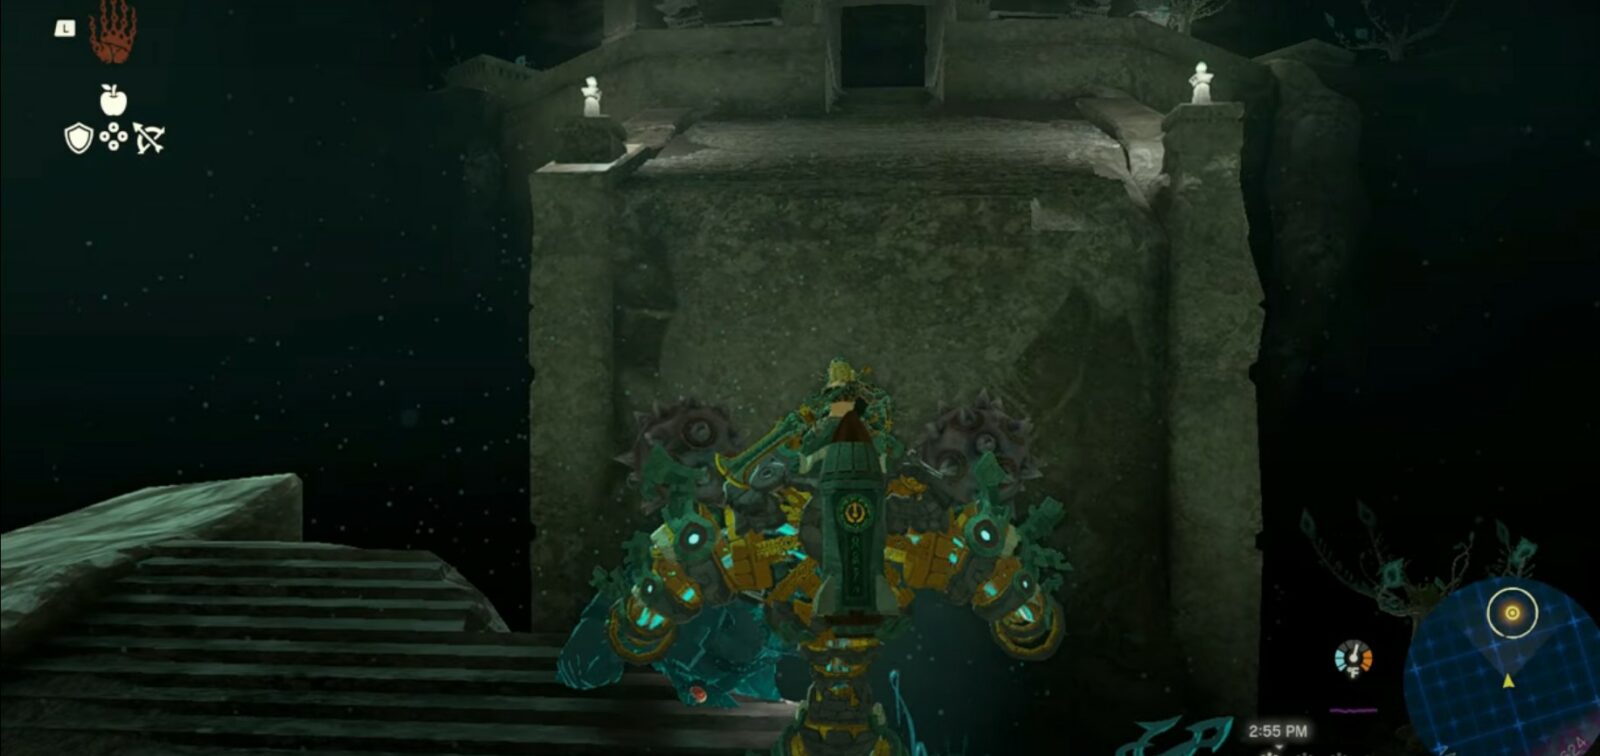
Next, you can go up the stairs, and once you reach the broken path, you can cross it using the rocket attached to the back part. This way, you can reach the Spirit Temple with relative ease in Totk.
Inside the Spirit Temple, you will find a small bird statue in the middle of the hexagonal structure. Once you examine it, the construct will connect with it using light, and the lift will take you to the lower level in Tears of the Kingdom.
Seized Construct Boss Fight
If you look ahead, you will finally spot the spirit stone near the wall. However, when you try to go towards it, you will be trapped, and a giant Seized Construct will suddenly appear to fight you in Legend of Zelda: TotK.
Now you will need to defeat this Seized Construct to finally acquire the stone. You can start by landing some blows using the spiked balls and this will definitely take a chunk of health from the seized construct in Totk.
However during the first phase of this boss fight, you need to be aware of its ranged attacks as the construct will jump to one corner and fire attacks on you. You can dodge these and continue with the spiked ball pounding on the seized construct to damage it further in this boss fight in Tears of the Kingdom.
This vicious construct will also try to attack you by lunging at you, so evade it. During the fight, you can also block its physical attacks using your shield and stun this enemy boss by landing 3 consecutive blows.
Furthermore, the Seized Construct will use the Shock emitters to attack you head-on in Totk. So dodge the attack, and once he is done, you can reply by hitting him with the iron spiked blows to lower his health.
Once the Seized Construct’s health gets to half, it will go into a frenzy and its parts will elongate giving it more arms to attack you as well.
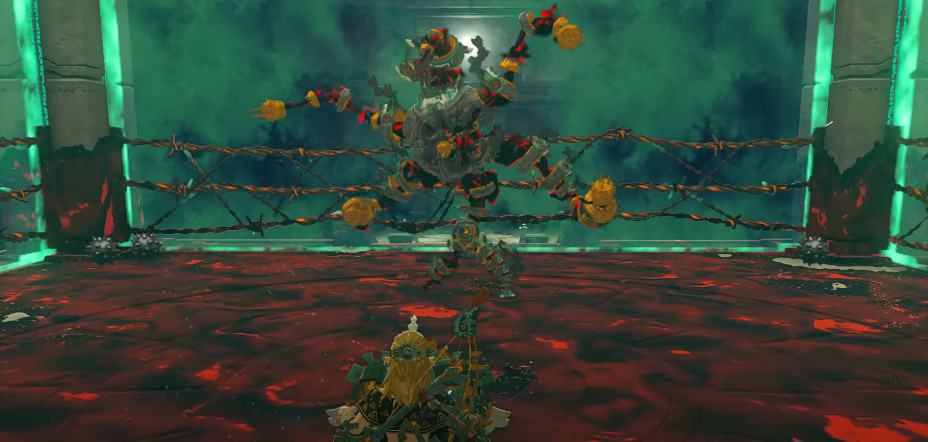
During this second phase, this enemy boss will start levitating using the fans attached behind it, making it hard for you to attack it. So take this opportunity to go to the corners to switch the Iron Spiked balls with the new ones.
The Seized Construct will fire shots at you while flying in the air, so dodge its incoming attacks and wait for it to land so that you can hit him back in Totk.
Similarly, after getting hit, the Seized Construct will take to the air again, and this time around, it will follow up with another attack. This attack will come as a shock emitter attack as it will prepare to lunge viciously at you. So avoid this attack at all costs and get behind him to counterattack him in Zelda: Tears of the Kingdom.
Near the end of the fight, the Construct will drop the Zonai device which you can grab. Meanwhile, the enemy boss will continue with the ranged shot attacks and once it lands, quickly move to attack it.
So, after a while, you will get the chance to land the final blow against the Seized Construct, and this way, you will defeat it in Zelda: TotK.
After that, you can get the Spirit Stone, and your quest Guidance From the Ages Past will be marked as complete in Legend of Zelda: Tears of the Kingdom. Lastly, you will also earn another Heart Container as well.