To help you find Smithing Stones early on in the game, we have prepared this guide where we will walk you through all the Elden Ring Smithing Stone Locations.
What Are Smithing Stones Used For?
Smithing Stones are one of the most important items in the game. These consumables are needed to upgrade your weapons in Elden Ring.
Though they are not a particularly rare item to find, Smithing Stones are hidden quite well around the world of Elden Ring. You’ll find them naturally as you play through the game, but if you know the best locations to find them beforehand, you will be able to upgrade your weapons much earlier.
If you find a bunch of Smithing Stones early on, you’ll be able to quickly upgrade your weapons using a Smithing Table in the Church of Elleh. This will allow you to have a much easier time beating the early-game mobs and bosses.
Elden Ring Smithing Stone Locations
So to help you out with finding Smithing Stones, below, we’ve listed down the best locations to find Smithing Stones early on in Elden Ring. Keep in mind these are just the regular Smithing Stones. We have created separate detailed guides for Somber Smithing Stones and Ancient Smithing Stones.
Smithing Stone 1 Locations
- Church of Elleh
- Limgrave Tunnels
- West Limgrave statue
- Purchased at the Roundtable Hold from the Twin Maiden Husks after getting the Smithing-Stone Miner’s Bell 1
You’ll find the first Smithing Stone in Limgrave. It’s inside the Church of Elleh on an anvil.
You’ll come across the Limgrave Tunnel east of the Church of Elleh in the north part of the lake.
For the West Limgrave Statue, you must visit the east of Stormhill Shack to find it next to some trolls. The trolls will help you in this situation. Considering how easy it is to bait a troll, you can simply bat it to breaking the statue.
Next up is finding the Smithing Stone Miner’s Bell 1. For this, you must head to Raya Lucaria Crystal Tunnel (northeast of Liurnia Lake). You’ll get the bell as a reward for defeating a dungeon boss.
Smithing Stone 2 Locations
- Castle Morne
- Limgrave Tunnels
- West Limgrave statue
- Stormveil Castle
- Purchased at the Roundtable Hold from the Twin Maiden Husks after getting the Smithing-Stone Miner’s Bell 1
After entering Castle Morne, you have to turn left and go upstairs to find the Smithing Stone 2.
Limgrave Tunnels and the West Limgrave Statue are found in the same spot as the first Smithing Stone. However, you’ll find the Stormveil Castle west of Limgrave, but you have to go through Margit the Fell Omen to enter the Castle.
Smithing Stone 3 Locations
- Academy of Raya Lucaria
- Raya Lucaria Crystal Tunnel
- Nokron, the Eternal City
- Night’s Sacred Ground
- Purchased at the Roundtable Hold from the Twin Maiden Husks after getting the Smithing-Stone Miner’s Bell 2
Visit Liumia to find the Academy of Raya Lucaria. The main entrance is closed; hence you must enter through the structure’s roof. However, things get harder from here as you must slay a dragon in the lake west of the Academy, who is guarding the key to the structure.
For Nokron, the Eternal City, you must defeat General Radahn in Caelid then make your way east of Limgrave, just past the Mistwood Ruins, in the south.
Smithing Stone 4 Locations
- Academy of Raya Lucaria
- Gael Tunnel
- Ravine-Veiled Village
- Leyndell
- Forsaken Ruins
- Purchased at the Roundtable Hold from the Twin Maiden Husks after getting the Smithing-Stone Miner’s Bell 2
Academy of Raya Lucaria is found in the same location as the third Smithing Stone.
As for the Gael Tunnel, it is found west of Caelid between the border going to Limgrave. This one is on the wall on the left side.
To find the Ravine-Veiled Village, you must visit Liurnia and head towards the north side of the lake.
Leyndell is found at the southeast side of the Altus Plateau and can only be entered through the northern outer wall.
Head to the west side of Caelid to find the Forsaken Ruins (south of Shack of the Rotting).
Smithing Stone 5 Locations
- Altus Plateau
- Academy of Raya Lucaria
- Ravine-Veiled Village
- Sellia Crystal Tunnel
- Old Altus Tunnel
- Altus Tunnel
- Leyndell
- Castle Sol
- Nokron, the Eternal City
- Subterranean Shunning-Grounds
- Purchased at the Roundtable Hold from the Twin Maiden Husks after getting the Smithing-Stone Miner’s Bell 3
In the Altus Plateau, you can find this by moving a little forward and dropping down from the hill. There you will encounter a few enemies next to a wooden cart that will drop the Smithing Stone 5 upon defeat.
The locations of both Academy of Raya Lucaria and the Ravine-Veiled Village have been discussed above.
As for Sellia Crystal Tunnel, you can find it at the center of Caelid, northwest of the Sellia, Town of Sorcery.
The Old Atlus Tunnel Is found at the center of the Atlus Plateau, south of the Minor Erdtree.
Check the eastern side of your map to find the Castle Sol in the Mountaintops of the Giants region.
Head south of the Avenue Balcony Site of Grace to access the sewers below Leyndell to find the Subterranean Shunning-Grounds.
Lastly, Smithing-Stone Miner’s Bell 3 can be found in the Zamor Ruins inside a chest.
Smithing Stone 6 Locations
- Sealed Tunnel
- Leyndell
- Redmane Castle
- Volcano Manor
- Castle Sol
- Subterranean Shunning-Grounds
- Purchased at the Roundtable Hold from the Twin Maiden Husks after getting the Smithing-Stone Miner’s Bell 3
For the Sealed Tunnel, visit the southeast part of Altus Plateau, and you’ll find it in a ravine outside the Leyndell tunnel.
Head to the southeast side of Caelid to find the Redmane Castle. In Redmane Castle on the rooftop, you will find it inside a wooden box.
In the end, visit the northwest side of the Altus Plateau to find the Volcano Manor
Smithing Stone 7 Locations
- Sellia Crystal Tunnel
- Volcano Manor
- Castle Sol
- First Church of Marika
- Guardian’s Garrison
- Subterranean Shunning-Grounds
- Purchased at the Roundtable Hold from the Twin Maiden Husks after getting the Smithing-Stone Miner’s Bell 4
In the Subterranean Shunning-Grounds, you will find this Smithing Stone inside the huge pipe.
Visit the south side of the lake on the shore to the northeast side to fund the First Church of Marika in the Mountaintops of the Giants.
Guardian’s Gar Garrison is found in the Mountaintops of the Giants, in the northern part of the Giants’ Gravepost.
Talk to Melina and defeat the Fire Giant in the Mountaintops of the Giants to enter the Crumbling Farum Azula, where you’ll defeat the Godskin Duo twin bosses to receive the Smithing-Stone Miner’s Bell 4.
Smithing Stone 8 Locations
- Yelough Anix Tunnel
- Purchased at the Roundtable Hold from the Twin Maiden Husks after getting the Smithing-Stone Miner’s Bell 4
Yelough Anix Tunnel is found west of the Mountaintops of the Giants. Use the medallion in the Grand Lift of Rold to access the location.
Once you reach the bottom, you will find this by breaking the wooden boxes shown in the image above.
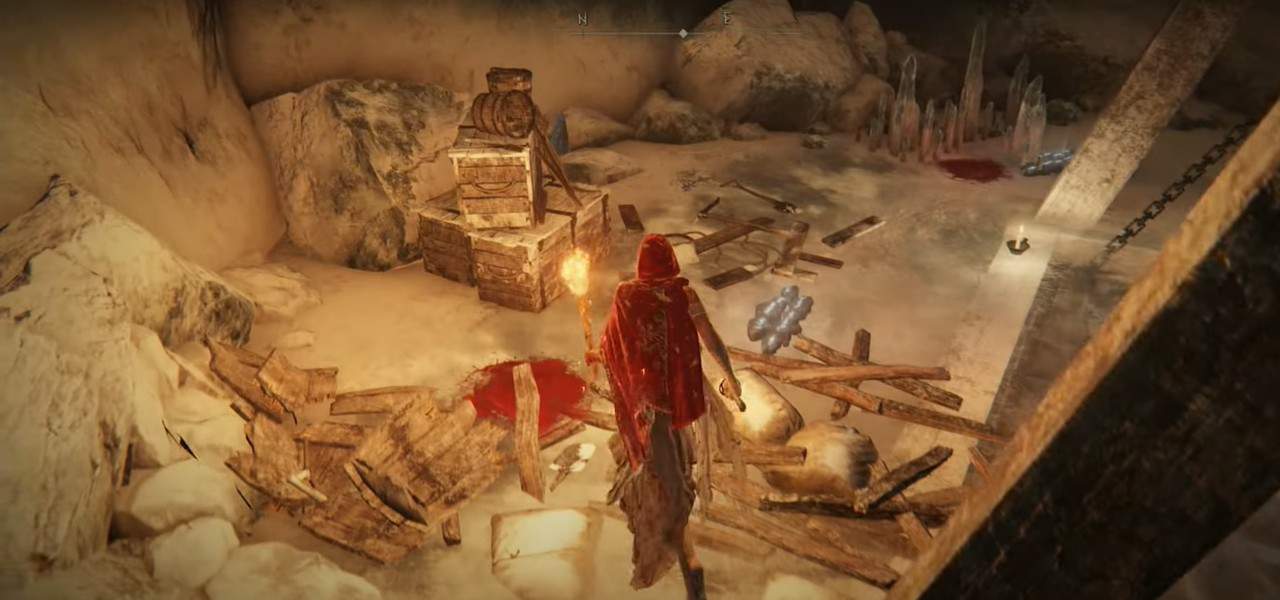
Smithing Stone 9 Locations
Yelough Anix Tunnel is found west of the Mountaintops of the Giants. Use the medallion in the Grand Lift of Rold to access the location. The Smithing Stone can be found in the corner on top of a corpse.
Enemies that Drop Smithing Stones
Smithing Stone 1
Smithing Stone 1 is dropped by the following enemies in the Elden Ring.
- Godrick Soldiers
- Raya Lucarian Soldiers
- Exiled Soldiers, Stormveil Castle
Smithing Stone 2
Smithing Stone 2 is dropped by the following enemies in the Elden Ring.
- Summoned Raya Lucaria Soldiers
Smithing Stone 4
Smithing Stone 4 is dropped by the following enemies in the Elden Ring.
- Stone Diggers at Ravine-Veiled Village, Liurnia
- Fanged Imps, Caelid Dungeons
- Leyndell Soldiers, Altus Plateau
Smithing Stone 5
Smithing Stone 5 is dropped by the following enemies in the Elden Ring.
- Flame Chariots, Mt Gelmir –
- Mausoleum Soldiers, Deeproot Depths
- Fanged Imps, Subterranean Shunning-Grounds
Smithing Stone 6
Smithing Stone 6 is dropped by the following enemies in the Elden Ring.
- Fallingstar Beast, Altus Plateau
Smithing Stone 7
Smithing Stone 7 is dropped by the following enemies in the Elden Ring.
- Fallingstar Beast, Caelid
Locations of Merchants Who Sell Smithing Stones
There are a total of three merchants from where you can buy all the Smithing Stones in Elden Ring.
First Smithing Stones can be purchased from the Nomadic Merchant in the West Limgrave. The blue marker on the map above shows this merchant.
The Smithing Stone 2 to 8 can be purchased from the Twin Maiden Husks in the Roundtable Hold after getting the Respective Smithing Stone Miner’s Bell Bearing. This merchant is shown by a yellow marker on the left side of the map.
The Smithing Stone 9 can be purchased from the Gurrang, Beast Clergyman. This merchant is shown by a green marker on the right side of the map
How to Get Unlimited Smithing Stones in Elden Ring
Smithing Stones are required to upgrade all weapons, except the Legendary Armaments, in the game. Though they are hard to find in the huge world of Elden Ring, another issue that many players face is that upgrading a weapon from the start forces them to stick to that weapon and moving to a new weapon that they like can be a problem.
So, Elden Ring fixed this problem by making it so that you can buy as many smithing stones as you like, but this is not an option from the start.
To get this option to buy unlimited Smithing Stones in Elden Ring, you need Bell Bearing that will unlock smithing stones at the Twin Maiden Husks merchant at the Roundtable Hall.
Smithing Stone Bell Bearing Locations
Here are the bells that will unlock Smithing Stones for players in Elden Ring.
Smithing Stone Miner’s Bell Bearing 1
The first bell bearing can be found in a mine in Lucaira. You need to head north from South Raya Lucaria Gate along the cliff on the east of the lake.
You will find a tunnel here, the Raya Lucaria Crystal Mine. Complete this mine and defeat the boss, Crystalian, at the end. Defeating this boss will give you Smithing-Stone Miner’s Bell Bearing 1, which unlocks Smithing Stone 1 and 2 for purchase.
Just a small tip, since you will be heading into a lot of mines for these bells, use magic weapons or sorceries to kill the miners.
Simple weapons deal next to no damage and make these mines unbearable. Any Magic Infused weapon or any weapon that deals some magic damage will do the job just fine.
Smithing Stone Miner’s Bell Bearing 2
The second bell bearing is found in a mine in Altus Plateau. You need to go to the Sealed Tunnel to get this bell bearing.
From the Outer Wall Phantom Tree grace that you get after defeating the two Tree Sentinels, head east to the small lake. Head down using the spirit stream or the rock formation, then head south of the lake.
Here, the entrance of the sealed tunnel can be found. The tunnel has many illusory walls, so whenever you can’t find the path to progress, start smacking the walls in the corners of the room to find them.
After the first illusory wall, next to the fire, turn right and open the chest to get the 2nd bell bearing.
Smithing-Stone Miner’s Bell bearing 2 allows you to purchase Smithing Stones 3 and 4 from the merchant.
Smithing-Stone Miner’s Bell Bearing 3
The third bell is in the end game area. You need to progress to Zamor Ruins in the Mountaintops of the Giants.
Even if you get there fast by bypassing most of the game, you need to have defeated the Draconite Tree Sentinel and obtained two great runes before you can actually purchase the stones.
Inside the Zamor Ruins, a simple underground room can be found which contains the bell bearing in a chest.
Smithing-Stone Miner’s Bell Bearing 3 allows players to purchase Smithing Stone 5 and 6 from the merchant.
Smithing-Stone Miner’s Bell Bearing 4
This bell bearing is in Crumbling Farum Azula. In this area, simply progress through the area and kill the Godskin Duo in the Dragon Temple. Killing the boss will reward you with Smithing-Stone Miner’s Bell Bearing 4.
Smithing-Stone Miner’s Bell Bearing 4 allows players to purchase Smithing Stone 7 and 8 from the merchant.