In this Elden Ring walkthrough, we will cover the whole Subterranean Shunning-Grounds area located below Royal Capital and a strategy to use against the enemies you will face in this area.
How to Get to Subterranean Shunning-Grounds in Elden Ring
The whole underground area is filled with rare loot and many enemies that will make your adventure a bit difficult.
It has a lot of paths and so much to cover that it will take you a long time to navigate the complete area. You will also face Mohg, the Omen boss in this area.
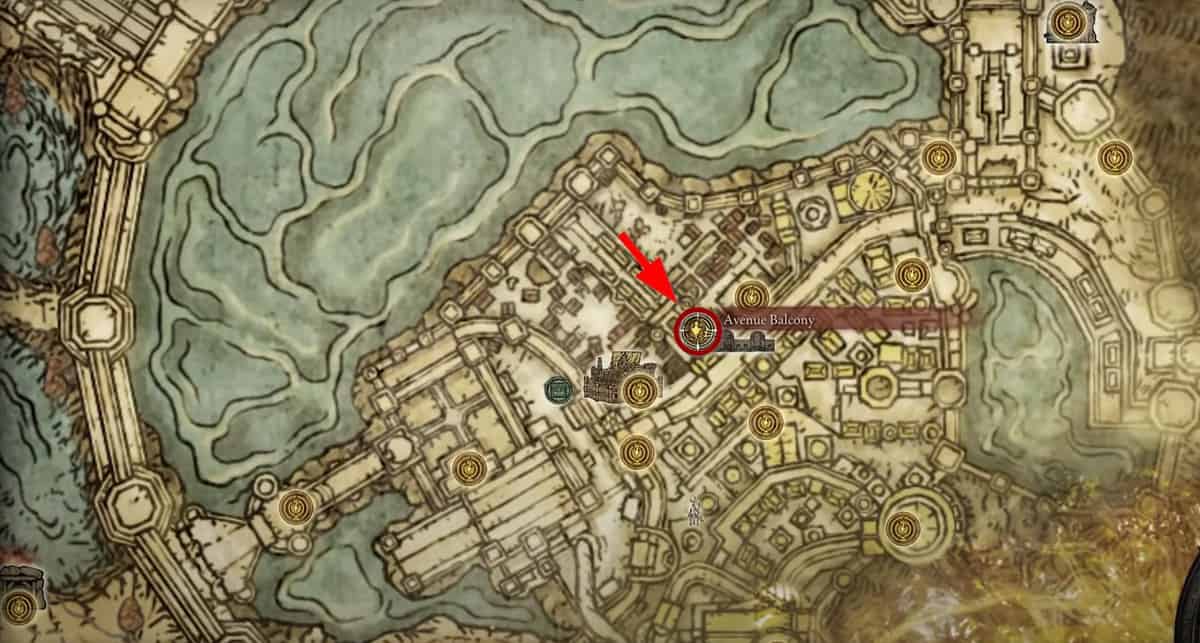
The underground area is located under Leyndell, Royal Capital. After you go downstairs from the Avenue Balcony Site of Grace, there is a well beneath the railing where the dead dragon’s wings are. Enter the well to access Subterranean Shunning-Grounds.
Elden Ring Subterranean Shunning-Grounds Walkthrough
Once you go down the well, there is a door on your left that you can unlock. Keep going straight from here and defeat the rats in your way. At the end of the path will be a platform from where you can see the main area below.
There will be Ogres right beneath you and a Site of Grace in a room, which is found by going straight from the ladder you dropped from and turning left. Rest at the Site of Grace and head towards the room with big pipes.
A Jade Goblin will be waiting there for you. Defeat the enemies and go over the pipes. At the end of the pipes will be a room with a dead body inside.
An Ogre will guard it. Kill the Ogre and loot the body. There will also be a lever to the right which will open a gate to the room with big pipes.
Back in the big pipes room, there is another pipe below you can jump on. You will be attacked by the Giant Lobster here. Run into the pipes to dodge the enemy and get the Morg Shackle in the southeast corner. Move the opposite way and look for a hole in the wall.
Go through the hole to enter a dungeon area. This dungeon area is called Leyndell Catacombs.
Go back and into the elevator. The elevator will take you to a new area with many ghosts that cannot be killed. Look to your right to find two illusionary walls and go through them.
Kill the snail here to get a Haligdrake Talisman +1. Follow the path to enter the main area of the start.
From here, head towards where the two Ogres are and jump down into the sewers. The straight path takes you to the Dung Eater’s room, where he is locked. You will need to follow this path when doing the Dung Eater’s questline.
We will take the right path and enter the pipes. There are holes in the pipe that will take you to different areas. Jump over the holes and go to the room with a corpse. An Omen will engage you in this room.
Fight or ignore the Omen and go up the ladder. Open the doors and enter the room with stairs that lead downwards.
The stairs are broken, but there are items that you can collect on the stairs. Go back up and drop to the platform on your left.
Follow these stairs and loot Nomad Ashes and Omen Bairn on your way. At the end of the path will be a large ladder that you can climb up and open the door right in front of the Site of Grace.
Face the way you came from and follow the pipe on your right. Keep following the pipe and jump on the wooden platform on your left at the end of it. Defeat the Imp and go through the path on your right.
Jump into the hole of the pipe and go straight. At the corner of the path will be a pipe to your left and straight. Taking the left path will lead you to a commoner and a gate that you can open.
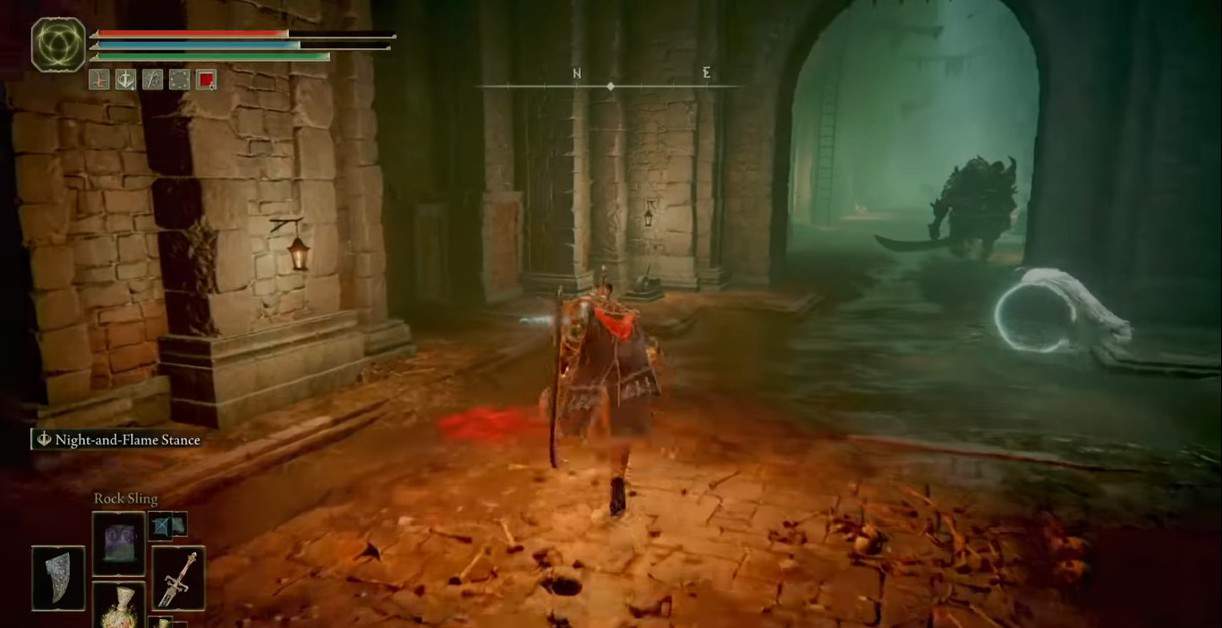
Go down the slope and climb the ladder to find a room with jars. Kill the jars and proceed to the elevator on the right side. The boss room where you will fight Mohg, the Omen will be right in front of you.
How to Defeat Mohg, the Omen
Mohg is an optional boss of the Subterranean Shunning Grounds. It is of the Great Enemy type and the same as the Omens but much harder. The boss wields a giant fork-type melee weapon called Trident and casts spells at a long distance.
These spells deal Fire damage, and getting hit by these will make you lose blood over time. The boss will cast a red circle of blood over its head and throw it at you in a straight line or a wide-angle.
The spell also leaves a burning effect on the area it lands. If you run into it, you will get damaged by the fire.
The boss’s attack animation is slow, but he deals a lot of damage quickly. You will have to time your rolls to dodge its attacks. Keeping your distance from the boss will make him cast the same spell repeatedly.
The boss’ melee weapon covers a large area when it attacks. The boss will thrust the Trident in your direction and send you flying if you get hit by it.
It will also use it to perform a three swings combo that can kill you instantly if you get hit by all three of the swings.
However, the boss fight can be cheesed with the use of spells. You can spam the Comet Azur spell constantly to keep damaging the boss.
Each burst of Comet Azur will take away one-third of its health. You can also use other spells to damage the boss from a distance.
Another item you can use in the boss fight is the Mohg’s Shackle that you looted in the pipes. The item is used to stun the boss when it is about to attack.
You can use it a total of TWO times to interrupt the boss when it is about to attack. You can then follow up with a charged attack for a critical strike.
Also, it is recommended that you use a +9 Spirit Summon to make the boss fight easier. The Spirit Summon will divert the boss’ attention, and you can use that to your advantage to damage the boss as much as possible.
After defeating the boss, you will get Bloodflame Talons Incantation and 75,000 Runes. There is also a chest in the room that will give you Erdtree’s Favor Talisman.