In Hogwarts Legacy, field guide pages are one-way players gain experience points. These field guide pages are a collectible resource scattered throughout the Hogwarts Legacy map. Collecting them also counts towards the Collector’s Edition achievement. There are around a total of 150 Hogwarts Legacy Field guide pages within the Hogwarts castle.
The number of field guide pages in Hogsmeade and The Highlands pale in comparison to the pages in the castle so players have their work cut out for them.
As players find these field guide pages floating around in Hogwarts Legacy, they need to cast some spells to grab them.
Jump To:
- Astronomy Wing Field Guide Pages
- Bell Tower Wing Field Guide Pages
- Grand Staircase Field Guide Pages
- Great Hall Field Guide Pages
- Library Annex Field Guide
- South Wing Field Guide Pages
The Astronomy Wing Field Guide Pages
- Climb the wooden staircases near the Tower to reach the main telescope, and then follow the curved walkway to get the moth. You must light it with “Lumos” to have the first page.
- This page is in the storage area at the bottom of the haven, and players need to cast “Confringo” on the brazier to uncover the page.
- You can find this page using “Revelio” on the Giant Astronomical Telescope.
- Meanwhile, the fourth page is in a hallway with a mural of green people sitting by a pond. Use “Revelio” to buy pages.
- Finally, the player can reach the fifth page by climbing the stairs from the Floo Flame of the Charm Class and turning right at the top. Use “Levioso” to extract a field page from the white statue’s sphere.
Hogwarts Legacy Charms, Fig’s classroom pages
- Look for a flying page in the same area as the Charms Classroom Floo Flame. To bring the page closer “Accio” spell should be used.
- Climb the ladder and pick the level 1 lock. Continue up the stairs until you reach the roof with a level 2-locked cell. Unlock the cell to get the field page.
- Use teleportation, then turn right towards the Flo Flame and find the gargoyle. The brazier will stand near the stone wall, and the wall will enclose the wooden floor. Use “Confringo” to light that brazier, then use “Accio,” and you will be granted a field page.
The Dark Arts Tower pages
- The mirror is on the left wall, and the moth can be placed in the mirror after clearing the moths in Fig’s Class and heading west along the grassy corridor.
- This page is in a glass cabinet in the main stairwell of the Dark Arts Tower. Acquire the page with Revelio orders.
- You shall find the Dark Arts Academy by striking the Floo Flame on this page. Once inside, go to the back balcony and look back to see a huge hanging figure. Use the “Revelio” spell to get this page.
- Go to the area around the Court of Transfiguration and light a fireplace or escape to the lower level of the Dark Arts Tower. The portal is protected by 2 Gargoyles and requires level 2 with the opening spell “Alohomora.”
- Teleport towards the Darts class and climb the stairs next to it to reach the Serpentine Beast Window. The “stained glass” window is on the wall at the end of the hallway. Get the page with “Revelio.”
- Find the Gargoyle door and follow the corridor to the end to find the Illyius painting. Use “Revelio” to open the field guide page.
- If you go upstairs, right of the west wing entrance of the Bell Tower, you can find the Moth Mirror of Pungent Passage. Use “Lumos” to show the suggestion and find the moth among the centaur statues before swapping them in the mirror.
- The “Revelio” spell must be cast to reveal the marked pages as you go through the bell tower passages.
Transfiguration pages
- Move east along the stone path next to the garden. When you see a statue with a sphere inside, use the “Levioso” spell to get the page.
- Then teleport towards the Floo Flame in the Court of Transfiguration and move towards the Wyvern Statue. The Wyvern Fountain is in the center of the Guardian. Get the page with the “Revelio” spell.
- Move towards the Transfiguration Classroom on the left side of the room. Find the glass dome with the partially deformed rat and use the “Revelio” spell to open the page.
Field Guide pages of dungeons
- To access the room beyond the doorway, players should use “Alohomora .”Go through the way through Ravenclaw’s hallways and keep an eye out for the dragon sculpture. Once you have found the doorway, use Alohomora to unlock it. On the inner side of the following room, cast “Revelio” to get an Alchemy Class Field Page.
- Once you have passed through the first door, you will encounter another obstacle in the form of an iron rod wall. Cast “Alohomora” for unlocking the wall and revealing a hidden statue. To proceed, use the “Levioso” spell to move the Statue from its place.
- If you move down, there is a closed door at the end of the dungeon passage. Use the “Revelio” spell to get the potion room page.
- Go deeper into the space to discover a gargoyle at the very top. Cast “Confringo” and after that cast “Accio.”
Bell Tower Wing Field Guide Pages
Hogwarts North Exit
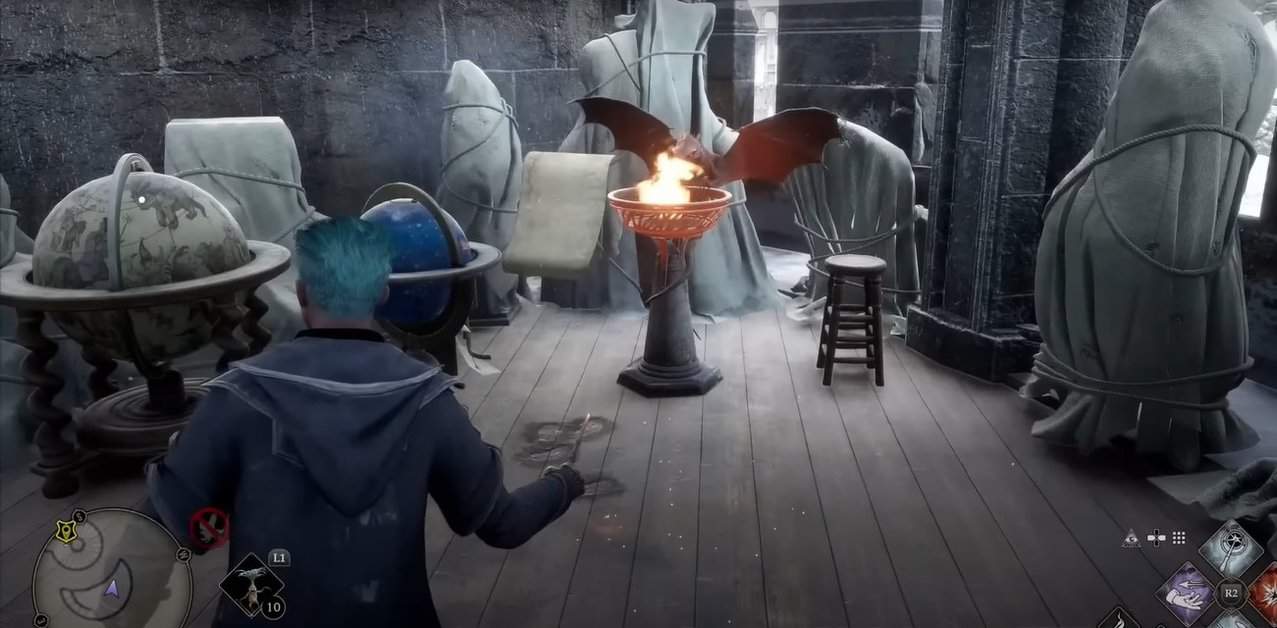
- To find this guide page, Hogwarts Castle field guide page, get to the Hogwarts north exit floo flame and move towards the castle. After passing through the archway, players will find a winged board statue as they turn left. First, use Confringo on the bowl, making the guide page float in the air.
- Enter the castle and open the locked door. Enter the room and use Lumos to find a Moth mirror. Players here need to find the moth and bring it back to the mirror, and this will unlock the second guide page.
- To reach the field guide page, players need to climb up the stairs and then pass through 3 doors to reach the room where they can finally obtain the guide page.
- As players pass the Archway and turn right, they will find a giant winged boar statue. Players will find a big double door a few steps after passing the statue. After using Alohomora as players enter the room, the next thing players need to do is cast Revelio. As players cast the Revelio, the guide page will be revealed and obtained by the players.
- Players then need to look for the fourth tower and follow the rampart. As players enter the tower, the next thing they need to do is cast Revelio. As soon as players cast it, the Field Guide page is obtained.
Bell Tower courtyard
- From there, using fast travel, go to the Bell tower courtyard. Once there, players must enter the tower on the extreme right. Entering it, cast Revelio, and thus guide page will be collected.
- Go to the ground through a big door that you will find in your front. Keep running until you see a fountain. Above the fountain, players will find a guide page floating. Players then need to cast Accio and grab it.
- From the fountain in the Courtyard, where you collected a Field Guide page in Hogwarts Legacy, use a door on the left to move forwards. Players here must cast Revelio on the beehive mound, and the guide page will be unlocked.
- While the first two doors are not locked, at the third one, players need to use Alohomora. As players enter the room, they will spot a statue. Use Levioson on that statue, and the guide page will be unlocked.
Quidditch arena
- Players must head toward the Quidditch Pitch to obtain the next guide page. Players must cast Revelio as they exit the rampart between the Rampart and Quidditch Pitch. Doing this will get them to the ninth guide page.
Beast alassroom
- Players need to travel fast to Beast Classroom for the next guide page. Players will find a guide page floating over the classroom as they reach the location. Players then need to use Accio and grab that guide page.
Hogwarts Owlery
- Another guide page is in the Hogwarts Owlery. Once players reach Owlery, they will find a building. Players must enter this building, take the staircase to the Owlery platform, and then look for a ladder to go to the rooftop. Reaching there, players must cast Revelio, and the Field guide page will be revealed.
- The top of the Owlery in Hogwarts Legacy consists of two field guide pages. As players reach the top, they find a statue with a globe. Use Levioson on the globe, and the Field guide page will be revealed.
- For the next, go straight, and you will see another field guide page floating in the air; for this one player need to use Accio and grab it.
Bell Tower courtyard
- As players reach the Courtyard using fast travel, they will find a large wooden piece of furniture on the right of a double door. As players see this furniture piece with many ornaments decorated over it, they need to cast Revelio. Casting Revelio will instantly reveal this guide page.
- Players, as they reach this area, find a big double door. Look towards the left of it, and players will notice a statue. This field guide page requires players to cast a Revelio on that statue; thus, the carrier will reveal it.
- They need to look backward from the previous location. After crossing two dummies standing with the large door, players will find three sister bells. Cast Revelio and the field guide page will be revealed.
- As players go upstairs, they will find a book floating in the air. First, use Accio to grab it, then cast the revelio to reveal the field guide page.
- As players reach the first platform after obtaining the previous field guide page, they will see a Mirror showcase with a statue inside. Players here need to cast Revelio on it.
- Players must take up the staircase in the bell tower courtyard and go to the top. Reaching the top, they will find a dragon basin. Players here must cast a Confringo on it, and the field guide page will reveal.
- Players must go upstairs using the right staircase instead of the one they used previously. As players reach the top, they find two-bladed weapons hanging on the wall. Cast Revelio and Field guide page will be revealed.
- Go one platform above, and as they reach the top, you will find the scorched outline of a wizard. Here, players need to cast Revelio, and thus field guide page will be revealed.
Musical room
- Take the left stairs from where you took a right previously and get to the top by taking one more staircase. In the room, players will find a frog sitting on a cushion which may sound cute to people who love these mini creatures. Players, as they see this frog needs to cast a Revelio on it.
- This field guide page is in the Bell Tower Courtyard. Players to find the White Blanket Dragon Basin need to go upstairs using the left staircase. As players reach the top, they will find a locked door. Use Alohomora to unlock it, and as players enter the door, they will find a White Blanket Dragon Basin to the left. Cast Revelio and field guide page will be revealed.
- Players must take another left and climb the second staircase from there. Once at the top, players will see a moth mirror. Grab a moth and bring it here to reveal the page in Hogwarts Legacy.
History of Magic classroom
- For this field guide page, one player must head towards the history of Magic Classroom and then unlock the door using Alohomora to enter the back room. Here players will find a statue holding a globe. Cast a Revelio on the globe, and the field guide page will appear.
- Players will find a stained glass window to their right as they enter the classroom. Players here must cast a Revelio on the window, and then the field guide page will be revealed.
- For this field guide page, players must open a door behind the History of Magic Classroom using Alohomora and then look for Sphinx Statue. As soon as players find this statue, they must cast Revelio over it.
- After players have obtained the Sphinx Statue field guide page, they must go forward in the same room instead of leaving it. As players explore the room, first, they will find a field guide page floating, which you can grab using accio.
- There’s also a statue standing at the end of the room. Cast Accio to the globe of that statue and then use Revelio.
Dungeon area
- To obtain this field guide page, players must go upstairs using the left staircase as they reach the bell tower courtyard. After it, as soon as players see a way toward the right, they must follow it. As players follow this and go downstairs, they will reach a dungeon. Here players will find a large tapestry with a K over it.
- Players then need to access the secret area by walking over the K. In the secret room; players will see a huge statue-lined corridor. Players here need to cast Revelio over the tapestry on the left, and thus field guide page will be revealed.
- Players need to take a sharp turn from the K-tapestry in the aforementioned location, and they will find some dragon ornaments. Cast Revelio over them; thus, another field guide page will be revealed.
- In the dungeon area inside the bell tower courtyard, players must go straight from the K-tapestry until they find the huge dragon statue. Once found, cast a revelio over it to reveal the page in Hogwarts legacy.
- Players must head right from above, where players cast a Revelio on a giant dragon statue. Here players will find a door on their left. As players cross the door, they see a glass case with a cannon inside. As players cast a Revelio on it, another field guide page will be revealed.
Library
- Players must travel fast to the library for this last field guide page. Reaching there, players must go upstairs and look for a painting of a man wearing a red dress. As they locate it, players need to cast a Revelio, and thus this last field guide page will reveal.
Hogwarts Legacy Grand Staircase Field Guide Pages
- Fast-travel to the Grand Staircase, and you will see a balcony. After a while, a flying page can be seen over the balcony floor near the Hogwarts Architect. Use the spell “Accio” to retrieve and collect the page.
- Head back from where you collected your first page. You will see a staircase. Head towards the stairs. You can see a lion statue with a wizard at the end of the stairs. Use the spell “Revelio” to retrieve the page.
- Head to the front, where you collected the page from “Hogwarts Architect.” On the right side, you will see a door. Open the door, and you will see a pitch-black moth mirror on your right side with blue aurora flames. Use the “Lumos” spell, and the darkness on the moth mirror will vanish. Now move on to your left side and open the great hall door. Head over straight to the King’s table. On the King’s table, a butterfly will follow you. Take that butterfly towards the mirror you visited before and aim the butterfly towards it. The mirror will magically unleash a guide page. Retrieve that page.
- For the next page, head towards the starting point of the Grand Staircase, where you first collect the flying guide page. On your right, you will see stairs going down. Head towards that stairs. In the middle of the stairs, you will see a cupboard. Apply the spell “Revelio,” and a guide page titled “HOUSE_ELF RECIPE BOOK” will come out.
Right Side of the basement
- From the same spot, move down the stairs. You will reach the basement. Move toward the very right side and go straight to the end of the basement, and you will see wine barrels. Apply the spell and retrieve the “HUFFLEPUFF BARRELS” page from behind the barrels. These are the five pages you can retrieve on the main Grand Staircase.
South Wing Faculty tower
- For the following location, open the map of Floo Flames Locations. Select the South Wing and Fast Travel to the Faculty Tower. Once you reach there, you can see a dull wizard statue on your left side. Approach the statue and use the spell “Revelio” a page will emerge titled “HONEYDUKES PASSAGEWAY.” Collect the page.
Ravenclaw tower
- Open the map. Select The Grand Staircase and fast travel to The “Ravenclaw Tower.” From the starting point, head straight towards the stairs going down. Once you reach the end of the stairs, you will see a moth mirror. Use the spell “Lumos,” and the darkness on the mirror will vanish. Head back to the top of the staircase you just used and look for the butterfly on the middle corner frame. The butterfly will follow you. Lead the butterfly back towards the moth mirror and aim the butterfly at it. The mirror will unleash the page.
- On the same Ravenclaws Tower, from the starting point, you can see stairs going upwards. Go upstairs. In the middle of the stairs, you will see a window with a sculpture. Apply “Revelio,” and you will retrieve your 8th page.
- Go upstairs from where you collected the guide page from the sculpture. Ultimately, you will see a room with a door and a raven doorknob. Apply the spell, and the raven will close its wings and open a door. Simultaneously, The raven will unleash a guide page titled “RAVENCLAW DOORKNOCKER”. Collect the page.
- Now again, on the Ravenclaw Tower, at the starting point. Go right and straight through the hallway. A corridor will come. You can see a wizard statue holding a magical relic in the middle of a corridor. Use the spell “Levioso” on the wizard statue. The statue will unleash the guide page. Collect the page.
- From the Levioso statue, the stairs will emerge on the right side. Go upstairs. At the top, you can see a roundabout pillar. On the right side, apply the spell “Revelio,” The guide page will emerge titled “Moving Staircase.” Collect the page.
Grand Staircase tower
- For the next page, Open the map, select the Grand Staircase, and fast travel to The Grand Staircase Tower. You will see a bridge to the left side from the starting position. Just at the initial point of the bridge, look right, and you can see a lantern. Use the spell “Confringo” at it. The lantern will lit up. Now use the spell “Accio” to pull the guide page.
Trophy tower
- Now again, open the map and select the Grand Staircase. Fast Travel to the Trophy Room. On the starting position, turn 180 degrees left. You will see a huge bulky knight statue. Use the spell “Revelio,” and a “TROLL ARMOR” page will appear.
- From the start of the Trophy Room, Head straight and look for a Chivalric Horseknight statue in a glass case on the left side of the hallway. Once you reach there, use the spell, and a page will emerge.
- From the previous position, head straight towards the hallway end. On your left side, you can see a door. On the door’s left is a small piece of armor. Use the spell, and the “HOUSE_ELF ARMOR” page guide will appear.
- From the House Elf Armor, go right. You will approach a hall, and on the left side of the aisle, approach the second goblet and use the spell “Revelio.” A guide page will appear titled “GOBLET OF FIRE CASKET.”
- From the last position, turn 180 degrees right. You will see a trophy shelf. Use the spell, and the page will appear titled “TROPHY ROOM.”
- Now get out of the Trophy Room and look right. There is a door. Open the door and go upstairs, into the hallway and again go upstairs until a door approaches you. Open the door. On the left side, you can see spiral stairs at the initial position. Use the spell “Revelio,” and a guide page titled “HEADMASTERS OFFICE GARGOYLE” will appear.
Headmaster’s Office
- There is a moth mirror on the right side from the last position. Use the spell “Lumos” and search for the butterfly downstairs. You will find the butterfly at the star-framed door. This door can be seen in the mirror before you spell on it. Lead the butterfly to the mirror and aim at it. The mirror will reveal the page.
- From the mirror, take the spiral upstairs and go to the room with portraits. There is a chair on the left side. Use the spell “Revelio,” and the “Sleeping Portraits” page will appear.
- Now go to the right side of the previous room to the hall. On the right side of the hall, there is a table. Use the spell, and a page will appear titled “THE SORTING HAT.”
- From the Sorting Hat, turn 180 degrees left and approach the door. Use the spell “Alohomora” on the lock. The door will open, and there is a staircase leading upwards. Go there and open the next door. Go upstairs and look for the gramophone on the table. Use the spell and collect The Key Of Admittance. Take the key to the Headmaster’s office and at the end f the room, pick the door lock and open the door. There are other spiral stairs. Go upstairs to the room. Use the spell “Revelio” on the book.
Quad courtyard
- Now open the map, select Grand Staircase, and fast travel to The Quad Courtyard. On the left side of the starting position is a garden, and you can see a flying page in the middle of the garden. Use the spell “Accio” to pull and collect the page.
- You can see a lantern from the left side, where you get the flying page. Use the spell “Confringa” on it and then use “Accio” to retrieve it.
Lower Grand staircase
- For the last two pages, Open the map and select The Grand Staircase and fast travel to The Lower Grand Staircase. From the starting position, go downstairs and then go upstairs on the left and approach the wolf statue. Use the spell “Revelio” to reveal the page titled “KELPIE STATUE.”
- For the last page, approach the hidden wall downstairs from the previous position. Fast travel to Scriptorium. (Be advised! You can only enter hereafter “The Shadow Of The Study Conquest”). Once you are in the room, go downstairs and just use “Revelio.”
The Great Hall Field Guide Pages
Entrance hall
- Start by entering the great hall, then locate the four hourglasses in the hallway. Head up to these and use the spell Revelio to reveal the first field guide. Now proceed into the great hall via the double doors. There will be a mirror on your right, which you have to light up. Now move through the next double door.
Great hall
- You will find the second field guide using Revelio right in the center of the room, where the dining tables start.
- Head up the stairs to the hall’s first floor above the dining area. Light the brazier by using Incendio to get to the next page.
- Head back downstairs and stick to the right as we want to enter the Courtyard. You will find a flying page that you can summon using Accio.
- You will see The Yawning Gargoyle statue that hides a page. Use Revelio to lift the statue and find the page below it.
- Move to the end of the dining area towards the stage. You will see a lantern. Cast Revelio on it for the field guide page
- Behind the podium, near the wall, is a moth. Make the moth follow you using Lumos and lead it to the mirror you lit up previously. Place the moth on the mirror by letting go of Lumos to get the page.
- Head down via the spiral staircase. On the left, you will see a portrait of fruits; stand before this painting, and cast Revelio.
- On the pear portrait, you will see a pear. You have to ‘Tickle the pear.’ After completing the ‘The Hunt for the Missing Pages’ Quest, you can only do this, and the door will open. Go into the kitchen. In the middle of the kitchen, cast Revelio and move forward.
- In the same kitchen, head on the far left side where you will see some barrels cast Revelio again
- Enter through the double doors on the other side to see a page flying around; use Accio to catch it.
- Head downstairs on the right, where you will see another statue; use Levioso on the statue to get to the next page.
Hogwarts crest
- Use Revelio on the crest to reveal the page.
Slytherin Dungeon
- Now, on the back, head towards the left and enter the gate; head downstairs and move to the left, where the hallway splits. Head on this path till you see the locked gate made of metal rods. Open the gate and head down the pathway to the Death day Party Room. You must use Alohamora Level 1 (if you haven’t unlocked this yet, keep playing the main story until you do) and then Revelio. Make a 180degree turn, and on the other side of the room, cast Revelio again, then look up to find another levitating page (use Accio)
- Find your way back on the same route; when you exit the gate, turn left to find another metal gate on your left. In this room, a brazier will be on your right; light it on fire using Incendio.
- Head out from the room and turn left again to see a wooden door; unlock this door using Alohamora Level 2 and enter the room now; use Revelio to get another page.
- Head out of the room and go straight down the hall to reach the girl’s bathroom again; cast Revelio to reveal the page.
- Exit the bathroom to see a mirror. Cast Lumos on the mirror, look for the moth nearby and lead it onto the lit-up painting.
Slytherin’s Scriptorium
- This page is accessible after “In the Shadow of the Study” Once you unlock this new room, cast Revelio in the center to find the page.
- Find the Statue outside the Entrance of the great Hall cast Levioso to find a page hidden underneath. Go down and towards the left, go down the stairs to find another moth mirror, light it and head back upstairs to find the moth you can bring back and place to get another page.
Underground harbor
- After getting the page from the third moth mirror, go down another level. On your left, you will see the gate to the underground harbor. Inside the harbor, go towards the right side of the last boat. Use Revelio here to reveal a page.
Boat house
- Teleport to the boat house. You will see a slanted, docked boat at one end of the house. Use Revelio again.
- Inside the boat house is a brazier to light up to get the final page.
Library Annex Field Guide Pages
Divination classroom
- Head up the spiral stairs and climb the ladder to the Divination class. Use Revelio to reveal the Field Guide on the desk next to the glass globe.
- Go back downstairs and onto the wooden balcony outside the tower entrance. Stand opposite the giant window and use Revelio spell to reveal the field guide. It can then be spotted flying near the balcony. To get it, use Accio on the flying guide.
- From here, turn around and head into the small path leading to a puzzle door opposite the giant window. Rotate the lock on the left of the door three times and the one on the right twice to unlock the door, leading to the Arithmancy Class. Head to the end of the corridor and enter the room on the left. Use Revelio in the classroom to reveal the Arithmancy Classroom Guide Pages.
- From the Divination Tower Floo System, head down to the hall and to the other side where the banners hang. Here, use Revelio to reveal the Field Guide. Use it near the banners on the right of the stairs. Here, you get the Portrait of Sir Cadogan Guide Pages.
Central hall
- Head downstairs to the giant fountain in the center. From here, you can use Accio to pull the two flying guide pages on either side of the fountain.
- In the same room, head behind the fountain, and use Revelio to cause the Field Guide to appear before you.
- This field guide is part of a side quest. From the Central Hall Fountain, talk to Lenora Everleigh and start the Like a Moth to a Flame Quest. The quest has you complete a Moth Mirror Puzzle. The reward for completing this quest is the Field Guide itself.
- From the Central Hall Fountain, turn left and head into the garden. Head down the stairs and enter the door to enter the greenhouse. Next to the tree in front of the greenhouse door, use Revelio to get the Field Guide.
- From the greenhouse tree, head into the room to your right, where the Dirigible Plums are. In the space, enter the room and use Revelio to reveal the Field Guide.
- Head left down the stairs. Just right off the stairs, a small wooden door can be found. Use Alohomora to unlock the door. Enter the small closet room, and use Levioso on the statue inside the closet to get the Field Guide.
- Back to the Central Hall Fountain, head up the stair set right behind the fountain. Here, use Confringo to set the cauldron ablaze.
- Enter the library behind the fountain in the Central Hall. Climb the spiral stairs in the library directly in front of the library entrance, and you can spot the Field guide page flying around next to the balcony. Use Accio to get it.
Library
- You can find a Moth Mirror puzzle on the library’s upper floor, just above the library’s entrance. Solve this Moth Mirror to get the Field Page. The moth for this puzzle can be found on the podium in front of the statue from where you climbed up.
- The Field Guide is hidden in the Restricted Section of the Library. Here, head down to the lower levels of the library. In the lowest level of the Restricted Section, you can use Revelio to reveal the Field Guide. This field Guide is about Enchanted Books in the restricted section.
- From the last Field Guide, head on and enter the basement of the Restricted Library. Here, as soon as you descend the stairs into the basement. Right in front of the stair is a statue with a cage in its hand. Use Levioso on the statue to get the Field Guide.
Central Hall Floo flame
- This Field Guide is in the Central Hall. Start from the Central Hall Floo system and turn left from the fountain. Where you found the Moth for the Like a Moth to a Flame quest, head there and use Revelio, and it reveals the Field Guide on the statue in the corner.
Potion class
- Head to the Potion Class. Head to the table in the back and use Revelio to get the Field Guide. This is the Professor Sharp’s Auror Badge Guide Pages.
- The Field Guide is found by solving the Mot Mirror puzzle in Long Gallery. The moth is on the troll display just along the Long Gallery. Solve the moth mirror to get the Field Guide in Hogwarts Castle.
- A door is opposite the troll display from where you got the moth. To unlock the door, turn the lock on the left two times and the lock on the right once to open the door. As soon as you enter the room, use Revelio in front of the painting in the room to get the Field Guide about Gorgon Portrait.
The South Wing Field Guide Pages
Clock tower courtyard
- As you approach the well, use the Revelio spell to reveal the location of the field page. It should be on the southern side of the well. Press X to collect the (The well of four beasts) field page.
- Head towards the entrance of the clock tower and enter the room on the west using Alohomora. To see the exact location of the moth, use Levioso on the mirror. Travel outside to the open area and use Levioso on your west to see the moth. Guide the moth to the mirror while using Levioso. When you are near the mirror, de-cast the spell.
- Exit the room where you find the moth puzzle field page and look it up. You will notice a field page flying; cast Accio spell on the page to collect it.
- After collecting the flying field page, walk straight and turn left to enter the steel door. Turn left again, and you will see a statue holding a sphere. Use Levioso on it to get your hands on another page.
- Travel north to enter the room using Alohomora. Ascends through the stairs ahead. After reaching the point where no more stairs exist, turn left and left again to see the wooden stairs. You will notice a brazier on the wall on the right; use the Confringo spell to reveal the field guide page, and use Accio on it.
- After collecting the brazier field guide page, turn around and walk straight. Then after taking a couple of left turns by the dead end, you will see a large glass window with clock mechanics nearby. Use Revelio spell on the clock mechanics to reveal and collect the field guide page.
Hospital wing
- Travel to the Hospital wing and look around, and you will see a unicorn fountain; use Revelio.
- Turn left from the fountain, and you will notice a flying page; use Revelio.
- After collecting the flying field guide page, return to the fountain, and you will see a way opposite the fountain. Descends through the stairs by taking this way. As you go down, you will see a statue holding a sphere. Use Levioso on it to collect your page.
- Enter the bathroom through the door to your east. You will notice a painting of a mermaid on the northwest side; use Revelio on it, and you will get your hands on another page.
- Exit the Bathroom through the entrance Door, and you will notice a statue on the left. Cast Revelio on the statue to reveal and collect the field guide page. You can get another field guide page by using Revelio on it.
- Take the stairs beside the Boris statue and go downstairs. Keep moving forward until you come across a tortoise cage. To get another field guide page, use Revelio on the cage.
- You can quickly get your hands on another field page using Accio on the flying page.
- Use Alohomora on the locked door beside the tortoise cage to open it. Then use the Glacius spell on the fire ahead to put it out. Go to the upstairs room via the stairs on the other side of the pit. Use Confringo on the brazier ahead to reveal the field guide page. Press X on the page to collect it.
Tortoise cage
- Take the same route to return to the tortoise cage. Take the stairs up ahead to go down, and you will see a locked door on the right after two sets of stairs. Enter the room using Alohomora, and turn east, where you must use Revelio on the bookshelf to get your page.
- Exit the room and take the stairs to go down, where you will enter a hallway by using the door ahead. To your right, you see paintings. Go to the last painting of buffalo and use Revelio to reveal the field guide page and collect it.
- After collecting the field guide page from the buffalo painting, use the spiral stairs behind you to go up. Take the first left and run to the end of the corridor, where you will use Revelio on the overweight lady’s portrait to get your page.
- Turn around from the portrait of a fat lady and run until you are near the spiral stairs. Take these spiral stairs until you see a frog at the end of the stair. Press X at the frog to enter a room and go through the door to jump down the stairs. You can get another field guide page by using Revelio on the large map ahead.
- Use any spell on the button on the top of the map to open a screen room through the map. Using Lumos in front of the mirror will show the moth’s position to you. You can get the moth by two left turns after exiting this secret room.
- Enter the washroom through the first door on the left and use Lumos on the moth. Guide this moth and return it to the mirror while using Lumos.
Lachlan statue
- Exit the secret room and take the stairs on your left to go down. To collect the field guide page, you will see a dark brown statue at the end of the stairs, go near it and use Revelio on it.
- After collecting the field guide page from the Lachlan statue, turn around, and you will notice a brazier up ahead. Use Confringo on the brazier, and a field guide page will be revealed to you. Press X on the page to collect it.
- Run to the corridor to your left after collecting the above page. Use Revelio at the far end side of the hallway to acquire the field guide page.
- Travel to the northeast side to enter the Quad courtyard. You will notice a statue holding a sphere. Use Levioso on it to reveal and collect the final field guide page in the south wing.