Unlike trees and other plants, moving rocks in Animal Crossing New Horizons is a bit of a complicated process. Since rocks spawn randomly on your island, you can’t always be sure where they will appear next and might end up blocking a path you want to access.
Luckily, there is a way to move rocks in ACNH and ensure that they don’t create problems for you in the future. On top of that, moving rocks also serve another beneficial purpose by providing you with an easy mining source. To ensure all your island’s rocks spawn in a specific place after you have moved them, you need to build a rock garden in ACNH.
How to move rocks and make a Rock Garden in ACNH
To start off, you can’t move rocks by digging them up with a shovel like plants. Your tiny character can’t really lift those massive boulders and put them in a backpack, can they? Moving a rock in Animal Crossing New Horizons basically means breaking the old rock so the game spawns a new one somewhere else.
To break a rock in ACNH, you need to eat fruit which gives you a strength buff. After eating a fruit, simply hit a rock with a shovel, and it will break, giving you resource materials like clay. However, after you break a rock, the new rock spawns in a random location. To prevent that, you can make a rock garden so new rocks only appear in specific spots on your island.
If you are interested in making a Rock garden, then this is going to be an immensely tedious task. There are certain steps that you will need to follow to make this possible.
Step 1: Place Pathways first on a permanent spot on your island
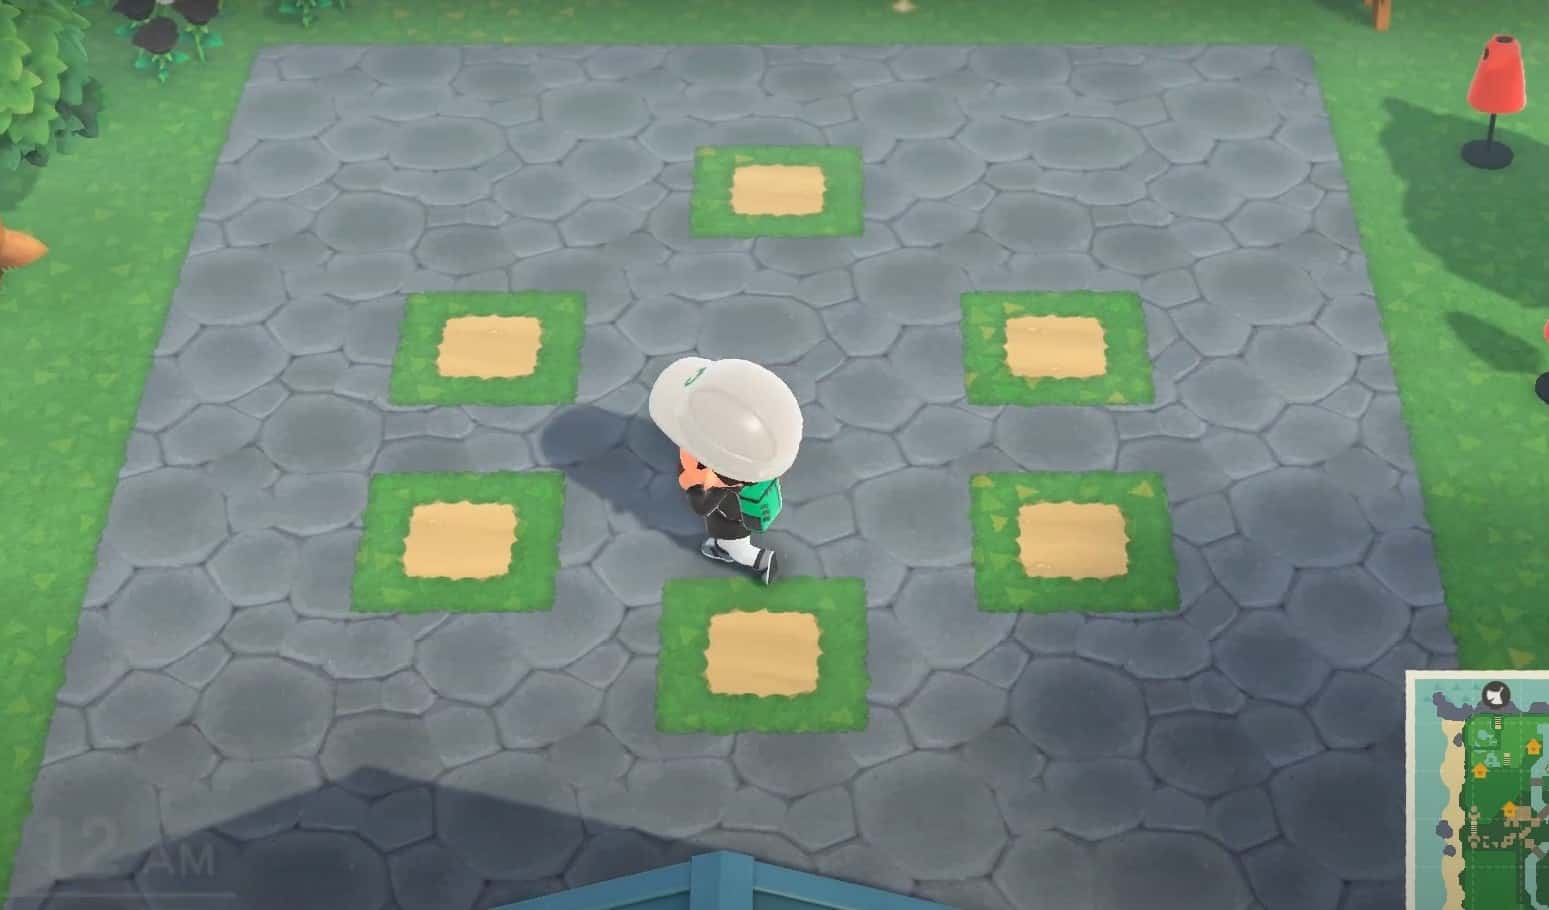
The first step is quite crucial, as you will need to place the pathways where you want the rocks to respawn in ACNH first. You can add the custom paths at one specific location, which may comprise dirt or sand, as rocks tend to respawn on top of these. You can open up your island designer tool, and then you can simply mark down the rock pathway on a specific grid.
Step 2: Find all the Rocks and break them
You will need to explore all the areas on your island to find rocks and then proceed to “move” these rocks in Animal Crossing New Horizons. And by move, I mean destroying them.
Each island has a max of 6 rocks at any given time, and you can break them all in one day if you have enough fruit. However, keep in mind that only one rock respawns per day in ACNH. So, after you break all six rocks, it will take a full week for your island to be fully populated with rocks.
Step 3: Placement of Rocks for your Rock Garden
Once you succeed in breaking all the rocks, the game will choose a random location on your island to respawn these rocks again in ACNH. However, these random locations will need to fulfill certain criteria for the rocks to spawn.
This is because the rocks cannot spawn on these locations that are touching a river or cliff, anywhere on a beach, adjacent to a tree or a building, and on a hardwood or stone pathway.
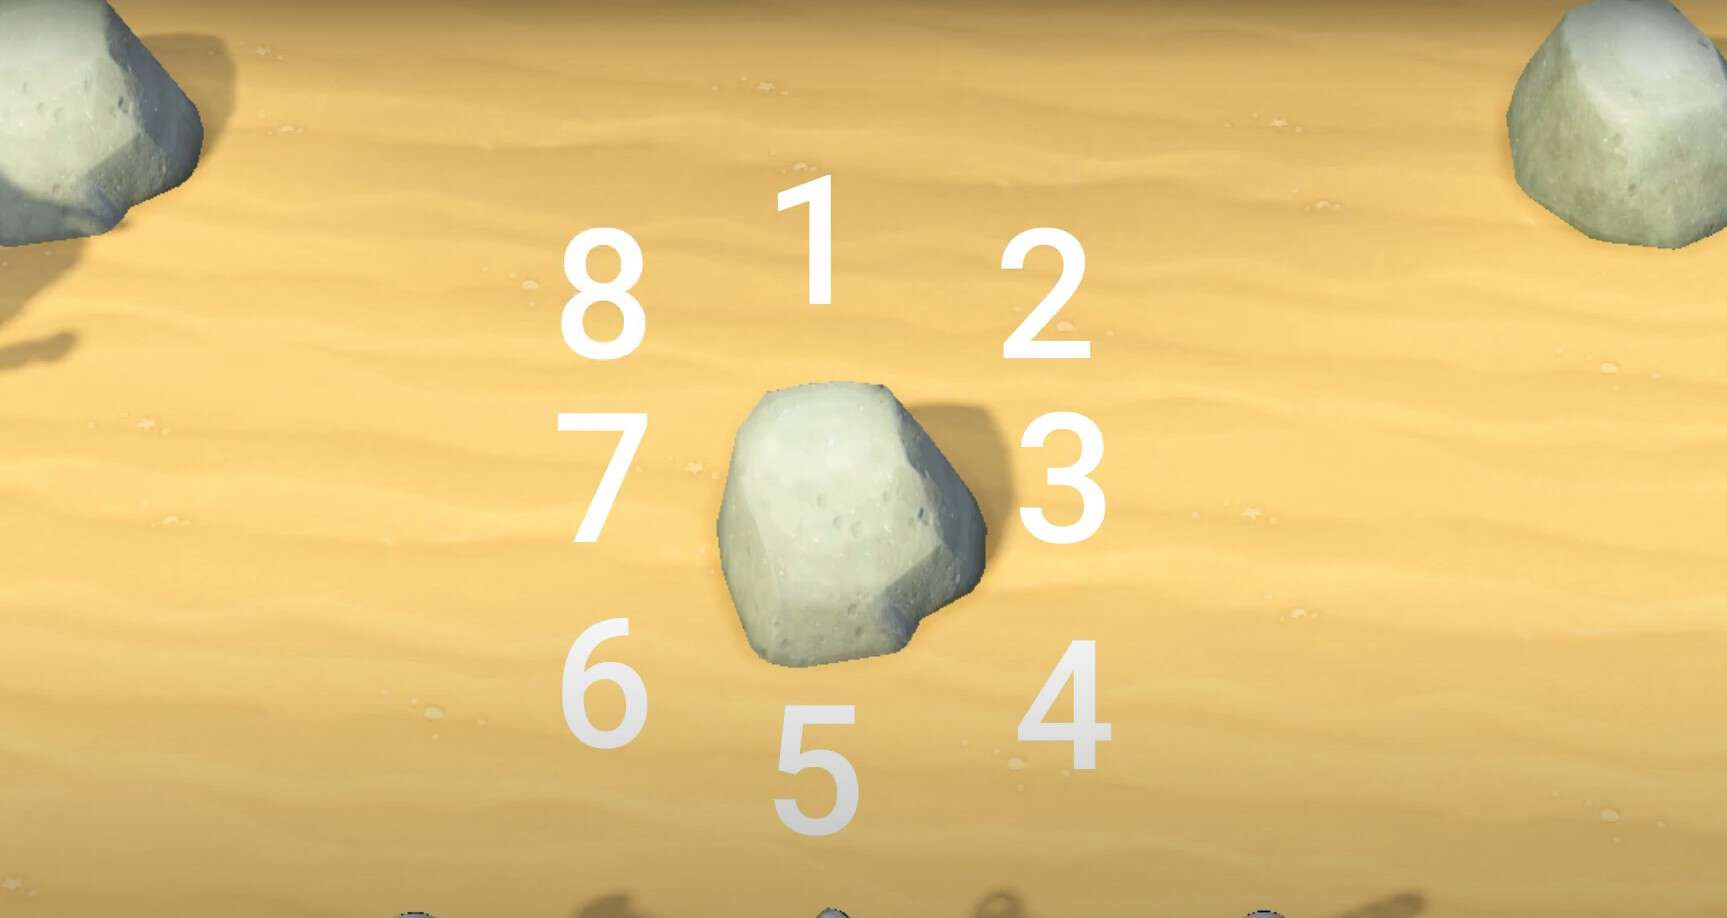
Apart from that, you need to give your rocks enough room to spawn. In short, if the rock has some distance on all 8 sides where the resources would be lying, then the rocks will respawn easily, and you’ll be able to collect the resources with relative ease.
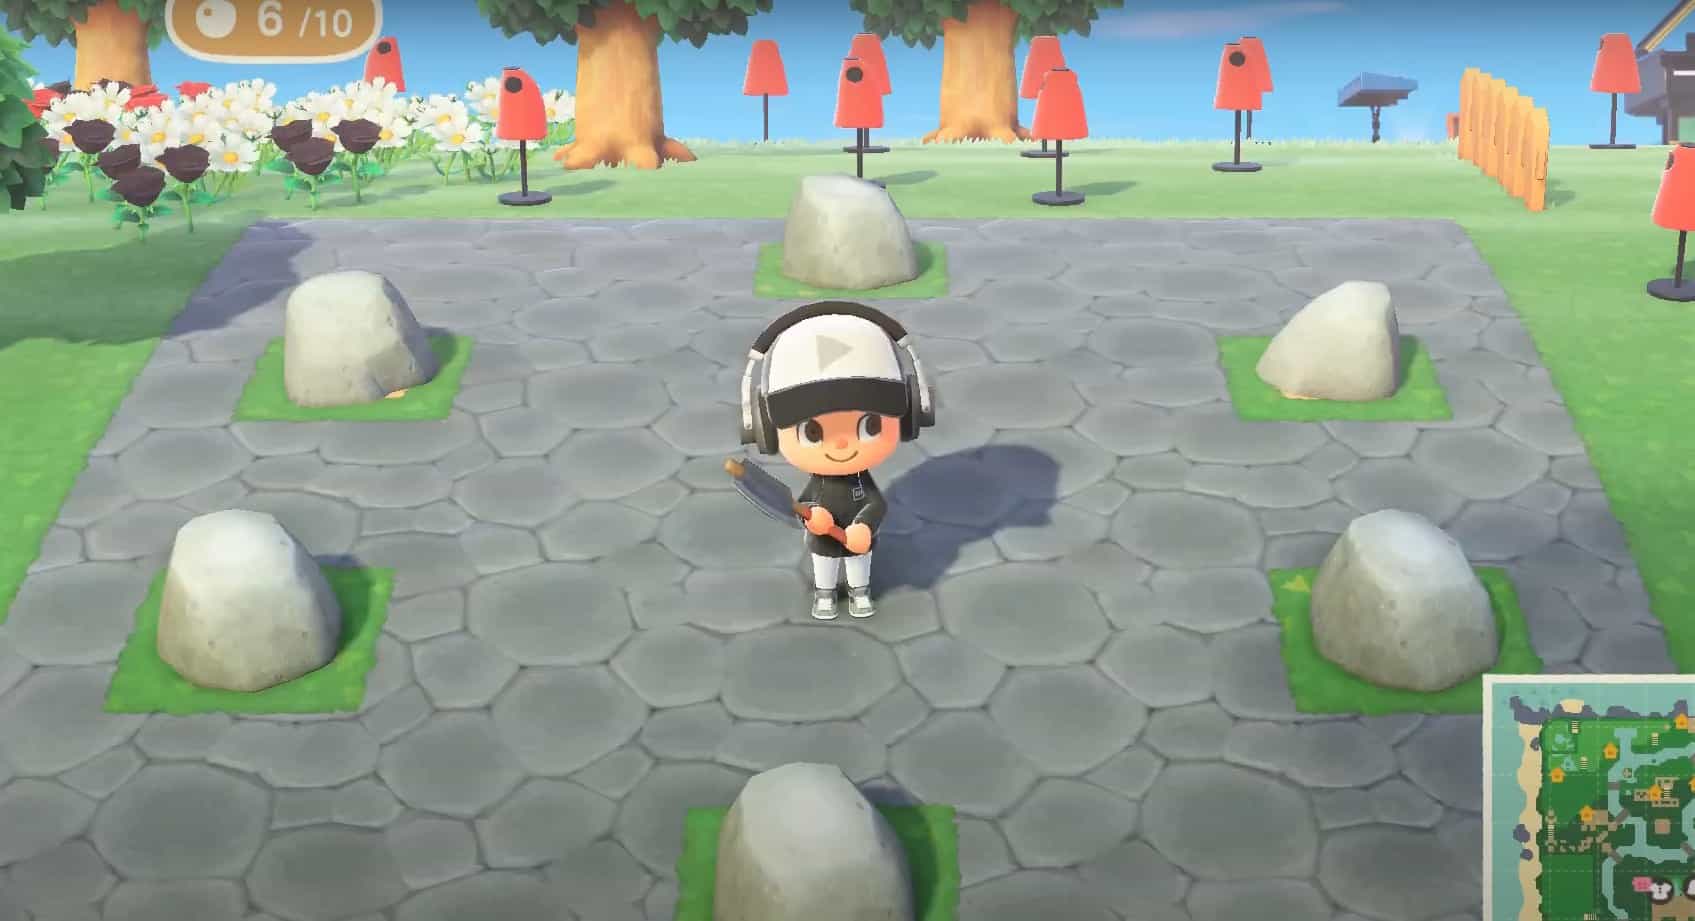
Step 4: Cover your Island with a lot of Mannequins
Now that you are aware of the conditions for the rocks to respawn in certain places, the best method to get them to spawn in your rock garden will be to cover your entire island with mannequins.
This way, the game will deem your rock garden fit for respawning the rocks there in Animal Crossing: New Horizons. Similarly, you can place a solid pathway or dig holes everywhere to stop the rock from respawning in those areas as well.
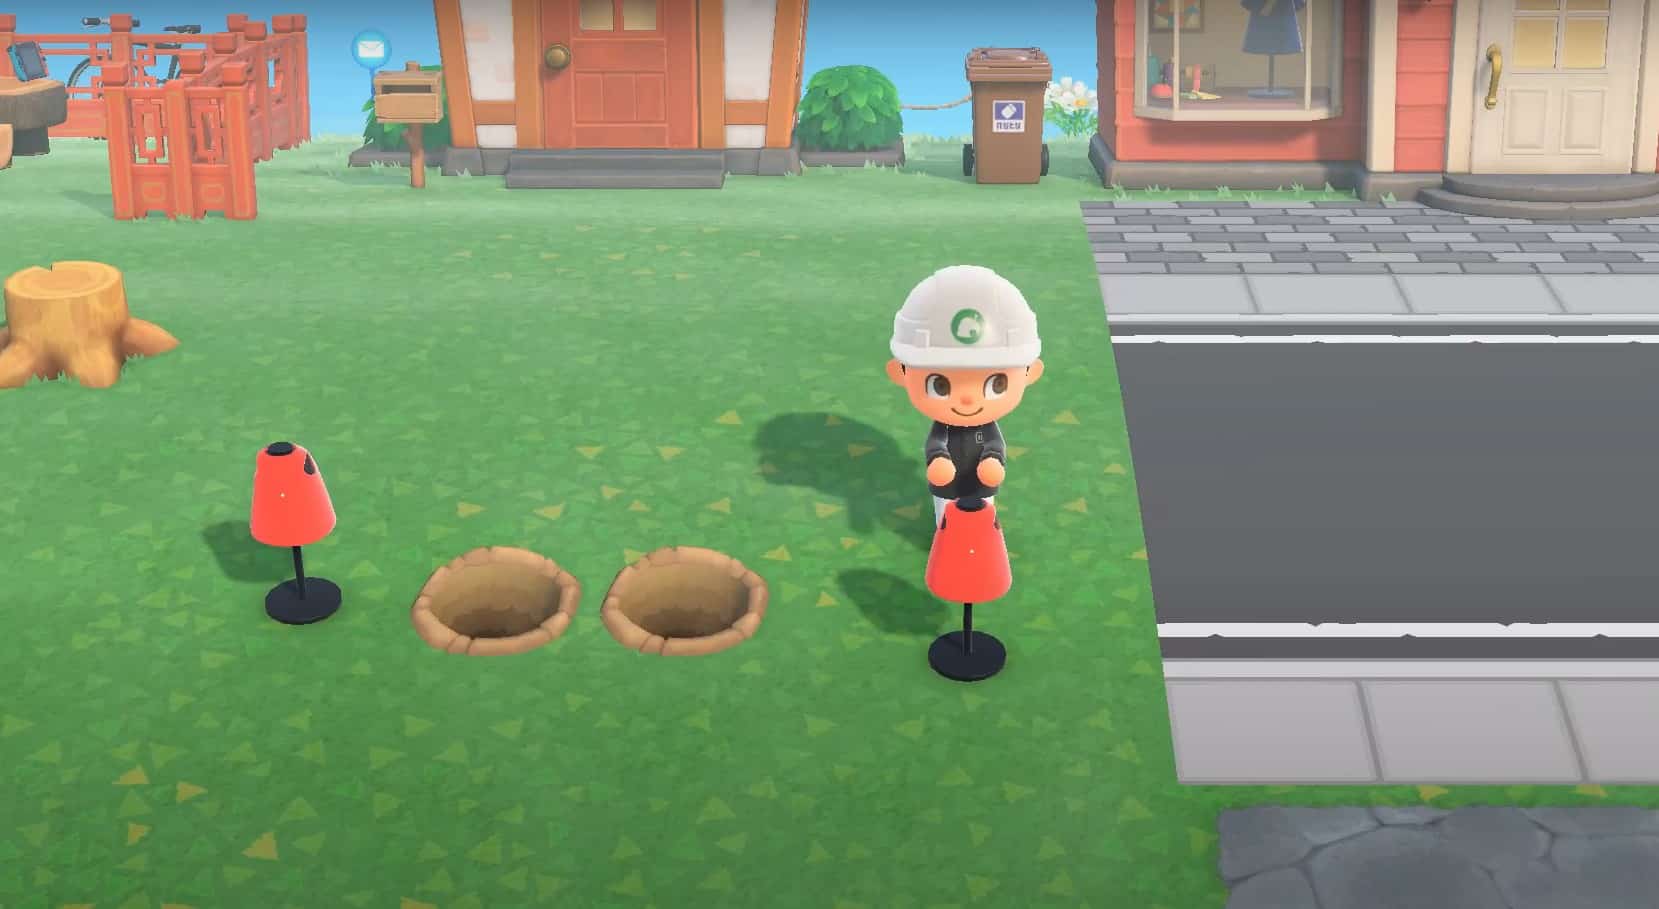
Placing a mannequin is an easy task as you can head over to the custom design tool tab first. Create or choose any pattern, select display here, and then proceed to choose the Mannequin option next. Then, you can place the mannequins two spaces from each other or at least two spaces apart from other solid objects. You can also dig two holes after each mannequin to get the correct measurements.
This way, once you have placed down enough mannequins and covered up your entire island with them apart from the rock garden spot, the next day, you will observe a rock spawning at your rock garden in ACNH. By day six, you will end up having six rocks in your rock garden, exactly in the spots where you wanted them to go.
If the rock ends up spawning at another location, you can repeat the process above by breaking it and covering that area with mannequins, and the next day, the rock will spawn in your rock garden.
Your rock garden can not only be decorated for a theme and improve feng shui but also work as a regular source of materials like clay, iron nuggets, or even gold nuggets. In fact, there are even chances of the rock garden spawning a money rock, which can be hit 8 times to give you 8000 bells.
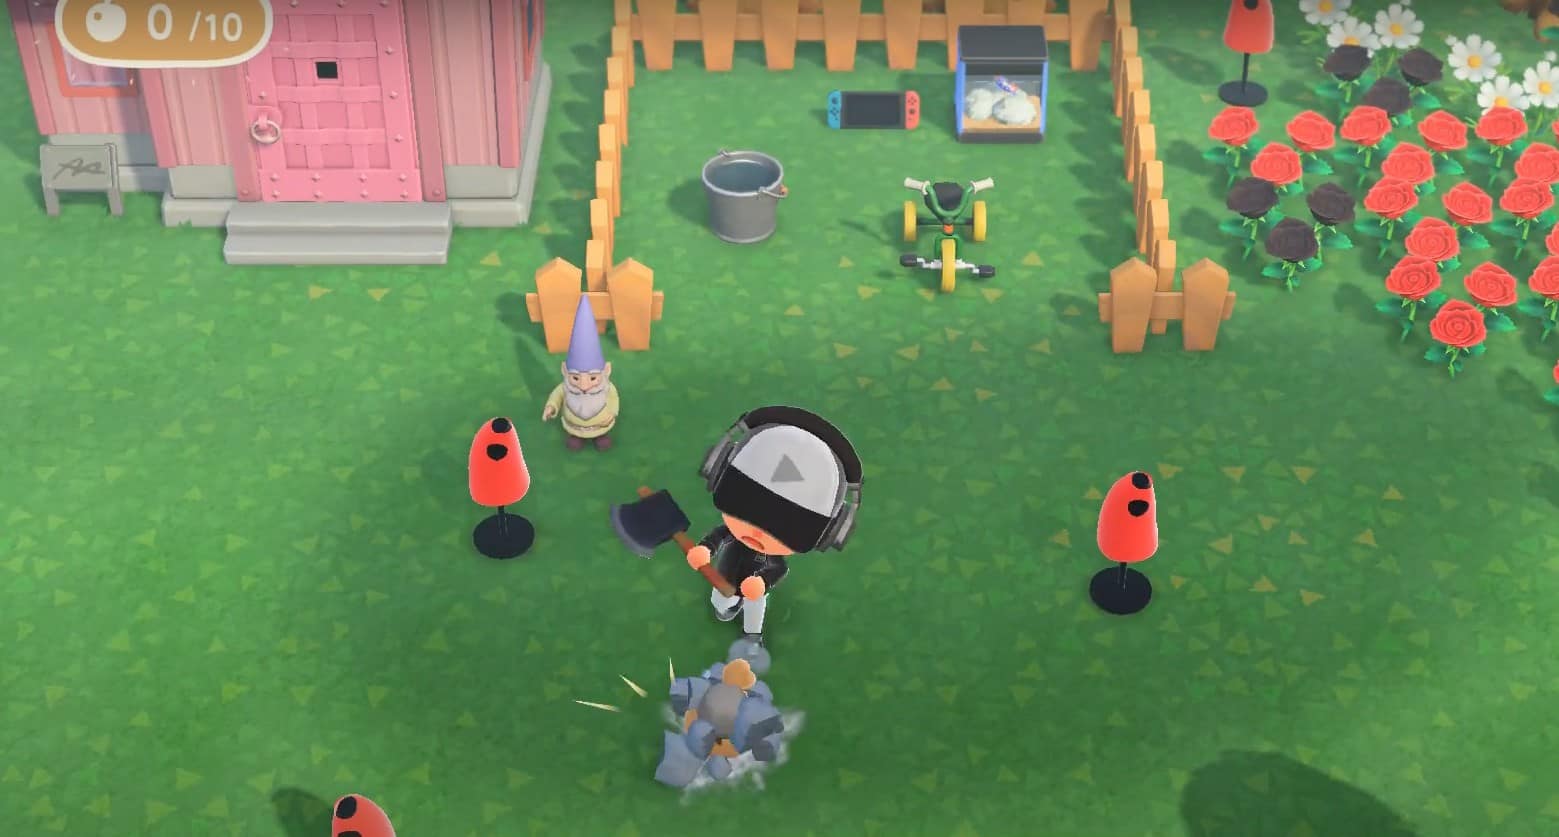
Step 5: Cleanup
Now that all of the six rocks have successfully spawned on your rock island, you will need to clean up the mannequins you placed around your island. This is one of the easiest tasks for you to accomplish. You simply have to open the custom design tab and change the design. You will need to change a single spot on the pattern that you are using, and then you can save and close it out.
By doing this action, the mannequins will disappear on their own. Apart from that, you can set up a fence around your rock garden so that when you hit the rock, you can get the maximum resources from your rock garden.