The Beast of Toussaint in The Witcher 3 is the second main quest that you will get to do in the Blood and Wine expansion. Toussaint is being ravaged by a serial killer who has been piling up bodies one after the other. Dubbed the Beast of Toussaint, you will have to travel all over the region until you finally come to know the true identity of the serial killer.
The Beast of Toussaint quest will start automatically once you complete Envoys, Wineboys. You will make your way to Toussaint with Milton de Peyrac-Peyran and Palmerin de Launfal, where you have agreed to help Duchess Anna bring the serial killer to justice.
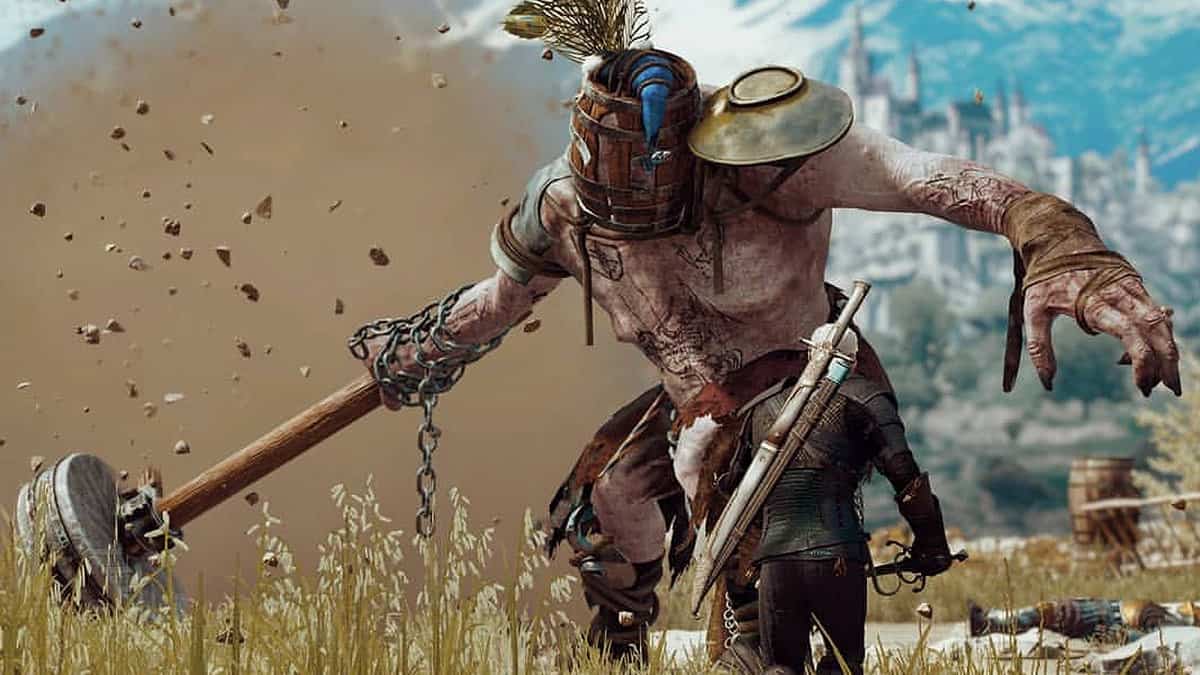
Defeat Golyat
Golyat, an armor-wearing giant, will be standing between you and Toussaint. Something important to note here is that shooting an arrow in Golyat’s eye with your crossbow will unlock the David and Golyat achievement. This is a missable achievement. If you kill Golyat without shooting his eye, you will have to either reload a previous save point or try again in a New Game Plus.
Golyat is not a difficult enemy to slay. Most of his attacks are slow, albeit they hit hard. Just keep a safe distance and go in to attack when Golyat fails his attack. If you want, you can apply some Ogroid oil on your sword for extra damage.
The giant is also quite slow, which can be quite helpful in attacking it. Use the windows after its attack to inflict damage. Also, use Thunderbolt to increase attack power against Golyat.
Make sure to have your Quen up most of the time. One attack from Golyat can deal a lot of damage. Dodge as much as you can and take advantage of the Fleet Footed skill to avoid damage if you take damage while dodging.
Investigate the shoreline below Cockatrice Inn
Milton will lead you to your next destination, the shoreline below The Cockatrice Inn. Use your Witcher Senses here to find the trail that leads you into the water.
Before diving into the water, though, you will have to take care of some Scurvers. These are a powerful variant of Rotfiends, and hence, they will explode when nearing death.
In the water, you will find a handkerchief with the initials D.I.C. as your first clue. Do note that you can also find an Old Pamphlet in the nearby barn to know beforehand that Duchess Anna has an elder sister. This will be revealed as you advance the quest.
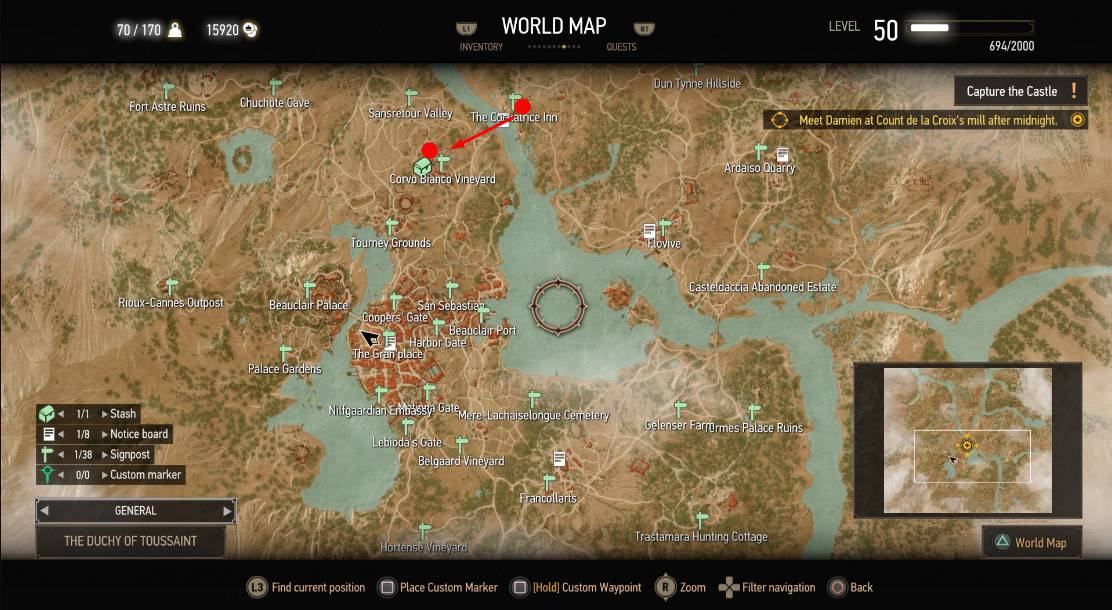
You will have a conversation with Milton before moving to the Inn and getting all the related information. Then, it will be time to make your way to Corvo Bianco, a bit southwest of The Cockatrice Inn.
As soon as you approach Corvo Bianco, you will hear some cries. Go closer to the sound and enter the cave, which appears to be the source of the sound. Use your Witcher Senses to see small footsteps going inside, and you’ll soon find a figure covered in blood. The figure is revealed to be a Bruxa.
Kill the Bruxa
After the interaction, the fight against the Bruxa starts. As with all vampires, use Vampire Oil to have an extra damaging effect on her. Another option is the Black Blood potion, which would have recoil damage if she lands a hit on Geralt.
Bruxa can turn invisible, which can make landing hits hard. To stop this, use the Superior Moon Dust bomb. This bomb would stop her invisible ability from working. Also, use Aard to knock her down and then kill the Bruxa with your silver sword.
Once you have taken care of the Bruxa, investigate the body of the victim to find an Unusual severed hand. This will be another clue to your investigation. It belongs to the Beast of Toussaint and was important enough that he sent the Bruxa to retrieve it.
Now, make your way toward the arena to meet Palmerin.
Defeat the Shaelmaar
Make your way to the arena, and you will hear some soldiers talking about another quest. You can ignore them, as you will get the same quest on the notice board later in the game.
Converse with Palmerian and move to the stands with him. You will see Guillaume taking on a handicapped Shaelmaar. However, you will step into the fight just after a few minutes as it loses its handicap and becomes dangerous.
Palmerian and Geralt will attempt to fight the Shaelmaar, but Palmerian will get hurt in the fight. Now, it is up to you to kill the Shaelmaar.
Being blind gives Shaelmaar a pretty big vulnerability. The creature reacts to sound to make attacks. Use Aard when you are close to a wall. It will crash into the wall if you dodge the attacks, opening a window for you to land hits.
Speak with Anna Henrietta
Anna will ask you to eliminate the Shaelmaar, but the choice is yours whether to kill or spare the Shaelmaar’s life in The Beast of Toussaint. If you spare the Shaelmaar and refuse Anna, you will complete the “Proof of compassion” virtue for There Can Be Only One.
If you accept Anna’s request, you can kill Shaelmaar, but then you will need to get the Proof of Compassion from somewhere else. There is no loot drop from the Shaelmaar, so just make whatever choice you feel is right. Since there is no loot involved, my recommendation would be to just spare the Shaelmaar.
Another conversation will start, and you both will go to see Damien. She will also hand over the deed and key to Corvo Bianco to Geralt as the reward for his contract. This will start the secondary quest, No Place Like Home.
The conversation turns serious as Geralt points toward the morgue and asks Damien for details about all the victims of Bruxa. Geralt will deduce from all the information that the next target will be Milton, and Anna agrees with you. Milton and previous victims were part of a team, so it all made sense.
Now you need to search for Milton as he has already left for the hare hunt game that takes place annually. A cutscene will initiate, and you will be on your way to Beauclair Palace on Roach.
Solve the riddle to save Milton
Anna tells you to collect a few items to help Milton. Geralt and Anna will work together to solve a puzzle. You must acquire a clue from the horn of a Unicorn and a key from the Golden Fish. However, a third item, the Phoenix egg, is required to solve the riddle, but Anna will get this item on her own.
You must follow Anna as she will lead you to the unicorn destination. There are many optional objectives apart from getting the key and locating Milton’s hiding spot. You can take on all those objectives to gain extra rewards.
If you know about Milton’s hiding spot, you can just get the key and solve the riddle. However, you will miss all the extra rewards and fun.
You can locate the yellow fish by diving into the water. There will be multiple fish under the water, but the yellow one contains the key. You can catch the fish on your own, but if you fail in your first two attempts, someone else will catch it. A cutscene will start, and Geralt will take the fish from the person.
You can easily catch the right fish on your own by moving toward the southwestern area and without using your witcher senses, as it makes it difficult to separate the goldfish from others.
Make your way forward and use Axii or treats to get the horn from the Unicorn. Otherwise, the unicorn will get freighted and runs away.
You can get the horn using any method, but you might have to face some partygoers if you use Axii to achieve your goal. You can fight them or use the same trick on them to achieve your objective.
Find the ring for a couple (optional)
Finding the ring is an optional objective at this point in the Beast of Toussaint quest. You can attempt it before returning to Anna with both clues. Whether you find the ring or not, the reward will stay the same, so it is your choice how you want to proceed.
Find the small bridge where a couple tries to find their lost ring. You must follow the stream to the lakeshore and move toward the larger waterfall. The stream will split into two, and you need to move toward the left. There, you will find the ring in the rocky crevasse. Take the ring and return it to the couple to see them jumping with joy.
Solve the riddle
Return the clues to Anna, and she will have a remaining clue. You will have to solve the puzzle by selecting “Greenhouse”. If you cannot do it, then Anna will make the correct guess, and your quest will end here.
However, if you do guess correctly, you will complete another objective, “Proof of Wisdom”, for There Can Be Only One.