Unearthed is part of the main storyline missions in Starfield. You will resume your journey from the end of the In Their Footsteps mission. You were last directed by The Emissary to visit the Moon of Old Earth, Luna. There is an old NASA base there which may contain clues to help your search of the Artifacts.
This is an important mission as in the end you will be choosing a side: The Hunter, The Emissary, or yourself. Your decision will solidify how your story will come to a close in Starfield.
Aside from the life-changing choice, you will be rewarded 4500 XP and 10200 Credits for completing the Unearthed quest. Let’s look into how you can make the best decision for yourself.
How to complete Unearthed in Starfield
To complete the Unearthed mission, you will have to visit the Nova Galactic Research Station on Luna, the moon of Earth, in the Sol System. After landing, head northeast to reach the research station.
Head to the tunnel entrance right of the station to find an Airlock door which you can open using the Moon Base Key. You will already have the key in your inventory as The Emissary handed it to you at the end of your last mission.
Investigate the Nova Galactic Research Station
After you have entered the station, follow the objective marker that leads you to a computer terminal. Here, you will find a set of 2 documents. But you must look for the document named Project Prism Launch. This, in turn, updates your objective to play the recording at the rooftop area of the station.
There is a Moon Base Slate on the table where you picked up the Prism Launch project file. This will start an optional objective to collect all the slates. Since they don’t provide anything extra except some lore, you can skip ahead to the main objective.
Optional: Collect all the slates
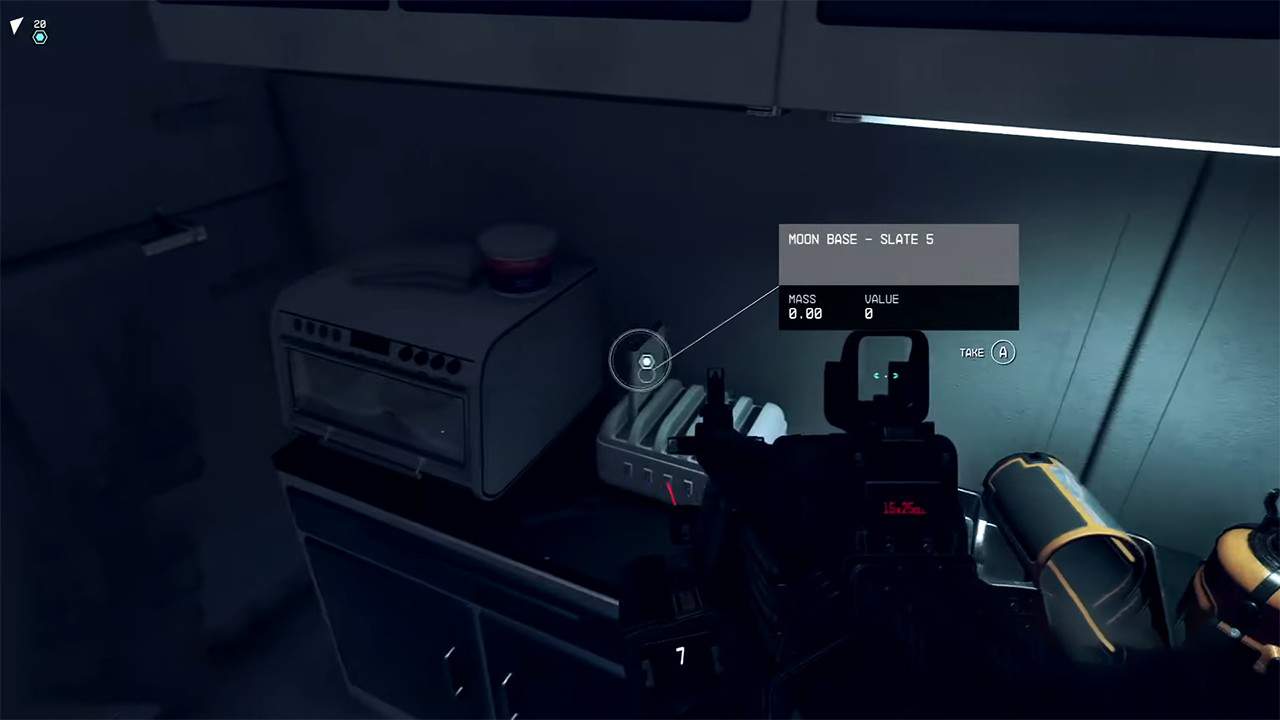
There are a total of six Moon Base Slates at the Nova Galactic Station that you visit during the Unearthed quest in Starfield. Each of them contains a recording to reveal what occurred at the station. Aside from that, it doesn’t contribute to anything else. Here’s where to find all the slates.
The Moon Base Slate 2 is on the computer table opposite the entrance door. It is the one in front of the door leading to the break room area
Go through the break room door, the door opposite the entrance one, and turn left. The Slate 5 will be on the counter, next to the oven.
Open the third door on the left of where you found the last slate. The Slate 4 will be on the shelf with a black “No Pain, No Gain” poster above it.
Now go through the double doors next to the hanging punching bag. Turn right and enter through the first door. The Slate 3 will be in one of the open lockers just left of the door.
There is another slate, Slate 1, on the table in front of the lockers.
Take the stairs in the room up and go through the door ahead. The Slate 6 is on the table at the end of the walkway.
Play the recording on the roof
After acquiring the document, head upstairs to the roof of the station to play the recording. In the end, you will receive a signal from NASA Tower which you need to investigate next during the Unearthed mission.
Visit the NASA Launch Tower
Return to your ship, set your course to Earth, and land on the NASA Launch Tower landing zone. Head northeast of the landing pad to find the Launch Tower. You can enter it from the left side, where the red climbable structure is.
There is an elevator door at the end that will require an alternative source of power. As you are climbing the tower, make sure to explore it as much as you can since many power cells are lying around the tower.
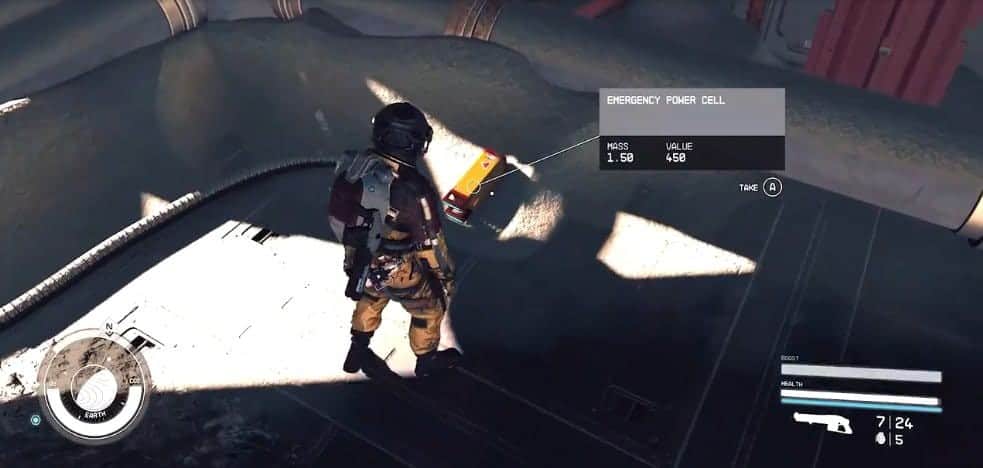
From the console near the elevator, you can find a large yellow cable. It leads to the generator where these power cells need to be inserted to power the elevator. Return to the elevator and press the blue button to activate it.
Explore NASA HQ
The next objective in the Unearthed mission will be to explore the NASA base in Starfield. Head over to the desk in the north and interact with the computer. Open the Access Station Log and check the Delivery From Mars file. You will need to find the Martian Sample mentioned in the recording next.
Head into the cave opposite where you find the audio tape and continue along the corridor. Go through the red-illuminated door and drop down into the cave below. Follow through the beat-up path till you reach NASA’s space history room. Go through the next red door and turn right to find another recording belonging to Judith.
Keep following the path down and enter through the cave on the east. There is a Lab in the back, on the right side. Follow the slope up and it will lead to a corridor of locked doors. You need to pass through the Secure Access door on the left, but it will require a power cell to open. The power cell can be obtained in the second room on the right.
We strongly recommend you save your game here since you will jump into a difficult fight. If you die, you must do everything again to reach this point of the Unearthed quest in Starfield.
As you progress through the new area, you will enter another control room with a generator in the back. You need to use another of your emergency power cells and then continue through the next Secure Access door here.
Hit the small switch here and head up the metallic stairs. You need to go through the giant doors ahead but first need to fight the robots and turrets inside. Use the environment as cover to dodge the turret onslaught and clear the area.
The next step in Unearthed is to find the Emergency Turret Controls. To find them, head to the end of this assembly area and enter the door to your right. You will need to use Digipick to unlock the console.
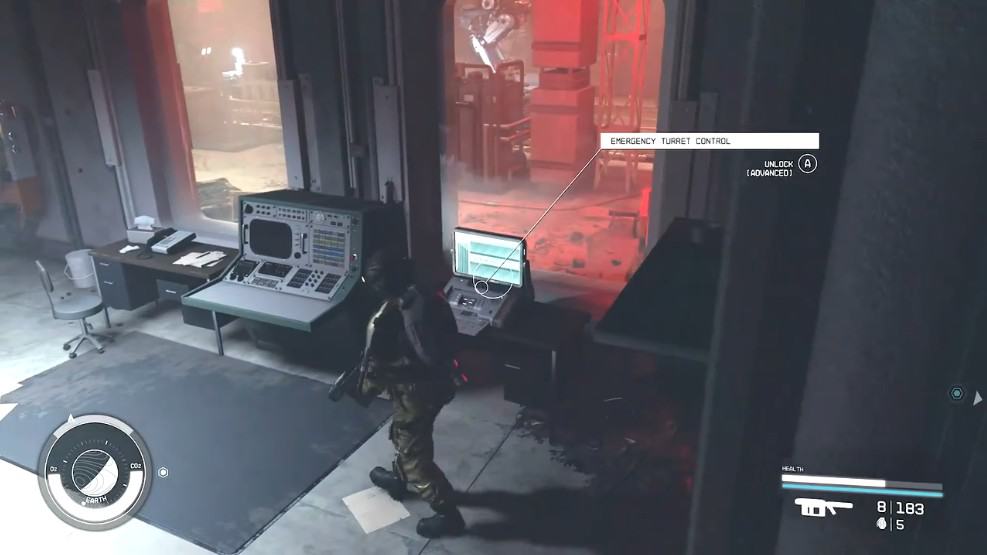
Turn the switch next to it to restore power to the assembly line. Exit the control room and activate the switch on the main gate to unlock it and progress deeper into the NASA facility.
There is a lot of loot in the surrounding rooms, so grab it before following the path down to the storage area of the NASA facility. Interact with the main storage area computer and read the logs here.
Find Information about the Grav Drive side effects
Things will be heated from here on in the Unearthed mission of Starfield. There is a deeper basement under the storage area. Enter through the door west of the computer and use the stairs to descend further. You will start noticing some abnormalities in the gravitational force.
Loot the body at the base of the stairs (bottom floor) and grab the NASA Maintenance Key on it. Then get back to the second floor and enter through the door on your right. Use the NASA Research Computer and read the logs to learn more about the unusual gravitational shift.
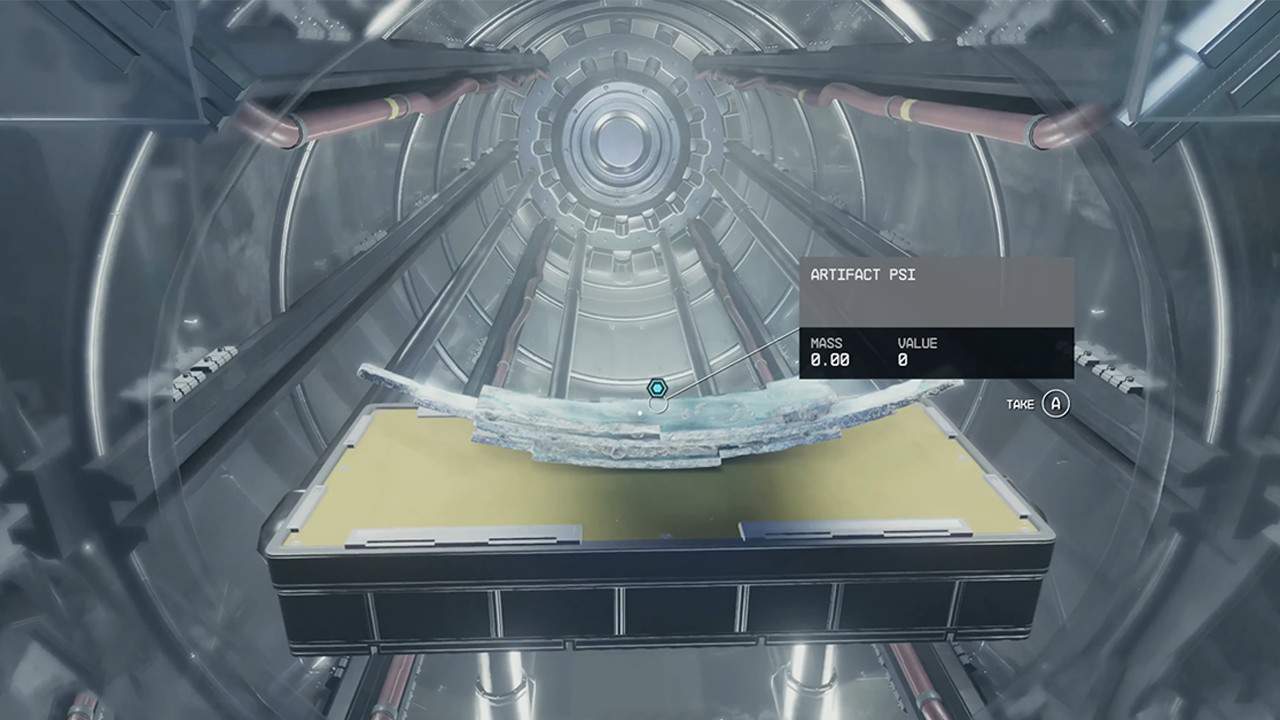
Release the Artifact
After reading the logs, pull out your weapons before pressing the red button next to it as you are about to fight soon. This will release the Artifact Psi, the one you set out for during the Unearthed mission in Starfield. Go back down to the bottom floor and turn right to enter the Artifact room.
This is where things get interesting. As soon as you grab the Artifact, you will be attacked by the Starborn. You can stand your ground and fight them or run out of the facility to escape. We recommend that you kill some Starborns to not get overwhelmed if you are planning to run.
After escaping the NASA Launch Tower in Starfield, you will come across both Emissary and Hunter outside waiting for you. You will now have to choose between the two characters. Do note that either of your choices will alter what will happen to you. Therefore, choose wisely!
Should you choose the Hunter, the Emissary, or reject both in Unearthed?
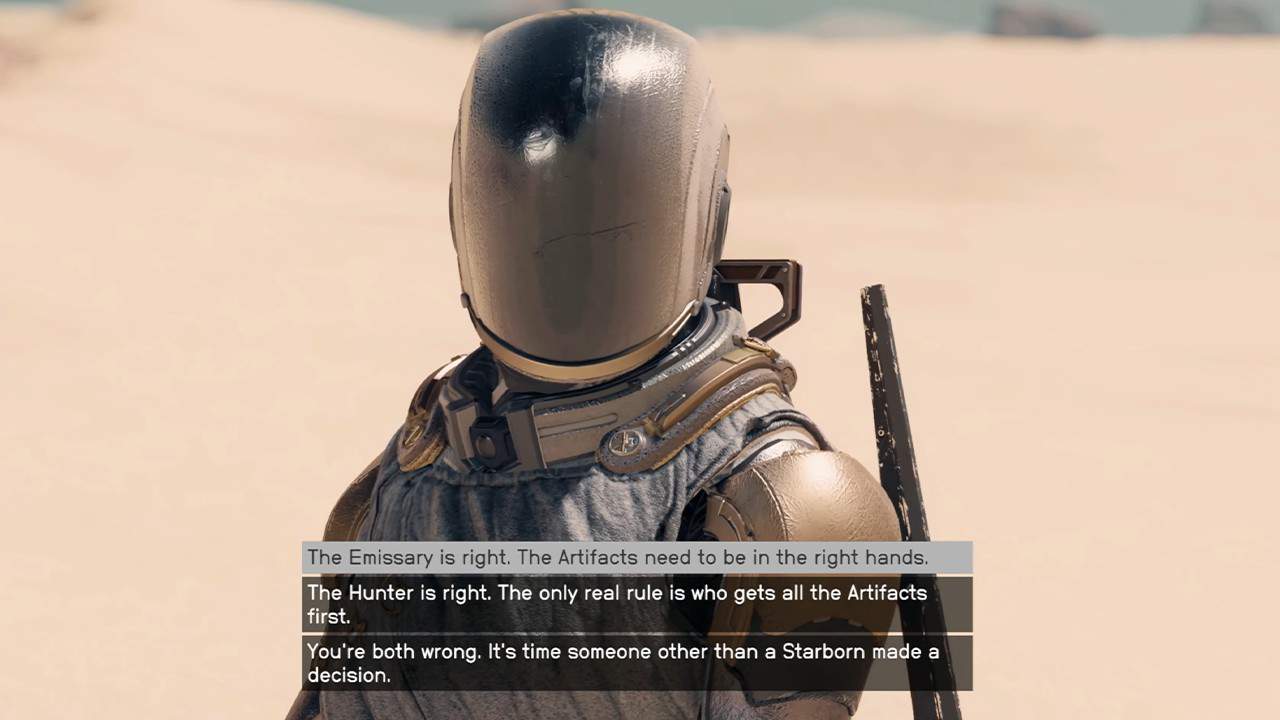
The best choice during the Unearthed quest in Starfield is to reject both of them. Your choice will impact who you face during the final mission, Revelation, and also which legendary weapon you will get as a reward, Eternity’s Gate or Unmitigated Violence.
Rejecting them will make you face both of them in the boss battle, which can prove to be slightly difficult. However, it also gives you a chance to get both of the legendary rewards, which is otherwise impossible.
Siding with the Emissary means you fight The Hunter and get Unmitigated Violence, an upgraded Orion, as a reward. Choosing the Hunter results in fighting the Emissary instead and getting Eternity’s Gate weapon, the unique version of Va’Ruun Inflictor.
If you want to choose one, we recommend going with the Emissary since the Hunter does end up permanently removing a couple of people from your friend group.
Unearthed mission bugs and fixes
Although the entire mission is free of bugs, you will find a possible bug if you decide to wreck Emissary and Hunter’s ship at the start of the Starfield Unearthed quest. Everything will go as planned until you approach them after escaping the NASA base in Starfield.
They will immediately start attacking you, preventing you from completing the mission. This is because you are on a bounty, which prevents you from siding with either of the characters. There are a couple of solutions you can try to see which one works best for you.
One way is to leave the NASA building and instead of engaging with them, return to your spaceship. Go to sleep or wait for 24hrs twice and then walk back to the meeting location. Don’t fast-travel to avoid problems.
Another way is to use console commands but it is limited to PC players only. To reset the bounty, click on either one of the characters and type: paycrimegold 0
Or try SetAngryWithPlayer 0
Using Console Commands will disable your achievements. You can counter this by using special mods in Starfield.