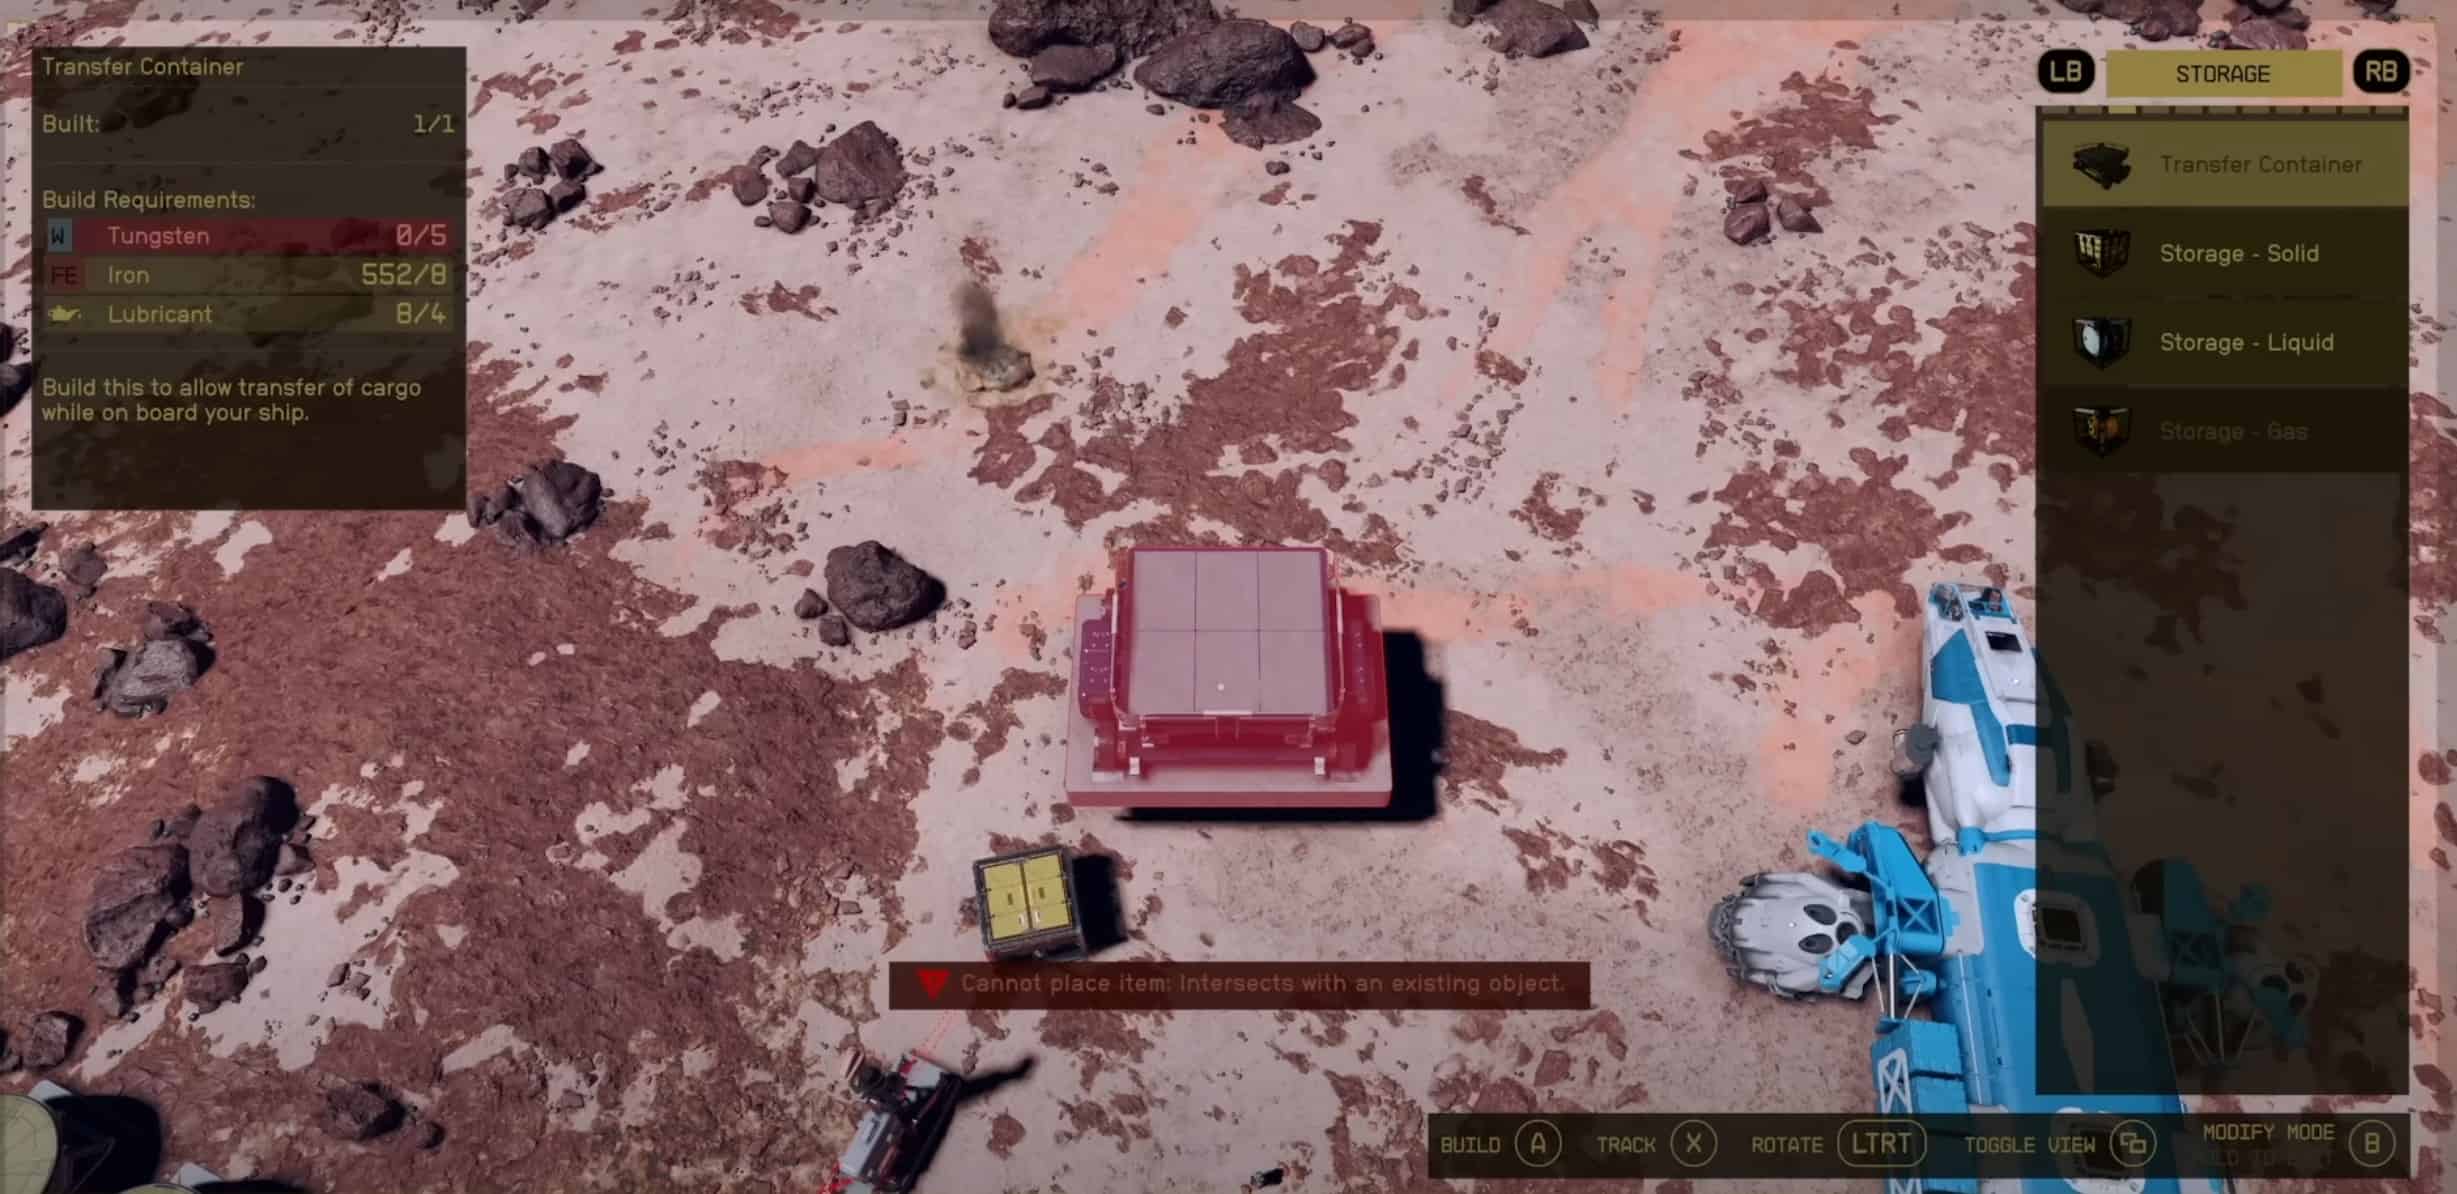
Transfer Containers are automated Storage Systems in Starfield. They store any mineral or resource, whether it is a Solid, Liquid, or Gas, that your excavators produce in an outpost and transfer it to your starship. Without a transfer container, you must sit next to an extractor for days while it produces resources.
The capacity of Transfer Containers is massive, storing up to 200 game items. They also don’t cost anything besides the materials used in the process. This makes them an economical and vital source to manage your inventory items.
The process to set up this massive mobile storage can be a bit complicated. This is why we have compiled all that you need to know about using Transfer Containers in Starfield.
How to build a Transfer Container in Starfield
Outpost building is a relatively deep system in and of itself. You have access to multiple supplementary building items to facilitate your needs.
To set up the system, you will need to build a container, power it, and then link it to an Extractor. Extractors will mine resources from rich deposits on the surface, and containers will act as storage where you can store them.
To build a Transfer Container in Starfield, you will first need the following resources:
Once you have those, you can go on to build the Transfer Container in your outpost. However, you’ll also need to build an extractor and its associated power source to get any mileage from it to initiate the resource harvesting cycle.
Each resource requires a specific type of extractor, e.g., you’ll need to build an Iron Extractor to extract Iron and a different one for Argon. This is important as the material you need to build, say, a cobalt extractor, will be different than the ones needed to build an iron extractor, so be sure to check which building materials you need on a case-by-case basis.
How to use a Transfer Container in Starfield
Transfer containers help transfer whatever output you extract from planets, which can be solid, liquid, or gas. Without a transfer container, you must sit next to an extractor for days while it produces resources.
If you have a transfer container, the harvested resource is automatically moved to storage in your outpost. The following material is required for Transfer Container construction.
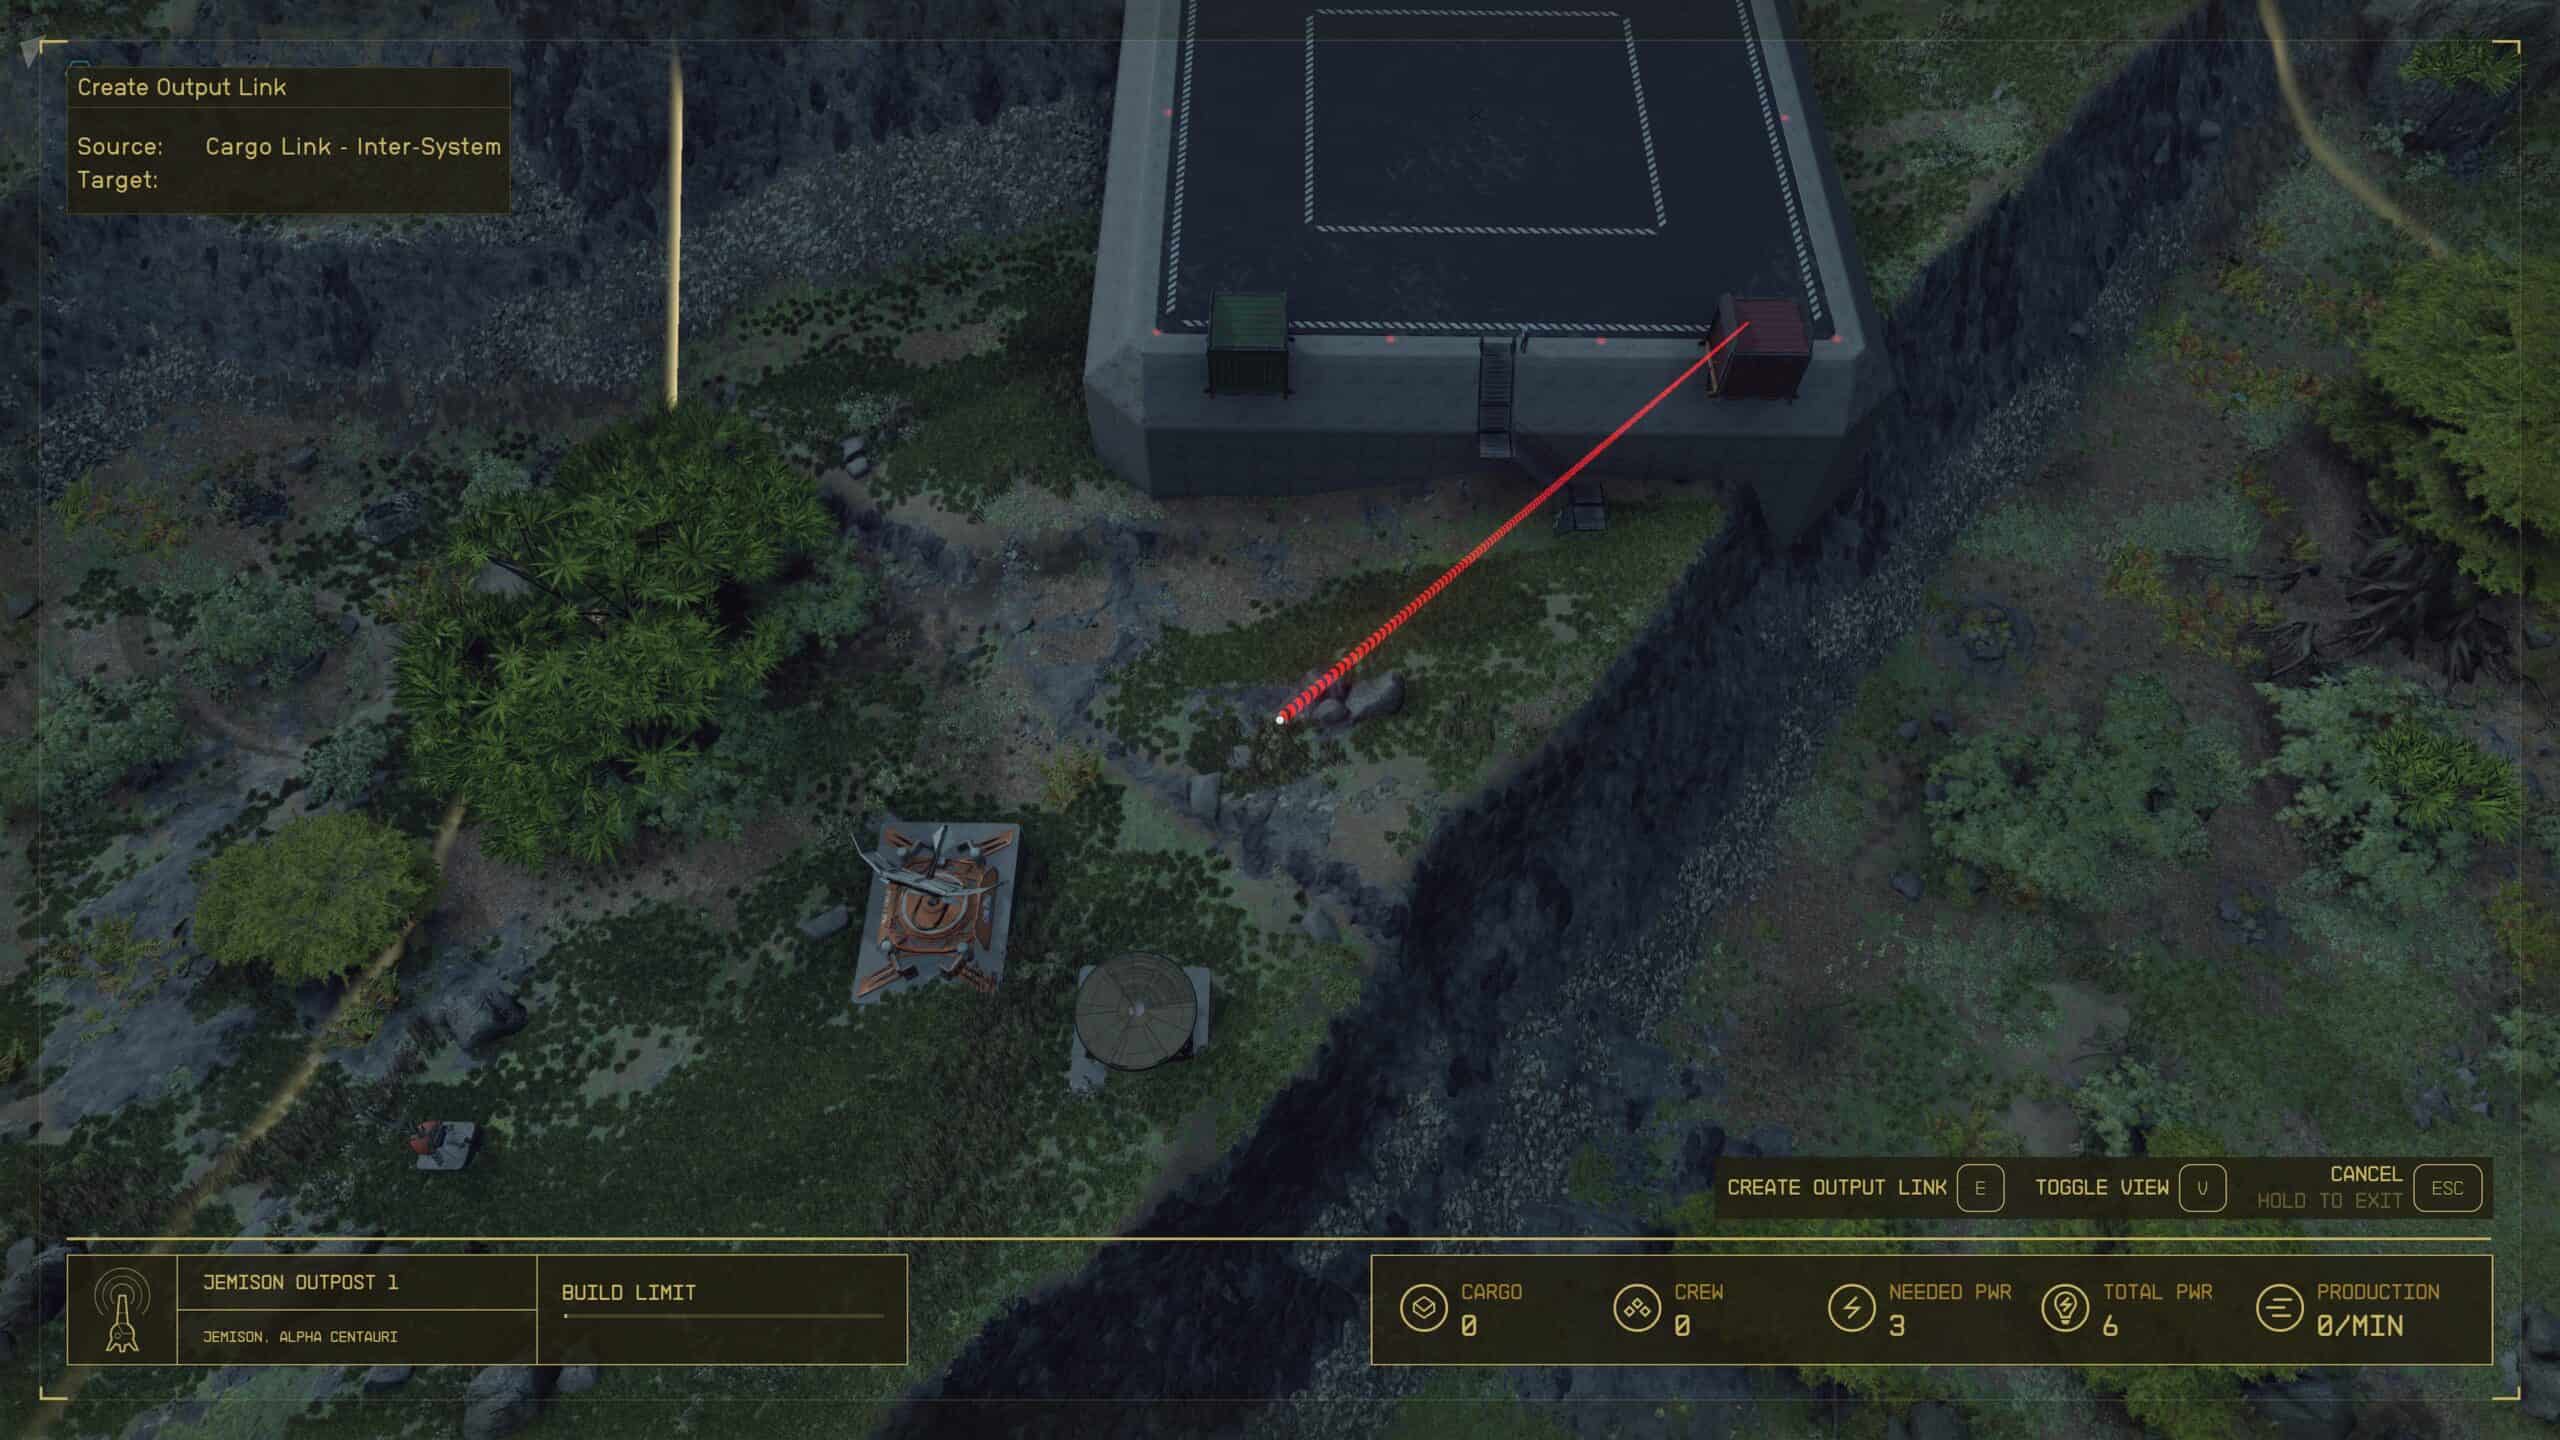
Using a Transfer Container is relatively easy. After you’ve built and placed your extractors, power sources, etc., go to your extractor in ‘Build mode’ (Press E on the Keyboard) and aim your reticle on it.
Look to your options and see an option ‘Create Output Link.’ On PC, the default button for this is right-click. Go ahead, and after right-clicking, a red line will emerge from the extractor, tied to your reticle. Manually take this line to your Transfer Container; when closed, it will automatically latch onto the container.
You can build the Starfield Transfer Container Output Link by pressing the associated button (E) on the Keyboard. Doing so, your Starfield extractor output will now be transferred into the Transfer Container.
How to collect items quickly
In Starfield, there is a way that you can transfer items quickly from the Transfer Container without needing to get out of the ship. For this, the first thing that you need to do is land your ship close to the Container Ship.
Due to the newer terrain, landing the ship nearby is not possible; therefore, it is best if you build a “Landing Pad.” After landing your ship onto this pad, reach the Cargo Hold and you will find all of the Transfer Container items there.
How to transfer cargo between your Outpost and Ship
Of course, that’s not all. You can transfer relevant materials to your ship with the container setup prepped and ready. First, you must ensure your ship is located near your outpost.
Then go to your ship inventory and swap to ‘Cargo Hold’. When toggling different inventories beyond ship and character inventory, you can access your Outpost’s Inventory. At that point, it’s a simple transfer. Take what you want, store what you want, etc.
How to link Outposts storages together
You can also get more mileage with transfer containers via ‘Cargo Link – Inter-System,’ a structure that allows you to readily transfer materials from one outpost to another to cut back the time it would take to travel to a specific Outpost to grab the specific materials you wanted.
Build one in your current outpost and another in a different outpost of your choice for additional ease of resource transfer. The cargo link comes with two containers. A red one for materials to be sent to other outposts and a green one for materials received from another outpost.
After you have built the cargo link, repeat the same steps you did to link the Extractor to the Transfer Container, but this time, link the transfer container to the red box. The Cargo link has a control panel to specify which outposts you want to transfer to adjust as you see fit. And just like that, you now have a self-sufficient resource transfer system in place
Tip: Linking your ships and outposts can create a big enough storage to stop you from getting Encumbered. You will however need to be near your ship to do this.
How to fix Starfield Transfer Container Not Working
While dealing with the Transfer Containers in Starfield, some players faced a problem with them not working. The reason that you might face this problem is that it’s not connected to any power source.
To fix this, you need to ensure that the output line is connected from the extractor to the Transfer Container without any obstruction. Sometimes, the wires are connected but not wired incorrectly.
If the distance between the extractor and the Transfer Container is big enough, you must add the Power Source in series to the Extractor.
Transfer Container bug
There is a bug with Transfer Containers that players may experience in Starfield where it stops being automated once you manually add items. The cause of the problem is unknown but thankfully there are a few ways to work around it.
The first one is if the problem is sourced from the Transfer Container then simply re-link it. Since you can’t mess with the storage container links, you will find the root of your problem and resolve the issue as well.
Another way is to first build separate containers for all types of materials, liquid, solid, and gas. Then join them through separate Output Links to individual Transfer Containers. Now connect your storage to these individual containers.