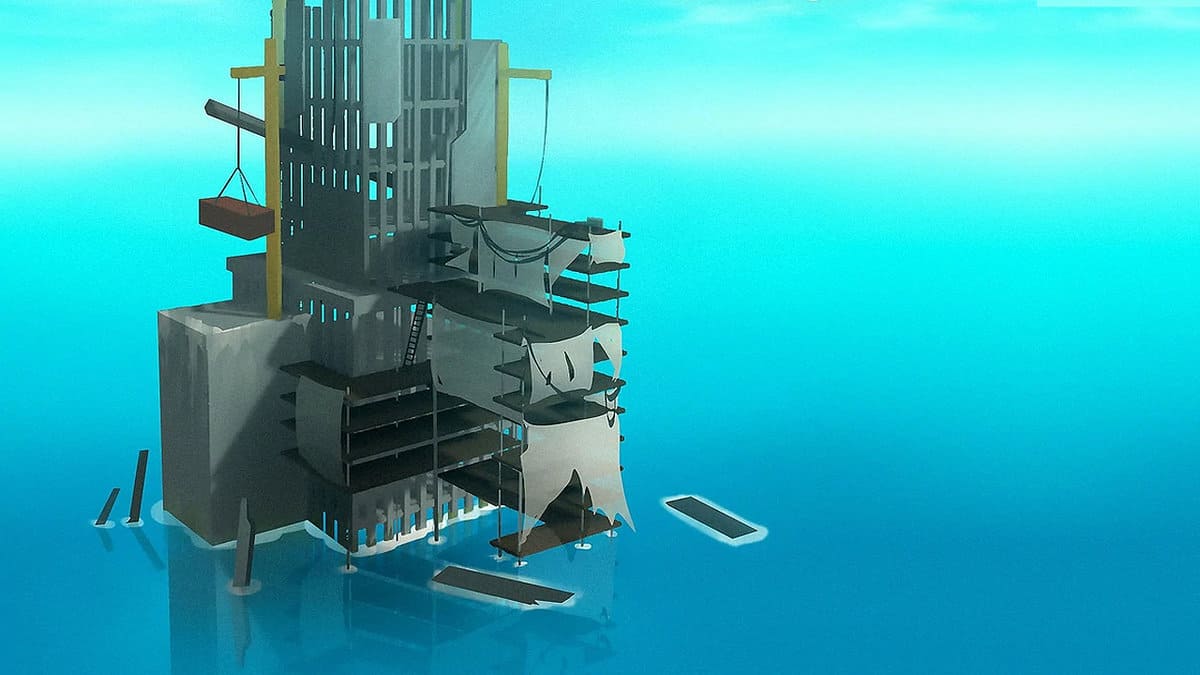
Varuna Point is one of the main locations that you will be exploring in Raft. It becomes accessible at the start of the third chapter and comprises a couple of skyscrapers that were abandoned mid-construction a long time ago.
You will be going underwater to explore the submerged ruins of Varuna Point which are now home to sealife, including the dreaded Rhino Shark.
The following guide will explain how to get to Varuna Point in Raft and how to find all of its collectibles.
How To Get To Varuna Point In Raft
Varuna Point is part of the main storyline and hence, you will not have to score the entire sea to find the location.
You will be handed over the coordinates of Varuna Point after completing all of the prior story chapters. Hence, you need to have found the Radio Tower, Vasagatan, Balboa Island, Caravan Town, and Tangaroa.
Once you are done with Tangaroa, open up your book by pressing the “T” key to find the coordinates for Varuna Point at #7528.
You then just have to update your coordinates from the navigation device on your raft to reveal Varuna Point on your radar.
Varuna Point Walkthrough
After getting to Varuna Point, you’ll need to investigate and find spotlights between the two towers. This is the quest of that site. The quest is to get four spotlight parts that in the end are required to fix the broken spotlight.
Spotlights are not the only things of interest at Varuna Point. You should also find the Motherboard key, Crane Key, Blueprints of an advanced battery, and finally the code to the next location which is Temperance. Besides the blueprints of the Advanced battery, you’ll also get some for Advanced Headlight, Wind Turbine, and Electric Grill.
These Blueprints are the bottom-most level of the skyscraper underwater and before you get them, you’ll have to defeat the boss of Varuna Point which is a Rhino Hybrid Shark. The best way to get rid of this massive shark is not the weapons. Though the weapons will definitely give the shark damage, the best way to defeat is to use the surroundings against it.
One way is to first place an Explosive Barrel and then make the shark slam into it. The shark will take three hits to be killed. After getting the Shark, you will get the “Explosive Force” achievement.
Varuna Point Notes Locations
There are seven notes in Varuna Point that glow yellow when you scan the place. Here are all the locations where you’ll find them
Note #1
The first Nots can be found lying on an underwater weight that is right next to a glowing jellyfish. The jellyfishes will be blocking the way to the building’s entrance. They will get aside as the light will fall on them.
Note #2
After getting the first note, head to the elevator shaft and into the darkest room. The note will be found next to a spotlight part.
Note #3
After getting into the tunnel blocked by jellyfish, you’ll see a box with rubble on it. The note is lying on the same box and is in front of the Grabber’s traps and spikes.
Note #4
After getting the blueprint for an Electric Grill, you’ll see a crane next to it. On the top of that crane is this note.
Note #5
This note is not underwater and is on the side of Varuna Point where there is a Jump Puzzle. You’ll find the note on a piece of metal by a small crane.
Note #6
After getting to the end of the spiked path, you’ll find this note behind the Motherlode Key.
Note #7
Here comes the final note of Varuna Point. The last note is actually the Temperance code that is the next location. This is a mandatory note and to get it, you’ll need to get to the bottom of the building.
Varuna Point Blueprints Locations
Electric Grill
This is located on the top of the crane at Varuna Point.
Advanced Headlight
It is located inside the building underwater. It can be found inside the Motherlode Location. You’ll need to get the Motherlode Key and open the gate. Go inside and you’ll get the blueprints next to the boxes there.
Windturbine
After getting done with the boss, you’ll have access to the office where you need to go up through the hole and then move right and go upstairs. The blueprint is lying in the room next to you.
Advanced Battery
To get the blueprint, you’ll need the key for the crane. After getting the key, get into the crane and start operating it. The crane will throw the junk to the lower building and this will open the way to go down into the building. Get to the zipline and you’ll end up in an office where there is the blueprint.