Tokiy Crystal in Zelda: Tears of the Kingdom is a hidden shrine that only becomes visible once you locate and return its life crystal. Like most of the crystal shrines, the only challenge here is to make the shrine appear as the shrine itself doesn’t offer any challenges.
Tokiy Shrine in Zelda: Tears of the Kingdom is one of Rauru’s Blessings, meaning there is no puzzle to solve in it. What you will be doing here is completing a quest linked to the Shrine called The Oakle’s Navel Cave Crystal.
Tokiy Shrine Location in Zelda: TotK
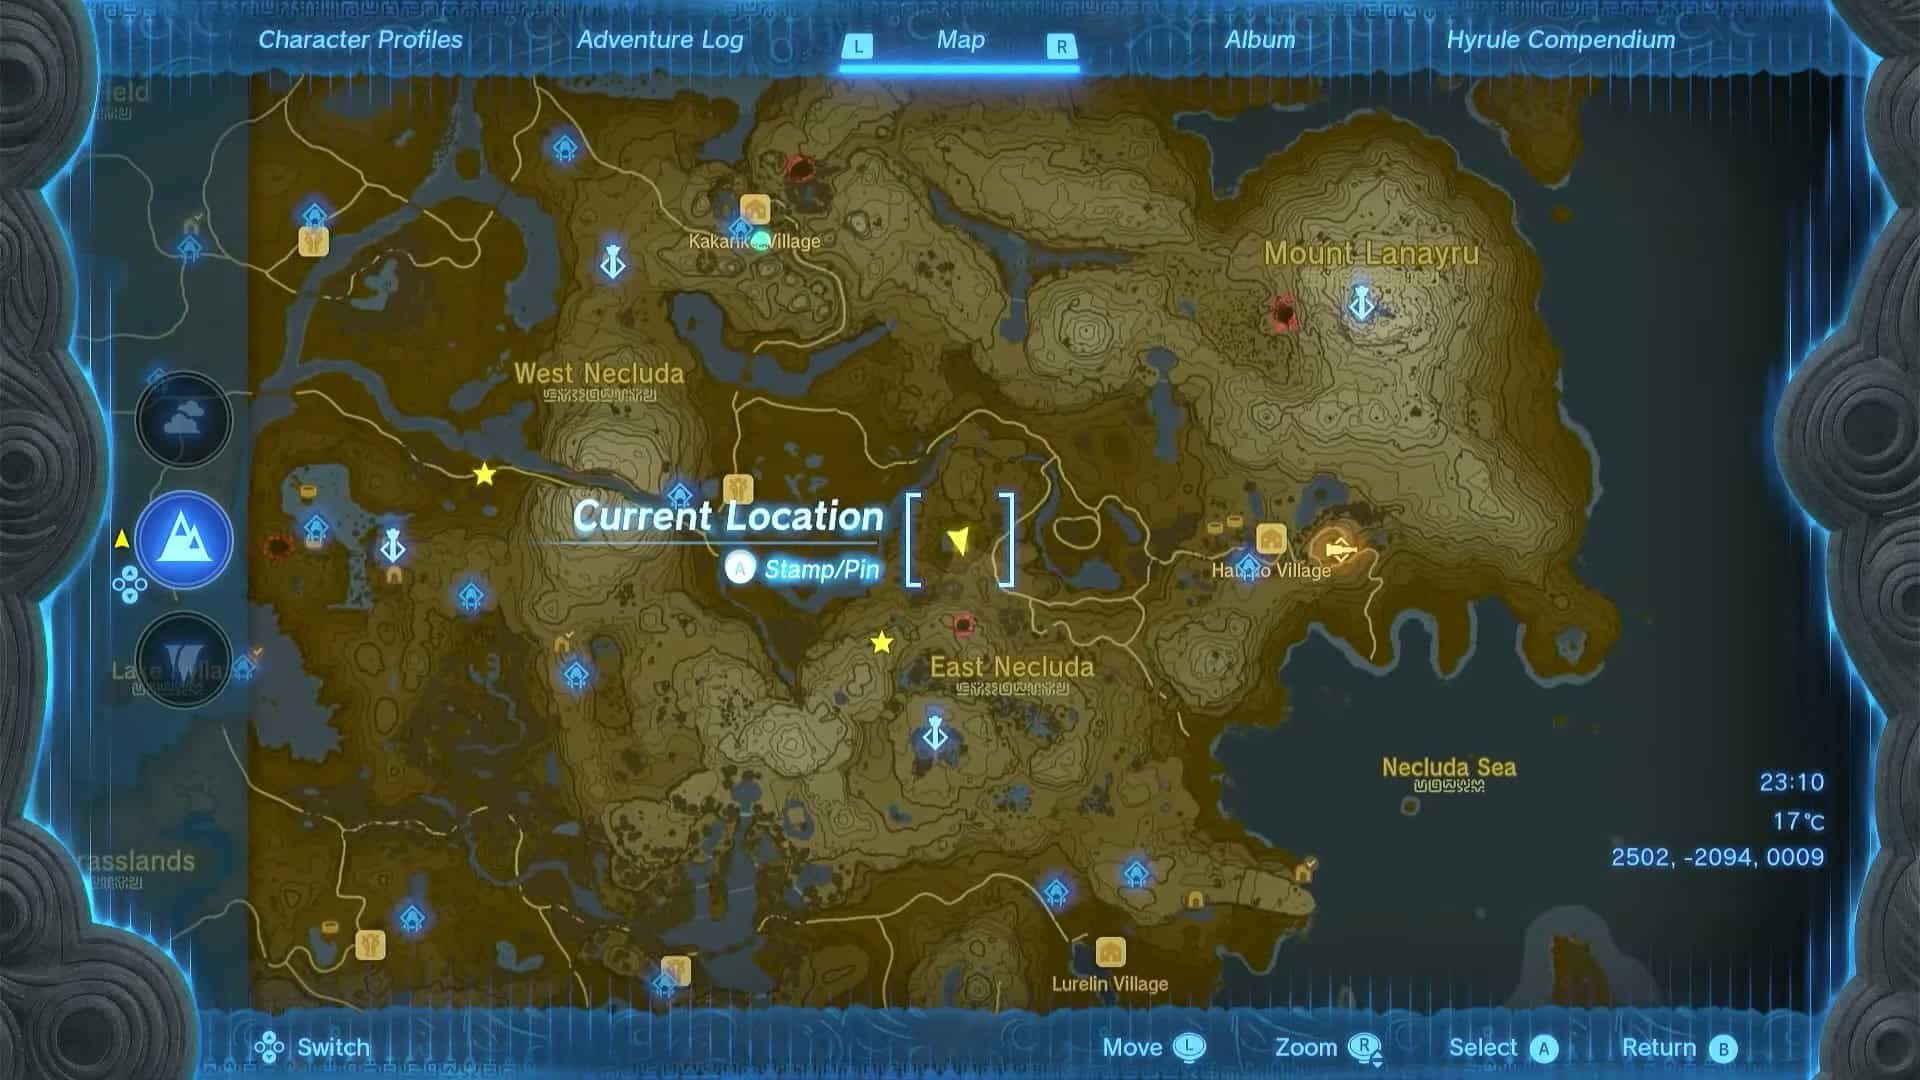
Tokiy Shrine is inside Oakle’s Navel Cave, north of the East Necluda region. The coordinates for the cave’s entrance are (2502, -2094, 0009).

The nearest Skyview Tower, Rabella Wetlands Skyview Tower is to the east and this cave is sandwiched between Mount Rozudo and Cliffs of Quince.
Tokiy Shrine Walkthrough
Tokiy Shrine in Zelda: Tears of the Kingdom belongs to the crystal shrine category. This means you must return its life crystal to make it appear and enter it to receive Rauru’s Blessing.

1. Enter the Oakle’s Navel cave and go past a Shock-Like enemy.


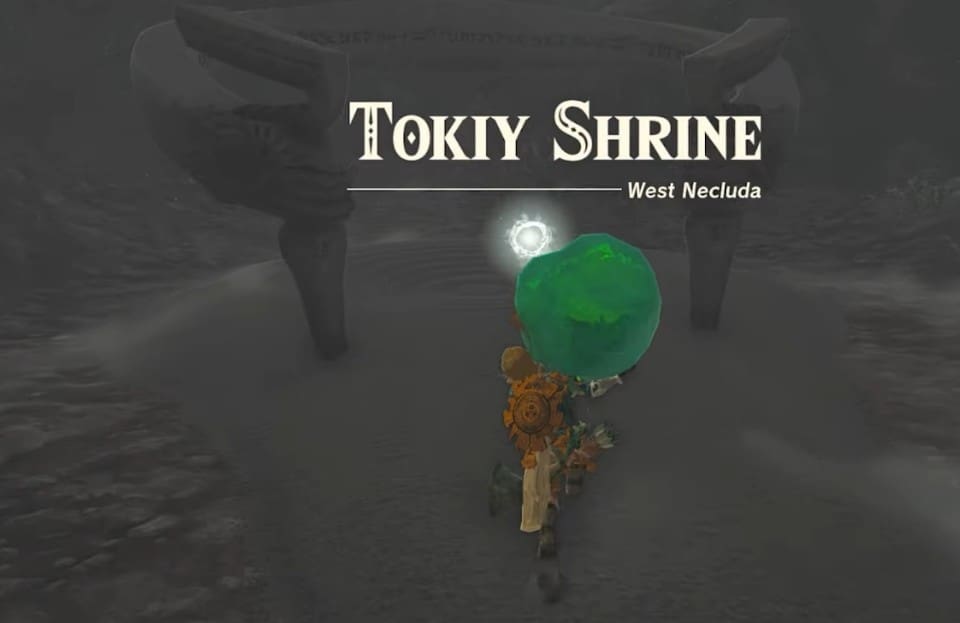
2. You will notice a green crystal lying on the altar. Interact with it to start The Oakle’s Navel Cave Crystal shrine quest.
3. Pick up the green crystal with Ultrahand and follow the green light originating from it. Go through the newly opened door right in front of you.

4. This cave has a lot of rolling boulders that can hit you and make the crystal fall into the lake to the side. While it is not as devastating as it sounds, this can be a bit troubling and time-consuming.
5. Take your time and slowly progress through the cave while avoiding the rolling boulders. Keep following the green light to the right.
6. Soon, you will come across a narrow alleyway leading to the shrine. Make sure to hug the left wall tightly while moving forward.

7. This area has a large boulder that will crush you if you are not hugging the left wall. Keep moving forward as it won’t be able to touch you.

8. Place the crystal on the Tokiy Shrine’s entrance (2308, -2375, -0029) to complete The Oakle’s Navel Crystal shrine quest and make the shrine appear.

9. Interact with the shrine’s entrance to unlock a fast travel point and enter it. As this is a Rauru’s Blessing shrine, there won’t be any puzzles or combat challenges inside. Open the treasure chest to obtain a Large Zonai Charge.
10. Interact with Rauru and Sonia’s statues to complete Tokiy Shrine in Zelda: Tears of the Kingdom and obtain a Light of Blessing as a reward. You can exchange four Lights of Blessing at any goddess statue to either increase your stamina or health.