Shipbuilding is a core aspect of Starfield that you can easily lose many hours in. After all, traversing the stars in your trusty spacecraft is something you’ll be doing for a long. So, what’s the harm in taking the time out to idle away and mix and match different ship parts in Starfield to create your own uniquely designed ship.
Whether it’s for purely aesthetic purposes or tangible efficiency improvements, Starfield’s ship-building aspect has many layers to it and offers many Ship parts for you to choose from to give your ship a refined personal touch.
Where to buy Ship parts in Starfield
Of course, before you can entertain the notion of building your own ship, you first need to find the appropriate authorities who will be willing to give you the necessary ship parts to begin building your dream ship.
Below is a list of some noteworthy vendors from where you can buy ship parts in Starfield and where to find them:
Major Ship manufacturer locations
Stroud-Eklund: Located in the space station orbiting planet Deepala in the Narrion System.
HopeTech: Located in Hopetown, on planet Polvo in the Valo System.
Taiyo: Located in the Ryujin building in Neon City, located on planet Volii in the Volii system.
Deimos: Located in the Deimos Staryard, orbiting Mars in the Sol System.
Landing Zones where you can find various ship parts
Cydonia: On the surface of Mars. You can find Deimos and Nova Galactic parts here.
New Atlantis: On Planet Jemison in the Alpha Centauri system. Nova Galactic and Deimos parts are sold in New Atlantis.
Gagarin Landing: On Planet Gagarin in the Alpha Centauri system. Nova Galactic and Deimos parts are sold here.
Crimson Fleet Base: Located on The Key in the Kryx system. Shielded Cargo is sold here.
Red Mile: Located on Planet Porrima III in the Porrima System. HopeTech, Stroud and Tayo parts are sold here as well as shielded cargo.
Eleo’s Retreat: Located on planet Ixyl II in the Ixyl System. HopeTech, Nova Galactic and Stroud parts are sold here.
Paradiso: Located on planet Porrima II in the Porrima System. You can buy Stroud, Nova Galactic and HopeTech parts here.
Neon City: Located on Volii Alpha in the Volii system, you can buy Stroud and Taiyo parts on Neon from the landing strip. The manufacturing stores are further in the city as previously mentioned.
Akila City: Located on planet Akila in the Cheyenne System, you can buy HopeTech, Stroud and Taiyo parts from Akila City.
All Starfield Ship parts
Ship parts in Starfield are divided into different categories based on where they fit. Some parts are purely cosmetic while others improve the performance of your ship including weapon damage, cargo capacity and jump distance.
- Cockpit
- Dockers
- Weapons
- Cargo Hold
- Bay
- Engine
- Fuel Tank
- Landing Gear
- Grav Drive
- Hab
- Reactor
- Shield Generator
- Structural Components
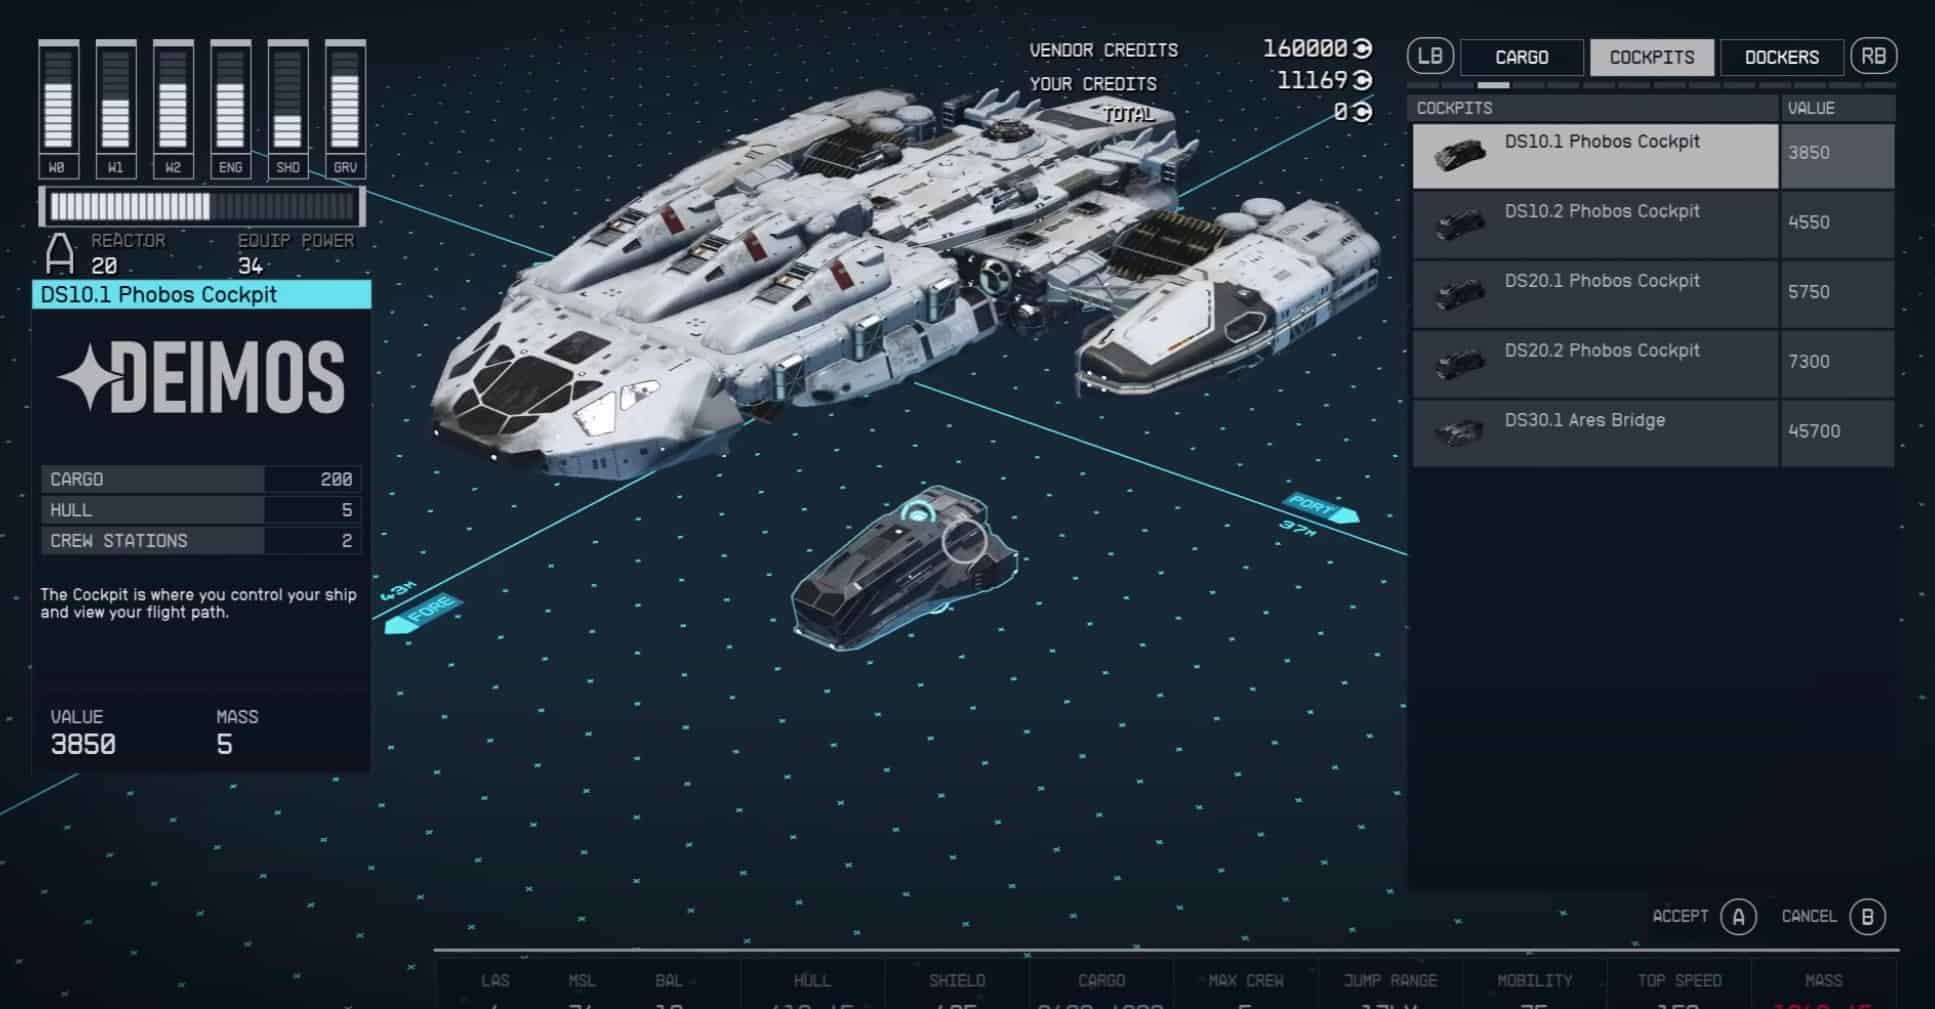
Cockpits
This is the main area where you pilot your ship from.
Part Name | Brand | Stats | Price |
DS10.1 Phobos Cockpit | Deimos | Cargo – 200 Hull – 5 Crew Stations – 2 | 3207 |
DS10.2 Phobos Cockpit | Deimos | Cargo – 220 Hull – 5 Crew Stations – 2 | 3790 |
DS20.1 Phobos Cockpit | Deimos | Cargo – 240 Hull – 5 Crew Stations – 2 | 4789 |
DS20.2 Phobos Cockpit | Deimos | Cargo – 260 Hull – 5 Crew Stations – 2 | 6080 |
DS30.1 Phobos Cockpit | Deimos | Cargo – 300 Hull – 5 Crew Stations – 8 | 38068 |
Armstrong 10 Cockpit | HopeTech | Cargo – 200 Hull – 5 Crew Stations – 2 | 3207 |
Armstrong 10R Cockpit | HopeTech | Cargo – 220 Hull – 5 Crew Stations – 2 | 3790 |
Armstrong 20 Cockpit | HopeTech | Cargo – 240 Hull – 5 Crew Stations – 2 | 4789 |
Armstrong 20E Cockpit | HopeTech | Cargo – 280 Hull – 5 Crew Stations – 2 | 8163 |
Magellan C1 Cockpit | Nova Galactic | Cargo – 200 Hull – 5 Crew Stations – 2 | 3248 |
Magellan C1X Cockpit | Nova Galactic | Cargo – 220 Hull – 5 Crew Stations – 2 | 3873 |
Magellan C2 Cockpit | Nova Galactic | Cargo – 240 Hull – 5 Crew Stations – 2 | 4914 |
Magellan C2X Cockpit | Nova Galactic | Cargo – 260 Hull – 5 Crew Stations – 2 | 6205 |
Cabot C3 Bridge | Nova Galactic | Cargo – 280 Hull – 5 Crew Stations – 2 | 7996 |
Viking CP-100 Cockpit | Stroud-Eklund | Cargo – 200 Hull – 5 Crew Stations – 4 | 5414 |
Viking CP-110 Cockpit | Stroud-Eklund | Cargo – 220 Hull – 5 Crew Stations – 4 | 5997 |
Viking CP-200 Cockpit | Stroud-Eklund | Cargo – 240 Hull – 5 Crew Stations – 4 | 6997 |
Viking CP-210 Cockpit | Stroud-Eklund | Cargo – 260 Hull – 5 Crew Stations – 4 | 8246 |
Viking CP-220 Cockpit | Stroud-Eklund | Cargo – 280 Hull – 5 Crew Stations – 4 | 9996 |
Kon-Tiki B-300 Bridge | Stroud-Eklund | Cargo – 300 Hull – 5 Crew Stations – 4 | 12578 |
Samurai Cockpit | Taiyo Astroneering | Cargo – 200 Hull – 5 Crew Stations – 2 | 3248 |
Samurai Enhanced Cockpit | Taiyo Astroneering | Cargo – 220 Hull – 5 Crew Stations – 2 | 3873 |
Daimyo Cockpit | Taiyo Astroneering | Cargo – 240 Hull – 5 Crew Stations – 2 | 4914 |
Daimyo Enhanced Cockpit | Taiyo Astroneering | Cargo – 260 Hull – 5 Crew Stations – 2 | 6205 |
Shogun Cockpit | Taiyo Astroneering | Cargo – 280 Hull – 5 Crew Stations – 2 | 7996 |
DS20.3 Phobos Cockpit | Deimos | Cargo – 280 Hull – 5 Crew Stations – 2 | 8163 |
Armstrong 20R Cockpit | HopeTech | Cargo – 260 Hull – 5 Crew Stations – 2 | 6080 |
Overseer 300 Bridge | HopeTech | Cargo – 300 Hull – 5 Crew Stations – 2 | 10662 |
Dockers
This is the part of your ship that lets you dock on space stations and other ships.
Part Name | Brand | Stats | Price |
100DP Slim Docker – Top | Deimos | Hull – 3 | 1457 |
110DP Docker – Top | Deimos | Hull – 3 | 1457 |
Hope 11 Docker – Fore | HopeTech | Hull – 1 | 833 |
Hope 11 Docker – Port | HopeTech | Hull – 1 | 833 |
NG-2 Docker – Top | Nova Galactic | Hull – 1 | 978 |
Connect-Pro Docker – Top | Stroud-Eklund | Hull – 2 | 895 |
Connect-Pro Docker – Port | Stroud-Eklund | Hull – 2 | 895 |
Extender Port 200 Docker – Top | Taiyo Astroneering | Hull – 2 | 749 |
Weapons
Hostiles wandering in space necessitate the use of ship weapons. These can pack quite the punch and come in a great variety, ranging from ballistic missiles and lasers to electromagnetic weapons.
Part Name | Brand | Stats | Price |
Dangan Pb Cannon | Shinigami | Class – A Range – 1000 Fire Rate – 3.49 Hull DMG – 16.5 Shield DMG – 5.5 Max Power – 3 Hull – 1 Crew Capacity – 0.5 | 3581 |
Dangan Pb RF Cannon | Shinigami | Class – A Range – 1000 Fire Rate – 6.65 Hull DMG – 11 Shield DMG – 3.30 Max Power – 3 Hull – 1 Crew Capacity – 0.5 | 8496 |
KE-20 Cannon | Ballistic Solutions Inc. | Class – A Range – 800 Fire Rate – 3.49 Hull DMG – 18.70 Shield DMG – 5.5 Max Power – 3 Hull – 1 Crew Capacity – 0.5 | 6018 |
Mauler 104L Cannon | Horizon Defense | Class – A Range – 800 Fire Rate – 3.49 Hull DMG – 14.30 Shield DMG – 4.40 Max Power – 4 Hull – 1 Crew Capacity – 0.5 | 1145 |
Mauler 104L Autocannon | Horizon Defense | Class – A Range – 800 Fire Rate – 6.65 Hull DMG – 9.90 Shield DMG – 3.30 Max Power – 4 Hull – 1 Crew Capacity – 0.5 | 6164 |
EMP-80 Suppressor | Ballistic Solutions Inc. | Class – A Range – 800 Fire Rate – 1.5 Hull DMG – 36 Shield DMG – 5 Electromagnetic DMG – 24 Max Power – 4 Hull – 1 Crew Capacity – 0.5 | 3873 |
Spark 750 Suppressor | Light Scythe | Class – A Range – 1000 Fire Rate – 1.5 Hull DMG – 1 Shield DMG – 1 Electromagnetic DMG – 30 Max Power – 3 Hull – 1 Crew Capacity – 0.5 | 11078 |
Dragon 221 MW Laser | Horizon Defense | Class – A Range – 1000 Fire Rate – 3.49 Hull DMG – 4 Shield DMG – 12 Max Power – 3 Hull – 1 Crew Capacity – 0.5 | 1249 |
Dragon 221P MW Pulse Laser | Horizon Defense | Class – A Range – 1000 Fire Rate – 6.65 Hull DMG – 3 Shield DMG – 9 Max Power – 3 Hull – 1 Crew Capacity – 0.5 | 6643 |
Flare 15MW IR Laser | Light Scythe | Class – A Range – 1250 Fire Rate – 3.49 Hull DMG – 4 Shield DMG – 14 Max Power – 3 Hull – 1 Crew Capacity – 0.5 | 1249 |
Flare-P 15MW IR Pulse Laser | Light Scythe | Class – A Range – 1250 Fire Rate – 6.65 Hull DMG – 3 Shield DMG – 10 Max Power – 3 Hull – 1 Crew Capacity – 0.5 | 6643 |
Reza 45 GHz MW Laser | Shinigami | Class – A Range – 800 Fire Rate – 3.49 Hull DMG – 5 Shield DMG – 16 Max Power – 4 Hull – 1 Crew Capacity – 0.5 | 4394 |
Atlatl 270A Missile Launcher | Light Scythe | Class – A Range – 4000 Fire Rate – 1 Hull DMG – 47 Shield DMG – 47 Max Power – 3 Hull – 1 Crew Capacity – 0.5 | 3248 |
CE-09 Missile Launcher | Ballistic Solutions Inc. | Class – A Range – 4000 Fire Rate – 1 Hull DMG – 36 Shield DMG – 36 Max Power – 3 Hull – 1 Crew Capacity – 0.5 | 1416 |
Vanguard Tempest CE-13 Missile Launcher | Vanguard | Class – A Range – 4000 Fire Rate – 1.5 Hull DMG – 33 Shield DMG – 30 Max Power – 6 Hull – 1 Crew Capacity – 0.5 | 1249 |
Tsukisasu 13K Missile Launcher | Shinigami | Class – A Range – 4250 Fire Rate – 1 Hull DMG – 38 Shield DMG – 38 Max Power – 3 Hull – 3 Crew Capacity – 0.5 | 1749 |
Disruptor 3300 Electron Beam | Horizon Defense | Class – A Range – 3500 Fire Rate – 3.49 Hull DMG – 12 Shield DMG – 12 Max Power – 3 Hull – 2 Crew Capacity – 0.5 | 1874 |
Disruptor 3300A Auto Electron Beam | Horizon Defense | Class – A Range – 3500 Fire Rate – 6.65 Hull DMG – 8 Shield DMG – 8 Max Power – 3 Hull – 2 Crew Capacity – 0.5 | 5414 |
PB-30 Electron Beam | Ballistic Solutions Inc. | Class – A Range – 3000 Fire Rate – 3.49 Hull DMG – 13 Shield DMG – 13 Max Power – 3 Hull – 1 Crew Capacity – 0.5 | 2977 |
PBO-30 Auto Electron Beam | Ballistic Solutions Inc. | Class – A Range – 3000 Fire Rate – 6.65 Hull DMG – 9 Shield DMG – 9 Max Power – 3 Hull – 1 Crew Capacity – 0.5 | 7517 |
Vanguard Obliterator Autoprojector | Vanguard | Class – A Range – 3000 Fire Rate – 6.65 Hull DMG – 11 Shield DMG – 11 Max Power – 2 Hull – 1 Crew Capacity – 0.5 | 11745 |
Ravager 20MeV Electron Beam | Light Scythe | Class – A Range – 3250 Fire Rate – 3.49 Hull DMG – 15 Shield DMG – 15 Max Power – 4 Hull – 1 Crew Capacity – 0.5 | 5185 |
Jishaku Fe Railgun | Shinigami | Class – B Range – 1000 Fire Rate – 2.5 Hull DMG – 28.60 Shield DMG – 8.80 Max Power – 3 Hull – 3 Crew Capacity – 0.5 | 7934 |
Mauler 106T Cannon | Horizon Defense | Class – B Range – 800 Fire Rate – 2.5 Hull DMG – 25.30 Shield DMG – 7.70 Max Power – 4 Hull – 2 Crew Capacity – 0.5 | 5310 |
Mauler 106T Autocannon | Horizon Defense | Class – B Range – 800 Fire Rate – 5 Hull DMG – 16.5 Shield DMG – 5.5 Max Power – 4 Hull – 2 Crew Capacity – 0.5 | 11412 |
Vanguard Hellfire Autocannon | Vanguard | Class – B Range – 800 Fire Rate – 7.5 Hull DMG – 19.80 Shield DMG – 5.5 Max Power – 2 Hull – 1 Crew Capacity – 0.5 | 2290 |
EMP-500 Suppressor | Ballistic Solutions Inc. | Class – B Range – 800 Fire Rate – 1.5 Hull DMG – 1 Shield DMG – 1 Electromagnetic DMG – 45 Max Power – 4 Hull – 5 Crew Capacity – 0.5 | 37984 |
Dragon 241 Laser | Horizon Defense | Class – B Range – 1000 Fire Rate – 2.5 Hull DMG – 7 Shield DMG – 23 Max Power – 3 Hull – 3 Crew Capacity – 0.5 | 4394 |
Dragon 241P Pulse Laser | Horizon Defense | Class – B Range – 1000 Fire Rate – 5 Hull DMG – 5 Shield DMG – 15 Max Power – 3 Hull – 3 Crew Capacity – 0.5 | 11162 |
Scorch 60MW Laser | Light Scythe | Class – B Range – 1250 Fire Rate – 2.5 Hull DMG – 8 Shield DMG – 25 Max Power – 4 Hull – 4 Crew Capacity – 0.5 | 6643 |
Atlatl 270B Missile Launcher | Light Scythe | Class – B Range – 4000 Fire Rate – 1 Hull DMG – 68 Shield DMG – 68 Max Power – 4 Hull – 3 Crew Capacity – 0.5 | 6768 |
CE-29 Missile Launcher | Ballistic Solutions Inc. | Class – B Range – 4000 Fire Rate – 1.25 Hull DMG – 58 Shield DMG – 58 Max Power – 3 Hull – 4 Crew Capacity – 0.5 | 5102 |
Disruptor 3320 Neutron Beam | Horizon Defense | Class – B Range – 3500 Fire Rate – 2.5 Hull DMG – 20 Shield DMG – 20 Max Power – 3 Hull – 4 Crew Capacity – 0.5 | 4394 |
Disruptor 3320A Auto Neutron Beam | Horizon Defense | Class – B Range – 3500 Fire Rate – 5 Hull DMG – 13 Shield DMG – 13 Max Power – 3 Hull – 4 Crew Capacity – 0.5 | 9079 |
PB-100 Neutron Beam | Ballistic Solutions Inc. | Class – B Range – 3000 Fire Rate – 2.5 Hull DMG – 23 Shield DMG – 23 Max Power – 3 Hull – 3 Crew Capacity – 0.5 | 6747 |
Marauder 114ANC Railgun | Horizon Defense | Class – C Range – 800 Fire Rate – 1.5 Hull DMG – 47.29 Shield DMG – 14.30 Max Power – 4 Hull – 5 Crew Capacity – 0.5 | 7746 |
EMP-1000 Suppressor | Ballistic Solutions Inc. | Class – C Range – 800 Fire Rate – 0.80 Hull DMG – 1 Shield DMG – 1 Electromagnetic DMG – 54 Max Power – 4 Hull – 8 Crew Capacity – 0.5 | 9662 |
Dragon 261 SX Laser | Horizon Defense | Class – C Range – 1000 Fire Rate – 1.5 Hull DMG – 13 Shield DMG – 43 Max Power – 3 Hull – 6 Crew Capacity – 0.5 | 6205 |
Vanguard Starseeker Pulse Laser | Vanguard | Class – C Range – 1000 Fire Rate – 6 Hull DMG – 8 Shield DMG – 21 Max Power – 4 Hull – 6 Crew Capacity – 0.5 | 31820 |
Atlatl 270C Missile Launcher | Light Scythe | Class – C Range – 4000 Fire Rate – 1 Hull DMG – 149 Shield DMG – 149 Max Power – 4 Hull – 6 Crew Capacity – 0.5 | 20325 |
Disruptor 3340 Alpha Beam | Horizon Defense | Class – C Range – 3500 Fire Rate – 1.5 Hull DMG – 38 Shield DMG – 38 Max Power – 3 Hull – 7 Crew Capacity – 0.5 | 6601 |
Vanguard Ares Particle Cannon | Vanguard | Class – C Range – 3000 Fire Rate – 4 Hull DMG – 18 Shield DMG – 18 Max Power – 3 Hull – 5 Crew Capacity – 0.5 | 11328 |
Dragon 231 IR Laser | Horizon Defense | Class – A Range – 1000 Fire Rate – 3.49 Hull DMG – 6 Shield DMG – 19 Max Power – 3 Hull – 1 Crew Capacity – 0.5 | 7559 |
Reza 45 GHz MW Pulse Laser | Shinigami | Class – A Range – 800 Fire Rate – 6.65 Hull DMG – 3 Shield DMG – 11 Max Power – 4 Hull – 1 Crew Capacity – 0.5 | 6643 |
Infiltrator SC-01 Missile Launcher | Horizon Defense | Class – A Range – 3750 Fire Rate – 1 Hull DMG – 40 Shield DMG – 41 Max Power – 3 Hull – 1 Crew Capacity – 0.5 | 2082 |
PBO-40 Auto Electron Beam | Ballistic Solution Inc. | Class – A Range – 3000 Fire Rate – 6.65 Hull DMG – 14 Shield DMG – 14 Max Power – 4 Hull – 1 Crew Capacity – 0.5 | 17992 |
Mauler 106S Shot-Cannon | Horizon Defense | Class – B Range – 800 Fire Rate – 1.75 Hull DMG – 52.80 Shield DMG – 15.40 Max Power – 4 Hull – 2 Crew Capacity – 0.5 | 4165 |
Scorch-S 80MW Pulse Laser Turret | Light Scythe | Class – B Range – 1500 Fire Rate – 3 Hull DMG – 8 Shield DMG – 25 Max Power – 4 Hull – 4 Crew Capacity – 0.5 | 10245 |
Atlatl 290B Missile Launcher | Light Scythe | Class – B Range – 4000 Fire Rate – 1 Hull DMG – 96 Shield DMG – 96 Max Power – 10 Hull – 6 Crew Capacity – 0.5 | 11495 |
Cargo Holds
This part is meant to expand your ship’s storage capacity so that you can hold a larger number of resources/items. The regular cargo holds let you carry anything you want while shielded cargo holds aid you in smuggling contraband.
Part Name | Brand | Stats | Price |
100CM Ballast Cargo Hold | Sextant Shield Systems | Cargo – 210 Hull – 5 | 624 |
100CM Ballast Shielded Cargo Hold | Sextant Shield Systems | Cargo (Shielded) – 160 Hull – 5 | 1249 |
200CM Ballast Cargo Hold | Sextant Shield Systems | Cargo – 245 Hull – 5 | 874 |
200CM Ballast Shielded Cargo Hold | Sextant Shield Systems | Cargo (Shielded) – 190 Hull – 5 | 3956 |
Caravel V101 Cargo Hold | Protectorate Systems | Cargo – 225 Hull – 5 | 708 |
Caravel V101 Shielded Cargo Hold | Protectorate Systems | Cargo (Shielded) – 170 Hull – 5 | 2165 |
Caravel V102 Cargo Hold | Protectorate Systems | Cargo – 300 Hull – 5 | 1249 |
da Gama 1000 Cargo Hold | Panoptes | Cargo – 210 Hull – 5 | 624 |
da Gama 1000 Shielded Cargo Hold | Panoptes | Cargo (Shielded) – 160 Hull – 5 | 1249 |
da Gama 1010 Cargo Hold | Panoptes | Cargo – 245 Hull – 5 | 874 |
Stormax 30 Cargo Hold | Dogstar | Cargo – 210 Hull – 5 | 624 |
Stormax 40 Cargo Hold | Dogstar | Cargo – 245 Hull – 5 | 874 |
Stormax 50 Cargo Hold | Dogstar | Cargo – 320 Hull – 5 | 1374 |
300CM Ballast Cargo Hold | Sextant Shield Systems | Cargo – 320 Hull – 5 | 1374 |
400CM Ballast Cargo Hold | Sextant Shield Systems | Cargo – 435 Hull – 5 | 2124 |
10T Hauler Cargo Hold | Sextant Shield Systems | Cargo – 585 Hull – 5 | 3165 |
Caravel V102 Shielded Cargo Hold | Protectorate Systems | Cargo (Shielded) – 240 Hull – 5 | 8413 |
Caravel V103 Cargo Hold | Protectorate Systems | Cargo – 395 Hull – 5 | 1874 |
Caravel V104 Cargo Hold | Protectorate Systems | Cargo – 550 Hull – 5 | 2915 |
da Gama 1020 Cargo Hold | Panoptes | Cargo – 320 Hull – 5 | 1374 |
Galleon S201 Cargo Hold | Protectorate Systems | Cargo – 720 Hull – 5 | 4040 |
StorMax 60 Cargo Hold | Dogstar | Cargo – 435 Hull – 5 | 2124 |
Bays
This is the landing bay, the small room at the bottom of your ship that opens up into a ramp that lets you walk onto a planet’s surface.
Part Name | Brand | Stats | Price |
120LD Landing Bay | Deimos | Hull – 2 | 708 |
Hope 4 Landing Bay | HopeTech | Hull – 1 | 833 |
NG-6 Landing Bay | Nova Galactic | Hull – 2 | 791 |
Stability Pro Landing Bay | Stroud-Eklund | Hull – 1 | 833 |
Ship Bed 200 Landing Bay | Taiyo Astroneering | Hull – 3 | 1416 |
Engines
This is the part that determines your ship’s overall mobility and inertia, how easy it is to turn around and maneuver in a dog fight, is it clunky or quick, etc.
Part Name | Brand | Stats | Price |
Amun-1 Engine | AmunDunn | Class – A Max power – 2 Engine Thrust – 5660 Maneuvering Thrust – 1550 Engine Health – 50 Hull – 5 Crew Capacity – 0.25 | 3831 |
Amun-2 Engine | AmunDunn | Class – A Max power – 2 Engine Thrust – 7440 Maneuvering Thrust – 1830 Engine Health – 61 Hull – 5 Crew Capacity – 0.25 | 5164 |
Amun-3 Engine | AmunDunn | Class – A Max power – 2 Engine Thrust – 9200 Maneuvering Thrust – 1900 Engine Health – 71 Hull – 5 Crew Capacity – 0.25 | 6913 |
Ares DT10 Engine | Panoptes | Class – A Max power – 2 Engine Thrust – 5660 Maneuvering Thrust – 1800 Engine Health – 45 Hull – 5 Crew Capacity – 0.25 | 3831 |
Ares DT20 Engine | Panoptes | Class – A Max power – 2 Engine Thrust – 7440 Maneuvering Thrust – 1950 Engine Health – 55 Hull – 5 Crew Capacity – 0.25 | 5081 |
Ares DT30 Engine | Panoptes | Class – A Max power – 2 Engine Thrust – 9200 Maneuvering Thrust – 2050 Engine Health – 64 Hull – 5 Crew Capacity – 0.25 | 6747 |
White Dwarf 1000 Engine | Reladyne | Class – A Max power – 3 Engine Thrust – 4650 Maneuvering Thrust – 2445 Engine Health – 48 Hull – 5 Crew Capacity – 0.25 | 2915 |
White Dwarf 1010 Engine | Reladyne | Class – A Max power – 3 Engine Thrust – 7950 Maneuvering Thrust – 2535 Engine Health – 48 Hull – 5 Crew Capacity – 0.25 | 3706 |
White Dwarf 1020 Engine | Reladyne | Class – A Max power – 3 Engine Thrust – 8850 Maneuvering Thrust – 2625 Engine Health – 48 Hull – 5 Crew Capacity – 0.25 | 3998 |
White Dwarf 2000 Engine | Reladyne | Class – A Max power – 3 Engine Thrust – 10500 Maneuvering Thrust – 1785 Engine Health – 58 Hull – 5 Crew Capacity – 0.25 | 4623 |
White Dwarf 2010 Engine | Reladyne | Class – A Max power – 3 Engine Thrust – 11340 Maneuvering Thrust – 2130 Engine Health – 67 Hull – 5 Crew Capacity – 0.25 | 5289 |
White Dwarf 2020 Engine | Reladyne | Class – A Max power – 3 Engine Thrust – 12180 Maneuvering Thrust – 2400 Engine Health – 67 Hull – 5 Crew Capacity – 0.25 | 5747 |
White Dwarf 3000 Engine | Reladyne | Class – A Max power – 3 Engine Thrust – 15270 Maneuvering Thrust – 2820 Engine Health – 75 Hull – 5 Crew Capacity – 0.25 | 8080 |
Nova 1000 Engine | Reladyne | Class – B Max power – 3 Engine Thrust – 12870 Maneuvering Thrust – 3375 Engine Health – 100 Hull – 5 Crew Capacity – 0.25 | 7621 |
Supernova 2000 Engine | Reladyne | Class – C Max power – 3 Engine Thrust – 17670 Maneuvering Thrust – 6450 Engine Health – 136 Hull – 5 Crew Capacity – 0.25 | 15910 |
Fuel Tank
This part is meant to funnel more energy to your Grav drive. The greater your fuel tank capacity, the more that can be supplied to the Grav drive, allowing you to grav-jump even greater distances to far-off star systems.
Part Name | Brand | Stats | Price |
100G He3 Tank | Ballistic Solutions Inc. | Grav Jump Fuel – 50 Hull – 5 | 1041 |
200G He3 Tank | Ballistic Solutions Inc. | Grav Jump Fuel – 70 Hull – 5 | 1374 |
300G He3 Tank | Ballistic Solutions Inc. | Grav Jump Fuel – 100 Hull – 5 | 1874 |
400G He3 Tank | Ballistic Solutions Inc. | Grav Jump Fuel – 140 Hull – 5 | 2582 |
M10 Ulysses He3 Tank | Dogstar | Grav Jump Fuel – 50 Hull – 5 | 1041 |
M20 Ulysses He3 Tank | Dogstar | Grav Jump Fuel – 70 Hull – 5 | 1374 |
M30 Ulysses He3 Tank | Dogstar | Grav Jump Fuel – 100 Hull – 5 | 1874 |
M40 Ulysses He3 Tank | Dogstar | Grav Jump Fuel – 150 Hull – 5 | 2748 |
M50 Ulysses He3 Tank | Dogstar | Grav Jump Fuel – 250 Hull – 5 | 4456 |
Titan 350 He3 Tank | Nautilus | Grav Jump Fuel – 75 Hull – 5 | 1457 |
Titan 450 He3 Tank | Nautilus | Grav Jump Fuel – 110 Hull – 5 | 2082 |
Titan 550 He3 Tank | Nautilus | Grav Jump Fuel – 160 Hull – 5 | 2915 |
Landing Gear
This part constitutes the support that your ship rests on when it lands. The heavier your ship gets, the more ‘Lander Thrust’ stat is required to support the ship’s weight and ensure landing.
Part Name | Brand | Stats | Price |
220CB Landing Gear – Port | Deimos | Lander Thrust – 1 Hull – 2 | 541 |
320CB Landing Gear | Deimos | Lander Thrust – 3 Hull – 4 | 708 |
Hope 5 Landing Gear | HopeTech | Lander Thrust – 1 Hull – 2 | 624 |
Hope 55 Landing Gear | HopeTech | Lander Thrust – 4 Hull – 3 | 1249 |
Hope 6 Landing Gear – Port Fore | HopeTech | Lander Thrust – 2 Hull – 2 | 624 |
NG-10 Landing Gear – Port Fore | Nova Galactic | Lander Thrust – 1 Hull – 2 | 624 |
NG-15 Landing Gear – Port | Nova Galactic | Lander Thrust – 2 Hull – 4 | 1457 |
NG-20 Landing Gear – Fore | Nova Galactic | Lander Thrust – 4 Hull – 4 | 1457 |
Accu-Lander 11 Landing Gear – Port | Stroud-Eklund | Lander Thrust – 2 Hull – 1 | 541 |
Pinpoint 4G Landing Gear | Taiyo Astroneering | Lander Thrust – 2 Hull – 3 | 1145 |
Pinpoint 4G Landing Gear – Port | Taiyo Astroneering | Lander Thrust – 2 Hull – 3 | 1145 |
Pinpoint 4G+ Landing Gear | Taiyo Astroneering | Lander Thrust – 2 Hull – 3 | 1145 |
Grav Drive
The gravity drive differs from the engine in that rather than impact the ship’s general mobility, this one is focused entirely on Grav jumps to get you to far away systems. A fast travel tool in essence. The greater your ship’s mass, the higher the ‘Grav Jump Thrust’ Stat required.
Part Name | Brand | Stats | Price |
Helios 100 Grav Drive | Deep Core | Class – A Max Power – 9 Grav Jump Thrust – 16 Grav Drive Health – 52 Hull – 5 | 5122 |
Helios 200 Grav Drive | Deep Core | Class – A Max Power – 9 Grav Jump Thrust – 19 Grav Drive Health – 57 Hull – 5 | 6080 |
Helios 300 Grav Drive | Deep Core | Class – A Max Power – 9 Grav Jump Thrust – 23 Grav Drive Health – 68 Hull – 5 | 7913 |
NG150 Grav Drive | Nova Galactic | Class – A Max Power – 9 Grav Jump Thrust – 12 Grav Drive Health – 47 Hull – 5 | 4165 |
NG160 Grav Drive | Nova Galactic | Class – A Max Power – 8 Grav Jump Thrust – 13 Grav Drive Health – 52 Hull – 5 | 4498 |
Vanguard Recon Grav Drive | Vanguard | Class – A Max Power – 12 Grav Jump Thrust – 18 Grav Drive Health – 52 Hull – 5 | 5664 |
NG170 Grav Drive | Nova Galactic | Class – A Max Power – 9 Grav Jump Thrust – 14 Grav Drive Health – 61 Hull – 5 | 4914 |
R-1000 Alpha Grav Drive | Reladyne | Class – A Max Power – 9 Grav Jump Thrust – 16 Grav Drive Health – 52 Hull – 5 | 5122 |
R-2000 Alpha Grav Drive | Reladyne | Class – A Max Power – 9 Grav Jump Thrust – 20 Grav Drive Health – 61 Hull – 5 | 6539 |
R-3000 Alpha Grav Drive | Reladyne | Class – A Max Power – 9 Grav Jump Thrust – 23 Grav Drive Health – 76 Hull – 5 | 8163 |
SGD 1100 Grav Drive | Slayton Aerospace | Class – A Max Power – 9 Grav Jump Thrust – 12 Grav Drive Health – 50 Hull – 5 | 4248 |
SGD 1200 Grav Drive | Slayton Aerospace | Class – A Max Power – 9 Grav Jump Thrust – 14 Grav Drive Health – 55 Hull – 5 | 4748 |
SGD 1300 Grav Drive | Slayton Aerospace | Class – A Max Power – 9 Grav Jump Thrust – 16 Grav Drive Health – 65 Hull – 5 | 5497 |
NG200 Grav Drive | Nova Galactic | Class – B Max Power – 10 Grav Jump Thrust – 18 Grav Drive Health – 76 Hull – 5 | 6414 |
NG300 Grav Drive | Nova Galactic | Class – C Max Power – 11 Grav Jump Thrust – 27 Grav Drive Health – 147 Hull – 5 | 15160 |
Hab
This part determines the extended inner area of your ship. If you find ships with much more areas of interest in them, greater walking room etc. it’s because those ships make use of many more Hab parts to flesh out the insides of the ship.
Part Name | Brand | Stats | Price |
Deimos Companionway 1×1 | Deimos | Hull – 5 | 874 |
Deimos All-in-One Berth 2×1 | Deimos | Hull – 5 Passenger Slots – 2 | 1124 |
Deimos Battle Stations 2×2 | Deimos | Hull – 5 Crew Stations – 6 | 1291 |
Deimos Cargo Hall 2×3 | Deimos | Hull – 5 | 1499 |
Deimos All-in-One Berth 3×1 | Deimos | Hull – 5 Passenger Slots – 2 | 1291 |
Deimos Cargo Hall 3×2 | Deimos | Hull – 5 | 1499 |
Deimos Cargo Hall 3×3 | Deimos | Hull – 5 | 1541 |
HopeTech Companionway 1×1 | HopeTech | Hull – 5 | 874 |
HopeTech All-in-One Berth 2×1 | HopeTech | Hull – 5 Passenger Slots – 2 | 1124 |
HopeTech Battle Stations 2×2 | HopeTech | Hull – 5 Crew Stations – 6 | 1291 |
HopeTech Cargo Hall 2×3 | HopeTech | Hull – 5 | 1499 |
HopeTech Engineering Bay 3×1 | HopeTech | Hull – 5 Crew Stations – 1 | 1291 |
HopeTech Cargo Hall 3×2 | HopeTech | Hull – 5 | 1499 |
HopeTech Cargo Hall 3×3 | HopeTech | Hull – 5 | 1541 |
HopeTech Companionship Fuselage A | HopeTech | Hull – 5 | 874 |
HopeTech Companionship Fuselage B | HopeTech | Hull – 5 | 874 |
HopeTech Companionship Fuselage C | HopeTech | Hull – 5 | 874 |
HopeTech Companionship Fuselage D | HopeTech | Hull – 5 | 874 |
HopeTech Hab Cross Brace | HopeTech | Hull – 5 | 1082 |
HopeTech Hab Spine | HopeTech | Hull – 5 | 1082 |
Nova Galactic Storeroom 1×1 | Nova Galactic | Hull – 5 | 874 |
Nova Galactic All-in-One Berth 2×1 A | Nova Galactic | Hull – 5 Passenger Slots – 2 | 1124 |
Nova Galactic All-in-One Berth 2×2 | Nova Galactic | Hull – 5 Passenger Slots – 3 | 1291 |
Nova Galactic Cargo Hall 2×3 | Nova Galactic | Hull – 5 | 1499 |
Nova Galactic Engineering Bay 3×1 | Nova Galactic | Hull – 5 Crew Stations – 1 | 1291 |
Nova Galactic Mess Hall 3×2 | Nova Galactic | Hull – 5 Passenger Slots – 3 | 1499 |
Nova Galactic Cargo Hall 3×3 | Nova Galactic | Hull – 5 | 1541 |
Nova Cross Passage | Nova Galactic | – | 1041 |
Stroud Storeroom 1×1 Port A | Stroud-Eklund | Hull – 5 | 874 |
Stroud Companionway 1×1 | Stroud-Eklund | Hull – 5 | 874 |
Stroud All-in-One Berth 2×1 A | Stroud-Eklund | Hull – 5 Passenger Slots – 2 | 1124 |
Stroud Battle Stations 2×2 | Stroud-Eklund | Hull – 5 Crew Stations – 6 | 1291 |
Stroud Cargo Hall 2×3 | Stroud-Eklund | Hull – 5 | 1499 |
Stroud All-in-One Berth 3×1 | Stroud-Eklund | Hull – 5 Passenger Slots – 2 | 1291 |
Stroud Cargo Hall 3×2 | Stroud-Eklund | Hull – 5 | 1499 |
Taiyo Companionway 1×1 Bottom A | Taiyo Astroneering | Hull – 5 | 874 |
Taiyo Companionway 1×1 Bottom B | Taiyo Astroneering | Hull – 5 | 874 |
Taiyo Companionway 1×1 Mid | Taiyo Astroneering | Hull – 5 | 874 |
Taiyo Companionway 1×1 Top A | Taiyo Astroneering | Hull – 5 | 874 |
Taiyo Companionway 1×1 Top B | Taiyo Astroneering | Hull – 5 | 874 |
Taiyo Companionway 1×1 Top C | Taiyo Astroneering | Hull – 5 | 874 |
Taiyo Companionway 1×1 Top D | Taiyo Astroneering | Hull – 5 | 874 |
Taiyo All-in-One Berth 2×1 Bottom A | Taiyo Astroneering | Hull – 5 Passenger Slots – 2 | 1124 |
Taiyo All-in-One Berth 2×1 Bottom B | Taiyo Astroneering | Hull – 5 Passenger Slots – 2 | 1124 |
Taiyo All-in-One Berth 2×1 Mid | Taiyo Astroneering | Hull – 5 Passenger Slots – 2 | 1124 |
Taiyo All-in-One Berth 2×1 Top A | Taiyo Astroneering | Hull – 5 Passenger Slots – 2 | 1124 |
Taiyo All-in-One Berth 2×1 Top B | Taiyo Astroneering | Hull – 5 Passenger Slots – 2 | 1124 |
Taiyo All-in-One Berth 2×2 Bottom A | Taiyo Astroneering | Hull – 5 Passenger Slots – 3 | 1291 |
Taiyo All-in-One Berth 2×2 Bottom B | Taiyo Astroneering | Hull – 5 Passenger Slots – 3 | 1291 |
Taiyo All-in-One Berth 2×2 Mid | Taiyo Astroneering | Hull – 5 Passenger Slots – 3 | 1291 |
Taiyo All-in-One Berth 2×2 Top A | Taiyo Astroneering | Hull – 5 Passenger Slots – 3 | 1291 |
Taiyo All-in-One Berth 2×2 Top B | Taiyo Astroneering | Hull – 5 Passenger Slots – 3 | 1291 |
Taiyo Engineering Bay 3×1 Bottom A | Taiyo Astroneering | Hull – 5 Crew Stations – 1 | 1291 |
Taiyo Engineering Bay 3×1 Bottom B | Taiyo Astroneering | Hull – 5 Crew Stations – 1 | 1291 |
Taiyo Engineering Bay 3×1 Mid | Taiyo Astroneering | Hull – 5 Crew Stations – 1 | 1166 |
Taiyo Engineering Bay 3×1 Top A | Taiyo Astroneering | Hull – 5 Crew Stations – 1 | 1291 |
Taiyo Engineering Bay 3×1 Top B | Taiyo Astroneering | Hull – 5 Crew Stations – 1 | 1291 |
Taiyo Cargo Hall 3×2 Bottom A | Taiyo Astroneering | Hull – 5 | 1499 |
Taiyo Cargo Hall 3×2 Bottom B | Taiyo Astroneering | Hull – 5 | 1499 |
Taiyo Cargo Hall 3×2 Mid | Taiyo Astroneering | Hull – 5 | 1499 |
Taiyo Cargo Hall 3×2 Top A | Taiyo Astroneering | Hull – 5 | 1499 |
Taiyo Cargo Hall 3×2 Top B | Taiyo Astroneering | Hull – 5 | 1499 |
Reactor
This part is responsible for distributing power to your ship. The stronger your reactor, the more energy you can divert to your weapons, Grav drive, engine etc. Allowing for greater Grav jump distances, engine boosts, weapon spam etc.
Part Name | Brand | Stats | Price |
330T Stellarator Reactor | AmunDunn | Class – A Power Generated – 14 Repair Rate – 1.14 Reactor Health – 23 Hull – 310 Crew Capacity – 1 | 3540 |
340T Stellarator Reactor | AmunDunn | Class – A Power Generated – 16 Repair Rate – 1.25 Reactor Health – 25 Hull – 375 Crew Capacity – 1 | 7372 |
350T Stellarator Reactor | AmunDunn | Class – A Power Generated – 18 Repair Rate – 1.39 Reactor Health – 28 Hull – 405 Crew Capacity – 1 | 11412 |
360T Stellarator Reactor | AmunDunn | Class – A Power Generated – 20 Repair Rate – 1.60 Reactor Health – 32 Hull – 440 Crew Capacity – 1 | 15660 |
114MM Toroidal Reactor | Dogstar | Class – A Power Generated – 16 Repair Rate – 1.10 Reactor Health – 22 Hull – 325 Crew Capacity – 1 | 6705 |
124MM Toroidal Reactor | Dogstar | Class – A Power Generated – 18 Repair Rate – 1.20 Reactor Health – 24 Hull – 355 Crew Capacity – 1 | 10579 |
134MM Toroidal Reactor | Dogstar | Class – A Power Generated – 20 Repair Rate – 1.35 Reactor Health – 27 Hull – 420 Crew Capacity – 1 | 14577 |
Tokamak X-050 Reactor | Xiang | Class – A Power Generated – 16 Repair Rate – 1.25 Reactor Health – 25 Hull – 340 Crew Capacity – 1 | 7372 |
Tokamak X-100 Reactor | Xiang | Class – A Power Generated – 18 Repair Rate – 1.35 Reactor Health – 27 Hull – 390 Crew Capacity – 1 | 11162 |
Tokamak X-120S Reactor | Xiang | Class – A Power Generated – 28 Repair Rate – 1.5 Reactor Health – 30 Hull – 480 Crew Capacity – 1 | 28738 |
Tokamak X-150 Reactor | Xiang | Class – A Power Generated – 20 Repair Rate – 1.5 Reactor Health – 30 Hull – 455 Crew Capacity – 1 | 15243 |
Z-Machine 1000 Reactor | AmunDunn | Class – B Power Generated – 14 Repair Rate – 2.45 Reactor Health – 49 Hull – 505 Crew Capacity – 2 | 9329 |
DC301 Fast Ignition Reactor | Deep Core | Class – B Power Generated – 18 Repair Rate – 2.59 Reactor Health – 52 Hull – 570 Crew Capacity – 2 | 16743 |
101DS Mag Inertial Reactor | Dogstar | Class – B Power Generated – 16 Repair Rate – 2.29 Reactor Health – 46 Hull – 525 Crew Capacity – 2 | 11995 |
Ion Beam H-1010 Reactor | Xiang | Class – B Power Generated – 16 Repair Rate – 2.59 Reactor Health – 52 Hull – 545 Crew Capacity – 2 | 13328 |
Theta Pinch A9 Reactor | AmunDunn | Class – C Power Generated – 18 Repair Rate – 4.25 Reactor Health – 85 Hull – 680 Crew Capacity – 3 | 24073 |
SF10 Sheared Flow Reactor | Dogstar | Class – C Power Generated – 20 Repair Rate – 4.05 Reactor Health – 81 Hull – 705 Crew Capacity – 3 | 26572 |
Shield Generator
This part is self-explanatory. The shields on your ship are meant to soak in damage and maintain the integrity of your ship’s hull.
Part Name | Brand | Stats | Price |
10S Protector Shield Generator | Dogstar | Class – A Max Power – 3 Shield Max Health – 310 Regen Rate – 10% Hull – 5 Crew Capacity – 0.5 | 1874 |
20S Protector Shield Generator | Dogstar | Class – A Max Power – 4 Shield Max Health – 355 Regen Rate – 10% Hull – 5 Crew Capacity – 0.5 | 3332 |
30S Protector Shield Generator | Dogstar | Class – A Max Power – 5 Shield Max Health – 420 Regen Rate – 10% Hull – 5 Crew Capacity – 0.5 | 5539 |
Bastille S80 Shield Generator | Nautilus | Class – A Max Power – 3 Shield Max Health – 325 Regen Rate – 10% Hull – 5 Crew Capacity – 0.5 | 2249 |
Bastille S81 Shield Generator | Nautilus | Class – A Max Power – 4 Shield Max Health – 390 Regen Rate – 10% Hull – 5 Crew Capacity – 0.5 | 4206 |
Bastille S82 Shield Generator | Nautilus | Class – A Max Power – 5 Shield Max Health – 455 Regen Rate – 10% Hull – 5 Crew Capacity – 0.5 | 6414 |
Marduk 1010-A Shield Generator | Protectorate Systems | Class – A Max Power – 4 Shield Max Health – 405 Regen Rate – 10% Hull – 5 Crew Capacity – 0.5 | 5039 |
Deflector SG-10 Shield Generator | Sextant Shield Systems | Class – A Max Power – 3 Shield Max Health – 340 Regen Rate – 10% Hull – 5 Crew Capacity – 0.5 | 2748 |
Deflector SG-20 Shield Generator | Sextant Shield Systems | Class – A Max Power – 4 Shield Max Health – 375 Regen Rate – 10% Hull – 5 Crew Capacity – 0.5 | 3956 |
Deflector SG-30 Shield Generator | Sextant Shield Systems | Class – A Max Power – 5 Shield Max Health – 440 Regen Rate – 10% Hull – 5 Crew Capacity – 0.5 | 6122 |
11T Defender Shield Generator | Dogstar | Class – B Max Power – 5 Shield Max Health – 505 Regen Rate – 7% Hull – 5 Crew Capacity – 0.5 | 11245 |
Tower N400 Shield Generator | Nautilus | Class – B Max Power – 5 Shield Max Health – 545 Regen Rate – 7% Hull – 5 Crew Capacity – 0.5 | 12245 |
Vanguard Bulwark Shield Generator | Vanguard | Class – B Max Power – 12 Shield Max Health – 1450 Regen Rate – 6% Hull – 5 Crew Capacity – 0.5 | 33736 |
Osiris 2020-B Shield Generator | Protectorate Systems | Class – B Max Power – 6 Shield Max Health – 570 Regen Rate – 7% Hull – 5 Crew Capacity – 0.5 | 11578 |
Warden SG-100 Shield Generator | Sextant Shield Systems | Class – B Max Power – 5 Shield Max Health – 525 Regen Rate – 7% Hull – 5 Crew Capacity – 0.5 | 12078 |
101D Guardian Shield Generator | Dogstar | Class – C Max Power – 6 Shield Max Health – 680 Regen Rate – 5% Hull – 5 Crew Capacity – 0.5 | 20908 |
Fortress A1 Shield Generator | Nautilus | Class – C Max Power – 6 Shield Max Health – 705 Regen Rate – 5% Hull – 5 Crew Capacity – 0.5 | 21491 |
Structural Components
The Structural components of your ship in Starfield are meant entirely for aesthetics and design. Feel free to lose yourself in the customization depth offered by these items.
Part Name | Brand | Stats | Price |
Horizon Weapon Mount | Horizon Defense | – | 416 |
Equipment Plate | Taiyo Astroneering | – | 416 |
Porthole – Fore | Nova Galactic | – | 416 |
Porthole – Port | Nova Galactic | – | 416 |
Porthole – Top | Nova Galactic | – | 416 |
Deimos Belly – Fore | Deimos | – | 416 |
Deimos Bracer A | Deimos | – | 416 |
Deimos Braking Engine | Deimos | – | 520 |
Deimos Bumper -Port Fore | Deimos | – | 416 |
Deimos Cowling – Fore | Deimos | – | 416 |
Deimos Hull A | Deimos | – | 520 |
Deimos Radiator | Deimos | – | 416 |
Deimos Skeg A | Deimos | – | 416 |
Deimos Skeg B | Deimos | – | 416 |
Deimos Spine A – Fore | Deimos | – | 416 |
Deimos Spine B | Deimos | – | 416 |
Deimos Spine C – Fore | Deimos | – | 416 |
Deimos Spine D – Fore | Deimos | – | 416 |
Deimos Spine E – Fore | Deimos | – | 416 |
Deimos Spine F – Fore | Deimos | – | 520 |
Deimos Spine G | Deimos | – | 520 |
Deimos Tail A | Deimos | – | 624 |
Deimos Wing A – Port | Deimos | – | 520 |
Deimos Wing B – Port | Deimos | – | 416 |
Deimos Wing C – Port | Deimos | – | 416 |
Deimos Wing D – Port | Deimos | – | 416 |
Deimos Wing E – Port | Deimos | – | 416 |
HopeTech Bumper A | HopeTech | – | 416 |
HopeTech Cap A – Fore | HopeTech | – | 416 |
HopeTech Cap B – Mid | HopeTech | – | 624 |
HopeTech Marker A | HopeTech | – | 416 |
HopeTech Nose B – Fore | HopeTech | – | 416 |
HopeTech Nose A – Port | HopeTech | – | 416 |
HopeTech Pipes – Fore | HopeTech | – | 416 |
HopeTech Pipes A – Mid | HopeTech | – | 416 |
HopeTech Radiator | HopeTech | – | 833 |
HopeTech Riser A | HopeTech | – | 833 |
HopeTech Riser B | HopeTech | – | 520 |
HopeTech Thruster | HopeTech | – | 520 |
Nova Bracer | Nova Galactic | – | 416 |
Nova Braking Engine – Port | Nova Galactic | – | 520 |
Nova Cowling 1L-TF | Nova Galactic | – | 416 |
Nova Cowling 1L-PF | Nova Galactic | – | 416 |
Nova Cowling 2L-PF | Nova Galactic | – | 833 |
Nova Cowling 2L-TF | Nova Galactic | – | 833 |
Nova Engine Struts | Nova Galactic | – | 416 |
Nova Radiator – Port | Nova Galactic | – | 416 |
Nova Radiator – Top | Nova Galactic | – | 416 |
Nova Radiator | Nova Galactic | – | 416 |
Nova Thruster Array – Port | Nova Galactic | – | 416 |
Nova Wing – Port | Nova Galactic | – | 416 |
Nova Weapon Mount | Nova Galactic | – | 520 |
Stroud Braking Engine | Stroud-Eklund | – | 520 |
Stroud Cap A – Port Fore Top | Stroud-Eklund | – | 624 |
Stroud Cap B – Port Aft | Stroud-Eklund | – | 520 |
Stroud Cap B – Aft Top | Stroud-Eklund | – | 833 |
Stroud Cowling 1LA-PT | Stroud-Eklund | – | 520 |
Stroud Cowling 3LA-PT | Stroud-Eklund | – | 1353 |
Stroud Engine Bracer A | Stroud-Eklund | – | 416 |
Stroud Engine Bracer B | Stroud-Eklund | – | 416 |
Stroud Engine Mount | Stroud-Eklund | – | 520 |
Stroud Mid Bracer | Stroud-Eklund | – | 520 |
Stroud Nose Cap 2B – Fore Top | Stroud-Eklund | – | 1666 |
Stroud Nose Cap B – Fore Top | Stroud-Eklund | – | 833 |
Stroud Nose Cap C – Port Fore | Stroud-Eklund | – | 833 |
Stroud Nose Cap D – Port Fore | Stroud-Eklund | – | 833 |
Stroud Nose Cap E | Stroud-Eklund | – | 520 |
Taiyo Braking Engine | Taiyo Astroneering | – | 520 |
Taiyo Braking Engine – Port | Taiyo Astroneering | – | 520 |
Taiyo Cowling – Fore Top | Taiyo Astroneering | – | 416 |
Taiyo End Cap – Port | Taiyo Astroneering | – | 520 |
Taiyo Forward Sensors | Taiyo Astroneering | – | 520 |
Taiyo Mid Cap – Port Top | Taiyo Astroneering | – | 416 |
Taiyo Nose Cap – Port | Taiyo Astroneering | – | 833 |
Taiyo Side Cap – Port | Taiyo Astroneering | – | 416 |
Taiyo Slope Cap – Fore | Taiyo Astroneering | – | 2082 |
Taiyo Spine A | Taiyo Astroneering | – | 416 |