The ancient castle of Hogwarts hides countless mysteries and trials for players. Hogwarts Legacy puzzle doors are one such trial that players can complete to unlock rewards.
Throughout Hogwarts Castle, players will see a number of locked doors with 10 creature symbols on them. It is up to the players to figure out how these puzzle doors can be opened.
Figuring out a solution to these puzzle doors in Hogwarts Legacy typically leads players to two chests, one with a gear item and another one that contains coins so it is definitely worth finding these doors and solving them.
And when you are done with Puzzle doors, you can also check out Hogwarts Legacy Secret Solutions.
Hogwarts Legacy Puzzle Door Key
These doors are scattered around Hogwarts Castle and can be interacted with. However, opening these doors requires a bit of a challenge as it requires you to find a key to understand which symbol represents which number.
Finding the keys to the door will be a complicated task as well. However, as you manage to find the first key, you will get used to this method of search.
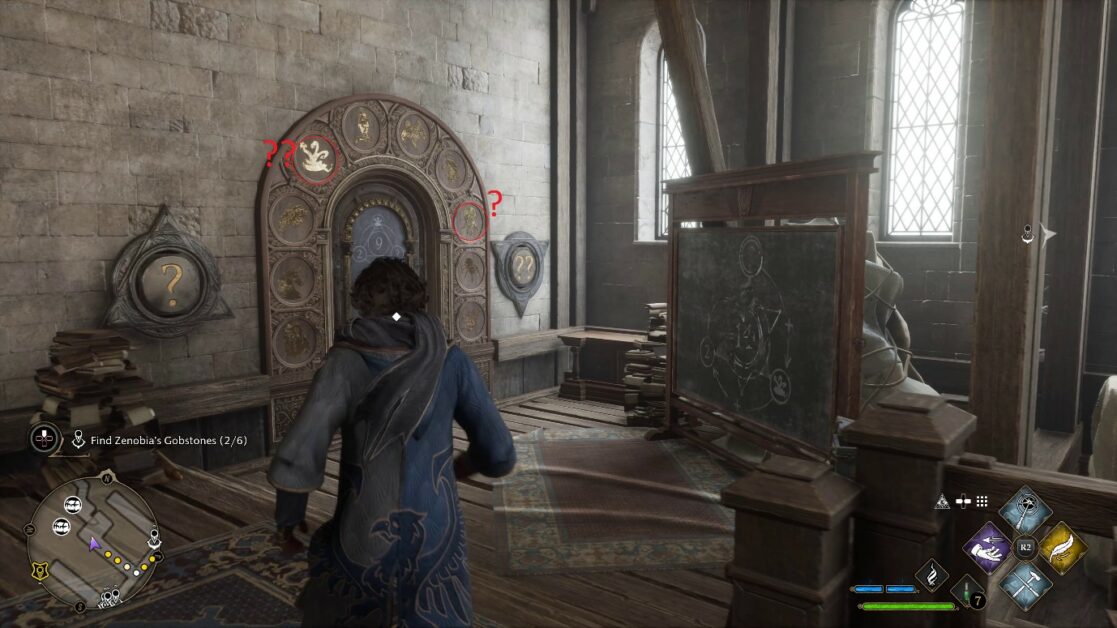
Start off by fast traveling to the Divination Classroom and turn right to enter the Central Hall rafters. You will have to come to this area as part of the Gobstones side quest.
Go through the rafters until you reach a puzzle door with a chalkboard next to it. Right next to the chalkboard, you will find a chest that contains the solution key/legend that you can use to calculate the correct code for every door.
How to solve Puzzle Doors
Whenever players see one of these puzzle doors in Hogwarts, they can interact with the door to reveal a mathematical problem. Yes, opening these doors requires a bit of calculation. Thankfully even if you are bad at basic maths, we will help you find a solution to each puzzle door.
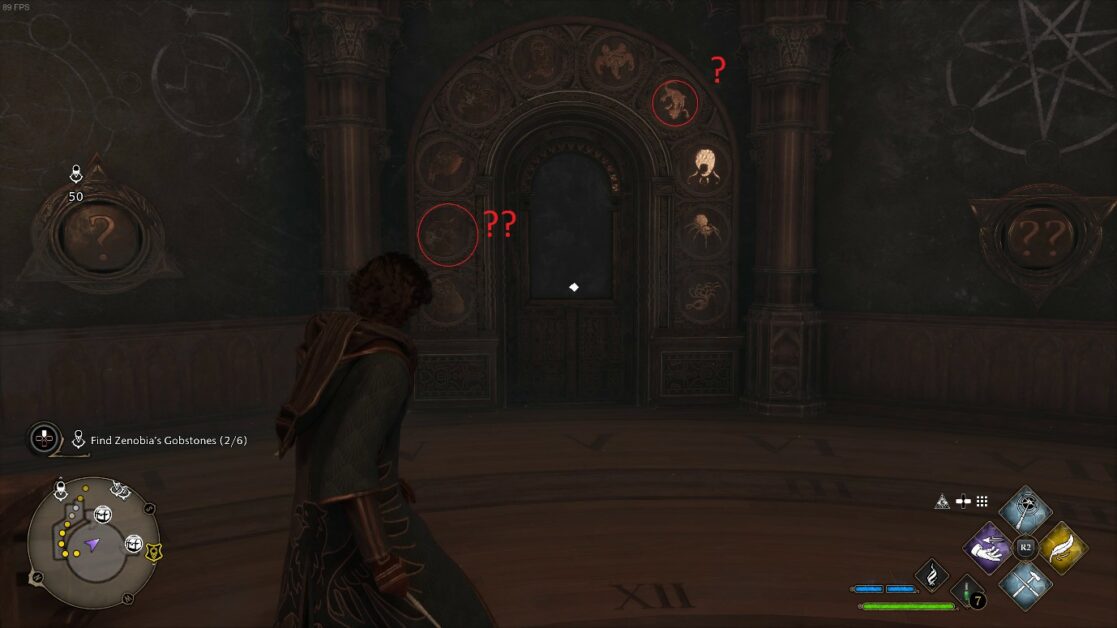
Near each of these doors, players will also spot some question marks on the walls along with the option to Roll when interacted with.
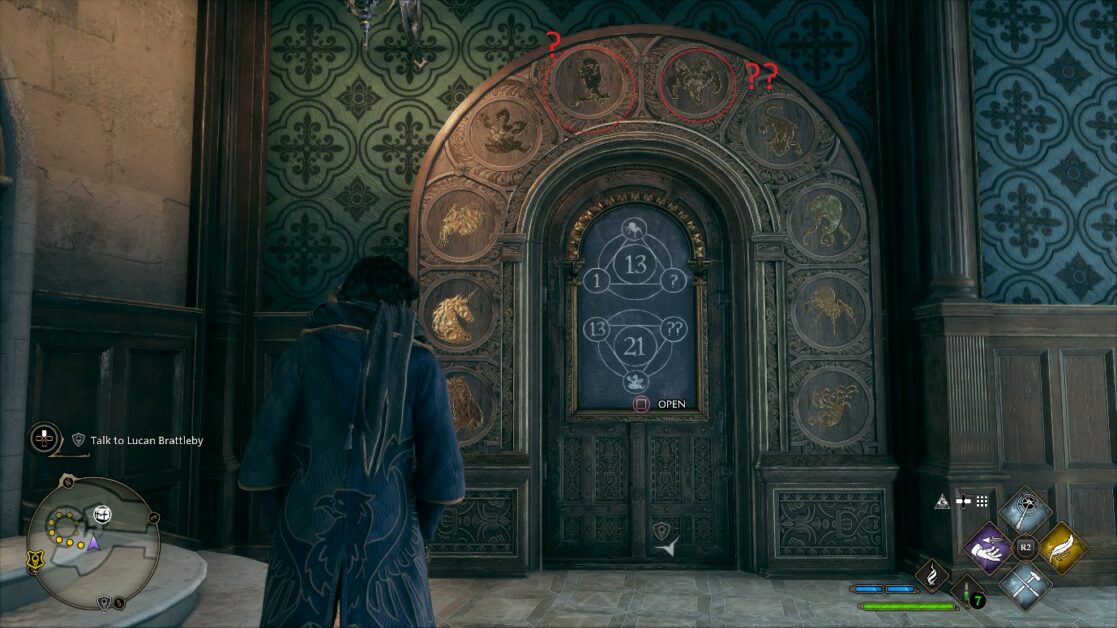
The core of the puzzle solving here is that players need to roll and select the correct creature symbol that corresponds to the equations shown on the door. One of the equations will require players to select the correct creature on the ? while the other will require correct one on ??
The number in the middle of the circle is what you need to achieve by adding the values on each corner of the triangles.
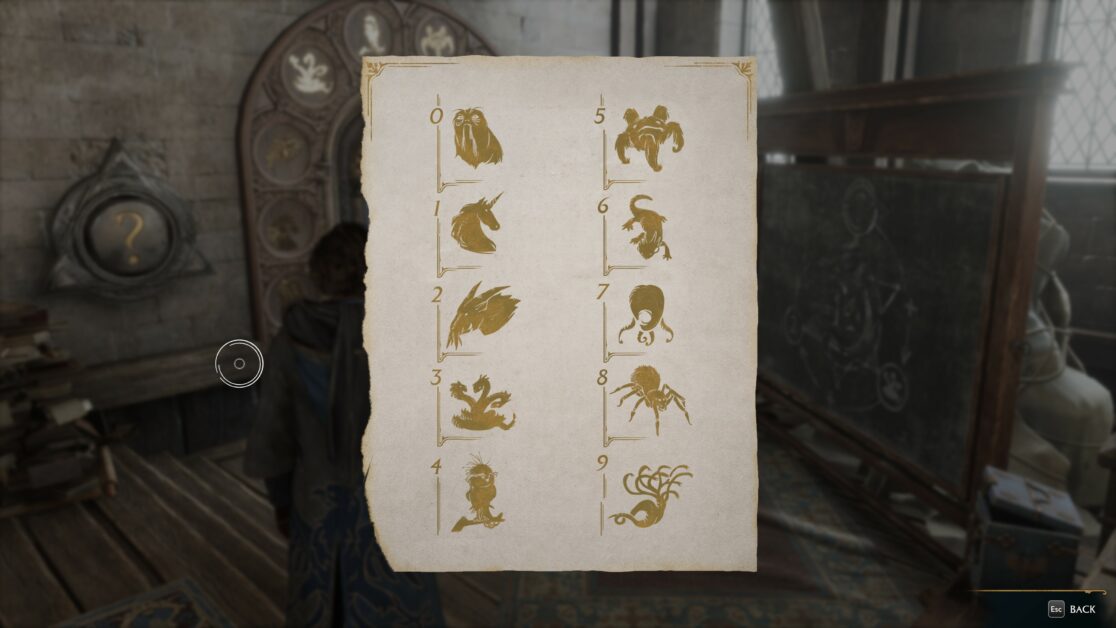
Each creature has a numerical value, from 0 to 9, starting from the bottom left. If that is difficult for you to remember, you can also find a piece of paper in the game that shows the value of each creature symbol.
Hogwarts Legacy Puzzle Doors location
Do keep in mind that you don’t actually need to find this piece of paper before you can start solving these puzzle doors in Hogwarts Legacy. That is why we have given the correct solutions for each puzzle door in this guide.
So without wasting any time let’s discuss how to solve all these puzzles and which symbols to pick.
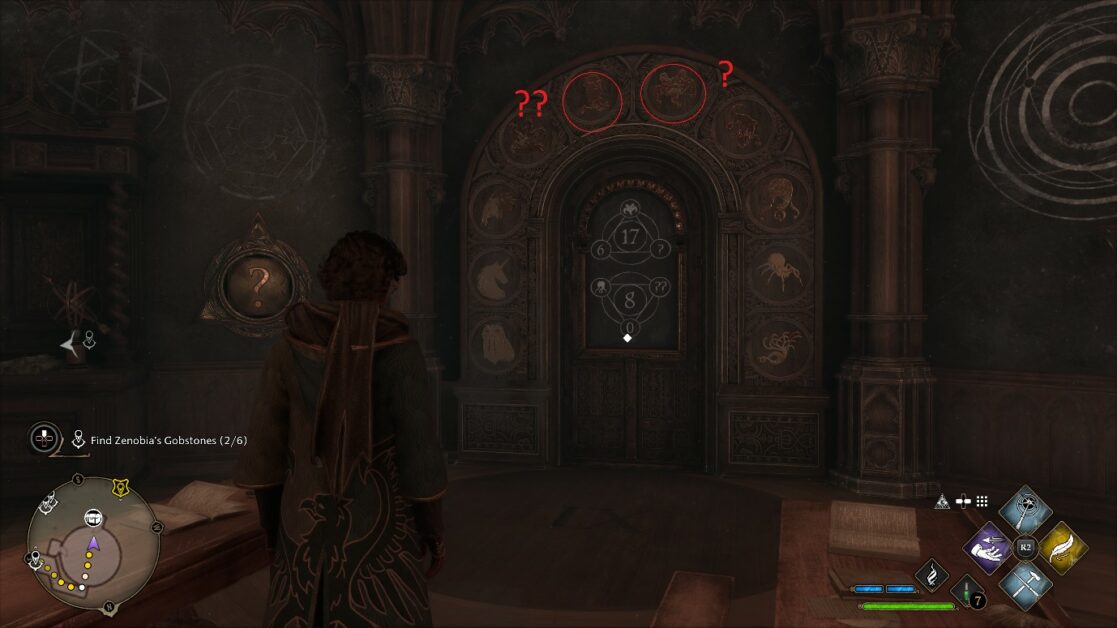
Central Hall
Location: At the Rafters next to the Divination Classroom
Solution: Fwooper (4), Runespoor (3)
Reward: 1x Clothing item, 1x Room Requirement item.
You will come across the Divination Classroom Floo Flame in the library annex. You must turn around from this area and go towards the rafters above Central Hall.
Moving forward, across the hallway, you will be required to take a left, where you will come across the puzzle door. This is the same place where you will find the code for all the doors.
Arithmancy Classroom #1
Location: Arithmancy Classroom
Solution: Salamander (6), Runespoor (3)
Reward: 1x Clothing item, 1x Room Requirement item.
Once you open the central hall rafters puzzle door, you will enter a hallway that leads into the Arithmancy classroom. You will find the door puzzle on the left.
Arithmancy Classroom #2
Location: Arithmancy Classroom
Solution: Salamander (6), Unicorn (1)
Reward: 1x Clothing item, 1x Room Requirement item.
This Puzzle door is found in the same area as the first one found in Arithmancy Classroom. However, you will find this door puzzle on the right.
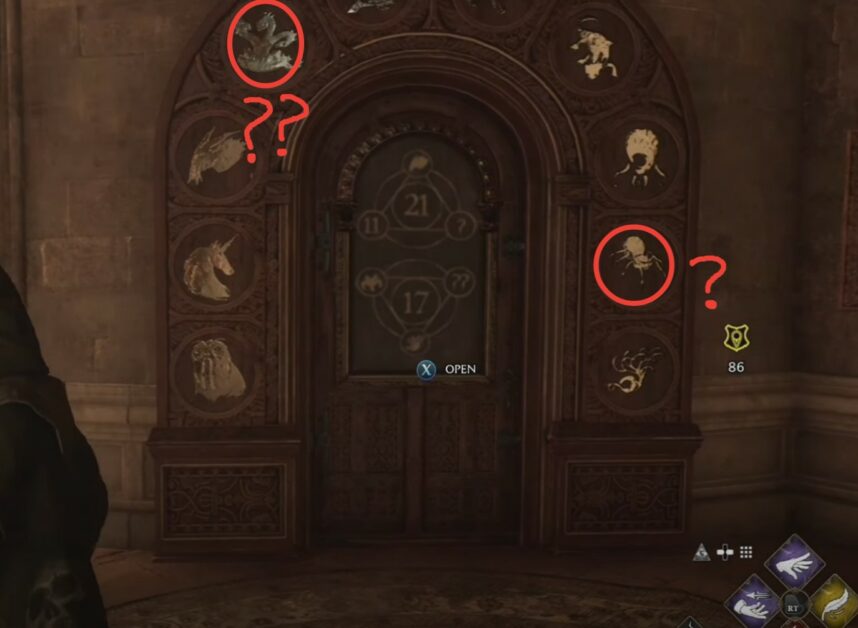
Great Hall
Location: Dining Area
Solution: Acromantula (8), Runespoor (3)
Reward: 1x Clothing item, 1x Room Requirement item
To get to this location, you must fast-travel to the Great Hall floo flame and then turn right and go down the corridor. Here you will come face to face with another puzzle door.
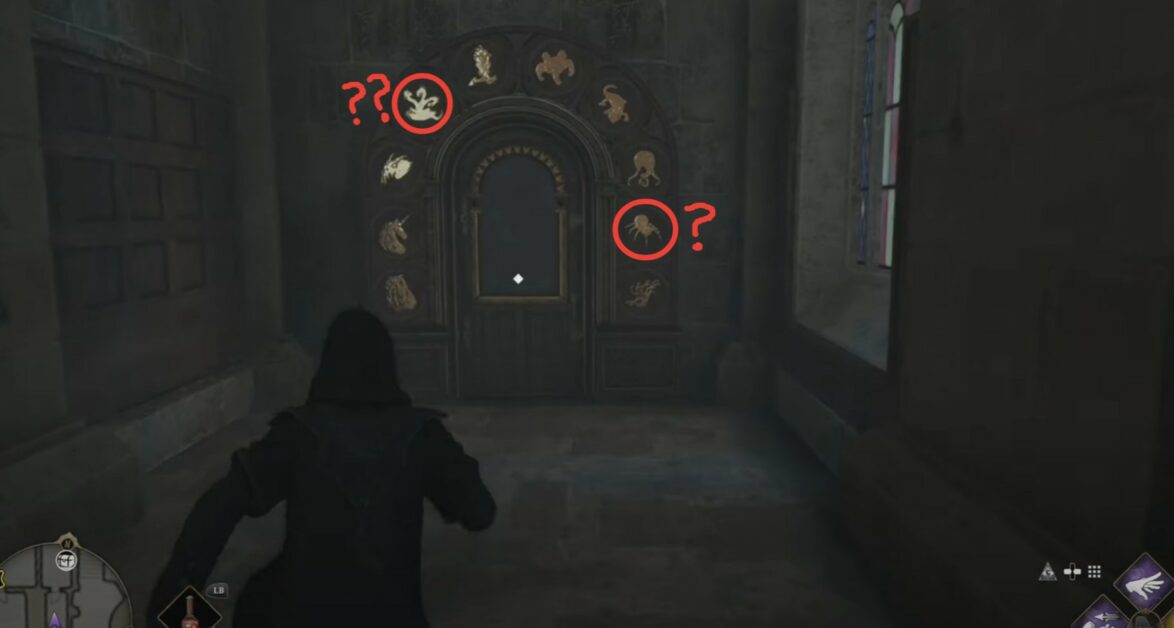
Potions Classroom
Location: Hall past the Potions Classroom
Solution: Acromantula (8), Runespoor (3).
Reward: 1x Clothing item, 1x Room Requirement item.
Fast travel to the Potions classroom floo flame where you will see this puzzle door across the hall. While the ? of this puzzle is right next to you, the ?? symbol is on the floor right above the door. You can reach this place easily through the stairs.
Charms Classroom
Location: Outside of the Charms Classroom
Solution: Graphorn (2), Grindylow (7).
Reward: 1x Clothing item, 1x Room Requirement item.
Fast travel to the Charms class, and you will find this door right next to it.
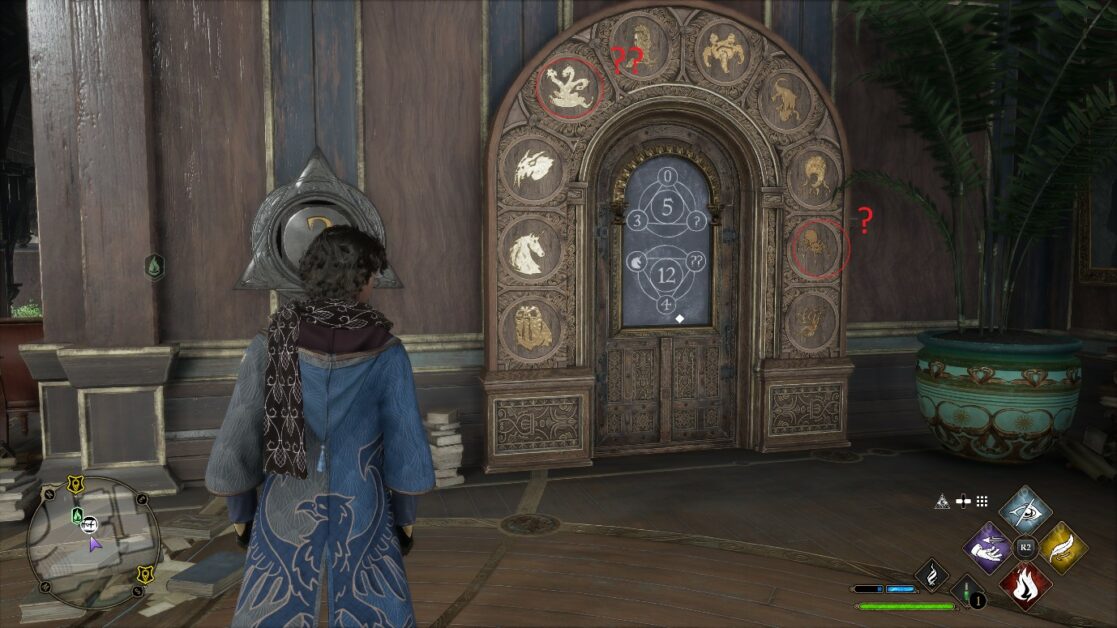
Ravenclaw Tower
Location: Ravenclaw Tower
Solution: Fwooper (4), Quintaped (5).
Reward: 1x Clothing item, 1x Room Requirement item.
Right at the entrance of the Ravenclaw Tower, before heading up or down the stairs, you can see this puzzle door. If you join the Ravenclaw house, this will be the very first door puzzle that can be encountered once you wake up on your first day in Hogwarts.
Grand Staircase
Location: At the Grand Staircase Tower
Solution: Salamander (6), Grindylow (7).
Reward: 1x Clothing item, 1x Room Requirement item.
Head over to the “Grand Staircase” area first. Keep going upwards on the grand staircase and you will spot this puzzle door.
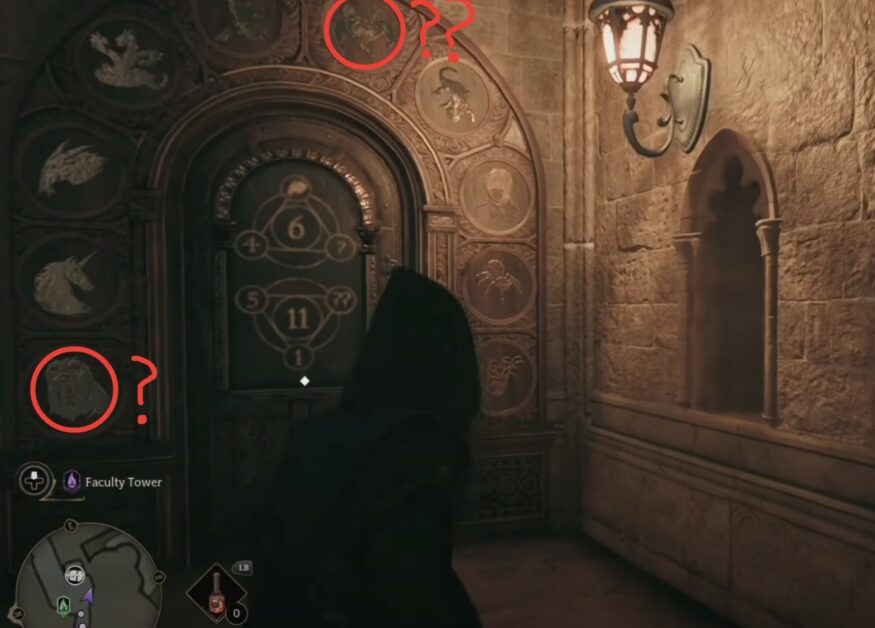
Reception Hall
Location: Faculty Tower floo flame
Solution: Demiguise (0), Hydra (9).
Reward: 1x Clothing item, 1x Room Requirement item.
The Reception Hall puzzle door requires players to first take on a quest called Caretaker’s Lunar Lament first. Once you’ve completed the quest, the tower will also be unlocked.
Fast travel to the Faculty Tower floo flame, turn right to go towards the staircase, and then take another right to reach Reception Hall. You can also go straight down from the Grand Staircase Tower floo flame to reach this area.
North Hall
Location: Near the Transfiguration Classroom,
Solution: Acromantula (8), Runespoor (3).
Reward: 1x Clothing item, 1x Room Requirement item.
Go across the Transfiguration Classroom, and head inside the unlocked doors to the left. Head upstairs and through the locked door to find the puzzle door at the end of the hallway.