In this God of War Muspelheim Guide, we will guide you on how to clear the Muspelheim Favor. Muspelheim is one of the realms that are unlocked when you collect four Muspelheim Language Ciphers in the ‘The Realm of Fire’ favor.
How to Get to Muspelheim in God of War
Muspelheim is one of six optional Realms in God of War. This means that it won’t be unlocked by default. To unlock Muspelheim, you need to complete the favor “The Realm of Fire”.
In this favor, you need to collect four different Muspelheim Language Ciphers throughout GoW. Once you’ve done that, you’ll be able to access Muspelheim from the World Tree.
Before you head over to Muspelheim in GoW and compete in these Trials, make sure you’re at least level 7. If you’re below level 7, you’ll have a very hard time completing the Trials in Muspelheim.
What Kind of Challenges are in Muspelheim
In Muspelheim in God of War, you’ll be facing a series of timed arena challenges called “Trials”. There will be five arenas in Muspelheim, with each arena having a unique Trial available at two difficulties. So there will be 10 Trials in total to complete initially.
Each arena will first have a Normal Trial, which will then be followed by a Hard Trial. To be able to progress forward, you need to complete both the Normal and Hard Trial of each arena.
To start a Muspelheim trial, simply interact with the sword present in the middle of the arena.
When you complete all five arenas by finishing the 10 Trials, you’ll make your way up to the top of the volcano where you’ll face the final boss, the Valkyrie.
Once the boss is defeated, your journey in this realm will not be over yet, after it, you will unlock a new “Impossible” Trial difficulty. Each arena will have one Impossible Trial, so you’ll have 5 Impossible Trials in total to compete in.
Completing a Muspelheim Trial on the Impossible Difficulty in God of War will reward you with a key. And once you collect 3 keys, you can go back to the top of the volcano and compete in the sixth and final Trial.
The Muspelheim Realm in GoW has its own currency, Smoldering Ember, that you will earn exclusively in this realm. If you want to craft or upgrade Muspelheim gear, you will require this currency.
In addition, you will find the currency in different containers lying around throughout your journey. You will also get some really good gear that is very helpful in this area. You can find the details of the gear in the table below:
| Gear Type | Gear Name |
| Armor Set | Smoldering Brimstone Armor Set (3 Piece) |
| Armor Set | Fallen Ash Armor Set (3 Piece) |
| Armor Set | Blazing Magma Armor Set (3 Piece) |
| Talisman | Sinmara’s Cinder |
| Enchantment | Muspelheim’s Eye of Power |
| Axe Pommel | Sutr’s Grip of Flame |
| Blades Pommel | Grips of the Forgotten Flame |
How to Get the Fire Armor Pieces in God of War
The Fallen Ash, Blazing Magma Smouldering Brimstone armor sets have different abilities. Each set consists of a chest, waist and wrist pieces and you’ll get greater bonuses with each matching piece of armor you wear.
Once you get access to Muspelheim, you can purchase all the armor early on with Smouldering Embers during the first challenges, and get level six upgrades with the Crest of Flame you get.
However, to fully upgrade a set, and use even more exotic resources, you need Surtr’s Hidden Trials. The Greater Crest of Flame and Crest of Surtr are additions in it.
To reach level 8, you’ll need Niflheim Alloy, Aerisbane and Haze Weaves from Niflheim, and Pristine Dust, Ore, and Scale which you can find in Midgard.
Once you are completing the ‘The Realm of Fire’ favor, you will collect four Muspelheim Language Ciphers, which will grant you access to this new realm to explore and face the challenges within.
Once you have unlocked the realm, head to the Realm Travel Room, select Muspelheim and exit the temple.
As you enter the realm, cross the bridge and you will come across Brok who has a shop here near a Mystic gateway and Jotnar Shrine. At this point, if you head west and climb a wall on the right side, you will find a coffin.
Collect the Smoldering Ember from there and head back to the left side. Cross the lava river and you will drop down in the first arena.
God of War Muspelheim Arena Trials
Trial I – Time Attack and Resurrection
The first trial you need to clear comes in two phases, normal and hard. The normal phase is a Time Attack while the hard phase is Resurrection.
For the first phase, you will have 3 minutes and you will have to eliminate all enemies in the arena, 15 enemies in total.
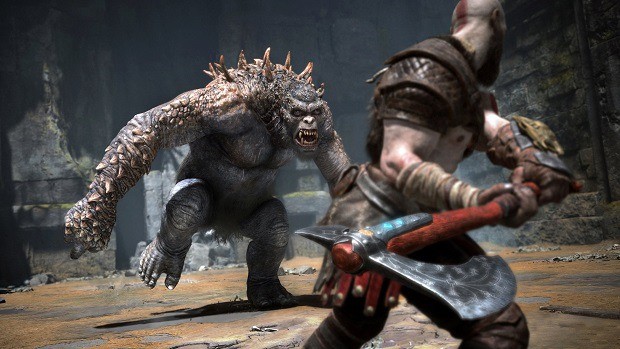
For this fight, you have to deal with different types of Draugr, ranging from levels 2-4 of basic Draugr, Heavy Draugr, and Ranged Draugr. Attacks with splash damage and Spartan Rage work very well here.
Once the trial is complete, you will be able to unlock a Legendary Chest to collect Smoldering Amber and Hacksilver as rewards.
Once done, interact with the sword again to start the second phase of the arena. For this hard phase of the trial, you must defeat the enemies that spawn in the arena.
The first wave will consist of Draugrs of all kind. Make sure you are able to kill all three of them within a short interval of each other. This is to avoid them getting resurrected even if one gets left over.
Use Atreus’ arrows and your Leviathan Axe to do the job.
For the second wave, be ready to face an Ogre and a Revenant. Have Atreus stun the Revenant with his arrows and in the meantime, deal damage to Ogre. After you’ve dealt with the Ogre, execute the finishing blow on the Revenant.
In the final wave, freeze off the two Tatzelwurns while you finish off the 2 wolves in the round. Then head back to deal with those Tatzelwurns with your Runic Attacks.
Rewards
The rewards for this Trial are:
- Normal: Legendary Chest containing Smoldering Ember and Hacksilver.
- Hard: Smoldering Ember and Hacksilver
Trial II – Survival and Stunner
Once you have completed both phases of the first trial, continue down the path to get to the next trial. Similar to the first trial, the second trial also comes with a normal and hard phase.
This time, the normal phase is Survival while the hard phase is Stunner.
For the first phase, all you need to do is survive for 5 minutes. Be ready to take on Draugrs, Shadows, Reavers, and Poison Wolves. Also, you’ll have to be worried about the lava cutting in the arena.
What works best is that you enter a corner so you can deal with enemies from all sides, have all of them in your view. Be sure to grab the health crystals from downed enemies to regenerate health every once in a while.
Once you have survived for 5 minutes, you can start with the second phase of the trial. For this phase, since enemies will regenerate health instantly, your best guess is using stun grabs.
Enemies will spawn in five waves so you will be in for a tough fight. Kratos’s fists and Atreus’s shock arrows cause the most effective stun attacks so they should be your priority for this fight.
Additionally, you can kick the Draugrs off of the cliffs for quicker results.
Rewards
The rewards for this Trial are:
- Normal: Smoldering Ember and Hacksilver.
- Hard: Smoldering Ember and Hacksilver
Trial III – Shield Breaker and Location Challenge
Complete both phases of the second trial and continue down the path to tackle your third trial. On the way to the third trial, you can search the path on the left for some bonus Hacksilver. This area is before you start climbing the cliffs.
This time too you will have to clear two phases. The normal phase of the third trial is a Shield Breaker while the hard phase is Location Challenge.
For the first phase, you must break the shield of Dark Elf Lord Elite who is invulnerable to any damage unless the weaker enemies are eliminated.
The enemies will come in five waves. Once you defeat a wave, the shield is temporarily lowered and you can inflict damage on the elite. Once his health is down, the phase will be complete.
In this first trial, you’ll have to deal with a bunch of Dark Elf Warriors, Dark Elf Lords, and some Nightmares.
Additionally, in the latter wave, you’ll have to bring down an extremely agile Revenant. Stun this fella with Atreus arrows to close the matter quickly.
The second phase of this trial could be tricky because you must defeat enemies inside the gold rings. Enemies will come in three waves and you must defeat five of them while they are inside the golden rings.
Keep in mind that each wave will have a time limit and the gold rings will move after every kill making the challenge much harder to complete.
Also, avoid stun attacks and bare-fisted moves since these will send the enemies out of the circle making the ordeal futile. Deal with Draugrs and Dark Elves to complete the trial.
Rewards
The rewards for this Trial are:
- Normal: Smoldering Ember, Hacksilver and Crest of Flame.
- Hard: Smoldering Ember, Hacksilver and Crest of Flame
Trial IV – 100 Enemy Challenge and Protector
Trial IV also comes in two phases, normal and hard. The normal phase is a 100 Enemy Challenge and the hard phase is Protector.
For the first part, all you need to do is defeat 100 enemies. There is no time or location limit so you can use whatever you want to defeat 100 enemies.
A number on the screen will show how much enemies you need to kill to complete the phase.
Be ready to take almost every type of enemy while clinging to that low health bar. That is unless; you’re equipped with pommels to grant health.
Better yet, the Talisman of Concentrated Vitality works quite well. We recommend you to play extremely defensively.
For the second phase of the trial, you must protect Atreus and prevent the enemies from capturing him. In this phase, you must always keep Atreus in your view. If Atreus is incapacitated or grabbed three times, the trial will fail.
Your focus should be on the Son Killer Heavy Draugrs that spawn in waves. There will be three waves of enemies. In the second wave, an Ogre will also spawn; you can use it against the Draugrs.
Rewards
The rewards for this Trial are:
- Normal: Smoldering Ember, Hacksilver and Crest of Flame.
- Hard: Smoldering Ember, Hacksilver and Crest of Flame
Trial V – Time Slips Away… and Untouchable
Before you start Trial V, while you are climbing the steep cliff, if you shimmy left you can find a coffin. Loot the coffin and continue ahead towards the trail. This trial has two phases ready for you.
The normal phase is Time Slips Away while the hard phase is Untouchable.
During the first phase, you need to defeat two waves of enemies. This time you have a small amount of time but each kill will add 30 seconds to the timer. Defeat all waves to complete the phase.
Save your Spartan Rage for the last wave because you will have to deal with a Soul Devourer, which is a mini-boss. If you use it before then you might not have enough time to defeat it with normal attacks.
The second phase of this trial is Untouchable. This is a very tough trial because you must defeat all enemies in the trial without taking any damage. A single hit will fail the trial.
This is the final trial before the boss battle so it will take some time to complete.
Enemies will spawn in four waves and a total of 20 enemies will spawn. For this challenge, you must focus on evading damage rather than dealing damage.
Try to keep your distance from the enemies by throwing the Leviathan Axe as soon as they spawn. Also, use Atreus to his full potential as his arrows will eliminate Nightmares and other fast moving enemies.
Rewards
The rewards for this Trial are:
- Normal: Smoldering Ember, Hacksilver and Crest of Flame.
- Hard: Smoldering Ember, Hacksilver and Crest of Flame
How to Defeat Valkyrie Gondul in God of War
Once you have completed the five trials and their hardened phases, you are allowed access to the top of the volcano where you must fight and free the Valkyrie Gondul. We recommend that you try to maintain your distance for this boss battle.
Throw your axe at her as much as possible and use Atreus’s arrows to deal as much damage as possible.
Almost all her moves are unblockable, so dodging and evading her strikes is the key here. Avoid meteor strikes and the winged attacks.
Also, be ready to dodge not once but twice when she screams ‘Valhalla’ to avoid both the meteor and her unblockable grab. Lastly, her mace attacks have a decent range, so use Atreus’ arrows to interrupt her whenever she’s about to use it.
Once you have defeated the Valkyrie, you will get access to the impossible trials.
Rewards
The rewards for this boss fight are:
- Crest of Surtrs
- Crests of Flame
- Greater Crests of Flame
- Hacksilver
- Raging Inferno of Muspelheim
- Smoldering Ember
God of War Impossible Trials
Once the boss is defeated, you will find a new sword in the middle of the arena. Here you can take part in the final gauntlet of the realm. To enter here, you must first obtain three keys by completing Impossible Trials.
Each trial you complete earns you a key and you need three keys to enter the gauntlet. Finish any three of these challenges and you will be able to enter the gauntlet.
Aside from the keys, you’ll also earn a bunch of rare resources as rewards from the Impossible Trials. You can use these resources to upgrade your armor and gear to higher levels.
To start an Impossible Trial, you must head to the sword locations of the previous trials.
Trial I (Impossible) – Untouchable
One of the trials that will get you a key is Untouchable. You will need to defeat 20 enemies without taking any damage.
The enemies are much more harder and aggressive this time around. Complete the challenge to earn a key. Use Atreus to distract enemies while playing very defensively.
After taking out a few enemies, the white walkers will appear wielding ice spears. Atreus should shoot at them while you’re guarding yourself. Be sure to save up some Spartan Rage for the Soul Devourer to finish him off quickly.
Trial II (Impossible) – Time Attack
Similar to before, this trial requires you to kill all enemies before the time runs out. Enemies will be much harder and more aggressive than before. You will have four minutes to complete this trial.
Complete the challenge to earn a key. We recommend making use of your Runic Attacks and Summons as much as possible to do a lot of damage to the Revenants. Freeze them by tossing the axe at them and then proceed to melee them.
Also, hit the Tatzelwurms your Heavy Axe throw to keep them above ground and then attack when they’re stuck.
Trial III (Impossible) – Kill Location
In this trial, you must defeat all enemies inside the gold rings. The enemies will spawn in three waves and they will be much harder to kill this time around, not to mention more aggressive as well. Any kill outside the rings will not be counted.
The Blades of Chaos are the ideal weapon choice for this one since you can pull enemies into the ring and kill them. The Ogres can be stunned and then you can ride them in the rings to cause massive damage.
You must defeat 10 enemies in a ring for a wave to end. Each wave will also come with a timer. Complete the challenge to earn a key.
Trial IV (Impossible) – Stunner
For this challenge, you will be required to defeat all enemies with Stun Grabs. When you hit enemies, they will quickly regenerate health so you must rely on Stun Grabs for this fight.
Kratos’s fists and Atreus’s shock arrows work very well against them. Build up the stun meter by meleeing and stunning while having the boy shot arrows at them.
For Dark Elfs, you’ll need to do a Heavy Axe throw to freeze them. You can Spartan Kick them into the lava or off the edge of the cliff.
Trial V (Impossible) – Time Slips Away
This challenge will give you a small amount of time at the start of the challenge and you must defeat more enemies to increase the time.
Each kill will add 30 seconds but your total time cannot go above 1:30. You will have to deal with five waves of enemies.
The best way of this challenge is to keep enemy health low and kill them only when the timer comes under a minute mark. Defeat all enemies without letting the timer reach 0 to earn a key.
We recommend saving your Spartan Rage for Wave 5 since you’ll encounter Shield Draugrs and Hel-Travelers. Stun grabs and Runic Attacks/Summons are the best options here.
These are five Impossible Challenges that will give you a key for the final gauntlet. Keep in mind that you can complete these challenges in any order while the first three challenges you complete will give you a key.
The fourth challenge you complete will not give you a key.
The Gauntlet – Trial VI (Impossible)
The Gauntlet is a battle of your wits as it is very difficult to complete. There are three different challenges in this gauntlet. Each time you enter the gauntlet, you’ll be given a different challenge.
There are three winning conditions for the gauntlet. You can check the table below for them:
| Completion Goal | Gold Target | Silver Target | Bronze Target |
| Defeat 50 enemies as quickly as possible | 8:00 | 16:00 | 32:00 |
| Defeat as many enemies as possible before the timer runs out | 50 | 35 | 20 |
| Defeat all enemies without getting hit | 35 | 20 | 8 |
Finishing this gauntlet unlocks the ‘Fire and Brimstone’ trophy. Silver gives you Greater Crest of Flame, and Bronze just the Crest of Flame. Taking home the Gold will give you the following rewards:
- 50x Smoldering Ember
- 20x Crest of Flame
- 12x Greater Crest of Flame
- 5x Crest of Surtr
- Enchantments and Hacksilver