Tomb of Fahir is the third dungeon in Diablo Immortal. This guide will cover how to clear the Tomb of Fahir in Diablo Immortal to ensure you don’t struggle with the challenges that await.
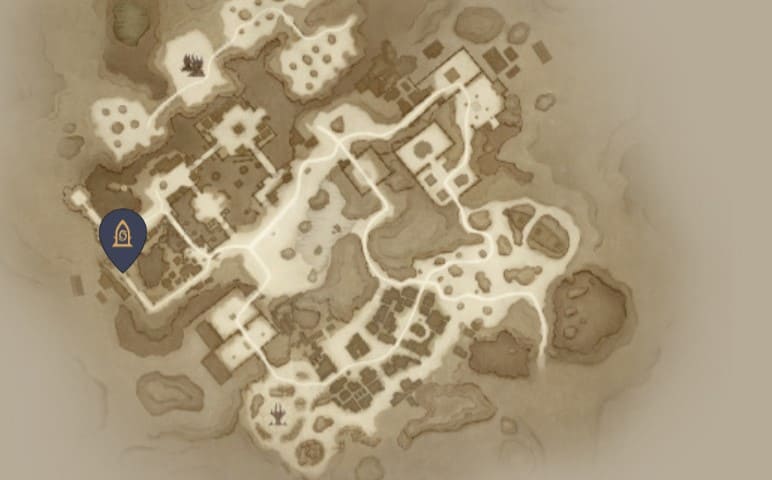
Diablo Immortal Tomb of Fahir Location
This dungeon can be unlocked when you reach level 28 while doing the Shassar Sea zone’s questline. Once you have completed Tabri’s request, she will then command Peth to open the path to the Library of Zoltun Kulle.
The dungeon will be located close to Sereth Outpost Waypoint.
Tomb of Fahir Set items (Drops)
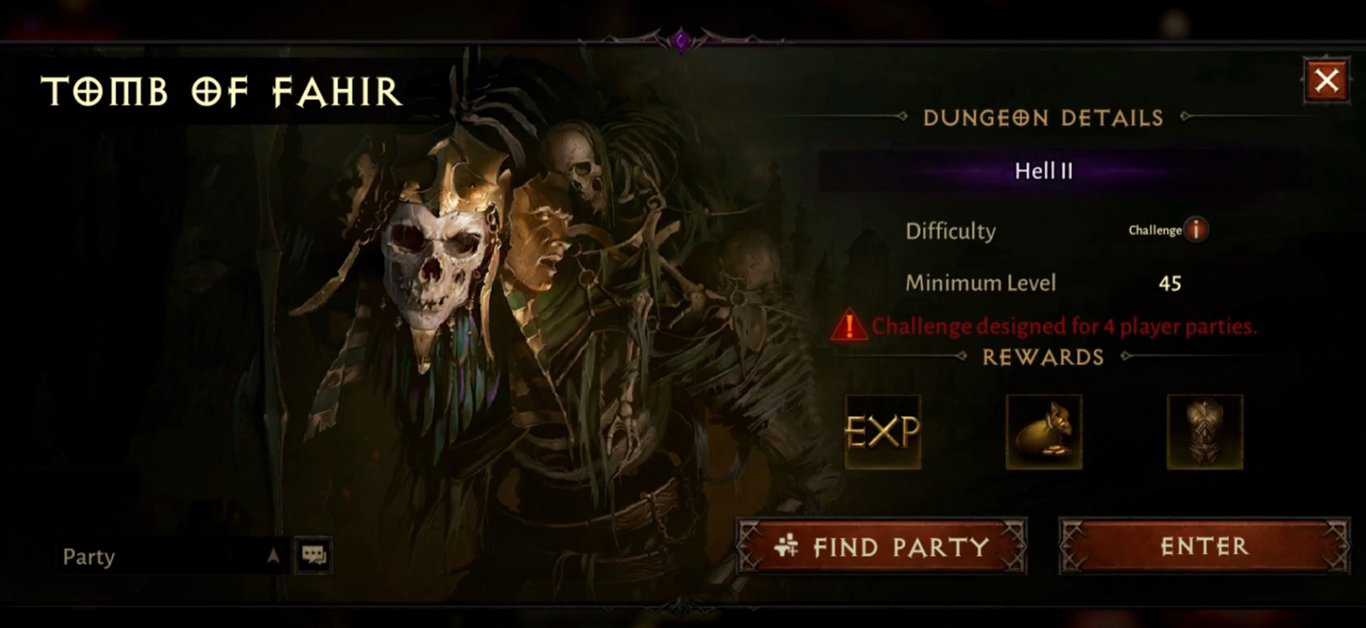
The first time you play this dungeon, you will be doing it as part of the questline. However, you can play the dungeon again on a higher difficulty to increase the challenge and get better loot.
Set items start dropping when you are on Hell 1 difficulty and that is mostly what you need in Diablo Immortal.
After you are done with the dungeon, The bosses in Tomb of Fahir will drop
- Braided Serpent of Shal’baas(Ring) Hell 2
- Exemplar’s Urge(waist) Hell 1
- Issatar Undone(ring) Hell 2
- Mountebank’s Bravado(waist) Hell 1
- Mountebank’s Flourish(amulet) Hell 2
- Open Gut(waist) Hell 2
- Shepherd and Beastmaster(gloves) hell 1
- Storm-Tack of Shal’baas(waist) Hell 1
- The Tyrant(boots) Hell 2
- Whipcrack(waist) Hell 1
Tomb of Fahir Bosses
This dungeon is a bit complex compared to other dungeons. The first boss you will encounter is Icon of Rebirth to the far left side of the map. After you take down the boss, he will give you a fair amount of experience along with some loot depending on the difficulty you are playing at.
For the next boss, you will run to the right side of the map. There you will encounter Icon of Souls. Again, defeat the boss which will give you experience and some loot.
Now you travel towards the inner chamber in the middle, where King Fahir will spawn. The boss does AOE knockback attacks.
After you have defeated him, you will have to take the path in front of you towards the elevator.
While you descend to the depths, you will encounter yet another foe, The Colossal Tomb Borer. He is pretty easy to fight against only if you do not stand in front of his face which will knock you back.
After you have defeated him, you will reach the bottom of the depth and encounter Segithis, the Clusterflesh.
Tomb of Fahir Walkthrough
How to Defeat Icon of Rebirth and Icon of Souls
They are more like mini-bosses in the game rather than actual bosses. They are comparatively easy to defeat without actually struggling.
Icon of Rebirth summons Lacuni Slasher, Lacuni Huntress and Hollow One. Icon of Souls summons Spiderling, Toxic Lurker, Broodmother, Skeletal Archer, and Skeletal Warrior.
Icon of Souls channels a blue laser beam after slamming his staff on the ground. Just run around to avoid the damage.
AoEs are very useful in the fight against both these bosses. Whenever they spawn melee minions, kite them to the boss and then focus your AoEs on both the boss and the minions to deal with them together.
How to Defeat King Fahir
The only strategy to follow against King Fahir is to tank the knockback attacks. To do that you will have to stand in front of the pillar to tank the damage. You will take moderate damage. But also deal lots of damage. Keep your heals ready as well just in case you take a lot of damage.
Throughout the fight, King Fahir will spawn mummies with a green-ish glow on them. Run away from those as these mummies explode after a while.
King Fahir will slam his staff on the ground multiple times. Whenever he does that, be ready as this means he is about to throw bombs at the players. Just keep moving to avoid any damage from those.
When a large telegraphed circle appears around King Fahir, he is about to pull the players close to him and knock them back dealing a lot of damage. Whenever you see the circle, try to get out of it as quickly as possible.
How to Defeat Segithis, the Clusterflesh
After defeating King Fahir, head towards the elevator and activate it. Multiple small enemies will attack players on this elevator ride but you should have no trouble dispatching them.
Eventually, a Tomb Borer will latch onto the platform and start spawning more monsters. Quickly kill the tomb borer so you don’t get overwhelmed by this new wave of enemies.
Once the fight against Segithis starts, make sure you always stay on the move and avoid the venom orbs it spits out in a cone. If struck by these orbs, players will receive poison damage over time.
Segithis will periodically do a swipe attack which should be avoided. Upon getting hit by it, players will get knocked back and receive a fair amount of damage.
When Segithis creates a circle around a player, be prepared to run away. You have about 1s before the circle is completed and if you are caught in it, Segithis will web you up and pull you close to deal significant damage.
Keep attacking her back legs until her head is lowered allowing you to deal maximum damage.