
Call of Duty: Black Ops 3 gives players a major throwback by introducing the remastered version of the Call of the Dead map, including its own easter egg. This easter egg/main quest is the same as that of the original Call of the Dead map in Call of Duty: Black Ops, with little to no difference.
In both the remastered and the older version, you can complete the easter egg both solo and in multiplayer (minimum 2). There are a few extra steps if you are doing the easter egg in multiplayer though, completing which will allow you to send the Original Characters to Paradise.
In CoD: Black Ops, completing all the steps of the easter egg in co-op earns you the Ensemble cast achievement, and the solo path gives you the Stand-in achievement.
Since there is no difference in the steps to complete it, you can complete the Call of the Dead remake easter egg in the same way as you did in the older version. If you haven’t done that, let us walk you through the steps in detail.
How to complete the Call of the Dead Easter Egg
Completing the main easter egg in the Call of the Dead Remastered map requires a lot of effort, so make sure to buckle up before getting started. Doing this solo is the easier way to go, though you don’t necessarily have to complete all the steps in co-op.
Doing the easter-egg solo is the fastest way because you are required to complete less number of steps compared to multiplayer. Even if you are planning to do it in co-op, these steps will be fundamental, and the extra steps can be completed in order.
Step 1: Turning the power on
The first step to completing the easter egg in Call of the Dead is to turn on the power for the map. Doing this is fairly simple. All you have to do is go to the wrecked ship and make your way into the control room.
This is the topmost room in the left portion of the ship. Keep in mind that you will require at least 2750 points to reach this room because there is a lot of Debris in the way.
Once in the control room, you will find the power switch right beside the door. Interact with this power switch to turn on the power for the map.
Whilst you are here, it is also best to turn the ship’s wheel to the five o’clock position. The wheel is right in front of the power switch. Interact with the wheel twice to turn it into the correct position. Then, move to the levers adjacent to the wheel and interact with them in the following order.
From left to right, interact with the first lever once and the third one thrice. If you don’t do this now, you will have to do this before the fog horn step to proceed further.
Step 2: Finding the Fuse
After turning on the power, get onto the launching pad and jump to the other side of the map. Head down on the stairs and into the room below the PhD Flopper. Here, knife the metal door and you will initiate dialogues with the Original Characters.
If the power is already turned on, the Original Characters will ask for your help and will task you with getting a fuse. Keep in mind that only after initiating this conversation with the Original Characters will the fuse spawn, otherwise, you will not be able to find it.
To find the fuse, go upstairs into the PhD Flopper room and you will find it right in front of you. If not, there are two other locations where the fuse can spawn:
- Next to a shelf beside the door
- On top of a table next to the Perk Machine
After getting your hands on the fuse, take it back to the room below and insert it into the control panel to the right of the metal door.
Step 3: Disabling the MTD Security System

After inserting the fuse into the control panel, knife the metal door again and wait for the dialogues to play out. Nikolai will activate the MTD Security System, and you will be tasked to disable it. Doing that requires you to find and destroy four generators.
These are identified by their glowing red orbs and can be found:
- Directly in front of the metal door
- Between the ice caps next to the platform just below the MP40 wall-buy
- In the water across the other end of the ship, straight as you enter it from the stairs
- The last one can be seen through the barricaded window in the room behind the Stamin-Up perk machine
You must destroy these generators with explosive firepower. We recommend that you use Semtexes, which can be bought from their wall-buy in the second half of the ship.
Step 4: Get the Vodka bottles (co-op only)

After completing the previous easter egg step, knife the metal door again and Nikolai will instruct you to get him a Vodka bottle in Call of the Dead. There are four Vodka bottles scattered around the Lighthouse and the PhD Flopper, each of which will be surrounded by a block of ice.
To secure a Vodka bottle, one player must stand right in front of it and the other in the area below it. The player next to the bottle must knife it to break the ice, and the player standing below will catch it.
The four Vodka bottle locations are mentioned below:
- On the railing above the staircase that leads to the PhD Flopper room.
- On the railing above the staircase leading to the AK-74U wall-buy.
- On the railing next to the MPX wall-buy on the first floor of the ship.
- On the ledge that connects both ships near the MP-40 wall-buy.
The spawns of the Vodka bottles are randomized, so you may need to check all the spots. After getting one, insert it into the tube to the left of the metal door, and then knife it to complete the step.
Step 5: Locating the Morse Code Radios

The next step requires you to find four Morse code radios scattered across the map. Keep in mind that you need to interact with these radios in a specific order to complete this step. Hence, pay attention to the radio locations mentioned below, which are in the correct order:
- On top of a cabinet below the power room.
- Atop the barrel next to the Stamin-Up perk machine.
- Inside the train cart next to the Semtex wall-buy.
- Atop a cabinet under the steps in the room where the metal door is.
Step 6: Finding the Fog Horns (co-op only)

As mentioned previously, you have to turn the ship’s wheel to the five o’clock position and interact with the levers in the correct order before this step. If that’s done, the submarine will spawn and a fog horn will be heard.
So for the next part of the easter egg quest, you have to replicate the sound of the fog horn by interacting with the fog horns on the ground between the Speed-a-Cola tunnel and the AK-74U wall-buy in Call of the Dead.
Therefore, the order in which you interact with the foghorns is very important. The order is always the same though, so you can simply just interact with the foghorns at the following locations in order:
- Located on the ground right next to the pond and the small shack
- Immediately right from the Speed-a-Cola tunnel
- Right next to the AK-74 wall-buy
- Right next to a lantern just after the Speed-a-Cola tunnel
Step 7: Finding the Lighthouse Dial Codes

After completing the Fog Horn quest, it’s time to find the codes for the security dials in the Lighthouse. The codes are written on small pieces of paper that are spread across the map. Finding these codes without any help is almost impossible, which is why we’ve already located them for you:
- On the floor inside the Juggernaut room
- Inside the lifebuoy next to the Double-tap
- To the right of the blue dial inside the Lighthouse
- On the floor in the room behind the Stamin-up
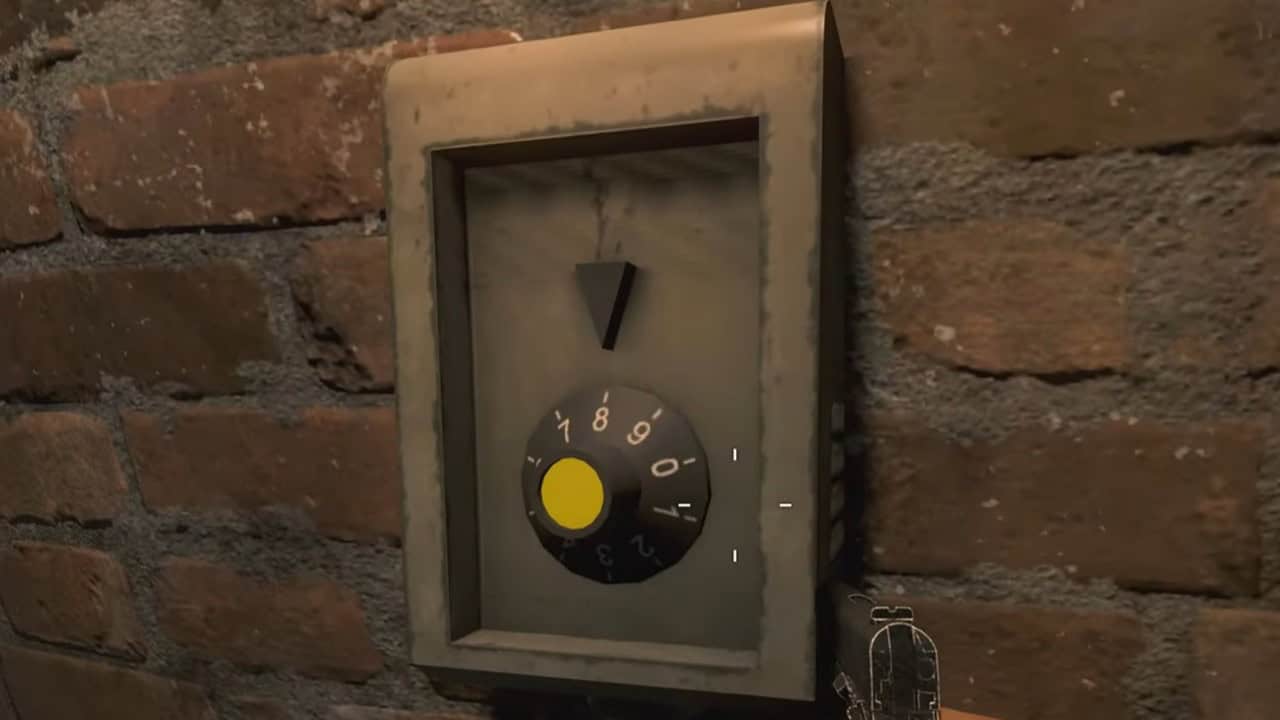
Each number on the piece of paper is a code for one of the dials in the Lighthouse. In total, you will have the numbers 2746 – in that specific order. The dials are color-coded as yellow, orange, blue, and purple from top to bottom.
Keep in mind that as you go from top to bottom, inserting a number in one dial will cause the ones at the bottom to go up by 1. Therefore, we recommend starting from the one at the bottom, leading to the top, and then correcting the one at the bottom again.
This means that you insert the number 6 on the purple dial first, followed by 4 on the blue, then by 7 on orange, and finally, 2 on yellow. At the end, come back to the purple one and make sure it is at 6. If this is done correctly, the light from the submarine will reflect on the lighthouse.
Step 8: Getting the Golden Rod
For the last step of the Call of the Dead remake easter egg, you have to get your hands on the Golden Rod. For that, you will need the V-R11 Wonder Weapon. This weapon can only be obtained from the Mystery Box, but your chances for obtaining this weapon are increased after completing step 7.
After getting the V-R11 you need to go to the Lighthouse and shoot a zombie with it. The gun will turn the zombie back into a human, and he will run into the green light at the center and start levitating up.
You have to kill this human in this state before he reaches the top. If done correctly, the Golden Rod will spawn at the bottom of the stairwell. All you have to do is interact with it to pick it up. Once that’s done, bring it back to the metal door and place it into the air tube to its left.
After that, knife the door a few times until the fuse to its right breaks down. Then, knife the fuse to fix it and start knifing the door once more.
After all of that is done, the door will open and the easter egg will be considered completed. You can then head inside and claim your Wunderwaffe DG-2. As for the Original Characters, they’re off to Paradise.