Assassin Contracts make a return in Assassin’s Creed 4 Black Flag. In Black Flag, these trademark side-missions from the franchise function more like they did in Ezio’s first game, rather than the way they did in Assassin’s Creed 3.
You’ll first have to undertake a contract from the designated location on your map for Assassin Contracts before you can begin any of them.
These secondary assignments reward you with 1000R usually, and there’s always an added bonus for you to claim if you manage to stay out of open conflict.
There are a total of 30 Assassin Contracts in Black Flag, spread out all across the Caribbean. Completing half of these will also award you with the Stealth outfit, which gives a boost to Edward Kenway’s hiding skills, making it more difficult for enemies to detect him.
Subsequent contracts in a single location might become available only when you complete a preceding contract, but there’s really no fixed sequence to follow when completing these assassinations.
For quick conclusion, stick to one location; whichever one you’re in, and finish all the contracts for that particular area before moving on to the next one.
For more help on Assassin’s Creed 4, read our Warehouses, Naval Forts and Naval Contracts Guide.
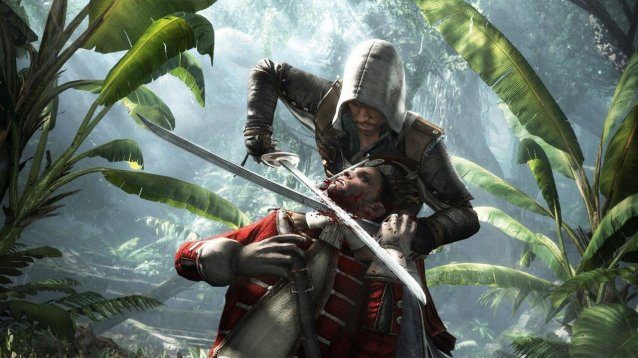
Assassin’s Creed 4 Black Flag Assassin Contracts
Your targets will always be in Restricted Areas, so simply walking up to them and performing a low-profile kill with the hidden blades won’t be an option.
The Blowpipe will prove to be invaluable during most of these contracts when attempting to assassinate your target without being noticed.
Keep ammunition for it and craft materials for darts at the ready before tackling any of the contracts. Darts aren’t the only way, however, and definitely not the most enjoyable one either.
Another way to infiltrate past the defenses without triggering open conflict is through the use of drunken pirates and employing the services of nearby dancers. Use either or both, and get in close to your target for a stealthy, low-profile stab with your hidden blade.
Long-range headshots with your pistol are also an option, as are air-assassinations, but you won’t get the no-conflict bonus in most instances when you take this route.
The methods for tackling each contract listed below are just our recommended ways of performing said assassinations without initiating open conflict. Feel free to experiment and make your own routes to complete each Assassin Contract.
Kingston
We’ll start the guide with the contracts in Kingston, since they are the first few entries in the progress tracker:
Assassin Contract #1 – The Plantation Master
Your target for this contract will be roaming around a plantation. Sneak your way around to the small hut at the west of the plantation and climb onto its roof.
From here, shoot your target with a Berserk Dart and get off the roof and out of the Restricted Area before someone notices you. Your target will die soon enough, completing the contract.
Assassin Contract #2 – The Guard Post
There are a few patrols moving about near your target this time, but the landscape provides you with plenty of opportunities to assassinate without being noticed. Climb onto the cliff to the west (directly behind your target) and from here, plan your course of action.
As always, the simplest solution is to kill the enemy with the Blowpipe, but you can perform a headshot, or even an air assassination if you time them right.
Another option is to incapacitate the other guards nearby with sleep-darts, and then close in on the Captain without being noticed for a hidden blade assassination.
Assassin Contract #3 – The Slave Traders
Directly next to your waypoint and the Restricted Area will be a large house on the east side.
Make your way up to its roof and then use Eagle Vision to identify your target. Your target will be patrolling the area directly below, but the rooftop opposite to you will have a Gunner standing on top of it who can detect you.
Be quick and hit your target with a Berserk Dart before the Gunner notices you. Now get out of the Restricted Area by jumping off the rooftop and back towards the road to the east. After a few seconds of battle, the target will drop dead and the contract will be completed.
Assassin Contract #4 – The Judge
This one’s a little further to the south of Kingston. It’s a long walk if you haven’t explored that area, but if you have, simply Fast Travel to the Viewpoint near your target’s location.
It’s fairly easy to spot your target since he’s the man shouting outside one of the houses. Moving in close is a bit of a problem since the man starts running at the sight of Edward, triggering a chase.
To make quick work of him, climb to the top of the building towards the southeast of his position, and from here, put a bullet into his cranium.
Stand at the farthest possible part of the roof that still gives you a clear shot when shooting to make sure you’re at a safe distance. To rid yourself of even that hassle, just use a Berserk Dart to take him out.
Assassin Contract #5 – The Weapons Smugglers
To the south of the Restricted Area is a building with a lift at its back. Use that lift to reach the building’s roof, and take out the Gunner patrolling it.
Now directly in front of you, your target will be roaming about along the street below. The musket of the Gunner you just killed is an option for making quick work of the target, but it will trigger open conflict.
For a stealthy conclusion, resort to your Blowpipe and land a Berserk Dart on your target to complete the contract.
Assassin Contract #6 – The British Captain
This target is surrounded by a bunch of citizens, and stands in the center of a Restricted Area in a small clearing, so a hidden blade execution without compromising yourself is out of the question.
Hitting your target with a Berserk Dart is a convenient way, and the Blowpipe can be used without alerting anyone from the rooftop of the building to the north of the Restricted Area.
There’s also an opening for a clear shot between the crowd on the side of the beach, and the Berserk Dart can be landed on your target from behind them.
If you’re bored of assassinating targets via the Blowpipe, there’s a bunch of drunken pirates nearby who you can pay to attack your target.
Havana
Assassin Contract #7 – Beach Bonfire
In this contract, your target patrols around a small Restricted Area on the beach. Stand outside the circle and observe his patrol for a while to acquaint yourself with it.
He moves from a hiding spot towards a few brawling pirates and then back.
To the west of the Restricted Area is a Stalking Zone. Start by moving into it, and then run to the hiding spot in your target’s patrol route when he’s close to the pirates. He’ll eventually make his way back to the hiding spot, and when he does, assassinate him to complete the contract.
Assassin Contract #8 – A Shipment of Powder
Head to the docks to the south of Havana to reach the Restricted Area for this contract, where your target is. The place is covered with guards, and the Restricted Area is rather large.
Swim outside the red zone to avoid being targeted all the way to the pier on the northeast edge of it. Hang on its front-most ledge, adjacent to the docked boat.
The Scout you’re meant to kill has a short patrol path and will come and stand right above you.
When he does move to the edge of the pier, perform a ledge assassination and swim out of the Restricted Area to complete the contract without triggering an open conflict.
Assassin Contract #9 – The Spanish Commander
The Captain that you have to assassinate is in a courtyard that’s heavily guarded, with Gunners stationed on the roofs and guards at the entrances to it.
We’ll cover two ways how to take out your target without being noticed. The first one is to hire a group of nearby dancers to distract the guards at the northeast entrance, and then land a Berserk Dart on the target from a safe distance. This way, you won’t be in the Restricted Area, and won’t have to worry about getting out.
The other method is to climb up to the roofs, put the Gunners in your path to sleep and then strike the Captain with a Berserk Dart from up above. You can take the same route you took to get back out to avoid being detected by the other Gunners on the nearby rooftops.
Assassin Contract #10 – Unlicensed Dealer
Your target is once again inside a courtyard, with Gunners on the roofs and guards at all entrances. Towards the southeast of the Restricted Area is an opening that you can exploit.
First, hire some dancers which you’ll find right at the corner on the bottom right of the red zone. Use them to distract a group of nearby guards at the southern entrance to the courtyard.
Now, right next to a bunch of crates is a small corridor with a low roof. Climb it to find a gap from which to identify and assassinate your target without being detected by the Gunners and Scouts around you.
First, turn on Eagle Vision to find the golden target. Then strike him with a Berserk Dart and retrace your steps to get out of the area unnoticed. Your target should expire after a few seconds, of completing the contract.
Assassin Contract #11 – No More Taxes
Approach the next target from the rooftops. Take out the Gunners around you using Sleep Dart and get into a position to identify your target. Turn on Eagle Vision and find the Captain.
Once identified, take out your Blowpipe and take him out with a Berserk Dart to quickly dispatch him without being detected. Make your way out of the Restricted Area to complete the assignment.
You can go down and hide in the hay-stack below to figure out another route but there are a lot of people around, so making a clean escape will prove to be rather difficult after the assassination, which makes the Blowpipe our preferred way for taking out the target, as always.
Assassin Contract #12 – A Botched Escape
Your next target is somewhat tricky. He’s in a squabble with some guards, and the moment you see him, he starts running. Your best bet is to be in a vantage point with a clear shot right from the moment you first set your sights on the target.
To do this, climb to a nearby rooftop using scaffolding to the northeast of the target. There’ll be a Scout on top, so take him out first. Now make your way towards the target, and keep your Blowpipe and Berserk Dart ready.
Strike the target with a Berserk Dart as soon as he starts to run to complete the contract undetected and without a chase.
Nassau
Assassin Contract # 13 – The Pirate Captain
The most convenient, hassle-free route to complete this assassination without being noticed is through the trees.
To get to the vantage point from where you can take out your target, follow the free-running path through the trees that starts from the nearby general store.
Once you’re at the tree from which you have a clear shot of the patrolling target, hit him with a Berserk Dart and return to the general store via the trees to complete the assignment.
Assassin Contract #14 – The Outlaws
To save time and effort, make sure you have the Viewpoint in the Restricted Area for this Assassin Contract synchronized. If you don’t have it synchronized then do so before beginning the contract.
Once done, start the contract and Fast Travel to the Viewpoint.
You’ll be inside the Restricted Area upon arrival, so act quickly and put the guard on the rooftop behind to sleep. After you’ve sleep-darted him, turn on Eagle Vision and identify your target.
If he’s not in range for a Berserk Dart, move a bit toward him and land one on him. All that’s left for you to do now is escape the Restricted Area undetected. Do so and complete the assignment.
In case you haven’t synchronized and have still started the contract, simply make your way to the building with the viewpoint. You’ll have to be sneaky to avoid detection. Once you’ve climbed it, follow the instructions above and you’ll be done with the assassination in no time.
Arroyos
Assassin Contract #15 – Tomb Raiders
This target can be found on Pinos Isle. The contract is a little more difficult than the rest to complete without triggering open conflict, as the Restricted Area is rather large, and infiltration opportunities are too few.
Synchronizing with the local Viewpoint is recommended, as Fast Travel will allow you to start from a much better position. It will also allow you to reset the whole set-piece for the contract if you do make a mistake in between by simply using Fast Travel on the Viewpoint again.
Upon arriving at the location after Fast Travel, perform a Leap of Faith. After landing below, perform corner assassinations on two guards one after the other. You’ll have to whistle both of them in.
Don’t move away from your location until you’ve taken both of them out.
Your target for the mission is a Captain, who only starts mobilizing after you enter the ruins. As soon as you get into the ruins, run to the second doorway and prepare yourself for another corner takedown.
The Captain will soon emerge from it. Assassinate him and complete the mission without being detected.
Assassin Contract #16 – A Last Drink For The Road
This contract is a bit tricky. If you follow the waypoint in a typical fashion, you’ll end up with a naval battle on your hands, and you won’t be able to complete the contract undetected.
Your target is a Captain that will first kill someone, and then run to his boat to escape.
As soon as you begin the mission, sprint to the harbormaster with all haste. If you don’t do so or aren’t fast enough, you’ll miss the small window in which you can kill the Captain before he gets to his boat.
Plot the fastest free-running course to get to the harbormaster from the starting point before you undertake the contract. Once you manage to get to the harbormaster before your target escapes, turn on Eagle Vision, identify him, and strike him with a Berserk Dart to finish the contract.
New Bone
Assassin Contract #17 – Castaway
The target for this contract is located in Cayman Sound. The entire island is marked as a Restricted Area, so you’ll need an entry point close to your target to avoid unnecessary complications.
Fast Travel to the Viewpoint and your target should be close by. Toggle Eagle Vision to identify the Captain, and then stealthily make your way toward him.
Avoid the pirates in the vicinity. Near the Captain are two Stalking Zones. Hide in either one of the two and hit your target with a Berserk Dart from here to complete the assignment.
Assassin Contract # 22 – The Dreaded Pirate
Fast Travel to the Viewpoint in Mistiriosa and you’ll find yourself a few too many meters above your target. Identify the Captain from this spot using Eagle Vision.
As you begin to approach him, he’ll change his patrol route, so quickly jump down onto the low tower below. From here, the target will be in the range of a Berserk Dart.
Land one on him to complete the contract. In case you haven’t visited the Viewpoint before, approach the tower and scale it from the west to avoid being spotted and follow the instructions above.
Corozal
Assassin Contract #18 – The Unworthy Brother
In order to complete this contract, you must first capture Fort Chinchorro. Since Chinchorro is a Level 3/Hard fort, you won’t be able to conquer it until the Jackdaw has been substantially upgraded.
Once you’ve taken the fort, undertake the contract and Fast Travel to it. Head to the top of the Fort Commander’s office, which should be to the north of the Restricted Area. Silently take out the Gunner at the top, and from here, strike your target with a Berserk Dart after identifying him with Eagle Vision.
Crooked Island
Assassin Contract # 19 – The Poachers
This is one of the easiest to complete contracts, provided you’ve synchronized the Viewpoint in Mariguana Island situated within the Restricted Area.
When you Fast Travel to this Viewpoint, you find yourself in the perfect position to land a Berserk Dart on the Captain that you’re supposed to kill. Do so and complete the mission in less than a minute.
If you don’t have the Viewpoint synchronized, look for a way to scale it undetected and do as instructed above to complete the contract without triggering open conflict.
Assassin Contract #20 – The Deserter
Your target for this Assassin Contract is in Salt Lagoon. He’s all alone, so fulfilling the optional objective of not triggering an open conflict is relatively easy.
There are multiple ways to take him out since a loud execution isn’t a problem. You can line up a headshot from a nearby Stalking Zone, or just run up and assassinate him with your hidden blades.
Just make sure he doesn’t see you coming, since he starts running if he does, initiating an unnecessary chase.
Grand Cayman
Assassin Contract # 21 – The Twin Dilemma
You’ll have to assassinate two targets this time, both of whom are a stone’s throw away from the starting point. Climb the rooftop behind the coop and proceed east until you get close to the two targets.
They’re surrounded by a number of other guards, so it’ll be difficult to take them out without being noticed unless of course, you use a Blowpipe. Strike both of them with a Berserk Dart and exit the Restricted Area to finish the Assassin Contract.
Île à Vache
Assassin Contract #23 – The Expedition
You’ll find the target for this contract at Cumberland Bay. If you’ve visited the area before, you probably would have synchronized with the Viewpoint in the region.
If not, then there’s an alternate path for you to take to eliminate your target.
First, the Fast Travel method: Fast Travel to the Viewpoint, and upon arriving there, turn around and face the opposite direction. The target should be right in front of you, so blow a Berserk Dart at him and perform a Leap of Faith into the water below to escape.
Now the second method, for those who haven’t yet synched with the Viewpoint: Move in on your target from the beach to the west. Along the path, you’ll find a Stalking Zone.
Hide in it and from here, strike the target with a Berserk Dart. Retrace your steps and exit the area via the same path you used to get to the Stalking Zone.
Assassin Contract #24 – The Slave Master
Your target for the Assassin Contract is at a villa in Tortuga. Stick to the left of the path leading up to the house. You’ll encounter a few patrols along the way, which can easily be avoided by hiding in the Stalking Zones and hiding spots nearby.
Once you’re right at the front of the villa, time your run and climb to its roof undetected. Reach up to your target from the roof, and you’ll have a chance to eliminate him with an air assassination.
Berserk Darts are still an option, but this is one of the few chances you’ll get during Assassin Contracts to perform an air assassination without compromising yourself.
Andreas Island
Assassin Contract #25 – A Slaver’s Business
This contract offers no additional reward for not triggering open conflict. This opens up a lot of possibilities for completing it, but if stealth is your thing, we’ll tell you a way to eliminate your target without being detected.
When you first reach the Restricted Area, the target won’t be there. Instead, there will be 5 guards standing at the pier. Tranquilize them using Sleep Darts. After a short wait, a ship will sail in and your target will be on its deck.
Since you’ve taken out the guards, you can move close enough to the ship to bring the target in the range of your pistol. Now precisely aim for the target’s head and finish him with your pistol, while standing at a safe distance so that no one is alerted.
Once done, slip away from the ship and you’ll complete the assignment. Another method is to use the Jackdaw to sink the vessel, killing the target in the process. It’s much quicker and far more convenient, and you don’t really lose anything for doing so.
Assassin Contract #27 – The Treasure Hunter
For this contract, head to Abaco Island to locate your target. Fast Travel to the Viewpoint close to the designated Restricted Area and look south. You’ll see your target enter a tent.
You’ll be able to see enough of your target’s body to land a Berserk Shot, so do that. Perform a Leap of Faith into the hiding spot below and wait for a clean escape.
When you get a chance, exit the hiding spot and leave the Restricted Area to finish the contract unnoticed.
Salt Key Bank
Assassin Contract #26 – The Informant
The Naval Fort at Dry Tortuga must first be conquered before this Assassin Contract can be completed. Start the assignment after you’ve captured the fort and Fast Travel to it.
Take out the Scout at the top of the gate using a Sleep Dart. Now head straight to the point where there are a few crates lined up to facilitate climbing.
From here, scale the wall and run straight until you hit another spot at higher ground. Keep climbing and going straight until you’re next to your target.
Identify him from here using Eagle Vision, and then shoot the powder reserves beside him to finish the assignment.
Assassin Contract #28 – Shady Business
This Assassin Contract requires you to engage in naval combat with the target vessel. To keep things short, make sure you have ample ammunition and the Advanced Mortars upgrade for the Jackdaw.
Board your vessel after undertaking the contract and head towards the marker. When at the search zone, use the spyglass to identify the target’s ship and begin pursuit.
Stay towards the open waters, away from your target – who’ll be sticking close to the coast. Line up the mortar once you have a clear vision of the enemy and fire a volley to disable the ship.
Once it’s incapacitated, you can either board it or sink it with a few cannon shots. For a quick conclusion, just sink the vessel before more enemy ships arrive, as you’ll be forced to fight them as well if they show up.
Note: To complete Shady Business and Treasure Hunter Assassin Contracts, you’ll first have to acquire the diving bell which is obtained during Sequence 06.
Grand Cayman
Assassin Contract #29 – The Smuggler’s Squat
You’ll have to locate your target for this contract by navigating through the underwater maze that leads to Anotto Bay. Once you’ve reached Anotto Bay, wait for the patrol at the center to pass, then grab onto the ledge and wait for a guard to walk up to your position.
Eliminate him with a ledge assassination and quickly move in on the guard nearby who’s beating up a prisoner. Use the hidden blade for a stealthy takedown.
Now look towards the center of the cave and you should be able to see the Captain who you’ve come to eliminate.
Strike him with a Berserk Dart and dive back into the water. Hide underneath the walkway to avoid detection. The target will die within the next few seconds and you’ll have completed another Assassin Contract without getting into open conflict.
Corozal
Assassin Contract #30 – The Outlaw’s Cave
The target for the final Assassin Contract is inside some old ruins. Reaching the point where the target is, is rather complicated, and requires you to find your way through a labyrinth underwater.
Once you’ve made your way through the water, you’ll emerge at the foot of the ruins. Look up northwest and you’ll see a guard stationed over there. A pirate will frequently patrol his way and then turn away and move in the opposite direction.
When he goes away, kill the sentry with a ranged weapon, preferably a silent one, such as a dagger.
Now climb to the top and stand at the corner of the pathway which the pirate is patrolling. As soon as he’s close enough, take him out with a corner assassination.
Pick up a musket and move forward. You’ll be able to see the main chamber from this point, and your target should be visible from this point. You can choose to shoot him with the musket from here and engage in open conflict afterward, or choose to close the gap and eliminate him discreetly.
No matter which route you choose it’ll take you roughly the same amount of time. Take whichever route you prefer. Once the target is assassinated, and you’ve escaped the area, the contract will end and so will the Assassin Contracts side missions.
This concludes our guide for the 30 Assassin Contracts in Assassin’s Creed 4: Black Flag.