After leaving Jackson, your next destination in The Last of Us 2 will be Seattle. Here we have prepared the complete walkthrough for The Last of Us Part 2 Chapter 2: Seattle Day 1 to help you guide Ellie in her hunt.
If you want to know the locations of all the collectibles scattered throughout this chapter, check out our TLoU 2 Chapter 2 collectibles guide.
The Last of Us Part 2 Chapter 2: Seattle Day 1
The Gate
Here we have covered the details on how to get through the wall and open the gates.
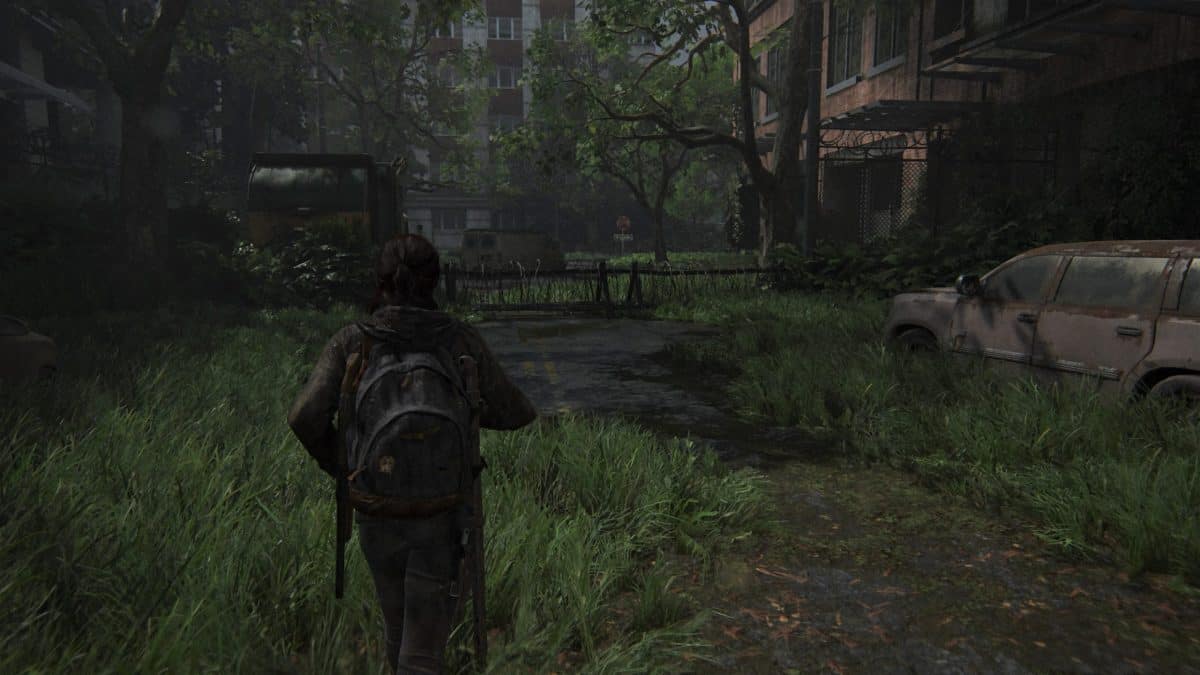
After the cutscene, you need to follow through the path as you can see on the ground. After walking for a while on the path you will eventually see a few cars around and this will indicate that you are on the right path. Nearby the first few cars is a bus stop with collectibles.
Following the cars will lead you to the overgrown freeway, a bit further down the path you will also see a trailer to your left, it will have some essential supplies inside.
On the table will be a trading card and a map of Seattle.
Now with the help of map, start going towards Seattle and you will reach a bridge. Cross under the bridge and then look to your left to find a small trailer where you can find another map of Seattle
Go towards North Seattle and you will pass through lots of abandoned cars on the sideways and through water as well.
After reaching the WLF area, get down from your horse and start walking. You will see a huge message written on the gate, inspect it and Ellie will write it down in her journal. This is the abandoned check post on the edge of Seattle.
There will be another abandoned small trailer towards back of the post, get inside and you will find photos of the infection on the table.
Get out of the trailer and go to the holding cells, here climb up the big boxes to go across the cages that you see. You will also have to do a running jump to get to the ladder to wards next area.
It is going to be some work to get to the other side of the wall, first cross the narrow ledge and then jump onto the metal platform, then you will see a small opening in front.
Crouch through it and then again climb, then do a running jump, keep doing this exercise until you get to the concrete ledge.
Now you will have to go down the spiral staircase as you are on the other side of the wall now. But before you go down, look up and to your left and you will see another staircase.
This will lead you to the watchtower and you will get some essential supplies and trading card there, so don’t forget to check that.
When you are inside the watchtower for supplies, look to your right when you climb the ladder and you will find a green crate and a note on top of it.
Now go through the metal bridge and down the ladder, ahead will be a military trailer again, break the window and get inside the trailer. Now unlock the door and exit on the other side.
Now get out of the trailer and now you will have to turn the generator on. It is quite simple, just look at the ball and when it gets to the triangle symbol just press the triangle on your controller.
You will have to repeat this process until the generator is charged up and then get the cord through the gate in front and plug it in and press the button to open the gates.
After the gates are open, throw the wire over the trailer that is close to you and then use it to climb up the trailer.
Upon the trailer, there will be more supplies and a note on the lawn chair as well with some trading cards too.
Get through the gates now and you will find Dina, talk to her and then go to the trailer on your right to see that terminal is not working and now you need to get that cord you just threw over the trailer.
Now throw this cord over and use it to power the terminal. When the terminal is up and running interact and now you are ready to leave.
There will be more supplies behind the trailer that you can use.
Get on the horse and go to the gate number 2, when you try to turn the generator on, it won’t work and you will be required to go to the Downtown.
Here will be the start of the next section of Seattle Day 1.
Downtown
As you know the generator on the gate 2 is not working, your mission here is to find some gas to get the generator running.
Synagogue
To get the gas, go to the synagogue which also served as ration distribution center, here you will see some infected scattered around so take precautions and you can also use log for your cover.
After taking them down, go straight ahead and climb the logs to go over the fence that has white paint marks.
There will be many shelves and boxes with ration and supplies, also scraps, there will be a doorway, go through it and open the door ahead and you will be able to go to the caged area.
This caged area is to the left of entrance, you can also get to this caged area through the main room instead of the doorway.
There are yellow bars in the cage, push the trolley to jump over them and you will get inside another small cage, here is the gas can you wanted, now Dina will open the cage.
Get back with the trolley and you can use it to climb up in the main room and get supplies and scraps from upper shelves.
There will be a stun bomb recipe in a small outpost that will be on the right side that might come in handy.
The Courthouse
Outside the courthouse will be a FEDRA truck, climb on it and get inside the courthouse through the window. There will be a lot of runners here, and clickers too.
You need to keep your calm and do not just start shooting as they will come in masses after hearing that. Go from room to room and taking them down one by one.
You will find clickers in the first room, go, and stealthily kill them from behind. A runner will be in the library and then go forward from the first room.
Then face a runner and then a clicker, the final runner will be in the hall. Also, there are more supplies in the Judge’s office. Go down the stairs, then go to the garage through the elevator. You will get an artifact from decaying bodies.
Now when you reach the garage, you will right away face some runners. Take all of them out and you will have to run and dodge when needed.
Clear the room and then walk straight to the end, from the end go to your right and you will find another gas tank. Now get back to gate 2 (the “Fuck Fedra Gate”).
At gate 2, use the gas you have collected and start the generator. Use the code 5345 to open the gate, get on your horse and jump through the barbed fence.
When you pass the WLF banner you will see some infected on the fence, this will be your way to get to the other side. Just get on the blur dumpster and hop on to get to the next area.
The Serevena Hotel
This next area is the Serevena Hotel, right ahead you will face some infected so just get rid of them. You need to take them down stealthily and one by one as mentioned before as well.
Use Molotov as well and dodge wherever is necessary. You can also interact with dead bodies to get loot and also scrap on the desk.
Then get ready to follow Dina to get out of the open door. Jump down on a van and then go for the East gate 1.
Dina will enter the code in generator, then you just keep walking ahead until a cutscene will appear. This cutscene will get you to the next part of Seattle Day 1.
Eastbrook Elementary
The cutscene at the end of Serevena hotel will lead you to the Eastbrook Elementary.
Classrooms
You need to walk around the whole school and clean the areas one by one. You can pick up the broken glass and string and knife and use these to kill your enemies (WLF members) here.
You will also be able to pick up two artifacts right at the start. Clear all the classrooms, again, very stealthily and with complete silence, we recommend that you just follow Dina as she has it all covered.
Use the Molotov and fire as much as you can, loot the dead bodies for supplies and stuff, then get the health from the library desk.
Cafeteria & Courtyard
There will be a lot of enemies in the courtyard and cafeteria as well, kill them all just as you did for the classrooms.
At first, you will see only 1 in cafeteria and 2 in the courtyard but when you kill them more will come from the roof so be ready.
For your help, there is a lot of ammo and health on the cafeteria tables so if you are running low on either of them, just go there and get some.
Roof
After clearing the courtyard and cafeteria, move towards the roof, there will be more enemies up there. There are solar panels, so you can use them for your cover.
You will find loot on the tables, get rid of enemies on the roof and get the loot and ammo from table and then get inside and then go out the window.
Leave the School
As you follow Dina to get out of the school, you will have to do a running jump from the window on the roof and to another apartment. Don’t forget to loot all the adjacent areas like kitchen and other rooms.
You will also get trading card in the bedside table. Check all the rooms and kitchen and then get through the white door.
You will follow Dina in the cutscene and then the next section will begin in Seattle Day 1.
Capitol Hill
The cutscene and following Dina will get you to the Capitol Hill this time. Go towards the houses and apartments ahead for some loot and collectibles otherwise continue on the main path.
As you walk around the town you will find WLF members that you need to stay clear from and make sure they don’t see you. Get rid of all of them stealthily and loot bodies for supplies. There will be a workbench in the gas station as well.
You will encounter a clicker and you will see that a trip wire took care of it. That shows that the whole area is tripwired and you need to be very careful with your steps now.
Get through the trip wire area by going over bottles and bricks, at the end you will see a staircase, climb the staircase but make sure to stay at right as the ladder also has a trip wire on your left.
The door will be locked, and you will see a bent fence on your right, climb over there and you will be in the next section of Seattle Day 1.
Channel 13
From where you are right now, you can see the TV station yourself. From here, keeping an eye on the TV station, climb up the building. Then face towards the dead body that you see, in the line of that dead body will be a rope.
Grab that rope and use to get inside the building through window. Here you can loot dead bodies and coffee station.
Get inside the pipe and walk to go to the other side and here you can loot for some more supplies and materials.
There is an opening in the wall to your left, use the cable hanging there to get through the opening. Now you are in the TV control center, here you can get more loot.
Now get to the second floor of the building and you will get even more loot. Then go to the door that leads outside but it will be locked so go through the ledge on your left.
Now that you are outside through the ledge, you will face WLF members, now keep in mind that your main mission is to get out of the building and you do not necessarily have to kill everybody, you can clear rooms one by one and can sneak around as well.
After getting outside, run ahead until you are safe, safe area is an underground area and you will see a vending machine used as the door. This will get you to the next section of Seattle Day 1 which is The Tunnels.
The Tunnels
Now that you are in the tunnels, you will have to crouch for the most part as the tunnels get deeper, you will have to keep walking while crouched as much you can, there will be tight spots ahead, but just keep going until you are in the red tunnel.
This is now the area of WLF members, and right ahead of you will be two clickers in the room, use anything like a brick to throw it as a bait to distract the clickers.
These clickers will get rid of all the WLF members for you and when they are almost done with those WLF members, use your Molotov to kill and get rid of all of them.
Also, keep in mind to remain hidden and if there is some enemy left, get rid of them stealthily. You can get loot from dead bodies and supplies in the left side of the room.
Now you will have to go to the door right ahead and again do the same process to get the door open, by holding triangle method.
Get through the door and if you go straight you will get more supplies and stuff (artifacts and trading cards), but you basically have to go through the opening to your left.
Crawl through the tight spaces and ahead you will see a rope. Use it to get from one ladder to another.
You will have to grab the rope and press R1 to swing and get to the other ladder.
When you get to the opposite ladder you will see that it is broken, so get inside the room on your right, here you will get some loot and then go through the vent.
When you drop down from the vent on the other side, you will face two shamblers. To kill the shamblers, you need to use high damage weapons and also try to stay away from them as much as you can.
Lleave the tunnels and get to the subway station and you will see crashed trains all around. Climb your way up to the highest crashed rail car to find another artifact.
Then get out and a cutscene will appear on the screen marking the end of this section and beginning of the next section called The Theatre.
The Theatre
Now when you get to the shelter and the cutscene will appear, now you will get to The Theatre in TLoU 2.
After you’re done exploring the whole theatre, get back to the main theater hall and you will see a guitar case, interact with it and this will start a new cutscene and you will go to the next section called The Birthday Gift.
The Birthday Gift
For this section of the Seattle Day 1, you will go to the museum. Go around the dinosaur exhibitions, examining everything.
After examining all the dinosaur exhibitions, just keep going forward and soon a cutscene will appear marking the end of The Last of Us Part 2 Chapter 2: Seattle Day 1.