
Mayausiy Shrine in Zelda: Tears of the Kingdom presents a unique challenge to help you understand the incomplete blocks throughout Hyrule. Among all the shrines in TotK, this shrine is one of a kind, and its puzzle is rather challenging to complete.
Locating the Mayausiy Shrine in Zelda: Tears of the Kingdom is cumbersome. In this guide, we will help you locate this shrine and help solve its puzzle. While we are at it, we will also guide you to reach Mayausiy Shrine’s only treasure chest.
Mayausiy Shrine Location in Zelda: TotK
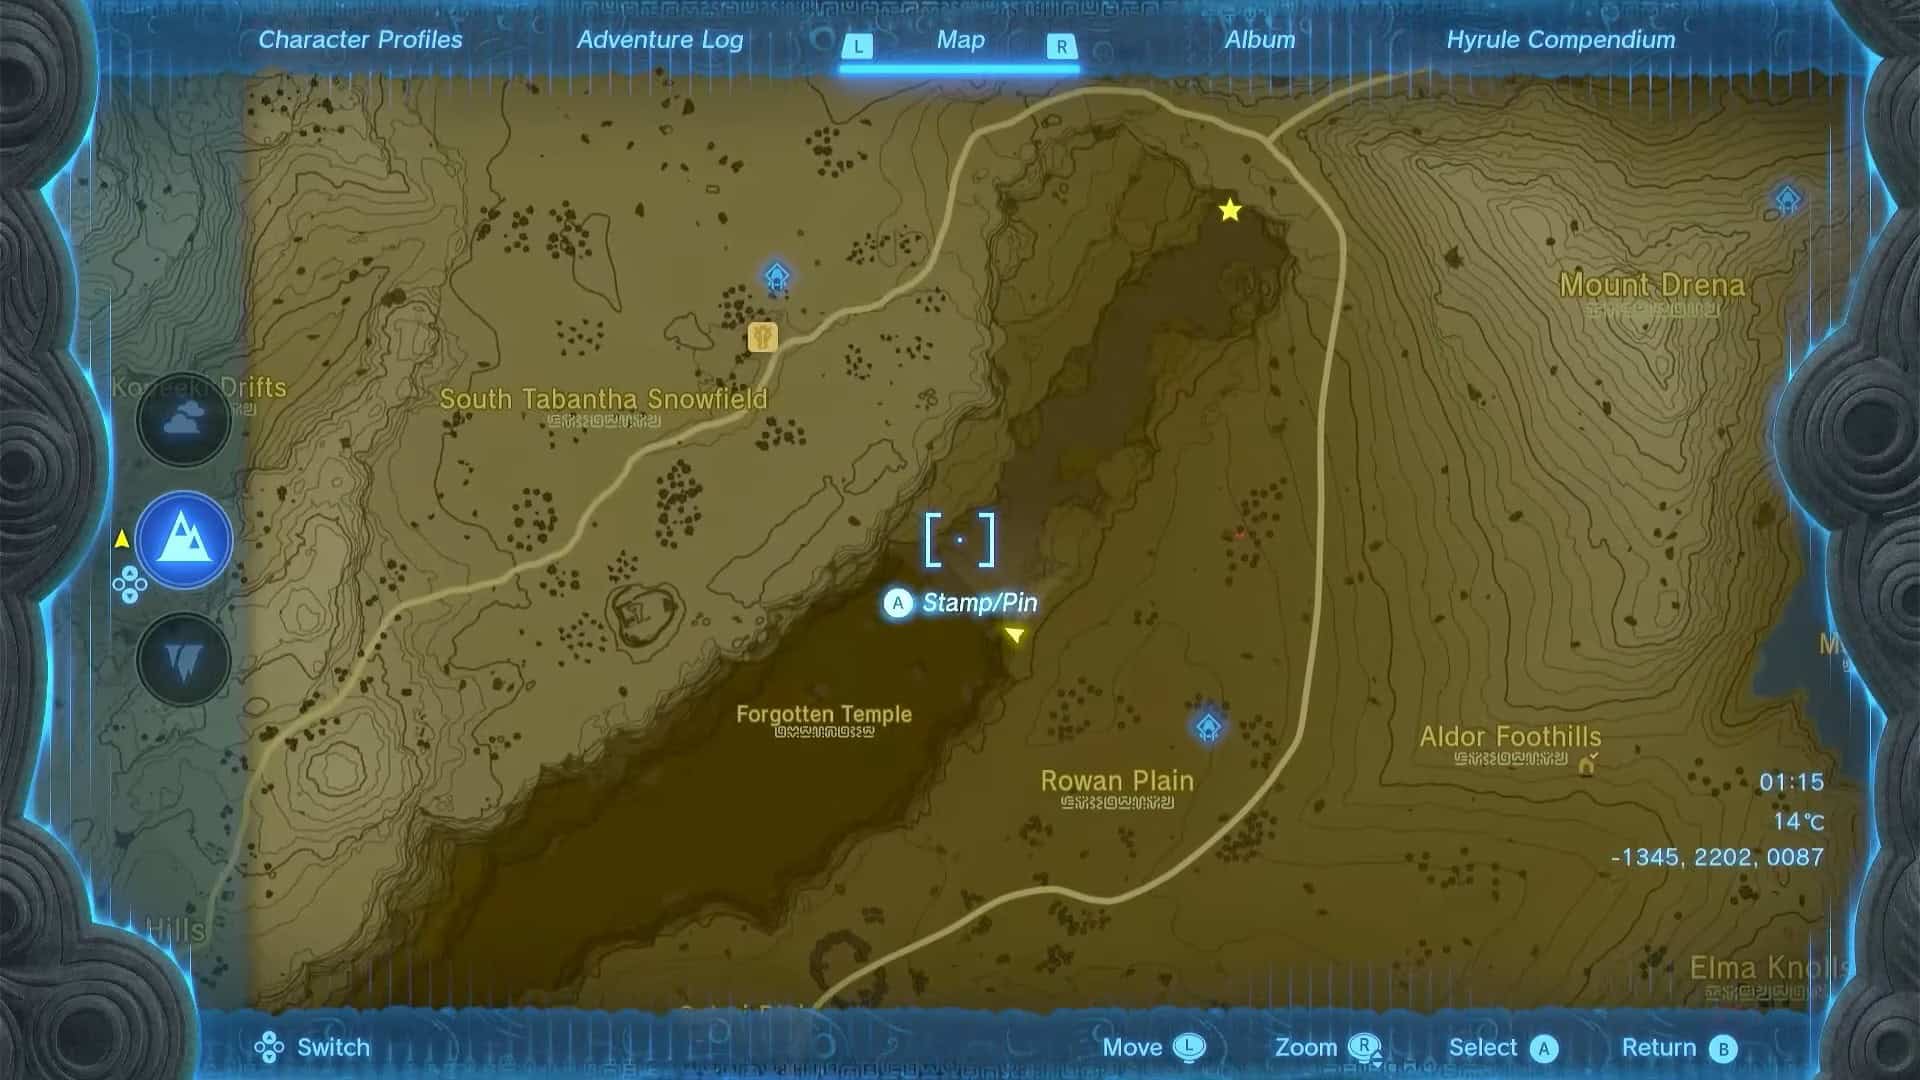

Mayausiy Shrine is hidden inside the Forgotten Temple near the southern edge of Tabantha Tundra. This temple is hidden inside a ravine and has an entrance through a hole in the wall.
1. Go to the edge of a cliff (-1345, 2202, 0087) and jump down in the direction marked on the map.

2. Turn back and look at the opening of the wall. Glide through it to reach the Forgotten Temple (-1435, 2233, -0014).
3. You need to reach the opposite side of the temple to locate the Mayausiy Shrine in Zelda: Tears of the Kingdom.

4. Hug the left wall and progress through the temple to avoid enemy camps. If you want to collect some Bokoblin parts, you can kill the monsters in the area.

5. There is also a Knight Bow (-1299, 2456, -0057) in this area that you can collect from a treasure chest.

6. Go to the opposite end of the temple entrance to find the Mayausiy Shrine at (-1165, 2602, -0083).
7. Interact with its entrance to unlock a fast travel point and enter the shrine.
Mayausiy Shrine Walkthrough

The trial presented by the Mayausiy Shrine in Zelda: Tears of the Kingdom is known as Building Blocks. The objective of this puzzle is to use blocks and rearrange them to complete square blocks.


1. In the first room, pick up and rotate a block, as shown in the picture above. It should be standing on one leg, and the other end must face away from you.
2. Place this block piece on the right side of the block.


3. Pick up the second block and rotate it exactly as shown in the picture above. Now, place it on the left side of the block to complete it.
4. This will solve the first puzzle of the Mayausiy Shrine and open the door to the next room.
5. In the next area, defeat a construct enemy and proceed forward.

6. Pick up the second block from the top and rotate it so that its extended part faces away from you (see picture for reference).
7. Attach the block to the first one from the top to create some steps.

8. Pick up the steps with Ultrahand and place them near the ledge.

9. Climb the stairs to reach the treasure chest and open it to obtain a Large Zonai Charge.

10. Drop down and unstick the block (grab with Ultrahand and then wiggle the right analog stick) that you previously attached.

11. Rotate it and place it on the side of the block, as shown in the picture above.

12. Pick up the bottom block, rotate it exactly as shown in the picture, and place it on the center block.

13. Pick up the final block you used as a base for the stairs and rotate it upside down.
14. Place it in the center block to complete the square. This will solve the puzzle, and the door to the altar room will open.
15. Interact with Rauru and Sonia’s statues to complete the Mayausiy Shrine in Zelda: Tears of the Kingdom and earn a Light of Blessing as a reward. You can exchange four Lights of Blessing at any Goddess statue to either increase your health or stamina.