The Lament Floating Stone Pillar puzzle or the Lament Bridge puzzle, which many players are calling it, is a challenge that many players of Remnant 2 struggle to decipher when making their way through the Lament Dungeon.
Although this particular puzzle is one from a series of fairly complicated ones, it’s not that hard to solve compared to the former ones in the series like the Lament Dial Puzzle or the Arrows.
You encounter this puzzle right after completing the Symbols Puzzle in the Lament Dungeon, but there’s one important thing that’s ‘key’ to solving the Floating Pillar puzzle found just before it – the Kolket’s Razor.
This can be obtained from an aberration that can be awakened from one of the coffins that you find across the door from the Dial Puzzle – make sure you obtain it.
Once you’ve got your hands on this item, interact with it in your inventory and you’ll turn it into the Kolket’s Key that is essential to solving the Lament Bridge Puzzle.
Once that’s done, you can continue on to the puzzle up ahead. If you can’t find a way through, stop scratching your head, and let us show you how to solve the Lament Floating Pillars puzzle in Remnant 2.
The Lament Floating Pillars puzzle solution in Remnant 2
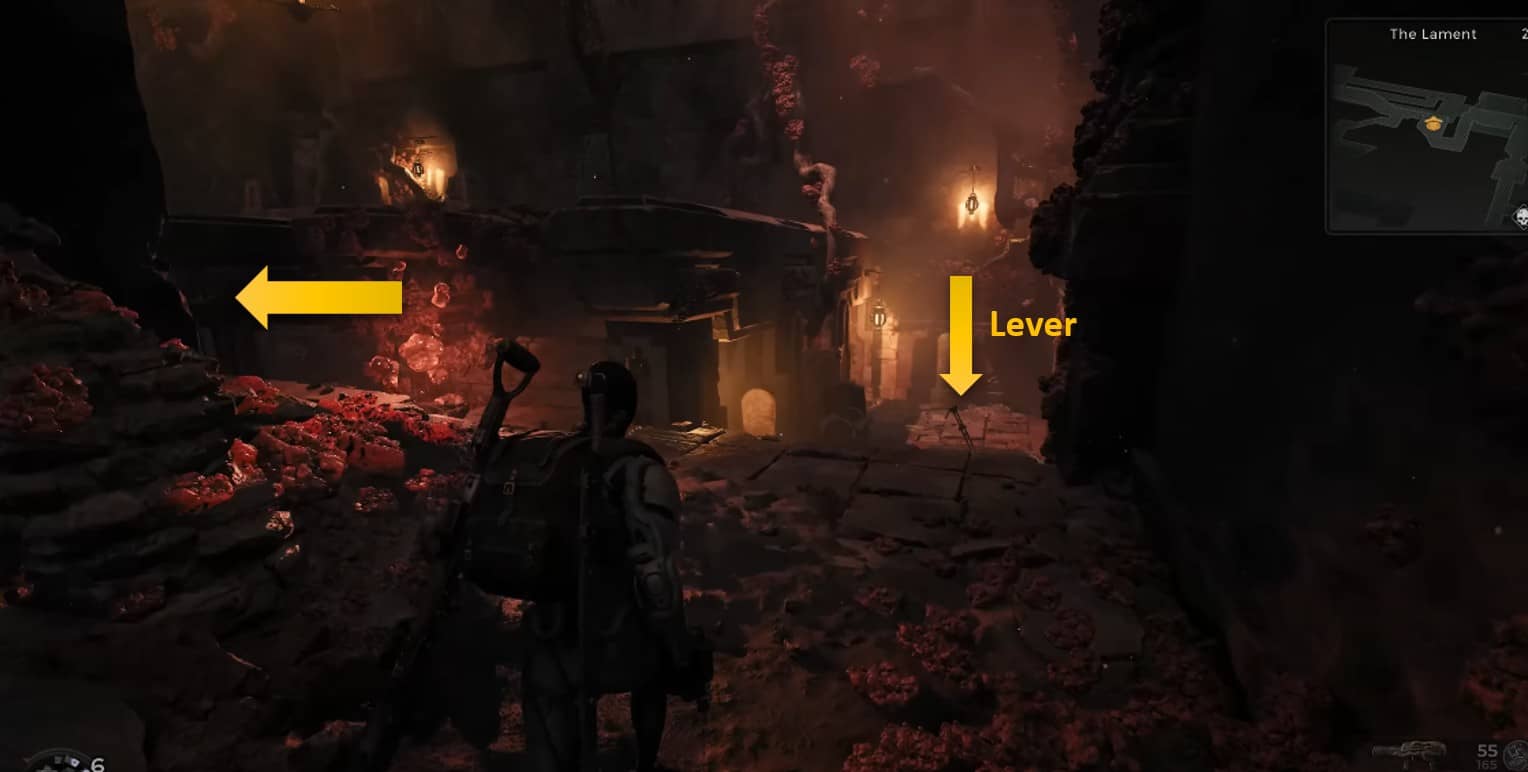
First off, inside the Lament Dungeon, you need to go to the place where you pulled the lever to basically deactivate the first arrow trap. Once you reach there head left and go down the stairs.
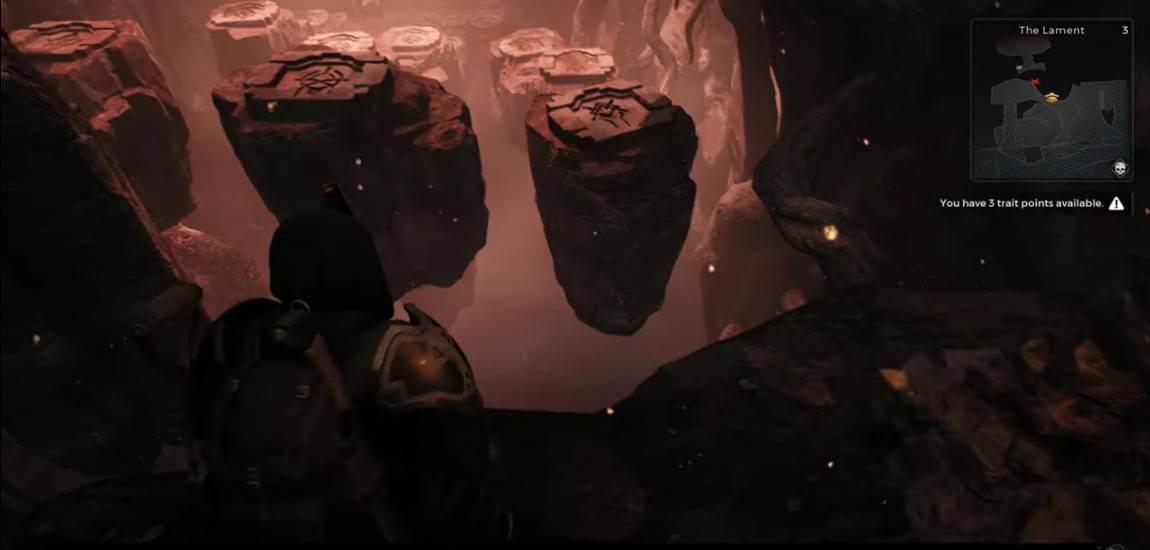
You reach a ladder not far along the path below which you need to use to get down even further. Eventually, you’ll find yourself in a large open area with nothing but floating pillars and death in between them.
So, if they really are just floating pillars separated by a fall to the death, why call this the Lament Bridge Puzzle then? That’s because there is actually a bridge connecting these floating pillars, but it is invisible.
However, not all of the floating pillars are connected – only a few of them. The main idea behind this puzzle is to have you find the bridge connecting the pillars.
To do that, you can follow one of two ways, you can either shoot the space between you and the pillar and check for a bridge by the bullet’s impact or you can simply follow the markings carved onto the pillar. Let me elaborate.
Move towards the floating stone pillars
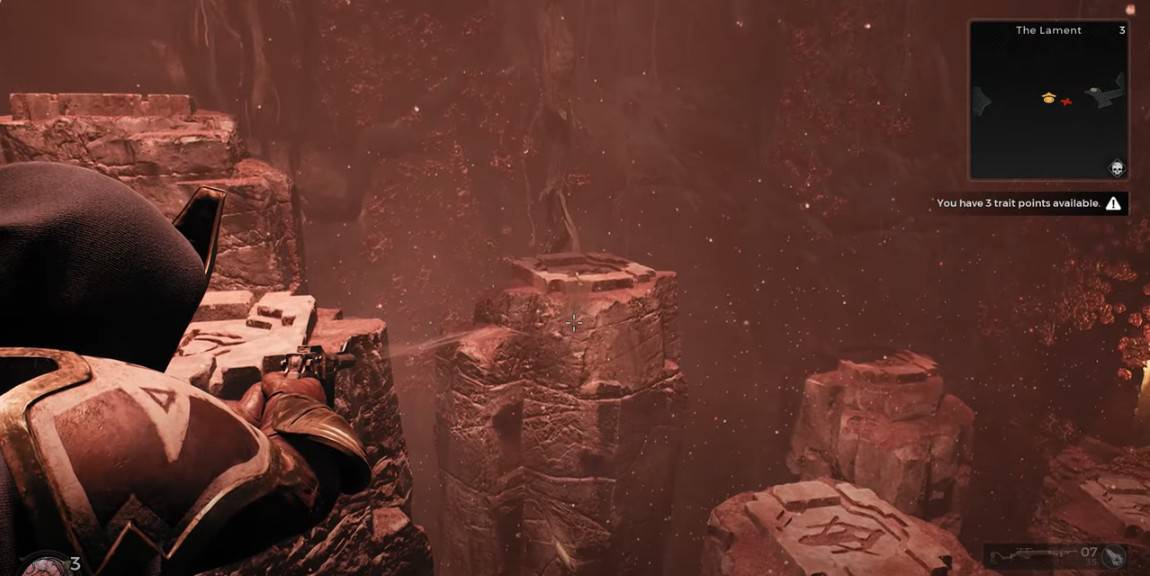
As you start off the puzzle, you have to shoot the gap between you and the next floating pillar to check if the invisible bridge lies there.
If there really is a bridge, then you can go ahead and memorize the marking/glyph carved onto that particular floating pillar. The reason behind doing this is all of the pillars with the same glyph are connected by the invisible bridge.
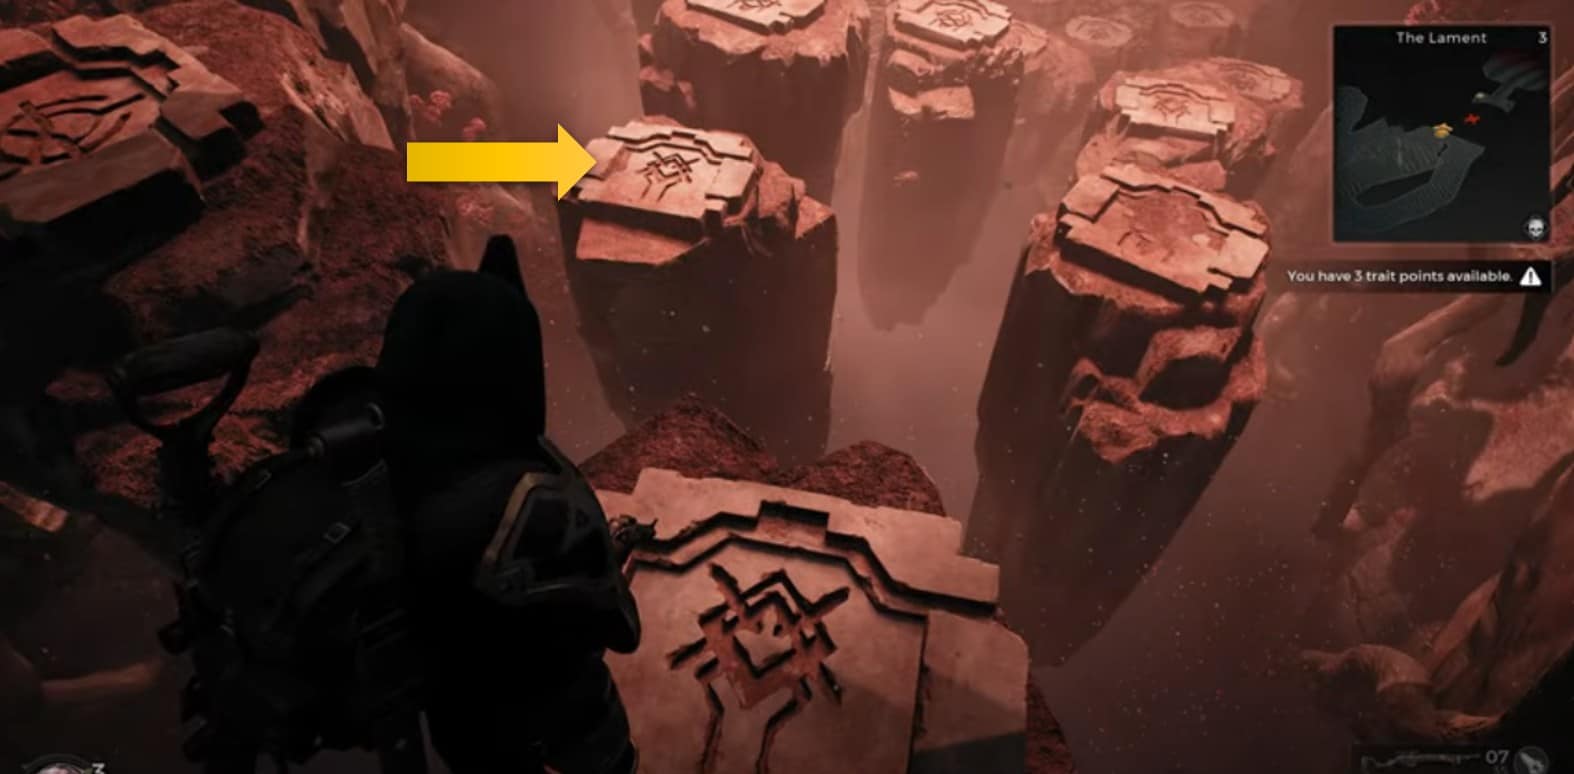
You can check by shooting the gap between you and the second floating pillar ahead to confirm that there is indeed a bridge between the two. The rest of the stone pillars are just dummies and don’t have a bridge between them.
Essentially, all you have to do is first check for the bridge by shooting the floating pillars, memorize the glyph carved on the one connected by the bridge, and simply just walk the rest of the way, keeping in line with the pillars that have the same marking on them.
This way, you don’t really have to shoot every single pillar to cross this puzzle. Simply follow the aforementioned strategy and you’ll be able to get through the floating pillars puzzle in Remnant 2.
Unlock the chest
Upon crossing the floating pillars and making your way into the next area, you’ll first find a chest. This chest contains small rewards like Scrap (x45), Relic Dust (x3), and Iron (x2), but there are big ones found just a little bit further.
After that, you will then come face to face with a giant door that can only be unlocked using the Kolket’s Key in Remnant 2.
If you have acquired that then use it to open this door. Inside you will find six coffins. From the second coffin on your right side, you will receive the Ring of Diversion and Iron (x2). There is also a fake wall here with a hidden passageway that gets you the Lodestone Crown.