As you play through the storyline of Hogwarts Legacy, one of the main quests you will come across is “The Helm of Urtkot” quest. It involves you gaining the trust of a goblin, Lodgok, in hopes that he will reveal some information on Ranrok’s plans.
Lodgok tasks you with finding an ancient Goblin relic called the Helm of Urtkot which is supposedly located inside the Collector’s Cave. Unfortunately, goblins cannot enter the cave, so you will be tasked to go in and find this lodgok relic on your own.
How to start the quest
This quest unlocks after you have completed “Professor Sharp’s Assignment” and “Percival Rackham’s Trial”.
This involves you investigating the goblin’s presence, and picking a letter from one of the tents at the goblin camp.
You then need to find a way to get past the goblins that are guarding that place. Next, you need to go to the San Bakar’s tower and search the premises which will in turn reveal the entrance to the first trial.
Once you enter this trial you need to keep moving until you reach the door. This will mark the beginning of Percival Rackham’s Trial for you in Hogwarts Legacy.
After that, all you need to do is complete the trial, defeat the guards you encounter along the way, and learn the trial’s secret. Finally, converse with Fig and Professor Rackham to complete the trial quest.
Following that, the Helm of Urkot side quest will be unlocked for you to access in Hogwarts Legacy.
We recommend that you reach at least level 12 along with learning the powerful banishment charm “Depulso” before starting this quest.
How to complete The Helm of Urtkot quest
This side quest asks you to basically find “Lodgok”. This goblin will be present somewhere in Hog’s Head Inn. Once you track him he will talk about the goblin relic which can be found in the witch’s tomb in Hogwarts Legacy. This tomb can only be accessed by wizards.
So, to obtain information on goblins, you must first head out to the Three Broomsticks in Hogsmeade and talk to the bartender Sirona Ryan. Ask her that you want to obtain intel on Ranrok, and she’ll tell you to meet Lodgok at the Hog’s Head Inn, which will be your next stop.
Talk to Lodgok at the Hog’s Head Inn
Head over to the Hog’s Head Inn and look for Logdok the goblin. You will find him on the table left from the entrance, sitting alone. Ask him about Ranrok’s plans after saying that you have Sirona’s trust, and he’ll assign you a mission to gain his.
Lodgok wants you to find an ancient Goblin relic called the Helm of Urtkot.
Meet Lodgok at the Witch’s Tomb
After your conversation with Lodgok ends at the Hog’s Head Inn, you must meet him at the Witch’s Tomb. Lodgok will lead you to a Collector’s Cave nearby – right next to the Collector’s Cave Floo Flame.
Lodgok explains that the Helm of Urtkot is down there, but from this point on, you will be on your own since goblins cannot go inside the tomb.
How to open Collector’s Cave
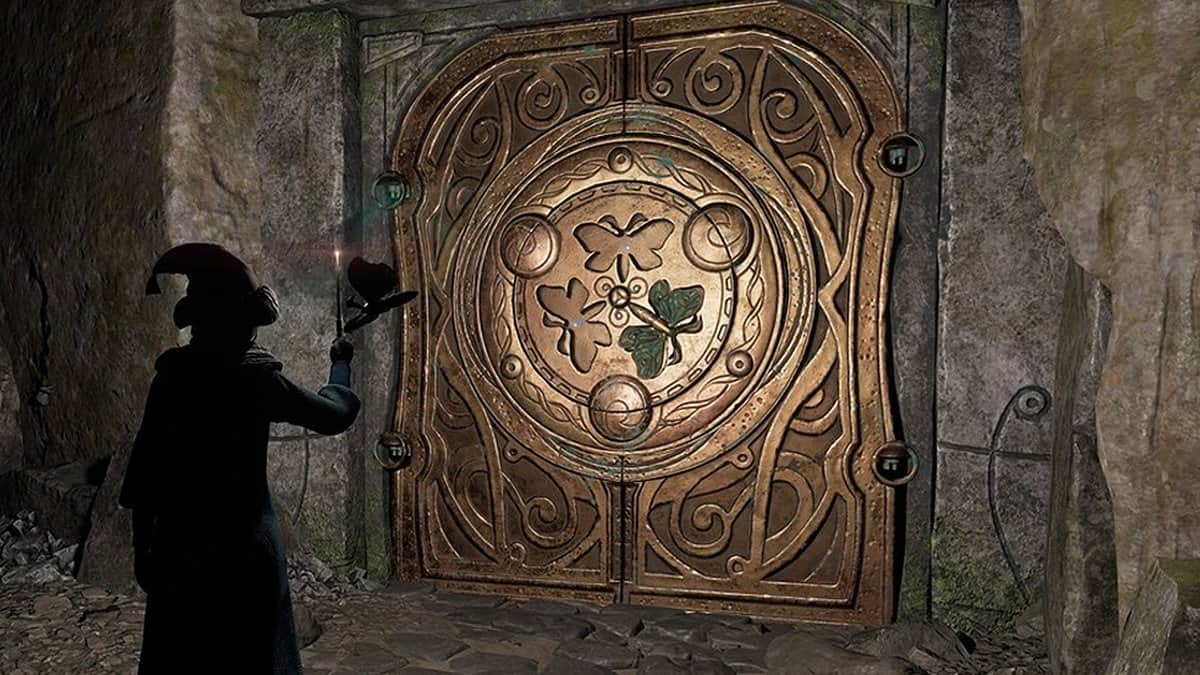
Enter the Collectors Cave and descend till you reach a locked door with moths on it. In this area, you will find a lot of locked Moth doors. You will have to solve all of the moth puzzles to continue forward.
How to solve the Helm of Urtkot moth puzzle
As you move through the collector’s cave, you will come across four different locked Moth doors. These act as sort of a puzzle, and there is a general method to opening them, for which you require moths.
These moths will be scattered across the area near the door. Most of the doors require three moths to open, but the last one will require four. For starters, search around the area to find the moths. Once you find one, cast the Lumos spell to bring light and make it follow you – as moths are attracted to light.
Next, lead the moths to the Moth door and uncast the Lumos spell. The moth will automatically land on the door. Once all the moths are placed on the Moth door, it will open.
How to solve the first moth puzzle
The first one is going to be easy to solve. You only have to get one missing moth to open the door. For this, you need to head into the passage on your left. Head towards the end and cast the Lumos spell to illuminate the area.
The moth will start to follow you. Lead it to the door and uncast the Lumos spell to allow it to go free. The moth will unlock the door after that.
Enter the room and follow the path ahead lit by wall torches. You will eventually reach a circular room with another one of the locked moth doors.
How to solve the second moth puzzle
All three moths are missing from this door. You can find two of them in the same room and the third behind the two ruined doors. These doors are to the right of the moth door. You can destroy them with the Depulso spell and enter the room.
Lead all three moths back to the moth doors as you did before – using the Lumos spell. Once the moths are in place, the doors will open and you will be able to continue ahead.
In this next area, you will encounter a few Inferi. You can kill them with incendiary spells like Incendio or Confringo. Additionally, there are also a few explosive barrels here that you can use to damage the Inferi.
How to solve the third moth puzzle
After dealing with the Inferi, Continue ahead to reach an area with another locked moth door. This area will have a moth-shaped mechanism at the center of it. Use Lumos to place one moth here.
Now for the second moth, you need to cast the Depulso spell on the mechanism, while standing on top of the platform to the right of the room. This will lift you up to the second moth.
Lead this moth back to the door with the Lumos spell. Then lead back to the one you placed on the mechanism. That leaves the third and final moth, which is on the ground level of the room.
Once you have all the moths, place them on the door to advance. Not far ahead you will see a crate hanging from the ceiling in a circular area. Cut the rope by casting a Basic Cast over it. This will drop the crate, breaking the floor.
You will see a bunch of rooms above you as well, but inaccessible. There will be another crate to the room on your right. You can break its doors with the Depulso spell and grab the crate with the Accio spell to access the rooms above, which contain a chest.
After you’re done looting, drop down into the water from the opening. Head over to the next circular room and you’ll encounter a bunch of Inferi. Again, you can kill them with the Confringo and the Incedio spells.
How to solve the fourth moth puzzle
In this room, you will see another central moth-shaped mechanism and a moth on the platform to your left. Grab that moth and place it on top of the mechanism, then head over to the section between the platforms and cast the Depulso spell on the mechanism.
That way you can reach the moth on the right side of the room. After you grab it, bring it over to the door by jumping over the gap and placing it on top. There will be another one to the right of the door, grab it and place it on the door with the Lumos spell.
Now, grab the other moth below without touching the one on the mechanism. Now you have three moths, but the door requires the one on the mechanism as well. Simply lead the moth near the door using the Lumos spell once again.
You can simply cast the Lumos spell on the moth from right next to the door to lure it toward you.
Now that the door is opened, continue down the stairs to reach the witches resting place. You will notice that the Helm is nowhere to be found, and there is an Ashwinder corpse right next to the coffin.
You can loot the corpse to get a Signet Ring, then exit the cave by interacting with the wall adjacent to the coffin.
Once you arrive back at the North Hogwarts Region, talk to Lodgok, and he will explain that the Helm is probably with the Ashwinders in the camp nearby – but you need to make haste as the Rookwood might escape.
Retrieve the Helmet from the Ashwinders
Head over to the Ashwinder camp nearby and destroy everyone. Then, head over to the tent on the camp’s right. There will be a large chest in this open tent which you can loot to obtain the Helm of Urtkot.
After that, you’ll be met with a few Ashwinder Assassins that summon Inferi. Deal with all of them and make your way to Lodgok.
Give the Helm of Urtkot to Logdok and he will thank you, saying that he will use this to distract Ranrok from his plans, concluding the “Helm of Urtkot’ quest.