
Hope County is full of Cult Outposts in Far Cry 5, which house large amounts of cultists. Cultists use these outposts are forward operating bases and to spread their propaganda. The outposts get bigger and harder to take over as you progress in the game. Each outpost you liberate gives you a good amount of reward, including money and resistance points. Some of them also reward you with bonus vehicles and equipment.
There are two main ways of liberating an outpost: take a stealthy approach or go in guns blazing. Below, we have detailed all Cult Outposts you must liberate in Far Cry 5, including their locations within their respective regions. We have also detailed what rewards you receive for completing every outpost.
Ranger Station
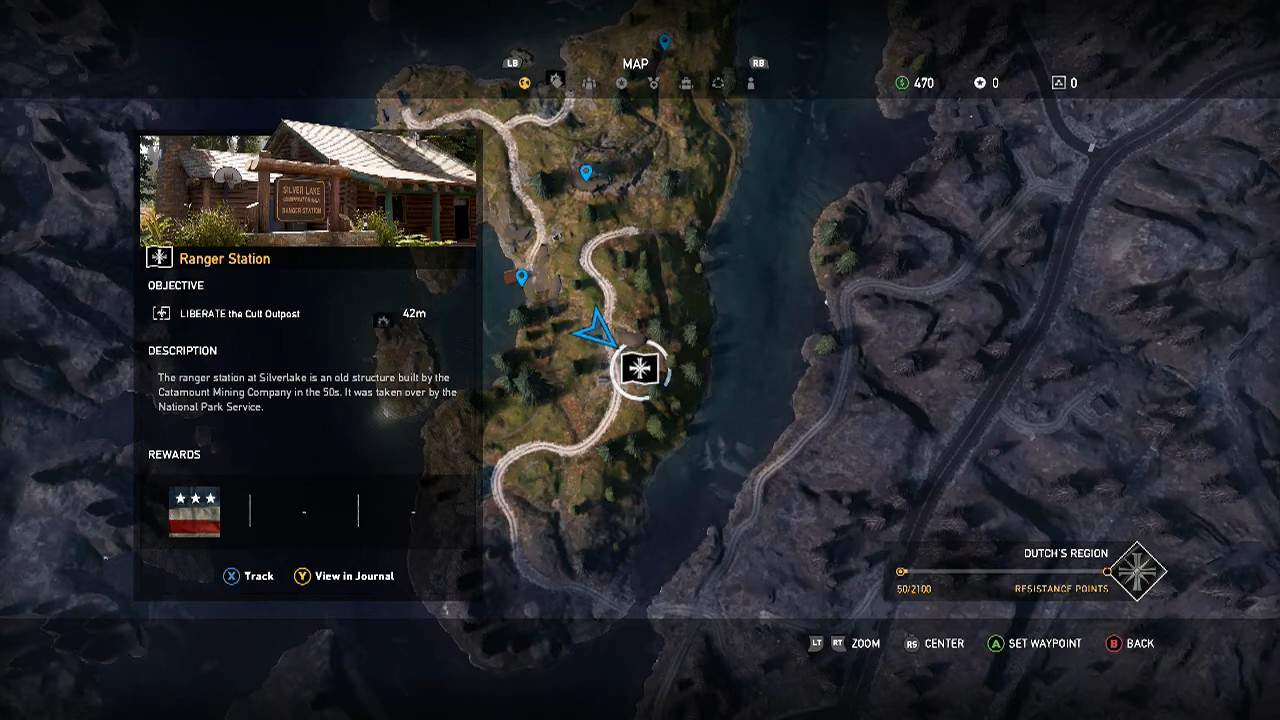
First up in our Far Cry 5 Cult Outposts Guide is the Ranger Station. Based in Dutch’s region, this is the easiest outpost to liberate.
It has no alarms, and there are only four enemies to take care of. This outpost contains the map of the Dutch’s Island region. It will reward you with money and 400 Resistance Points while eliminating the cult control from this region completely.
Make sure to tag all enemies before you start the attack. You can enter from the main entrance and mow all enemies down, but if you want to earn the highest score, we suggest that you opt for stealth. Use your compound bow and take out each enemy one by one, starting with the one nearest to the outbuilding.
Gardenview Packing Facility
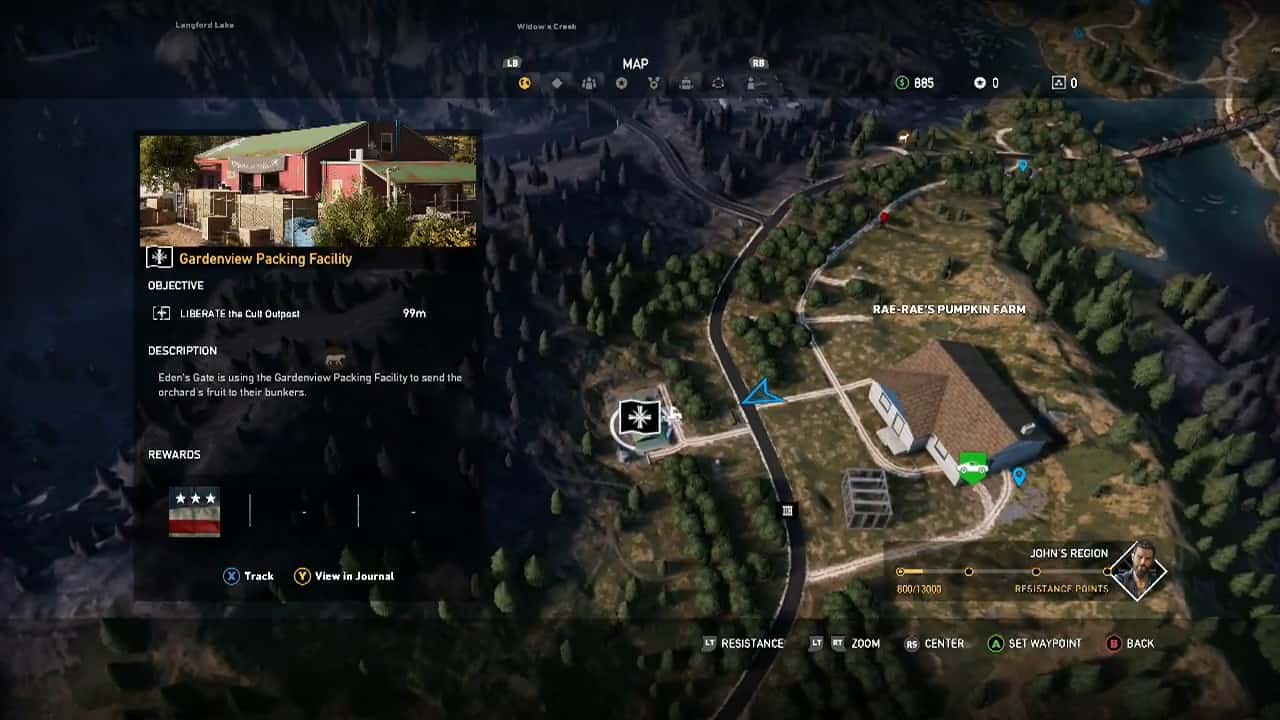
It is located in John’s region. It has 1 alarm at the unloading dock. This can be deactivated by either shooting it from the entrance or sneaking into the base from the south.
There are six cultist enemies and 1 animal here. If you want to use stealth here, start from the water tower and tag all the enemies around the outpost.
Once you know the location of all enemies, use the zip line, enter the silo, and get to its top. Use the zip line and reach the warehouse. Once there, you can take out enemies individually, starting with the guard on the rooftop.
Use your bow if you want stealth; otherwise, just barge in from the main gate, reach the unloading bay, and shoot the alarm. Once the alarm is down, mow down all remaining enemies and claim the outpost.
You can also free the animal to add to the chaos. Once liberated, you will be rewarded with money and cult control will be lowered in the area. You will also find Gardenview Key in this outpost giving you access to the warehouse office.
U.S. Auto

U.S. Auto. is located in John’s region. It has two alarms and eight enemies, including a sniper. Your priority should be taking out the Sniper. Since both alarms are located on opposite sides, you will have to be quick about them.
For the first alarm, go down the main road, climb the rocks on the right side, and approach the base until you see the alarm control box. Shoot it to deactivate it.
You can also tag all enemies from this location. Now, take the outside path around the outpost, making sure that nobody sees you. Climb the bus and shoot the second alarm. Once the alarms are down, aim for the sniper and remove it.
The sniper is located on the rooftop, so you must be careful. Once the sniper is down, eliminate enemies one by one until all are down. In other cases, if you want to use force instead of stealth, enter the area, eliminate the three enemies near the first alarm, and then deactivate the alarm.
Run back; shoot the two enemies and then the alarm. Once down, shoot the sniper and the enemies inside the building to take over the outpost. Once liberated it will lower the cult control in the region. You will also find a region map inside the outpost.
Green-Busch Fertilizer Company
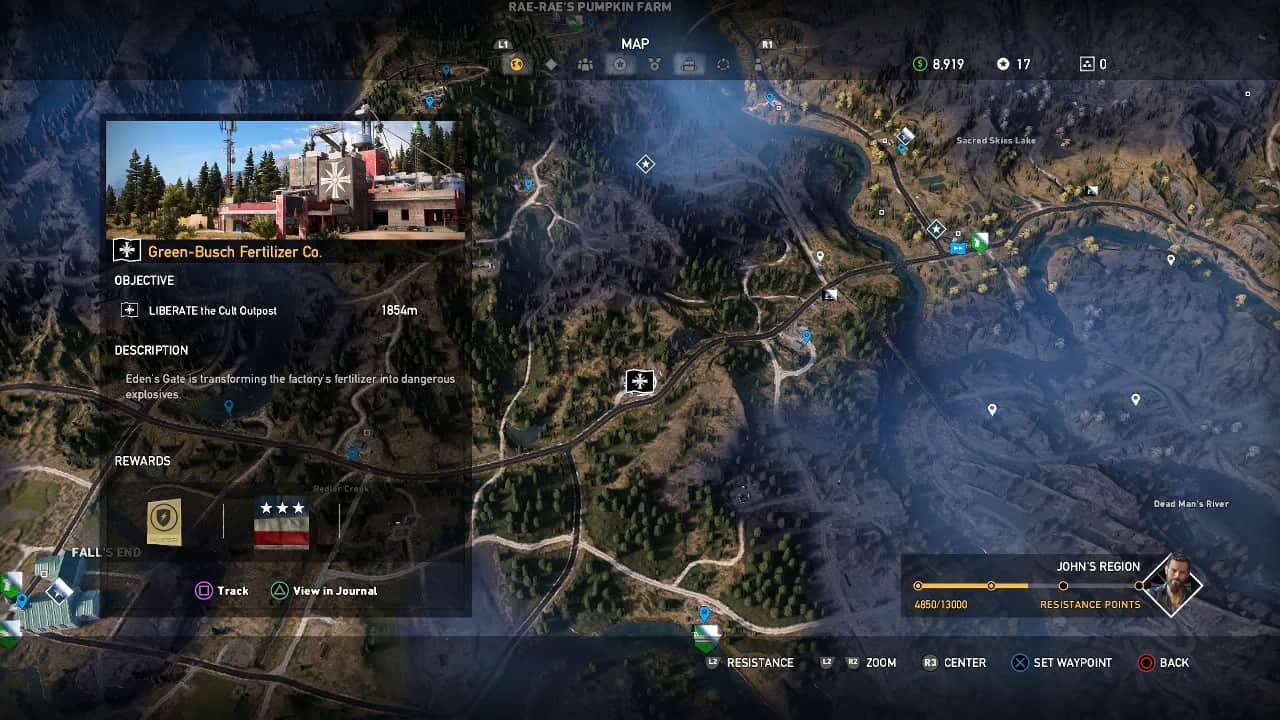
Next, in our Far Cry 5 Cult Outposts Guide, we have the Green-Busch Fertilizer Company. Located in John’s Region.
There are eight enemies here, including a sniper. It has two alarms as well, which are located at the end of the building. The sniper is located in the tower in the middle of the two structures. There are many grappling hook points in the outpost, which you can use for advantage.
If you climb the hill near the billboard, you can easily spot all the enemies and mark them from this location. This point also lets you view both alarm panels, so you can take them out from a safe distance.
To take the sniper out silently, you can enter the building from the main road, use the ladder near the low building with the helicopter on it and climb the ladder next to the silos. Take out the sniper, and the rest will be easy.
Once liberated, the outpost will reward you with the Ultimate Survivor – Enhanced craftable item. Inside, you will also find a region map.
Sunrise Farm

Located in John’s region. It comes with 2 alarms and 8 enemies. This time, there are six normal shooters, one sniper, and one flamethrower. One of the enemies arrives later when he drives a truck to the farm and parks near one of the alarms. There are also some hostages inside the small barn that you can save. Make sure you are not detected, or the hostages will be killed.
There is also a mortar near the west side of the map, which you can use to even the odds against the flamethrower. Your main targets here are the sniper and the flamethrower. You can climb the pumpkin field water tower for a good vantage point to mark enemies and take them out using sniper rifles.
You can strangle the flamethrower enemy but doing this will require that you clear other enemies around him first to stealth is your best option here. If you want to go stealth, you do not need to deactivate the alarms, and if you want to go head-on with the cultists, you should deactivate both the alarms and then use the mortar on the truck to start some chaos.
Seed Ranch
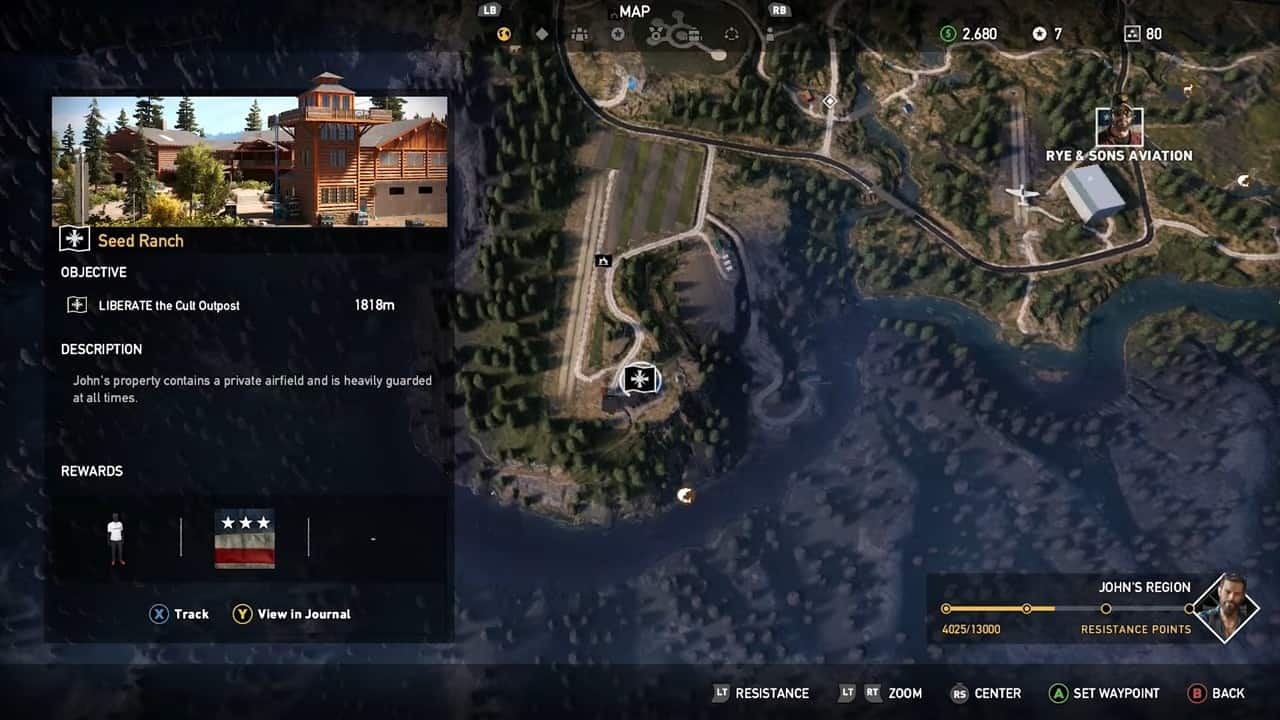
Seed Ranch is the toughest outpost in John’s region. It is John Seed’s residence, complete with an airfield. This outpost has 12 enemies, three of whom are snipers. The rest are normal cult enemies. It also has three alarms, and if one goes off, you will have to deal with a helicopter.
Your best approach for this outpost is from the rear of the residence. Avoid entering from the main road or the airfield. Access the southern gardens, as they are your best option for this encounter. If one of the alarms goes off and you must deal with a helicopter, there is an RPG in the main lodge.
You will have to be very vigilant about the three alarms. Spot them and you will see that they are in plain sight but getting to them will not be easy, as the area will be swarming with enemies. The best place to tag all the enemies is by climbing to the top of the north comms tower near the airfield.
If you plan to use stealth, the north comms tower is your best approach, as one of the zip lines here lands right next to bushes near one of the alarms. You can hide the bodies in bushes here as well.
Be careful of the machine gun enemies in the center deck. One of the snipers is located in the west tower, another in the hangar’s exterior deck, and the last one in the hangar.
Once liberated, the cult control in the region will be lowered, and you will be rewarded with the Hunting Magazine.
Kellet Cattle Co.
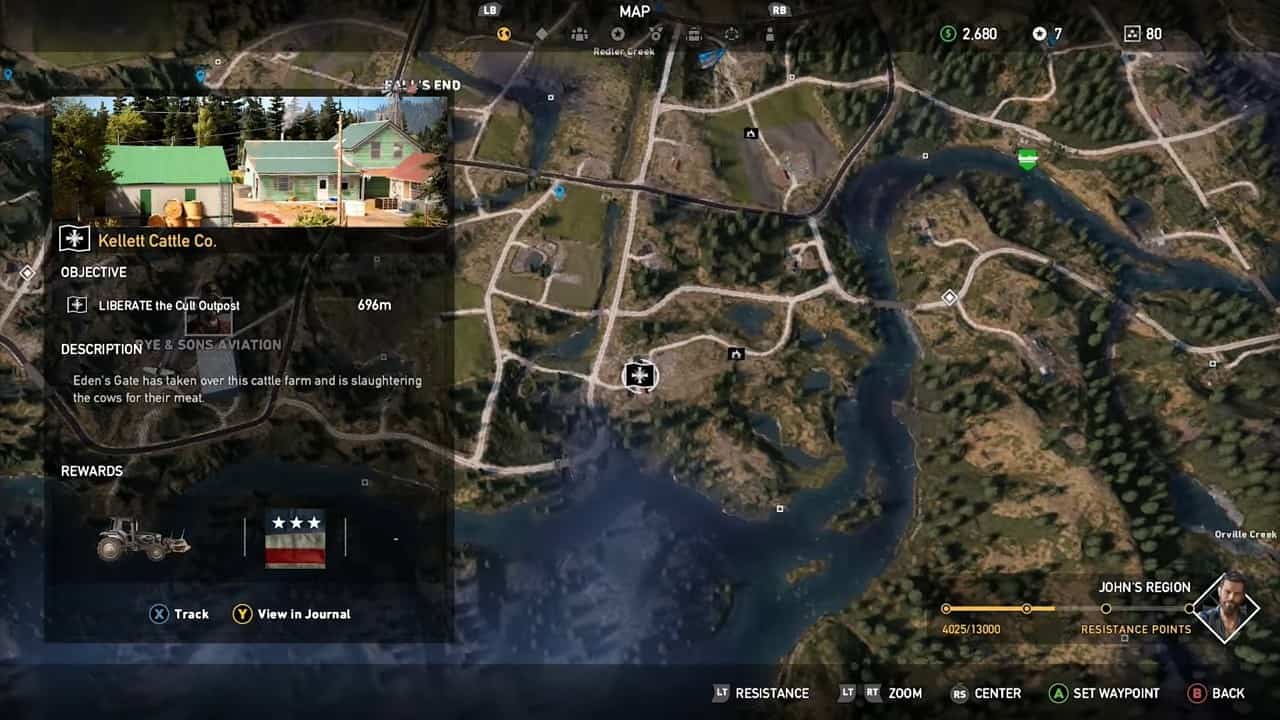
There are eight enemies in total, including one heavy, one VIP, and one animal. You also need to be careful about two alarms.
Your best bet here is to strangle the heavy unit rather than go head-to-head with him. The roof of the cow barn is a good place to scout for and mark the enemies. It is also a good vantage point for sniping. If the alarms go off, watch the west road, as more enemies will arrive from there.
If you want to use stealth, you will want to start at the water tower. Mark all enemies and start following the heavy once he starts patrolling. Keep following until it reaches the north side of the main house, and then strangle it. Use the trailer and the barn for cover to eliminate the remaining enemies and take over the outpost.
Completing the takeover will reward you with a special vehicle, ‘The Reaper, ‘ and decrease the cult’s control in the region.
Copperhead Rail Yard
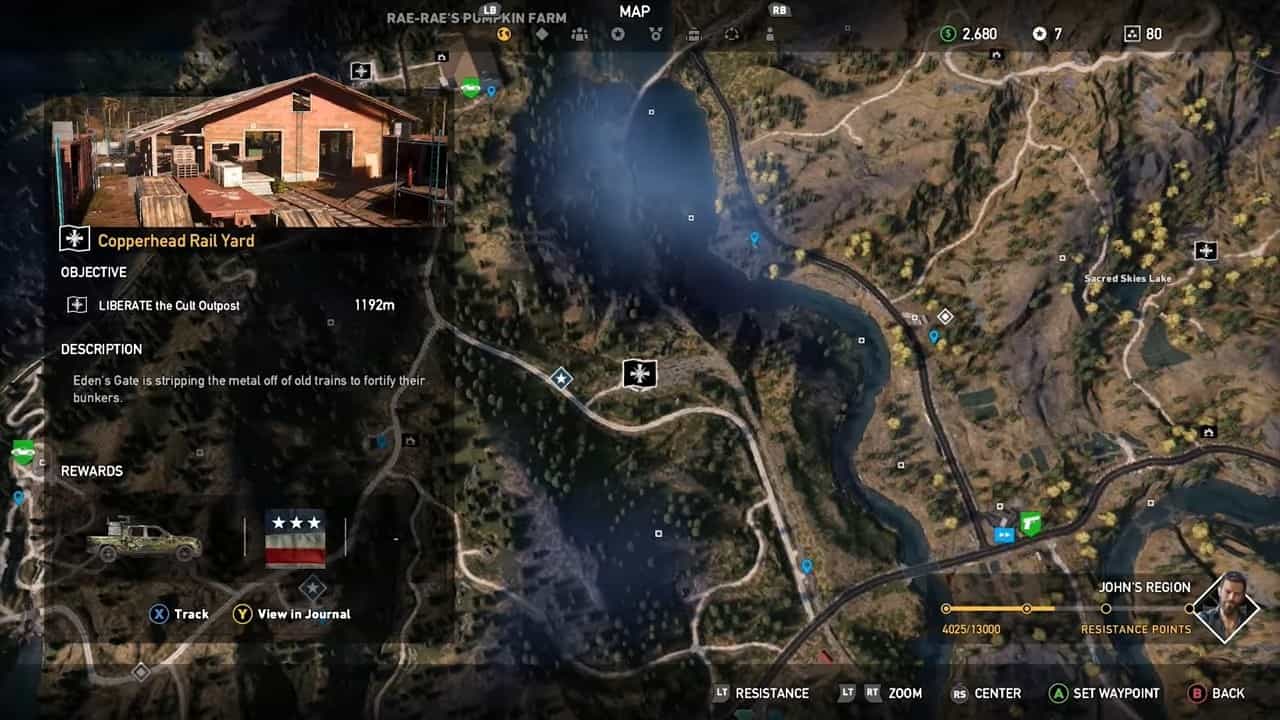
The Copperhead Railyard features 8 enemies, out of which 1 is a sniper and 1 is an animal. It has two alarms for you to deactivate. Both the alarms are located near each other in the open area. There are also two MG nests here.
In this outpost, most of the enemies are located behind rail carriages, so marking them is difficult. One of the alarms is nearly impossible to deactivate without clearing all enemies around it first, so taking them down beforehand is not an option here. Billboard and the water tower provide good vantage points for sniping and marking as many enemies as possible.
If you run out of cover while on the ground, the blue upturned rail car provides excellent cover. For the stealth approach, start by eliminating the enemies at the main warehouse. Afterward, get to the roof and shoot the remaining enemies individually. This will make it much easier.
After all the enemies have been defeated, the cult outpost will be yours. It will reward you with the special vehicle’ 2012 Kimberlite TC6 M-Duty “Outlaw, ” and the resistance will be further lowered in the region. You also get the region map inside the building.
Pin-KO Radar Station
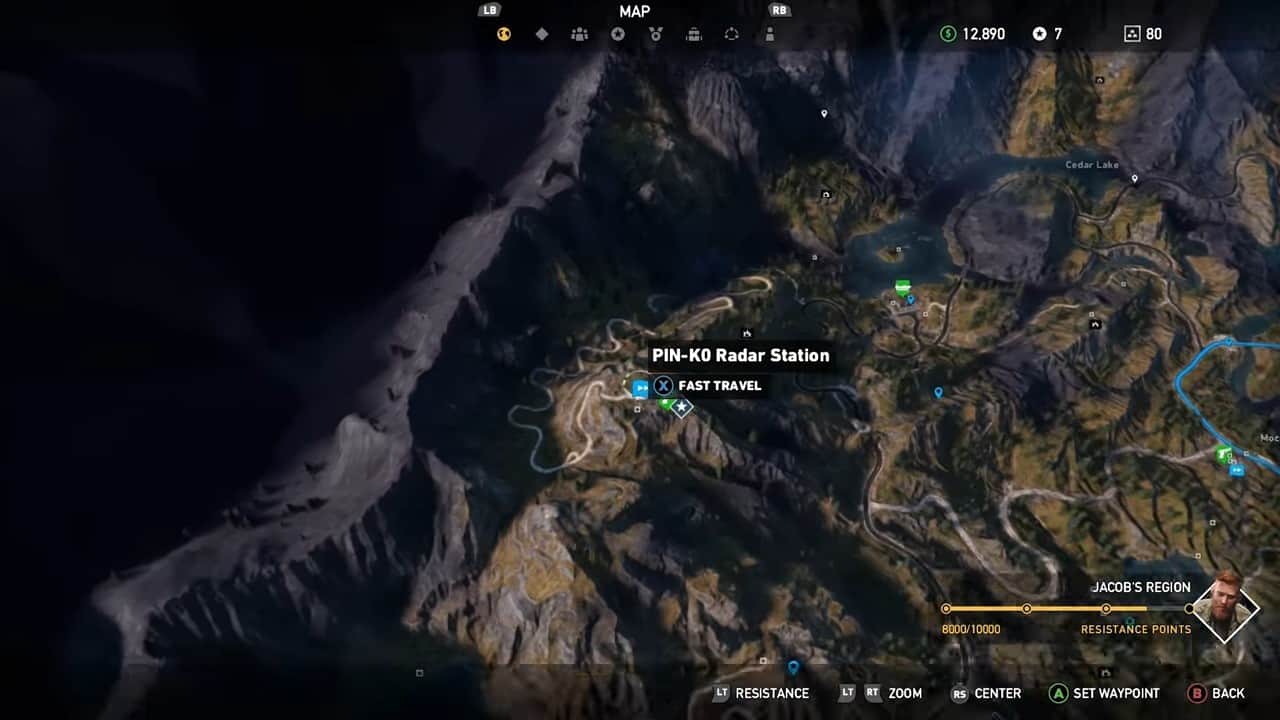
Pin-KO Radar Station has twelve enemies located in Jacob’s region, including two snipers, one heavy, and two animals.
Two alarms are for you to deactivate. One of the animals is also running loose in the radar station, making stealth very difficult. If you manage to reach the security hut right up to the main road, you will find some heavy weapons inside, including an RPG. You will have to pick the lock to get inside. If you want the key, it is located on the upper level of the main tower.
You will need access to this building if you are fighting enemy helicopters. The heavy weapons will help you easily take down all enemy helicopters. However, the heavy and the free animal will make the mission very hard for you if you plan on running stealthily, so we recommend that you keep them as your last targets.
Start by clearing out the main tower because it will give you an excellent vantage point to secure the outpost. It will also give you a lookout point for the outpost. Make sure to hide all bodies if you are going stealth; otherwise, the enemies will be alerted, and the alarms will call in helicopters, making it more difficult for you.
Once the outpost is secured, you will unlock the Kaumbat H-158 Sky Scarab and 400 resistance points. Inside the outpost, you will also find the region map.
Whitetail Park Ranger Station
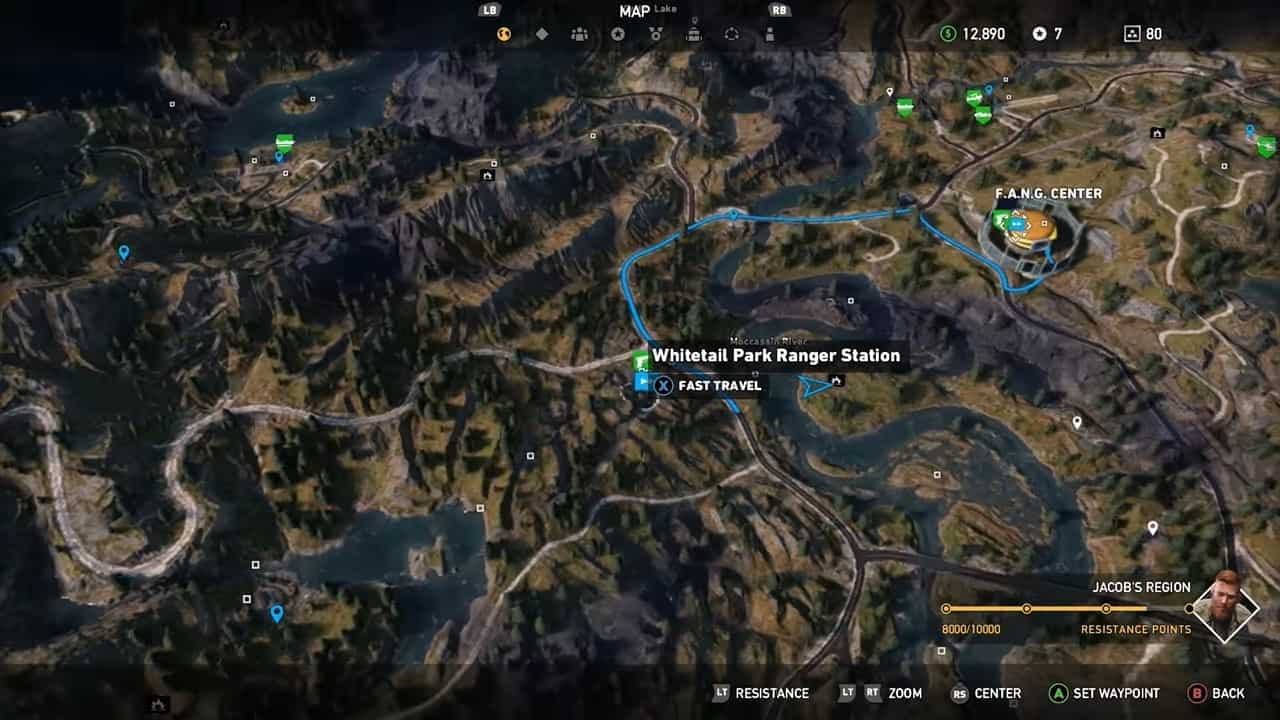
Located in Jacob’s region, it has 8 enemies, including one sniper, one heavy, and one animal. There are two alarms for you to tackle as well. There is a mortar nest here as well, so if the reinforcements are called, they will use it against you, so make sure that you eliminate them quickly.
This is not a difficult outpost if you come from the upper ground on the west side. Avoid the east road or the north side. Use the west side to make this outpost much easier. Start by taking out the sniper and using the building rooftops to your advantage. If you want to open the armory, find the key to the north building with the alarm.
The drainage tunnels and the motor pool warehouse also provide great hiding places and an easy way to reach one of the alarms.
The locked animal is also good for creating chaos in the outpost. If you plan to use stealth, approach from the billboard, remove the sniper and then stick to the motor pool roof. Keep the wolf as the last target, as it cannot sound the alarm once left alone.
Once the outpost is clear, you will earn 400 resistance points. You will also get the region map, a Cheeseburger Bobblehead, and a Perk Magazine inside the outpost.
F.A.N.G. Center
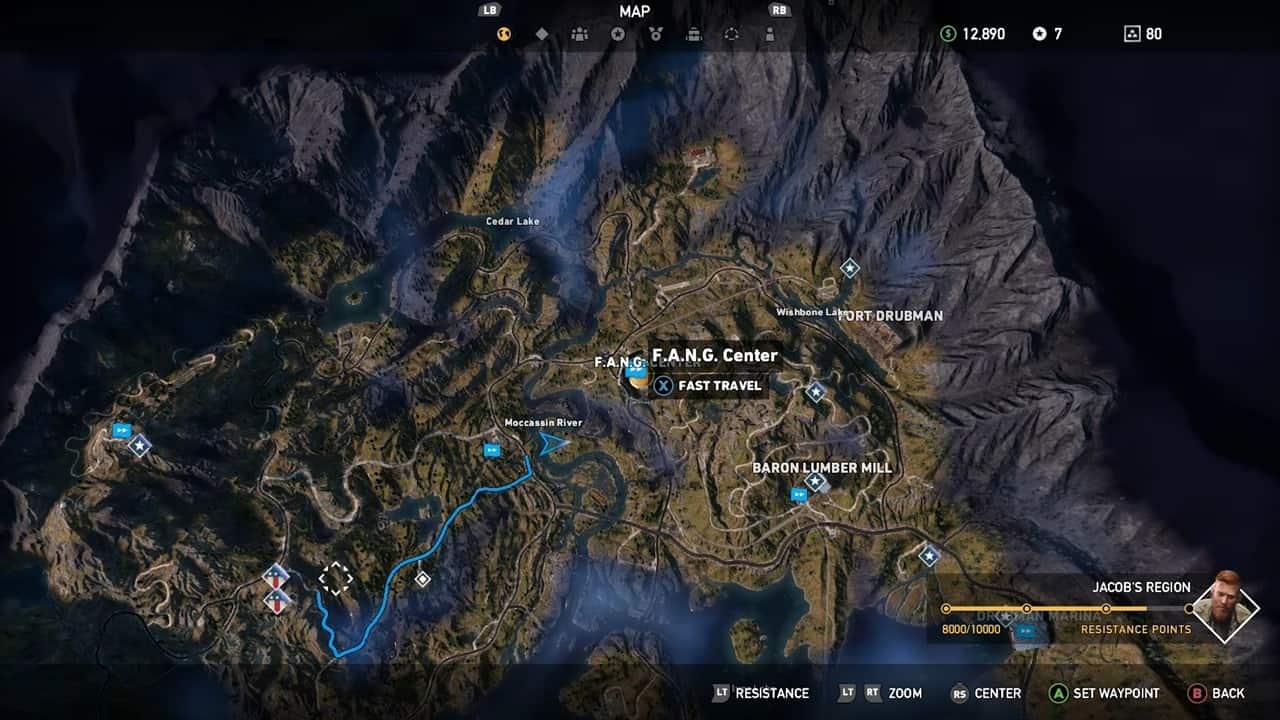
The F.A.N.G. Center includes 11 enemies, including 1 sniper, 2 Cult VIPs, 1 Heavy, and 2 Animals. The outpost also has two alarms and three MG nests.
Your main targets here are the VIPs and their wolves. If you want to take a stealthy approach, avoid the main road and the dirt road located in the south at all costs.
Do not hide in the drainage tunnel, either, because the space is very small and you will have no visibility of its upper level. Your best bet is to approach the area from the green shed and the structure next to it. This will give you a decent area to look around, hide, and mark the enemies.
For stealth, marking enemies is very important so we recommend using the rock where the cheeseburger sign is attached. This place will also allow you to kill the sniper, one of the VIPs, and his wolf.
Use the zip line, get inside the structure, and eliminate enemies, starting with the one next to the machine gun nest overlooking the dirt road.
Aim for the VIP in the middle and his wolf, then go after the heavy. Once the heavy is down, remove the remaining enemies, and the outpost will be yours. It will give you 400 resistance points and the essential outfit. You can also find the region map and a Cougar Baseball Card in the outpost.
Elk Jaw Lodge
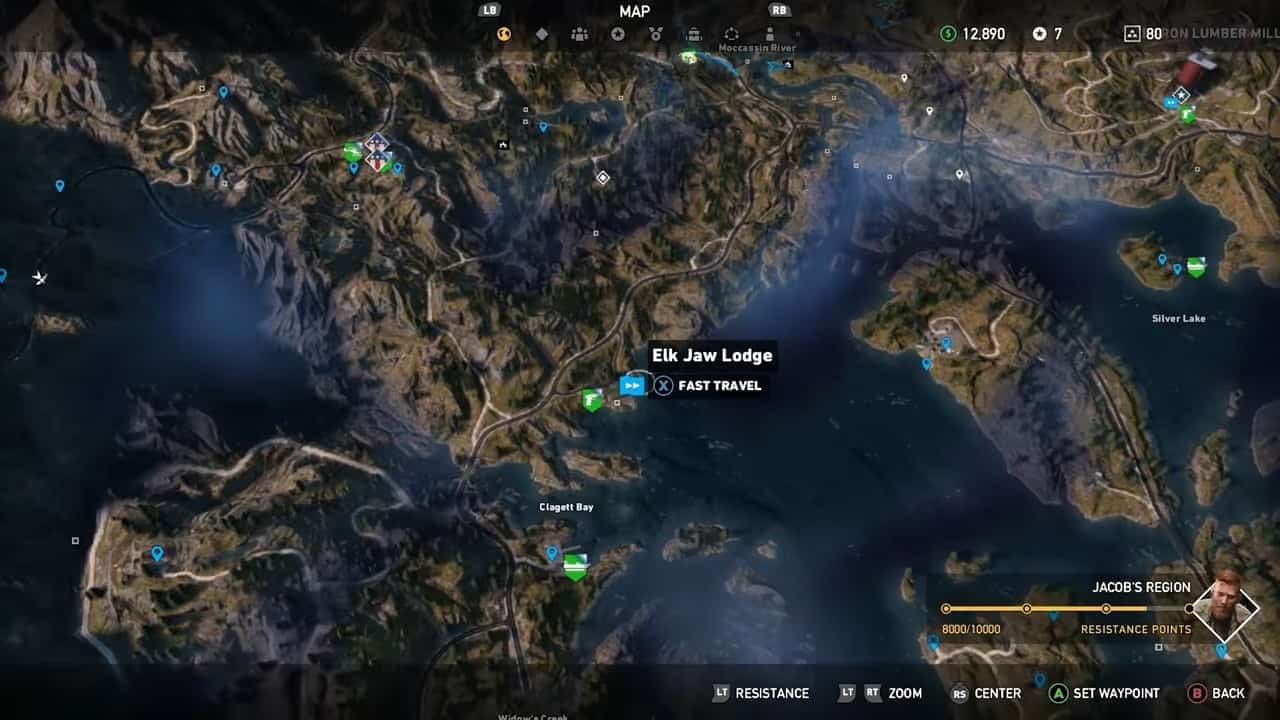
This outpost is located in Jacob’s region with two alarms and 10 enemies, including a sniper, a flamethrower, 2 VIPs, and two animals. Your first targets for this outpost should be the VIPs, the sniper, and the flamethrower unit.
There are also two MG nests and a mortar nest here. If the battle goes sour, you can use the mortar nest. The woods from the northeast give you an excellent approach point. You can open the wolf pens and then go for the first VIP.
Head inside the lodge using the grapple point, and you jump down to kill the second VIP. Once they are down, eliminate the remaining enemies, and the outpost will be yours.
The docks also provide an excellent attack point even if you plan to come in using stealth. Once the outpost is clear, you will get 400 resistance points. Inside the outpost, you can find the region map and a magazine.
Drubman Marina
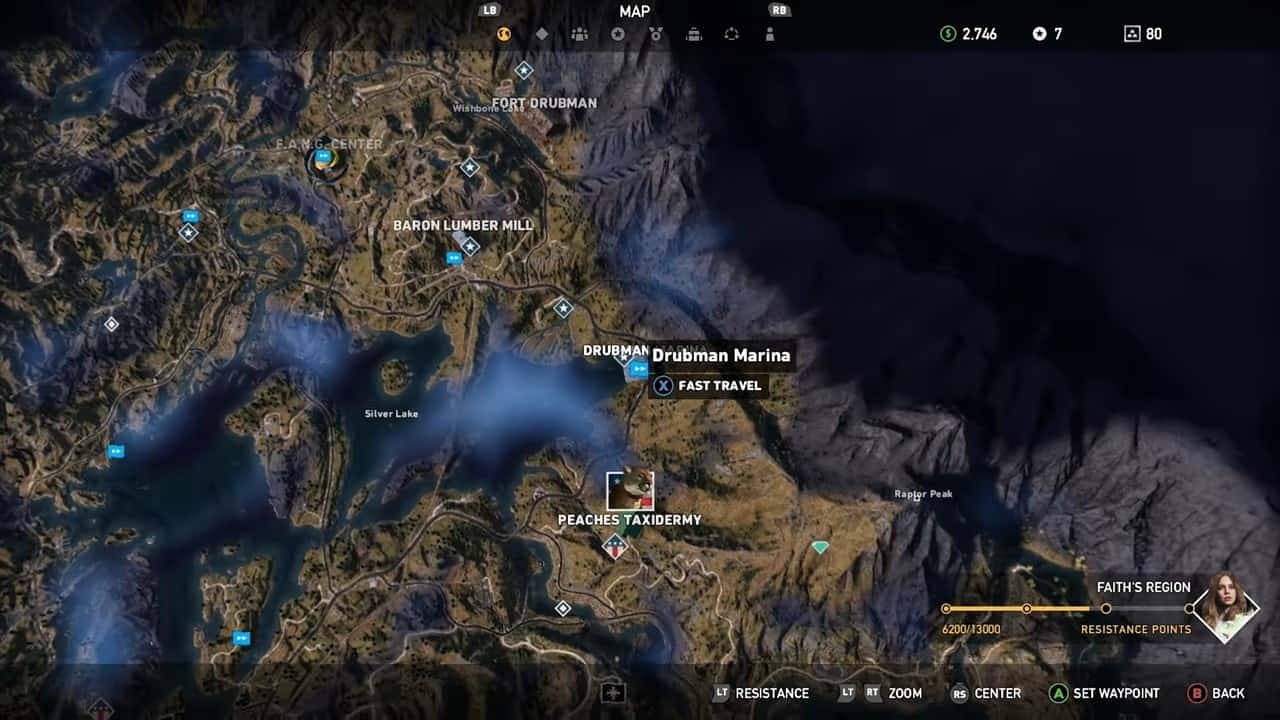
This outpost is located in Faith’s region and includes two alarms and ten enemies, including a sniper, a heavy unit, and three enemies patrolling the area on a watercraft. There is also an MG nest and a mortar nest.
This can be done easily if you care for the enemies on the watercraft. If you are looking for an interior to start your attack, the warehouse located on the north is your only option. However, there is a sniper on the top who can easily see you spoiling a stealth attempt in the process.
You can also use the rocks on the south side of the docks to the west side to initiate the attack. The docks present the constant threat of enemy boats coming in and out, so you must be quick and stealthy. The fence on the north side also has a gap, which you can use to enter the outpost. If you are detected and an alarm is raised, the mortar will start pounding you so avoid getting the alarms raised or eliminate the mortar team quickly.
For stealth, stick to the rooftops and make sniper your primary target. The rocks on the south will give you a good vantage point to mark all enemies.
As for the enemies on the boat, eliminate one using a silenced gun and they will disembark the boat to search for you on the ground. Once they are out of the water looking around, take them down as you see fit. Once all enemies are eliminated, the outpost will be yours.
Once the encounter is complete, you will get money and 400 resistance points as a reward. You will also find a region map inside the outpost.
Eden’s Convent
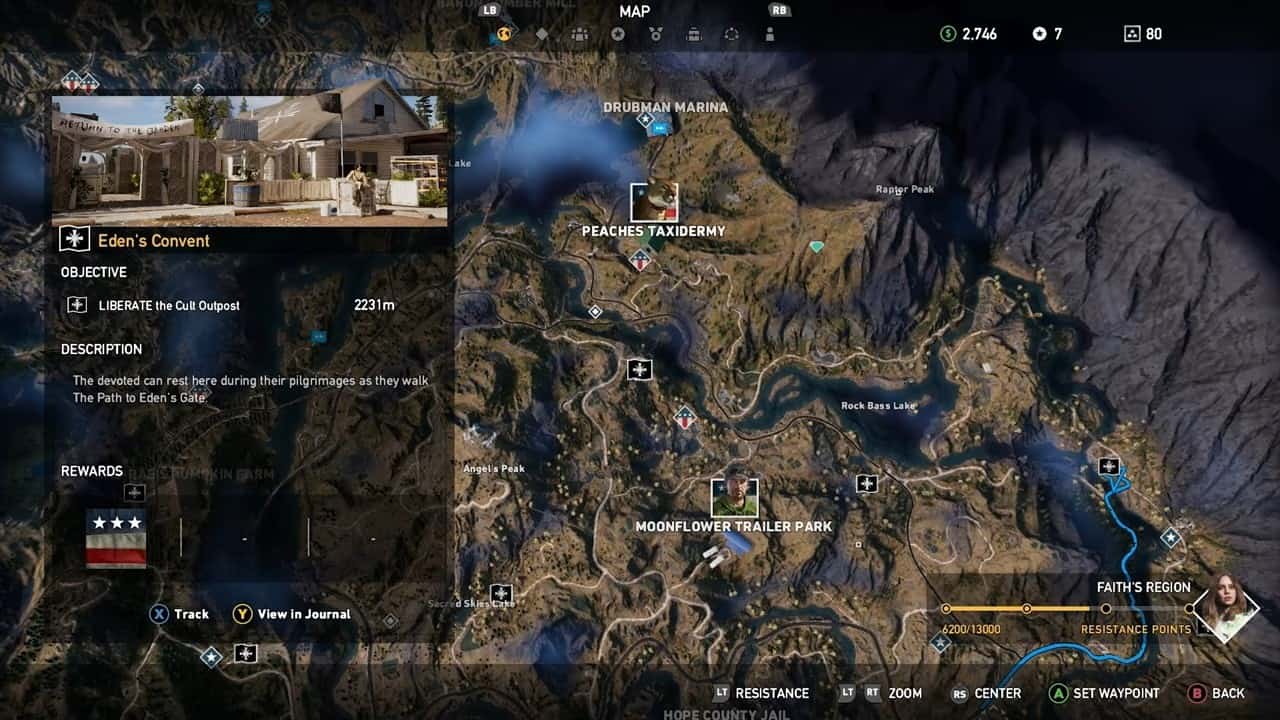
Eden’s Covenant is located in Faith’s region. It has eight enemies, including one VIP, one Angel, and one Animal. It also has only one alarm and one MG nest.
This outpost has entrance and access points all around it thus opening up a wide range of options to choose from when trying to attack it. The hills on the west provide an excellent marking spot, and the rocks are located on the southeast and southwest of the outpost.
Near the alarm, one of the cultists patrols the area. The Angels are located inside the church, save them for last. If you start from the hills on the west, you can complete the stealth route without needing any ranged weapons. The enemies are all in your path one by one and you can eliminate them by using melee from behind.
Once the outpost is free, you will be rewarded with money and 400 resistance points. Inside the outpost, there is also a magazine for you to collect.
Sacred Skies Youth Camp
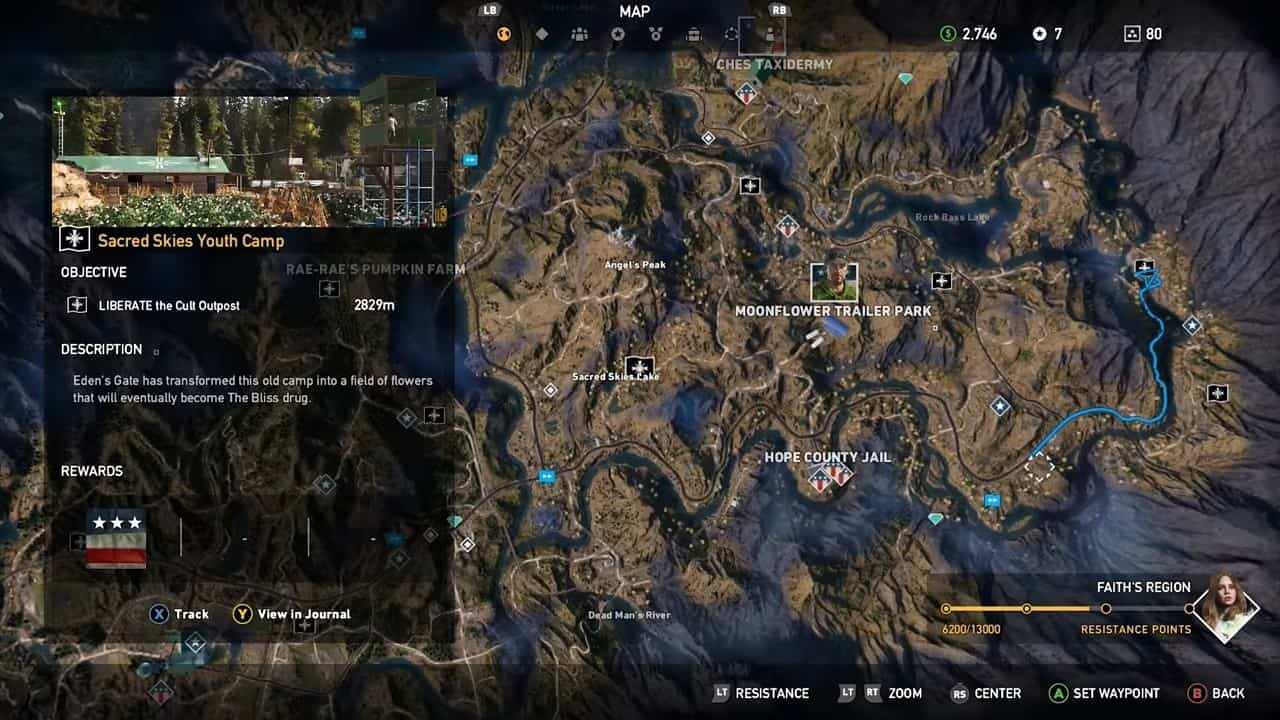
This is another outpost in Faith’s region. It has nine enemies, one of whom is a sniper and two of whom are Angels. It has two alarms and one MG nest.
The tree platforms provide excellent view for marking enemies however avoid the many zip-lines going in the outpost, as you will be easily seen. If you get on the tree platform at the east entrance, you can shoot both alarms easily. Keep in mind that due to the Bliss drug in the area, you might suffer from some wobbly hallucinations.
The fields provide an excellent place to hide the bodies. In addition, the two Angels in the field must be your last priority. Start with eliminating the enemies located around the main building. Once they are done, head inside and use a silenced weapon to land headshots on four enemies inside.
Only then can you move to the Angels in the field. Once the Angels are down, the outpost will be liberated. If you need to hide when the battle goes sour, you can use the smaller cabins to hide in. You will be rewarded with money and 400 resistance points for liberating the outpost. There is also a region map and a magazine inside the outpost.
King’s Hot Springs Hotel
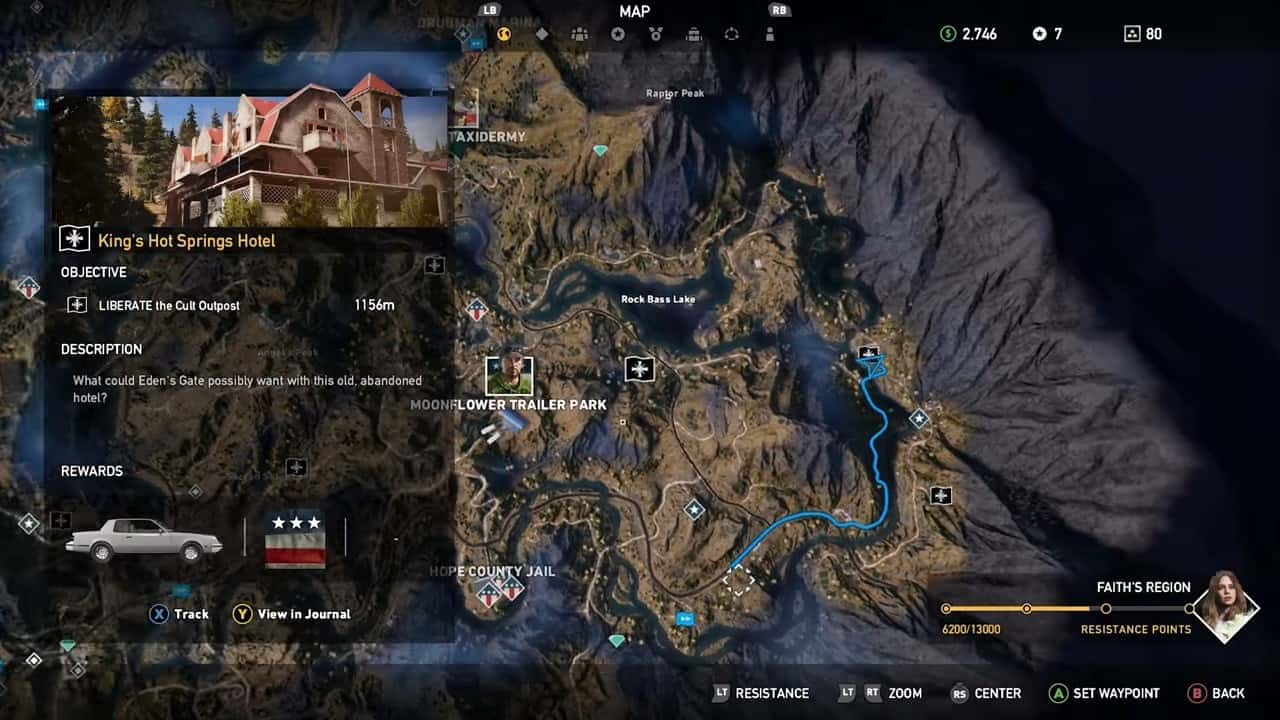
This outpost has eight enemies, including one heavy enemy, along with two alarms. Avoid the main road entrance, as you will be easily spotted unless you want to run in all guns blazing. The rocks at the back of the outpost provide an excellent spot for viewing enemies and tagging them. The rocks on the north side provide an excellent view for taking out both alarms.
Once the alarms are down, use the grapple and get access to the roof of the building. From here, you can plan your attack by dropping in from the skylight, crushing an enemy below, or using silent weapons to take him out from a good distance. For the heavy, track him down and try to get behind him for a melee kill.
Once the heavy is down, resting will be easy. You can hide in the kitchen and wait for the enemy that keeps patrolling around the area. Once the inside is clear, go out to the courtyard and use silenced headshots on the patrolling enemies and those pouring the Bliss drug.
Once all enemies are down, you will liberate the post and earn the vehicle ‘1987 Pygmalion Bruelag as a reward, with some money and 400 resistance points. There is also a region map inside the outpost to collect.
Whistling Beaver Brewery

The Brewery has three alarms and ten enemies, including one flamethrower, sniper, and VIP. A mortar nest inside the outpost will be used against you if you are spotted or an alarm is raised.
The area is full of explosive barrels, and the harder enemies, which are the VIP, sniper, and flamethrower, can easily converge on you if spotted. For this outpost, we recommend that you do not tamper with the alarms as the enemies can easily spot them and become suspicious. Leave the alarms functional.
If you do not care about the stealth approach and want to take out the alarms, head to the hills on the southeast side and take out the first alarm, then continue to the north and take out the next one.
The warehouse can be accessed easily from different directions, including the roof. If the enemies become suspicious, you can also find some hiding spaces inside the brewery.
For the stealth approach, stick with melee kills as using arrows or snipers can cause enemies to become suspicious due to the proximity. Use the trash bins to hide bodies and avoid using weapons on the flamethrower and VIPs. Even when enemies become suspicious, reach the upper gantry and snipe all enemies except the flamethrower and the VIP. Once the area is clear of normal enemies, follow them and strangle them.
Eliminating them all will clear the area and liberate the outpost. As a reward for liberating them, you will receive money and 400 resistance points. Also, collect the region map from inside the outpost.
Lorna’s Truck Stop
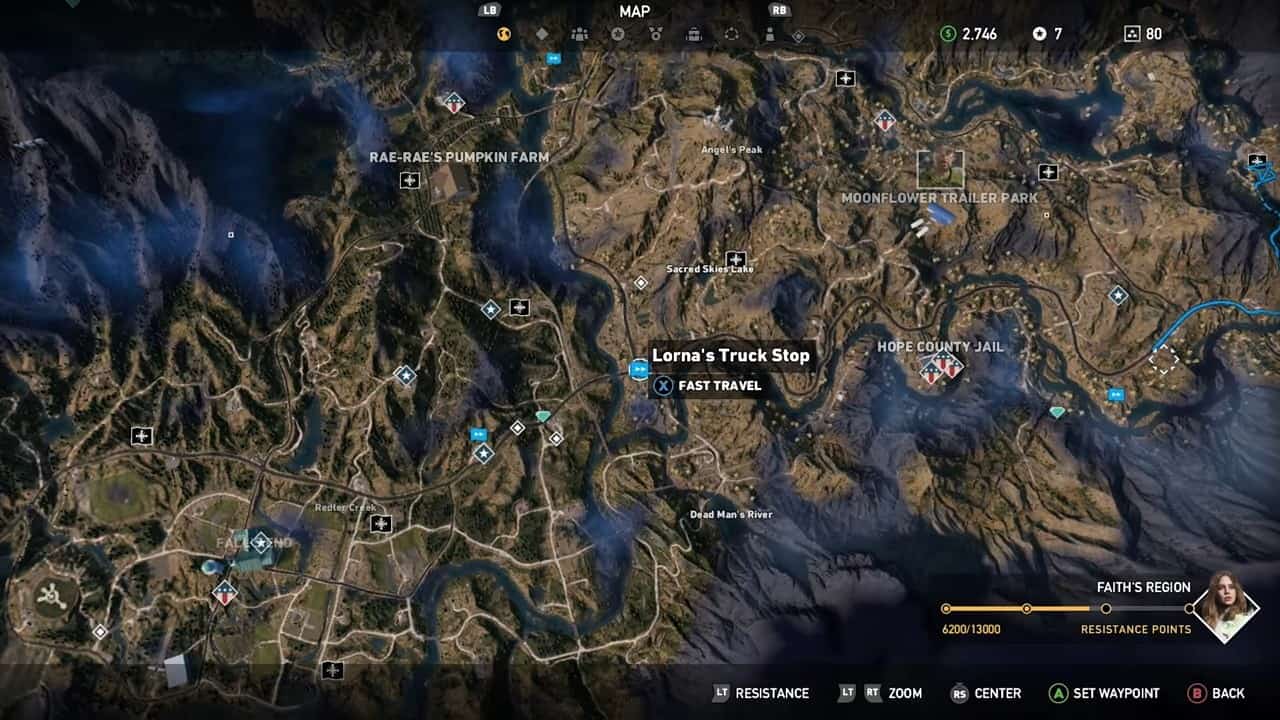
This outpost has two alarms, eight enemies, including an animal, and two MG nests.Avoid the main road entrances, as they will lead you directly to the MG nests at the front. However, you can use the billboard across the road for good cover against enemy fire.
Set the wolf free for a good distraction. Once the enemies are distracted, you can make your move. There are also some explosive canisters that you can use to your advantage.
If you plan on using stealth, the antenna tower is your best option. The warehouse roof also has good cover and will let you easily see the enemies inside the outpost. Since there are no heavies or other special enemy types, you can dispatch the enemies easily if you do not come in the range of the MG nests if things go sour.
Liberating the outpost will reward you with the Badass outfit, along with some money and 400 resistance points. Inside the outpost, you will also find a region map.
Nolan’s Fly Shop
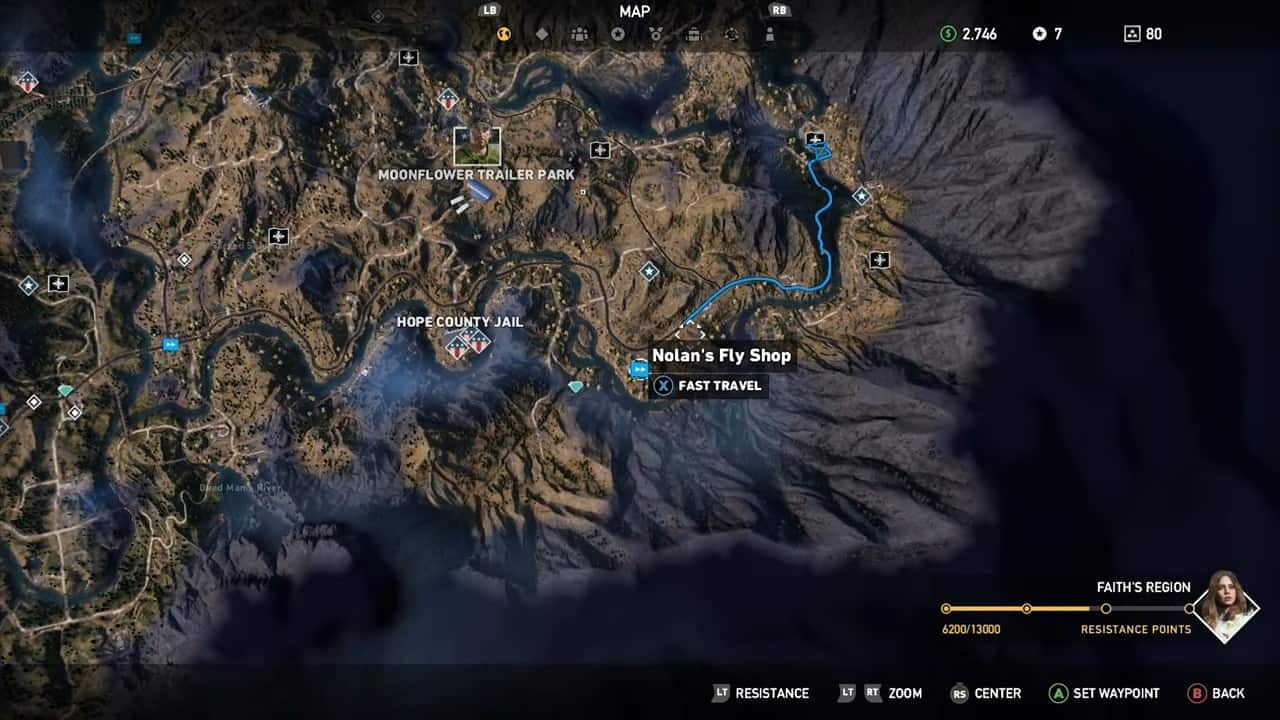
This is another cult outpost located in Faith’s region. The enemies include a sniper, two animals, and two angels. For this outpost, your main concern is the sniper, which has an excellent view of the complete area.
The outpost itself is open and allows multiple entrance points. Your priority here must be to take out the sniper. If you crouch between the bliss fields, you will have a good view of the whole outpost.
To take out the sniper, you can approach the outpost from the hills on the east side. Mark the enemies and crawl inside the kitchen once the enemy has been taken care of. Inside, you will have a good view to take out the enemies near the sniper tower. Take them out, crawl to the door, and aim at the sniper to take it out. Once the sniper is down, you can easily dispatch the remaining enemies.
Once the outpost is liberated, you will earn money and 400 resistance points as a reward. Remember to collect the region map from inside the outpost.
Jessop Conservatory
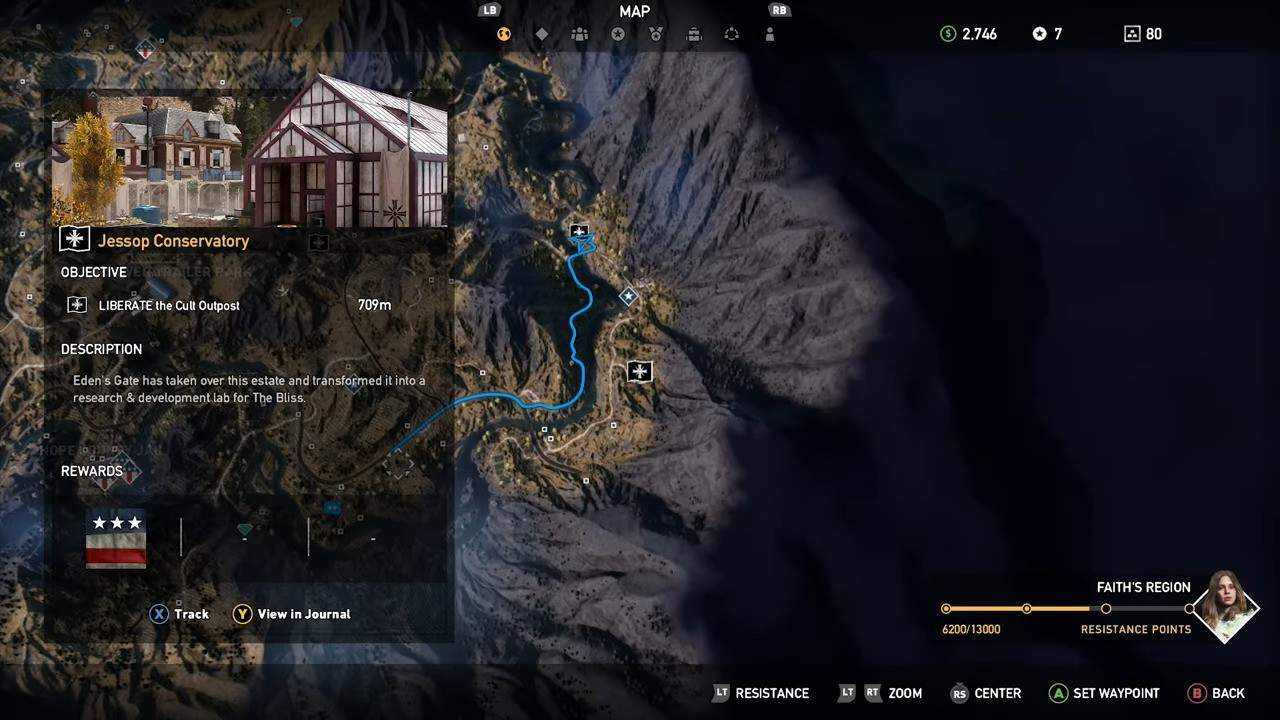
Jessop Conservatory has two alarms and eleven enemies. One is a sniper, and one is an animal. There is also one MG nest in the outpost, overlooking the main dirt road leading inside the outpost.
Your best approach for this outpost is the mansion house and then heading west, clearing enemies as you advance. The greenhouses give good cover from enemy fire. You can use the antennae for tagging enemies as it provides the best view of the complete outpost.
If you are going for the stealth approach, there are plenty of places to hide the bodies in the bliss fields and greenhouses. You can shoot both alarms safely from the southern slope near the small garage. You can shoot both alarms if you can get to the machine gun nest.
The sniper must be your last priority for this outpost as he clearly sees many other enemies. If you take him down early, the enemies around him will notice and become suspicious. You will be easily spotted if you want to remain inside the mansion, but if you remain extra vigilant, you can eliminate them quickly.
For stealth, we recommend starting from the antennae, tag all enemies, and accessing the mansion from the zip line. Eliminate the enemies inside the mansion and then move out. You can also release the caged animal for chaotic moments in the outpost. It will kill some enemies, making it easier to mop up the rest.
Once the outpost is liberated, you will receive money and 400 resistance points as a reward. Collect the region map from inside the outpost.
How to reset Cult Outposts in Far Cry 5

If you’ve completed all Outposts and liberated Hope County but still want to take down some cultists, you can reset the Outposts to become hostile again. To do so, open your pause menu and select the “Outpost Mater” option. All 20 Outposts will now be available to liberate once more.
Do note that you can only select the Outpost Master option once you’ve completed all 20 Outposts and cleared the final campaign mission.