In Elden Ring, the Bloodhound Knight Set is excellent armor that gives you sturdy Damage Negation against Physical attacks and Fire and Holy Magic attacks. You will also receive excellent Robustness Resistance stats when equipping the Bloodhound Knight armor set, making it a great mid-game option.
As the name suggests the Bloodhound Knight Set is dawned by the Bloodhound Knights and consists of four armor pieces including the Bloodhound Knight Armor, Bloodhound Knight Gauntlets, Bloodhound Knight Greaves, and Bloodhound Knight Helm.
All the armor pieces of the Bloodhound Knight Set can be obtained in one go and you can do so by heading to the Glemir’s Hero’s Grave dungeon in Mt. Glemir.
Where to find the Bloodhound Knight armor set in Elden Ring
The Bloodhound Knight that you need to defeat is found guarding the Gelmir Knight Armor Set inside Gelmir Hero’s Grave. So you can essentially obtain both armor sets in one go.
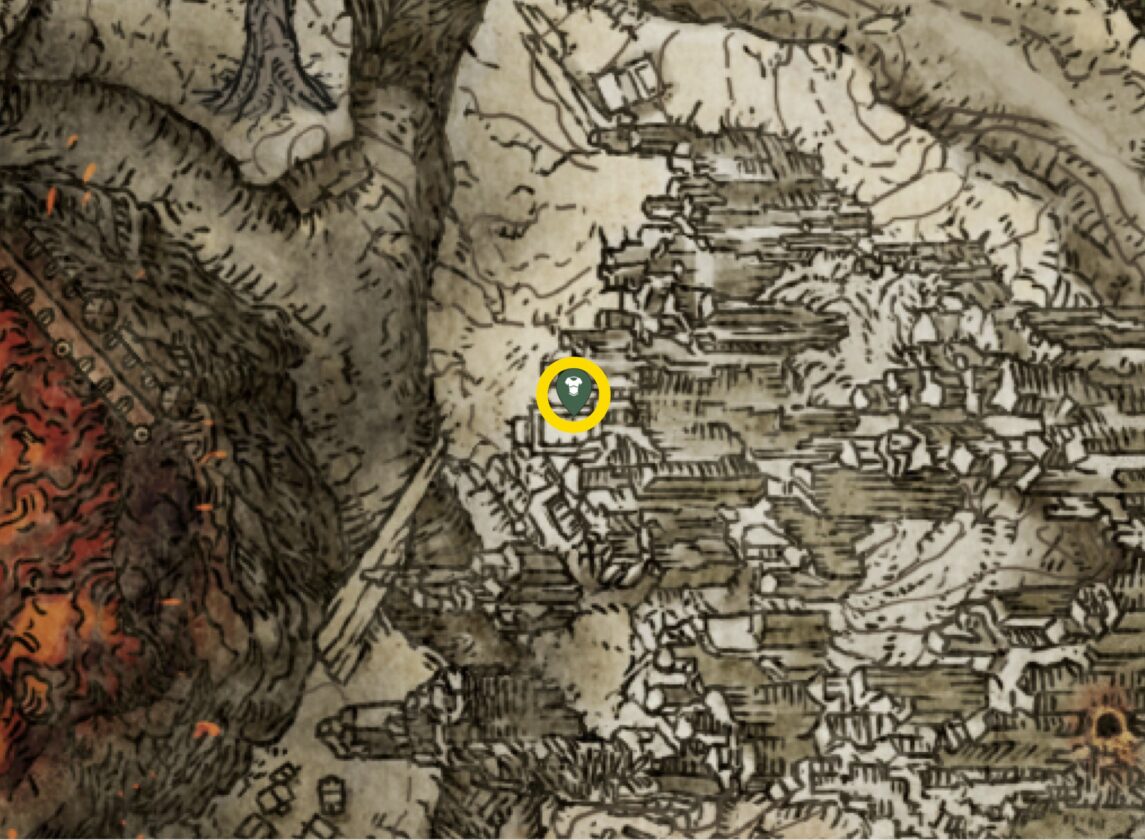
First, you must head to the Gelmir Hero’s Grave, Site of Grace or you can fast-travel there if you have already found it before.
Otherwise, you’ll need to head toward Mt. Gelmir which is a late-game volcanic mountain region found in between the Altus Plateau and the Liurnia of the Lakes region of Elden Ring.
After entering the region, you can then travel to the Bridge of Iniquity, Site of Grace, and use it as starting point. You must then head northwest and find your second Site of Grace in Mt. Gelmir, First Mt. Gelmir Campsite.
You’ll need to you the rope ladder to access the campsite. From here you then turn and head west to reach the entrance of the Gelmir Hero’s Grave catacombs.
You will find yourself on a pathway through the lava on either side. It will lead you down to an area where you will see a chariot.
You need to avoid this chariot as it will crush you in its path, so make use of the small gaps on either side of its path lane to avoid getting hit.
There will be a few extra pesky skeleton mobs here including swordsmen and archers. It is best to avoid them and carry on, letting the chariot do the killing for you.
Near the end of the chariot lane, you must keep your eyes open for an arch. As you go through it, you’ll be led straight to a large hall area.
Now you’ll be welcomed by a host of enemies that you must take out before continuing. This part can get quite hectic as you get crowded out, so you need to be careful that you don’t die.
If all gets too chaotic, simply make a beeline for the archway to your left. You will find a stairway that leads you toward a Flaming Gargoyle.
You’ll need a weapon with decent range to snipe it out of the air and defeat it. Once you take out the gargoyle you can continue onward through the archway path.
You will see another chariot lane that you’ll need to avoid. Take shelter inside the openings on each side of the chariot lane and progress forward.
You may find skeletons inside these side openings, but you can easily take them out. Once you reach the end of the chariot lane, you’ll find yourself next to a bridge.
You make your way up the bridge to about halfway before jumping to the platform below. You can use the wall beside you to guide you onto it.
You will see a dead body here and next to it an archway leading to another large room.
Once you enter this room, you’ll face the Bloodhound Knight who will be found protecting the Glemir Knight Set and whom you can defeat to obtain the Bloodhound Knight Set.
Overall, the fight will be relatively easy, you just need to look out for the knight’s agile attacks and you’ll be good. After defeating him you can loot the Bloodhound Knight Set from his dead body.
You can then move straight toward the grave which is elevated on a platform and loot the dead body there to also obtain the Gelmir Knight Set.
Bloodhound Knight Set stats
The Bloodhound Knight Set is excellent armor that gives you sturdy Damage Negation against all sorts of Physical attacks including 22.6 Strike, 27.6 Pierce, and 26.5 Slash attacks.
It is also decent in fending of Fire and Holy, Magic attacks but struggles a bit against Light. You will also receive an excellent Robustness Resistance stat of 120 and a decent bump of 74 in immunity when equipping the Bloodhound Knight armor set. All in all, making it an excellent mid-game option.