Our God of War the Magic Chisel Walkthrough Guide will guide you through all of the seventh chapter in God of War in a step by step manner so that you can complete the chapter without a hassle.
We would like to mention here that this walkthrough would strictly focus on the main story progression. There are many collectibles, hidden chambers, and chests found in each chapter but we have different guides especially focusing on each of these collectibles and side missions. You can visit our site and check out all other guides related to God of War posted there.
God of War The Magic Chisel
Continue to follow Mimir’s instructions all the way to the bottom of the bridge and eventually all the way to Mason’s Channel. You need to row between the paddles to ensure that you are on the right path.
When you find that your path is blocked, get out at the beach and then use the crank wheel to open the gate. This will spawn a lot of enemies and you will need to defeat an Ogre along with many Dark Elves and you’ll find favor (Anatomy of Hope) in this area.
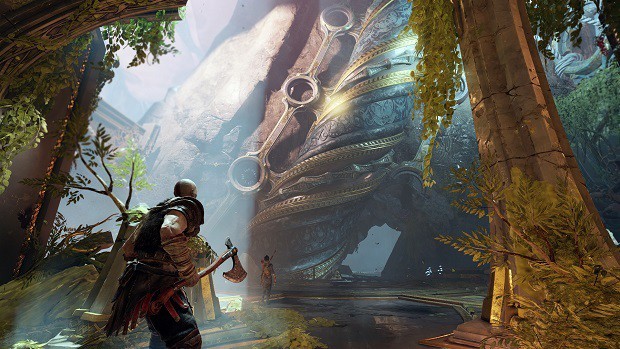
After that, you will need to get to the Dead Giant and investigate it. First of all, defeat the Wulver using Atreus’ ranged attacks to stagger it and then using the Leviathan Axe’s ranged component.
It is important to stop it as soon as it starts howling using a Shock Arrow. Defeat both of the Wulvers and then use the ring to advance to the Hidden Chamber (the ring can be retrieved by shooting the Shatter Crystal in your path). Keep on going on the path until you get to the second chain and see Thamur.
The Magic Chisel
You will be at the Frozen Lake and will need to defeat all of the enemies including the 2 Wulvers before you can do anything else.
Once they are dead, break the Runic Gate and then head on over to find the Realm Tear. Grab a Shatter Crystal from the Yggdrasil root and then use it to shoot the red sap towards the left side of the Lore Marker.
Now, use the loose crystal and put it in the stand towards the far edge of the lake. Use Light Arrows at it as this will create a Realm Tear.
When you close the Realm Tear, you will get the Dust of Realms. Once you have done that, you need to find a way to get to Thamur’s head. Use Atreus’ marksmanship to take out all enemies on your path.
You will soon need to break the ice. The monsters will have to be dealt with before though so take out the squad of Draugrs using your agility.
Once they are all dead, you can move ahead to destroy more Draugrs who are now assisted by 2 Furious Ogres. Kill them all and speak to Sindri afterward to begin your eventual path to Thamur’s Head.
Finding Thamur’s Head
Shoot the red gem in the spinner ring behind Sindri’s tent using a Shock Arrow. Shoot two more of those after turning right in order to knock Thamur’s braid away from the path and open it up for you. Continue forward and you will soon be able to enter an arena to face off against the Traveler Champion.
Defeat the Traveler Champion and then look to find the three different chests that are in the area. One is on the balcony, the other is near a marked jump point in the arena and the third one is found after you toss your axe at the sword sculpture and then climb it to the top.
After that, continue on the path and you will soon be able to break the first strap of the hammer. Once you have done that, continue to make your way to the hammer by climbing and climbing until you are able to release the strap. Get to the ring near it and then tap circle repeatedly to take it off. This will make the Giant’s hammer fall sideways.
After that, you will need to solve the Seasons puzzle by hitting the disc under the rightmost portrait, then hitting the disc under the second portrait, then the third and so on from right side to the left.
Once the puzzle has been completed, you will activate it using the square button and will have to fend off 4 different waves of enemies before getting away from the platform.
Once you have defeated the enemies, sprint towards the wall and climb it to escape the crumbling floor in a heroic fashion.]
The Hammer
After coming across the giant’s hammer, you’ll find the crystal hanging off of its handle. You can simply grab It. But keep in mind that Kratos may give it a shove.
At this point, Atreus can start shooting to break the ice and make sure to do it twice so the strap falls perfectly.
Once it does, Atreus will shoot it again to break the ice and unlock a path going towards a coffin where you’ll find solid Svartalfheim steel.
Riding the Platform
From here, open the coffin and find the Runeweaver War Belt. Once done, head into the next room and break the plank which then opens a tunnel.
Interacting with the sand bowl, triggers few spinners below the four wall panels. Your axe is perfect for spinning them, doing this makes them show the season in reverse.
Seasons in the order of winter (snowflake), spring (flower), summer (sun) and autumn (the diamond-shaped leaf). Interacting with the sand bowl again starts the next phase.
You’ll have to fight your way through three waves of adversaries. The initial wave is level 2-3 draugr. Just push them off the platform and you’ll take care of the first wave easily. Make sure to pick up the loot dropped after each eave.
The second wave Is of level 3 draugr and the third is of few nightmares and a revenant. Atreus then shoots the crystal and opens a wall for you to climb.
The Hammer Head
Once you’re at the top of the Tower, climb around the wall and perform a godly shove on the hammer. Simply crawl your way out of the tunnel and leap onto the gap and make your way to the ledges lining the wall.
Take a turn and find a coffin below, continue your climb past it the down. Climb towards the right from the bottom of the ledges and you’ll find solid Svartalfheim steel.
Climb onto the ledge again and keep moving left till you drop into a area with wood on its ground. Keep going right and find more ledge to climb. Reach the top and head towards the path around and to the left.
On your left there are a few hacksilver’s and a ledge. From here enter more door that lead you inside a structure.
Finding the Magic Chisel
Jump towards the pillar and go down the canyon. You need to get to the coffin in the grotto using the cliff above it. Beware of the avalanche which occurs when you get onto the cliff.
Get to the coffin to find a green health stone. Keep on moving down until you get to the ice barriers. Here, you will need to defeat the enemies that stand in your way including the Stonebeard King. Free the king by shooting down the chandelier with the crystal and then putting the crystal on the center ice block before shooting it.
You will need to defeat the Stonebeard King and then free up the Fierce Wulver using the Shatter Crystal once again.
Once you have defeated the Fierce Wulver along with his 2 cousins, you can free up the Fierce Ogre in the same fashion and defeat him along with his minions to end this part of the chapter.
Once you have defeated all of the aforementioned enemies, a path will open up for you. Before you head onto the path, you need to meet up with Sindri to discover the guys you overheard were gods known as Magni and Modi.
Once you have heard that, proceed to the far door and then punch open the chest. Keep on the path until you begin to see the Chisel, and then slowly move towards it.
Once you get close enough to the Chisel, you will need to defeat Magni and Modi. Use our God of War Boss Guide to figure out how to make short work of them.
Once they are defeated, head on over to the tip of the Chisel and follow the directions to get a piece of it. This will end the chapter