There is no fixed formula that ensures success in Assassin’s Creed: Unity co-op missions. Each strategy is different and every player has a distinct playstyle.
For more help on Assassin’s Creed Unity, read our Helix Rifts Tips, Companion App Glyph Puzzles and Creed Points Farming Guide.
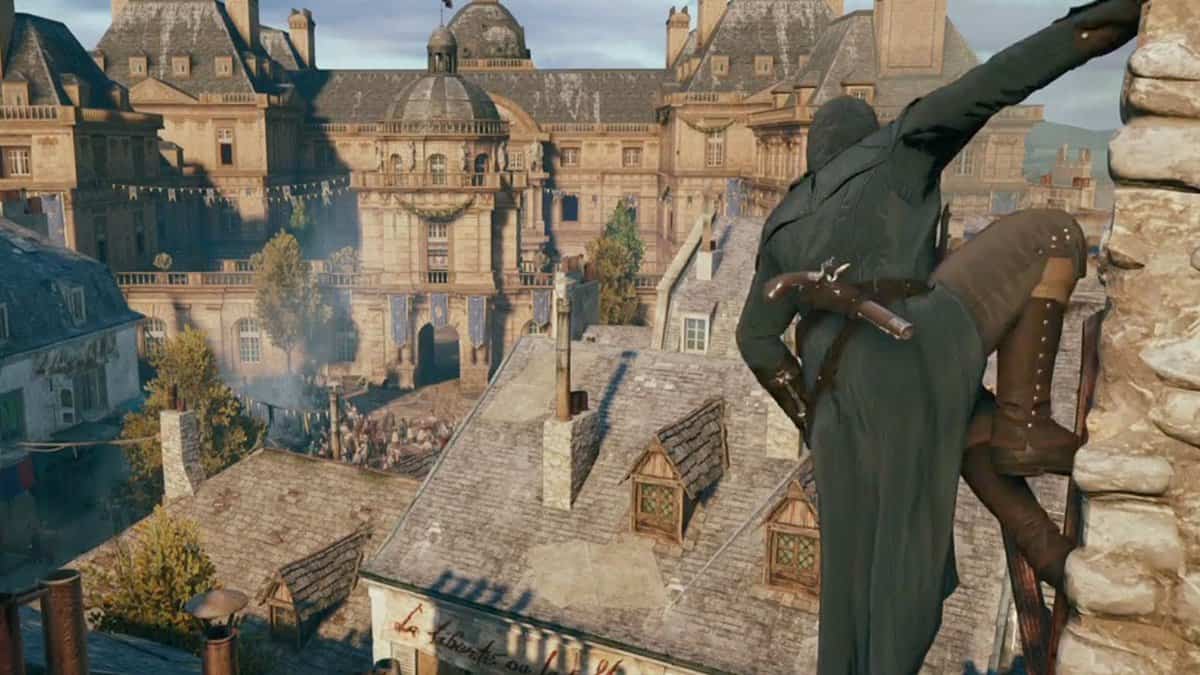
Assassin’s Creed Unity Co-op Missions Walkthrough
The idea is to have good coordination and create a unique blend of these unique playstyles of individual players.
Therefore, the purpose of this guide is not to force you to adopt a particular strategy, but to provide a summary of important locations and key targets in these missions.
Heads will roll
Rewards: Handmade Prowler Breeches, Handmade Medieval Belt, Tailored Musketeer Coat
To retrieve the key from the Warden of the Grand Chatelet, reach the rooftop from the left side of the main entryway. You’ll come across quite a few enemies on the rooftop.
If need be, don’t hesitate to snipe a few of them before moving forward. Keep your eyes peeled on the Warden’s patrol and reach near the stairs. As soon as he goes downstairs, perform an aerial assassination and loot his key.
I wouldn’t recommend pick-pocketing since it has a larger risk of detection. To retrieve Paton’s Notebook, run along the south wall and head towards the open window by the square tower.
Before heading inside the open window, make sure no one is noticing you avoid detection. Once inside, assassinate the key targets using Phantom Blades or Last Known Position.
Tip: If you’re playing with another player, you can ask the other player to deal with the Warden while you get in this location.
The treasure chest containing the notebook is located at the end of a corridor with an accompanying soldier. Drop the soldier with a Phantom Blade before looting the chest’s contents.
After looting Paton’s Notebook, head over towards the southeast edge to identify and assassinate three Templar henchmen. Their locations are highly randomized so make sure to use Eagle Vision to identify them.
This area is teeming with Extremists and regular enemies so be careful! After the Brotherhood initiates the attack, reach the waypoint to come to a graveyard.
Reach the south side of the restricted area and look for Extremists marksmen and climb the rooftop to perform an aerial assassination on two Extremists guarding the archway.
Go through the archway and reach the catacombs on the right side. Lockpick the door if required and speak with Paton inside to complete this mission.
The Food Chain
Rewards: Handmade Sans-Culottes Coat, Handmade Napoleonic Bracers, Arno’s Tailored Hood
From your starting position, you’ll be required to investigate a couple of sacks containing secret messages.
Locations of these sacks are highly randomized, but I would recommend getting to each sack with other assassins. The reason for this is that these areas are teeming with many Extremists and regular enemies.
After arriving at Mericourt’s location using the main road, head inside from the open window and assassinate enemies inside.
You’ll come across Mericourt on the top floor with a couple of Extremists and regular enemies. It’s recommended to be quick here and dispatch all enemies before meeting Mericourt.
Tip: It’s a good idea to clear the neighborhood before escorting Mericourt to make the upcoming sections a little easier.
While escorting her, it’s crucial that you assign one player to stop the guarding tolling the bell for reinforcements. This portion is not difficult as long you coordinate with other players and keep on killing enemies as soon as they appear along the way.
During the section when Mericourt takes over, try and stick to the rooftops to clear off enemies and if possible, use Cherry Bombs to isolate targets and assassinate them one by one.
When you’re tasked to assassinate Templars, have a couple of players take the rooftops and mark targets for you. Once you’ve marked the targets, have one player sneak in for a Phantom Blade kill.
An alternative way of doing this is to use a Berserker Blade on one of the guards followed by killing the remaining enemies yourself.
You’ll find your last two targets on the south side. This part is quite easy and can be completed with a synchronized aerial assassination from the rooftop nearby. Once done, leave the highlighted zone to complete this mission.
The Austrian Conspiracy
Rewards: Improved Military Hood, Tailored Prowler Breeches, Tailored Medieval Belt
Once this mission begins, wait until Danton has killed his target or intervene as you see fit. Once this is done, you’ll have to drop in several targets closing in your location.
It’s better to get on the rooftops and assassinate targets from a safer location. Alternatively, you can also use Berserker Blades for an easier job.
Throughout this engagement, don’t forget about a couple of marksmen on the balconies. After dealing with enemies, head towards the waypoint on the south side.
Reach the first green zone from the west side to identify your target accompanied by two enemies. I would recommend killing him directly and enemies that join in the battle for a quick finish.
You’ll find your second target in the very middle of the hedge maze. I would recommend getting one player on top of the ropes and directing the player to enter the hedge maze.
The player entering the hedge maze should be alert of many enemies patrolling the area and make use of Eagle Vision and Phantom Blades to his advantage.
Escape the area from the west side with proper coordination. Assassins on the rooftop and ground should work together and leave the restricted area.
Your last objective is to assassinate two master spies located in the mansion.
Depending upon your co-op players’ individual playstyles, you can either divide the tasks among yourself or deal with each target individually or work together to assassinate your targets simultaneously.
The Infernal Machine
Rewards: Tailored Brigand Coat, Tailored Sans-Culottes Bracers, Improved Brigand Hood
During the first portion of the mission, divide up your team into two groups with each group focusing on each side of the street. I would recommend only killing the Extremists and leaving the regular enemies.
Keep on sniping targets and make use of Phantom Blades, Cherry Bombs, and Smoke Bombs to disintegrate your enemies and make progress.
Note: One important thing to bear in mind is not to get too ahead of Napoleon’s Carriage as it will fail the mission.
After infiltrating the mansion, the first piece of the document can be accessed in an office which can be accessed from an open window. You’ll have to open up several desks to find the desired document.
For the second document, you’ll have to intercept a man patrolling in the heart of the courtyard. For killing the target in the courtyard, it’s not recommended to do so openly.
Instead, approach a more stealth-based approach and leave the area immediately. Your last target is inside a restricted zone with randomized entry points. You’ll find him on the upper floor of the building.
It’s recommended to split up and assassinate sentries in the area. Once you’ve eliminated the key target, leave the highlighted zone to complete this mission.
Danton’s Sacrifice
Rewards: Tailored Military Bracers, Tailored Musketeer Belt, Improved Napoleonic Coat
Just as this mission starts, reach Danton by blending in the crowd, but don’t head inside the restricted area. You can have one assassin transform into a guard using the Disguise Skill and walk up to Danton.
With this assassin in place, other players should go and take place in the gardens near the Place de la Revolution. After this point, head northeast and deal with the second of Danton’s associates.
The third of Danton’s associates can be found a little farther to the east. It’s recommended to get on the rooftops after arriving in position and take care of snipers before other enemies.
Your final task in this mission is to retrieve Danton’s letters from the area located on the northeast side.
To retrieve these letters, you need to arrive at the L’Arche Marion store and climb the rooftop of the opposite building followed by running almost halfway through the street.
Drop down and kill the guard near the locked door and head inside. Once inside, use your Eagle Vision to identify your targets and plan your strategy accordingly.
The first document can be found on the first floor and the second one can be found on the top floor. Grab the documents and leave the area to complete the mission.
Jacobin Raid
Rewards: Improved Medieval Coat, Improved Phantom Belt, Arno’s Master Hood
During this mission, it’s important to have one player with Assassin Cache skill in order to make use of ranged weapons.
Firstly, investigate the rooftops and assassinate the marksmen watching over the entry points before diverting your attention to the Jacobins. You can assassinate them in any way you want.
After eliminating all the Jacobins, you’ll be ambushed by a small battalion of enemies. At this point, you need to split up and head towards the stairs in the side rooms to reach the upper floor. Once you’re on the upper floor, assassinate all Extremists there using Phantom Blade headshots.
Interact with the torch located on the left side of the fireplace and head inside the secret tunnel. Always remember to check your corners and use your Eagle Vision to identify your key target.
Use a Cherry Bomb to lure your target out for an easy stealth kill. After getting to the second junction, you’ll come across a locked door. Open up this door and use your Phantom Blades to finish off the Jacobin Leader.
Keep on going through the locked door and use Eagle Vision frequently to identify enemy movements before taking out the final Jacobin Leaders to complete this mission.
Political Persecution
Rewards: Improved Bourgeois Bracers, Improved Prowler Breeches, Arno’s Master Coat
Once this mission starts, you’ll be tasked to warn highlighted Girondists located in different houses within the allotted time. This section of the mission is highly randomized and I cannot provide a possible walkthrough.
Once you’re done with the previous objective, head over to Bastille and head inside with a direct attack on the south gate.
Following this, head over to the top of rooftops and take up positions on the beams above the guards and perform coordinated aerial-assassinations on these enemies.
Note: You need to make sure to assassinate all enemies in the area without raising an alarm.
Next up, reach the rooftop and light up both pyres in the Bastille, and travel to the next waypoint by performing a leap of faith from the southwest edge of the rooftop.
After getting to the ground level, you need to find the sewer access and drop down to open up the gate for the final task of the mission.
For the final task, you must open three gates to make Girondists get through the sewer to reach the boat. Two of these gates are accessed via heavily guarded restricted areas.
The sewer entrance on the west side of the restricted area has many patrolling guards and sentries while the sewer entrance on the east side of the restricted area has a small battalion of enemies.
You can take any approach you see fit to deal with these enemies and once done, approach the waypoint on the south side. Use a Poison Bomb to deal with the enemies on the west bank and get to the boats to complete this mission.
Les Enrages
Rewards: Improved Napoleonic Hood, Improved Prowler Belt, Master Phantom Breeches
To complete this mission in a better way, it’s better to split your team in two. The players tasked with retrieving the patient ledger should head toward the two detached buildings near the water.
Your desired item will be in either of these two buildings. Once you’ve retrieved the object, climb on top of the rooftop to wait for the other team to complete their objective.
The other should head inside the cell areas and clear out the area of all enemies followed by going through the tunnel to reach the next cell area. You’ll come across a locked gate on the left side of the stairs. Open up this door followed by another gate at the end of the corridor.
Once you arrive at the next cell area, you need to neutralize all targets. If the other team has completed their objective by this time, you’ll be tasked to free three assassin prisoners. Once you’ve freed up all assassins, backtrack your steps and leave the restricted area.
Coming to the team waiting on the rooftops of the two buildings; after all, assassins have been released, Jacques Roux will appear near the two buildings providing the perfect opportunity for an aerial assassination.
Do note that you cannot let Roux escape and must seize the opportunity to kill Roux at this point which will complete the mission – after leaving the highlighted area, of course.
Moving Mirabea
Rewards: Legendary Napoleonic Breeches, Master Bourgeois Belt, Master Musketeer Bracers
As the mission starts, head towards the locked doors on the south side and go inside using the door on the right side. Once you’re inside, make sure to use pillars as cover and move past the sentries.
After arriving at the waypoint at the bottom of the staircase, you’ll have to complete a puzzle. In order to find symbols (to solve the puzzle), you’ll have to work as a team and eliminate all threats as they appear.
The most common locations for the symbols are pillars and square panels on the wall. After you’ve found all three symbols, head towards the central chamber having three pedestals followed by interacting with them to open up a secret door.
Once you’ve acquired the Mirabeau’s Relics, your next task will be to escape the area.
At this point, you’ll encounter National Guard who will make it harder for you to escape the area. Make sure to eliminate all enemies before heading towards the torch on the left side of the door to unlock the exit door.
At the top of the wooden scaffolding, you’ll find a ravel that will take you outside the premises of the building. Once outside, you need to leave the highlighted area to complete this mission.
The Tournament
Rewards: Master Phantom Hood, Master Brigand Breeches, Legendary Musketeer Coat
Once this mission starts, your first task will be to loot four letters of permission. Two of this letter can be found on senior guardsmen. The lone wanderer (guardsman) is no threat and you can loot him without any difficulty.
As for the guardsman with three enemies, approach them from behind and toss a Stun Bomb at them followed by charging in and stealing the letter.
The other two letters can be found inside white tents located in the area. You can climb get inside one of the tents using the open window in the backside and retrieve the letter without any difficulty.
The other tent requires a little teamwork. One of the players needs to keep the guards distracted using the Cherry Bombs and the other player should head inside the grab the letter.
Note: It’s extremely important that you don’t kill any guards here as it will help you in your final escape.
Your next task is to reach all the flags marked by waypoints before the timer expires. This can be done in any way you want whether you’re playing solo or with a full party.
In the battle arena, it’s important that one assassin keeps the enemies busy with everything at his disposal while the other assassins complete the objective until the on-screen meter fills in.
I would highly recommend a full team to complete this task effectively. Once this is done, speak with Dumas who will direct you to the building with four targets.
If you didn’t kill anyone during the playthrough, you’ll be able to go through the open window directly above the main entrance. You can easily kill the conspirators using the Berserker Blades and finish off the remaining enemies in any way you want.
The window would still be open if you killed any enemies during the playthrough, but this area would be considered restricted.
Women’s March
Rewards: Master Military Coat, Master Sans-Culottes Hood, Legendary Prowler Bracers
In order to complete the initial fight, it is best to stay at the edge of the road until the Extremists come to attack Mericourt. At this point, get behind them and perform coordinated assassinations.
After heading inside the restricted area, you need to divide up and one group should take a position on top of the rooftops to eliminate snipers guarding the area.
The other group should stay on the ground and toss Poison Bombs at the oncoming attackers.
Your next task will be to kill three marked captains. Make sure to eliminate the Extremists on top of the rooftops before finishing off your primary targets.
Identify your primary targets using the Eagle Vision and coordinate to kill them before they have time to react.
After you have assassinated three captains, get to the exit doors at the rear side of the gatehouse. During the next section, it’s extremely important that none of your teammates gets spotted.
Before sabotaging the cannons, it’s extremely important to clear off the rooftops and other elevated areas. You need to ensure that enemies don’t raise an alarm.
In order to achieve this goal, use your Berserker Blades on enemas like Brutes or other stronger enemies. Once you’ve sabotaged all cannons, leave the area to complete this mission.