The Arena is a new gameplay mode in The Witcher 2. It pits Geralt against a number of fighters in a gladiatorial arena located in some unnamed town in the Northern Kingdoms. If you are looking to take part in it, read this The Witcher 2 Arena strategy guide for assistance.
The Arena not only offers gold and items, but also a competitive leaderboard in which players can post their earned points.
Though it seems easy, the real challenge of The Arena becomes prominent in the higher difficulties.
In this guide we’ll go over the waves (up to 30) of enemies and the general strategy for every wave, and nearly everything else related to The Arena.
But before that, here are few things to consider:
Items
There’s a merchant available with plenty of goods and useful offensive/defensive items. It is entirely up to you what you decide to take for battle.
If you want to wade in and deal out death, you should choose the Sword. But you should talent Quen 2/2 to absorb any hits and reduce backstab damage.
Whereas if you want to go for the Magic, you can last entire fights without being hit only if you do the rolls right. All you have to do for this case is to keep spamming fires onto the foes
However, a few things to keep in mind are:
- Potions work well in the arena because there is little delay between when you drink and when the battle starts.
- Make sure to apply as many buffs on yourself and your weapons as you can.
- Bombs work very well in the arena, though getting one for every wave isn’t wise. I’ll explain which wave to get bombs for and why in the main part of the guide.
- On higher difficulties, a HIGHLY recommend having an ally with you for nearly every wave after wave 3.
Allies for Hire
When playing in The Arena, you can hire allies to fight beside you. Though you won’t really need one in the earlier levels, the importance of an ally because more prominent as you progress further and fight higher waves.
The allies are:
- Harald Gord, a dwarven mercenary for hire (250 gold)
- Vincent Molnar, a knight for hire (500 gold)
- Lady Adrianna, a sorceress for hire (1000 gold)
However, for the Arena mode, you might not need a follower until wave 20. And then after level 20, getting the dwarf is really not recommended as he gets gimped quite quickly.
So at this point, getting Vincent Molnar is far better than anyone else as he is quite cheap as well as great for drawing the foes off you.
So whenever you step into a wave full of foes, take Vincent as your follower as he will attract some of the mobs to himself which buys you enough time to deal with the rests.
But if you are going to a point score blitz through the opening few waves, you should get Lady Adriana as she helps you nuke things down at a very fast pace, which eventually results in higher scores.
For more help on The Witcher 2, read our Builds, Alchemy and Crafting Guide.
The Witcher 2 Arena Strategy
Following are the strategies you can use to survive all 30 waves in The Witcher 2 Arena Mode.
Wave 1
Time: 1:30
Enemies:
3 x La Valette Swordsman
1 x La Valette Armored Footman
1 x La Valette Arbalist
Points Awarded (Bonus Points):
Easy: 25 (100)
Normal: 50 (200)
Hard: 100 (400)
Dark: 150 (600)
This is a fairly easy wave. The 5 enemies are slow and rather weak. If you’re playing on a higher difficulty, try to land one hit at a time with your weapon and then dodge every attack the enemies have to offer.
Use the ledge to your advantage when you can, and once one or two enemies are down you can land two hits at a time and then back off. This will take out everyone fairly easily within the given time.
Wave 2
Time: 1:30
Enemies:
2 x Bandit Halberdier
2 x Bandit Shield bearer
1 x Bandit Swordsman
Points Awarded (Bonus Points):
Easy: 50 (200)
Normal: 100 (400)
Hard: 200 (800)
Dark: 300 (1200)
These guys are slightly faster and they seem to have a bit of teamwork incorporated in them. Your best bet against them is to fight near the ledge.
Throw off anyone you can early on through any means available to you (preferably magic), and once again land one hit at a time and then back off. You’ll have to be a bit patient to find the right moment to strike – just don’t miss it when it comes.
Wave 3
Time: 1:00
Enemies:
5 x Nekker
2 x Nekker Warrior
Points Awarded (Bonus Points):
Easy: 75 (300)
Normal: 150 (600)
Hard: 300 (1200)
Dark: 450 (1800)
If you are playing on a higher difficulty, it is recommended you go hire Harold Gord to lend you a hand for this one. It’s not the just the fast enemies themselves that make this wave challenging, but also the time.
Having an ally will allow you two keep a good few of the enemies busy, while you can attack and kill the isolated ones. Once the isolated Nekkers are down, it’s time to help your ally and take out the rest.
Speed is an issue here – you’ll have to deal out multiple blows at a time to an enemy to ensure you finish off everyone in time.
Wave 4:
Time: 1:30
Enemies:
2 x Scoia’tael Swordsmaster
2 x Scoia’tael Archer
Points Awarded (Bonus Points):
Easy: 100 (400)
Normal: 200 (800)
Hard: 400 (1600)
Dark: 600 (2400)
This wave is easy as cake if you have an ally. The two swordsmasters will mainly concentrate on your ally. This gives you an excellent opportunity to make your way to the archers and take them out first – they won’t stand a chance at close range.
Your ally should be good enough to have taken out at least one foe. The remaining can be cut into minced meat within a second.
Wave 5:
Time: 1:30
Enemies:
2 x Endrega Warrior
3 x Endrega
Points Awarded (Bonus Points):
Easy: 125 (500)
Normal: 250 (1000)
Hard: 500 (2000)
Dark: 750 (3000)
Oh boy, for anyone’s got fear of spiders: this is a bad battle for you. Right at the start the Endregas will collectively attack either you or your ally (if you have one, which you should).
Take out the normal ones before killing the warriors, as the warriors tend to take up more space due to their long tales and can leave you cornered easily (not to mention they are more lethal).
Try and help your ally as much as you can especially if he/she is fighting against the warrior. Not too difficult a fight since normal Endregas are very intimidating.
Wave 6:
Time: 1:30
Enemies:
1 x Sorcerer
2 x Kingslayer
Points Awarded (Bonus Points):
Easy: 150 (600)
Normal: 300 (1200)
Hard: 600 (2400)
Dark: 900 (3600)
Wave 6 is a little tough on higher difficulties. Expect to be greeted with an offensive spell immediately after entering the arena. I highly recommend an ally for this, as the Kingslayers seem to have quite a bit of health and sustenance.
Take out the mage first though, and let your ally handle at least one person by him/herself. You have to be clever in dealing out damage as single hits won’t do – try to land multiple blows at once.
Wave 7:
Time: 1:00
Enemies:
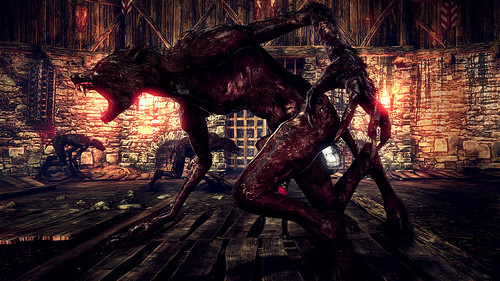
1 x Werewolf
Points Awarded (Bonus Points):
Easy: 175 (700)
Normal: 350 (1400)
Hard: 700 (2800)
Dark: 1050 (4200)
The werewolf is rather disappointing really. Yes, it takes a while to put down, but it really doesn’t offer a challenge, particularly if your ally has been carried over to this wave (if he/she survived).
Just keep hacking at it, dodging any lazy slash attempts made by it. Dealing out blows and dealing them quick is the only trick here.
Wave 8:
Time: 1:30
Enemies:
2 x Guardsman Halberdier
2 x Armored Guardsman
2 x Guardsman Arbalist
Points Awarded (Bonus Points):
Easy: 200 (800)
Normal: 400 (1600)
Hard: 800 (3200)
Dark: 1200 (4800)
The wave is quite similar to the earlier waves with multiple human foes. They don’t move too fast, though they can be slightly damaging. Its all a matter of really hacking at them one by one, and throwing any foe off the ledge when the chance is there.
Wave 9:
Time: 1:30
Enemies:
1 x Bruxa
2 x Wraith
2 x Zombie Swordsman
Points Awarded (Bonus Points):
Easy: 225 (900)
Normal: 450 (1800)
Hard: 900 (3600)
Dark: 1350 (5400)
Ok, the Wraiths here are quite fast, and won’t let you fight any one else easily. Concentrate on them first, and then the Zombie Swordsman.
Be sure to dodge as much as possible, as multiple enemies can easily overwhelm Geralt in this wave. It’s all about good dodge and attack timing in this one really.
Wave 10:
Time: 1:30
Enemies:
1 x Elite Kingslayer
1 x Kingslayer
Points Awarded (Bonus Points):
Easy: 250 (1000)
Normal: 500 (2000)
Hard: 1000 (4000)
Dark: 1500 (6000)
The Kingslayer isn’t as much an issue as the Elite version. Be sure to get rid of the Kingslayer as quickly as possible. Once you manage to do that, it’s time to face the Elite Kingslayer himself.
He’s tough, and a few abilities of his won’t let you hit him without taking damage yourself. He also has plenty of ranged capabilities including magic, bombs and more.
What’s worse is that he can easily take on your ally and Geralt at the same time, which can mean serious business.
You want to attack him only when he is fighting with your ally and is slightly distracted. On higher difficulties he’ll take away chunks of your health with seconds, so the defense gap in his technique must be utilized whenever possible.
With a bit of patience and some smart dodging and slashing even the Elite won’t be standing for too long.
Wave 11:
Time: 1:30
Enemies:
14 x Nekker
5 x Nekker Warrior
Points Awarded (Bonus Points):
Easy: 275 (1100)
Normal: 550 (2200)
Hard: 1100 (4400)
Dark: 1650 (6600)
Give yourself a pat on the back for taking out the Elite Kingslayer, and then get prepared for some absolute insanity. The numbers themselves are the only things that will overwhelm your ally and you.
But there’s a catch to this fight. A great way to really deal out constant damage is the use of bombs. Get a few before the fight and toss them to burn as many of those Nekkers as possible.
Then take out the slightly isolated ones, and when you’ve done that throw in another bomb. That, along with your ally, should be enough to severely weaken most of the enemies, and you can finish them off with a couple of slashes here and there.
Wave 12:
Time: 1:30
Enemies:
5 x Drowner
2 x Drowned Dead
Points Awarded (Bonus Points):
Easy: 300 (1200)
Normal: 600 (2400)
Hard: 1200 (4800)
Dark: 1800 (7200)
Though they’re fast, the Drowners are very weak, and will die with just a few quick hits. Take out the normal Drowners first, moving to the left of the arena as soon as the battle starts.
Once you’ve taken out 2-3 Drowners, you should move on to take out a Drowned Dead, which is probably busy with your ally. A rather simple battle this one.
Wave 13:
Time: 1:30
Enemies:
1 x Sorcerer
2 x Kaedweni Armored Footman
1 x Kaedweni Albalist
Points Awarded (Bonus Points):
Easy: 325 (1300)
Normal: 650 (2600)
Hard: 1300 (5200)
Dark: 1950 (7800)
Sorcerer first, the rest later. Dodge your way to the sorcerer and take him out ASAP. He shouldn’t be much in close-quarters.
Make sure not to take any blows from surrender foes though, which will probably be quite a concern. If you find the neighboring enemies troublesome, just hit them a few times to make them fall, and then start beating the sorcerer again.
Once the sorcerer is down, take out the Albalist, and finally the Kaedweni Footmen.
Wave 14:
Time: 1:30
Enemies:
6 x Harpy
4 x Erynia
Points Awarded (Bonus Points):
Easy: 350 (1400)
Normal: 700 (2800)
Hard: 1400 (5600)
Dark: 2100 (8400)
Flying thingies! Make sure to get bombs beforehand, as 10 low-flying enemies can be really irritating.
Take out a couple of Harpy first, then move out of the battle and throw a grenade in between all of them, and watch them light up.
Once that is done, just strafe in and attack and then strafe out when you feel you will get hit. Keep repeating to finish off everything with a pair wings.
Wave 15:
Time: 1:30
Enemies:
3 x Armored Dwarf
2 x Dwarf Albalist
Points Awarded (Bonus Points):
Easy: 375 (1500)
Normal: 750 (3000)
Hard: 1500 (6000)
Dark: 2250 (9000)
Time to fight some pint-sized foes! Take out the Albalists first, as they’re the one with range. The Armored Dwarves may try to intervene, but there’s nothing that can’t be dodged.
Though the fight is overall quite easy, you shouldn’t underestimate the power of the ones closer to the ground than you, as their hits can really pack a punch.
Wave 16:
Time: 1:30
Enemies:
5 x Rotfiend
2 x Greater Rotfiend
Points Awarded (Bonus Points):
Easy: 400 (1600)
Normal: 800 (3200)
Hard: 1600 (6400)
Dark: 2400 (9600)
Bombs! Get a few of those! Your ally may not last long in this fight, as it is one of the harder ones you’ve faced in a while.
That’s because it combines the numeric strength of the Rotfiends and the size of the Greater Rotfiends. They also do quite a bit of damage and a ridiculously agile.
The one with the nasty habit of dodging should have better chance of surviving. Couple that with bombs and some very carefully calculated hacking and slashing and you might make it out alive.
Wave 17:
Time: 1:30
Enemies:
2 x Sorcerer
4 x Kaedweni Swordsman
1 x Kaedweni Shield bearer
Points Awarded (Bonus Points):
Easy: 425 (1700)
Normal: 850 (3400)
Hard: 1700 (6800)
Dark: 2550 (10200)
Sorcerers first! You should know the pattern by now obviously. If you lost your ally in any previous wave you might want to consider hiring someone else if you have the money to. Otherwise this will be a tough fight, though certainly not an impossible one.
Once the sorcerers are down (they like to stick with each other), concentrate of the swordsman. Do NOT make the mistake of going after the Shield Bearer before the swordsman, as you’ll end up doing no damage and take lots from other surrounding enemies.
After slaying the swordsman, the shield bearer must go down. Attack him from behind only; he’s slow so it shouldn’t be a problem.
Wave 18:
Time: 1:30
Enemies:
12 x Nekker
2 x Troll
4 x Nekker Warrior
Points Awarded (Bonus Points):
Easy: 450 (1800)
Normal: 900 (3600)
Hard: 1800 (7200)
Dark: 2700 (10800)
This wave is nearly impossible without an ally, so make sure you have one. Also, make sure you have sufficient amount of bombs.
Once preparation is done, get ready to face some insanity. The trolls are serious trouble if they manage to actually hit you with those rocks. But the advantage is that they can crush the Nekkers into mince meat, leaving you with lesser enemies to take out yourself.
Obviously, the first objective is to eliminate all the Nekkers and Nekker Warriors, whether it’s through the help of the trolls’ rocks or through bombs.
Next are the trolls themselves. Yes, they are massive, but they are also stupidly slow when you are close – just make sure you aren’t close to both at one time. They seem to have good blocking defenses, but their speed allows Geralt to deal enough blows to make things easier than they would seem.
Wave 19:
Time: 1:30
Enemies:
3 x Kingslayer
2 x Sorcerer
Points Awarded (Bonus Points):
Easy: 475 (1900)
Normal: 950 (3800)
Hard: 1900 (7600)
Dark: 2850 (11400)
I shouldn’t have to repeat myself. Once the sorcerers are down, it’s time to slay some Kingslayers. While you are at it against the sorcerers, you might find your ally dead, because those kingslayers pack a lot of punch.
Just make sure you are as speedy as possible with the finishing of the sorcerers. Dodge as much as you can and take your time, though don’t get too slow.
Once the sorcerers are down, you should take out the remaining Kingslayers (your ally should have taken out at least one).
The real problem in this wave arises because of the extreme tankiness of the sorcerers, which is not only time-consuming but can also have you taken accidental hits from the other enemies.
Wave 20:
Time: 2:00
Enemies:
4 x Werewolf
Points Awarded (Bonus Points):
Easy: 500 (2000)
Normal: 1000 (4000)
Hard: 2000 (8000)
Dark: 3000 (12000)
Remember that disappointing werewolf you fought in one of those earlier waves? Well, these guys are just as bad, though their numbers can be a little problematic.
You see, they attack all at once, and though you might not take a single hit at all, your ally will definitely be overwhelmed.
Your goal here should be to make sure your ally survives – you wouldn’t want to be wasting extra gold for rehiring now, would you?
Wave 21:
Time: 1:30
Enemies:
2 x Elite Kingslayer
Points Awarded (Bonus Points):
Easy: 525 (2100)
Normal: 1050 (4200)
Hard: 2100 (8400)
Dark: 3150 (12600)
This battle can end in a jiffy if you can pull-off a dual-kill. Even otherwise it isn’t as tough (for some strange reason) as the previous encounter with the Elite Kingslayer.
Just take on both at one time, dodging whenever you think they would hit. An ally makes things easier here of course.
Wave 22:
Time: 1:30
Enemies:
2 x Arachas
5 x Endrega Warrior
2 x Queen Endrega
Points Awarded (Bonus Points):
Easy: 550 (2200)
Normal: 1100 (4400)
Hard: 2200 (8800)
Dark: 3300 (13200)
Oh boy, those Queens and Arachas are massive! I highly recommended an ally for this fight, and also bombs. The real problem here is the insane speed of these bugs.
Land only hit at a time only, as they’ll all fight very close by each other, like a family. Dodge like crazy, keeping dodging some more, and then land an attack, and then dodge more.
Repeat until you see a few bug carcasses lying around. Then go all-out against the 1 or 2 leftovers.
Wave 23:
Time: 1:30
Enemies:
3 x Bullvore
4 x Rotfiend
2 x Greater Rotfiend
Points Awarded (Bonus Points):
Easy: 575 (2300)
Normal: 1150 (4600)
Hard: 2300 (9200)
Dark: 3450 (13800)
Big, heavy, and dangerous – these are the three words that describe Bullvores. Contrary to what may seem like common sense, I would recommend taking out the Bullvores first; they don’t have as much health as it would seem, so it’s not a bad idea of getting rid of such a massive threat first.
Once those are gone, the Rotfiends shouldn’t be too much of a worry.
Wave 24:
Time: 1:30
Enemies:
5 x Golem (Earth Elementals)
Points Awarded (Bonus Points):
Easy: 600 (2400)
Normal: 1200 (4800)
Hard: 2400 (9600)
Dark: 3600 (14400)
Is it just me, or are the enemies getting bigger and bigger? If the constant shaking of the screen isn’t making you dizzy, then those massive blows definitely will.
This is a hard fight even if you have an ally. If you can afford the sorcerer ally, you should really get her, as her ranged attacks should assist you in take out these fast moving, heavy hitting giants.
Most of the times you’ll be running away from these bad boys in the fight, but it’s important that you occasionally strafe back to hit them a few times, and then continue your act of flee.
Repeat this until there are two golems remaining only. Then take on each one individually until they are downed. Good luck warrior.
Wave 25:
Time: 1:30
Enemies:
8 x Wraith
2 x Zombie Arbalist
3 x Zombie Swordsman
Points Awarded (Bonus Points):
Easy: 625 (2500)
Normal: 1250 (5000)
Hard: 2500 (10000)
Dark: 3750 (15000)
Take out the Arbalists first; they are squishy and pretty easy. After that take out as many Wraiths as possible, while constantly having a go at the swordsman.
Once 3-4 wraiths are down go all-out on the swordsman and take them out. After that finish off the Wraiths.
Wave 26:
Time: 2:00
Enemies:
7 x Gargoyle
Points Awarded (Bonus Points):
Easy: 650 (2600)
Normal: 1300 (5200)
Hard: 2600 (10400)
Dark: 3900 (15600)
7 Gargoyles honestly isn’t the most difficult thing you’ve faced considering all those previous hectic waves.
With a decent ally, you shouldn’t have much trouble taking out the most of the gargoyles without even taken considerable amount of damage. Be sure to keep your ally alive though; once again you wouldn’t want to have valuable invested cash wasted.
Wave 27:
Time: 2:00
Enemies:
4 x Werewolf
8 x Nekker Warrior
Points Awarded (Bonus Points):
Easy: 675 (2700)
Normal: 1350 (5400)
Hard: 2700 (10800)
Dark: 4050 (16200)
Familiar foes once again, and once again the werewolves are much of a threat. Having said that, 12 isn’t a small number, especially when compared with 2 (1 if you are fighting alone, which you really shouldn’t be).
Bombs are the best solution for such a dense crowd. Let these abominations have it as you toss those bombs, and then start killing as many Nekkers as you can. Once those guys are gone, move to the werewolves.
Wave 28:
Time: 2:00
Enemies:
6 x Draugir
Points Awarded (Bonus Points):
Easy: 700 (2800)
Normal: 1400 (5600)
Hard: 2800 (11200)
Dark: 4200 (16800)
Big shields, big swords – these guys obviously mean business. The fact that they are six doesn’t help either.
You are insane if you’re not fighting with an ally here, as the speed, strength and defense of the Draugir can easily overwhelm you.
Whatever you do, don’t let the successfully hit you. It’s not difficult taking on one or two alone, but the strength of six will destroy you.
This is where the ally comes in (choose the mercenary or knight). He’ll keep a few enemies busy while you can take on two or three with a bit of smart movement and well-timed hits. Then you can move in to assist your ally and take the rest out.
Wave 29:
Time: 2:00
Enemies:
3 x Golem (Fire Elementals)
7 x Gargoyle
Points Awarded (Bonus Points):
Easy: 700 (2800)
Normal: 1400 (5600)
Hard: 2800 (11200)
Dark: 4200 (16800)
The last time you fought golems, they were earth elementals. Sadly for Geralt this time they are fire elemental, which means they will be dealing fire damage.
The 7 gargoyles are very fast as well, and the situation will get most challenging when having to face a few gargoyles and one golem simultaneously.
Be clever with your dodges and try and take out the enemy closest to you, irrespective of which species it is. Your ally may not last too long in this fight, but having one is a necessity to buy some time and opportunity to have a go at the enemies.
Patience and good dodging should let you win. Just be careful not to go near the ledge, as the size of the golems and the numbers of the gargoyles can easily have you cornered and with no room for escape.
Wave 29:
Time: 2:00
Enemies:
1 x Draug
6 x Draugir
Points Awarded (Bonus Points):
Easy: 750 (3000)
Normal: 1500 (6000)
Hard: 3000 (12000)
Dark: 4500 (18000)
Don’t let the size of the Draug scare you, because that’s the guy you’ll have to take out first. He’s the biggest thing you’ve fought so far in the arena, and he can really hurt you bad. But what he lacks terribly is speed, and that is where you are advantageous.
Dodge everything and strafe to him, and make sure to attack him from behind; he’s slow enough to actually let you do so. The quicker you put him down the easier the battle is. Once he’s down. The 6 Draugir aren’t a match for a well-built Geralt.
If your ally is still alive, you should have no trouble getting rid of them quickly. They don’t do too much damage, aren’t ultra fast (though decently speedy), and won’t care to take on you at once.