While in the Duchy of Toussaint, Geralt will come upon a side quest; Mutual of Beauclair’s Wild Kingdom in The Witcher 3 which tasks players to escort a caravan. Mutual Beauclair’s Wild Kingdom can be started from the notice board you find at the Cockatrice Inn.
Once you get Contract for a Witcher/Witchers: Caravan Escort from the noticeboard, you can start the quest. Alternatively, you can also head straight to the campsite in the forest North of Coronata Vineyard to start the Mutual of Beauclair’s Wild Kingdom side quest in The Witcher 3.
How to complete Mutual of Beauclair’s Wild Kingdom in The Witcher 3
Your first objective will take you to a campsite near the Trading Post signpost. This campsite is located just northeast of Coronata Vineyard. Head to the camp by following your objective marker.
Once you reach the campsite, use your Witcher’s Sense to examine the camp. You need to examine a few paw prints, the pool of blood, and the body lying at the campsite. As you examine the area, Geralt will deduce that the attacking monster is a Basilisk.
As soon as you finish examining all the clues, you enter a cutscene, where Count Borhis arrives at the slaughter site and explains that the attacking monsters are indeed a basilisk, which belongs to the Count. The Count will ask Geralt not to track and kill the Basilisk.
Count Borhis tells Geralt that the Basilisk that attacked the campsite is one of the last surviving members of a critically endangered species of basilisks, the Silver Basilisks. This makes it a moral dilemma to slay the beast, but making a choice will have to wait. Before deciding what to do, you need to track down the beast.
Tracking down the basilisk
As a Witcher, racking and killing monsters is your job. Furthermore, the Count wants to protect the beast, so he doesn’t guide you toward the monster.
After the Count leaves, you can re-examine the area and find more clues, which include basilisk scales and venom trails. The Basilisk leaves this venom trail behind, and you can follow it to try and locate the beast.
The venom trail will lead you to another corpse in the middle of the forest. Here, examine the corpse, and you will find another venom trail to follow. This trail leads you to another unexpected encounter.
Joining the Reavers
As you follow the second trail, you come across a bunch of Reavers. They are also here to hunt and kill the silver basilisk known as locaste and ask if you want their help to slay the monster. At the same time, Count Borhis appears again, pleading with you to not kill the silver basilisk.
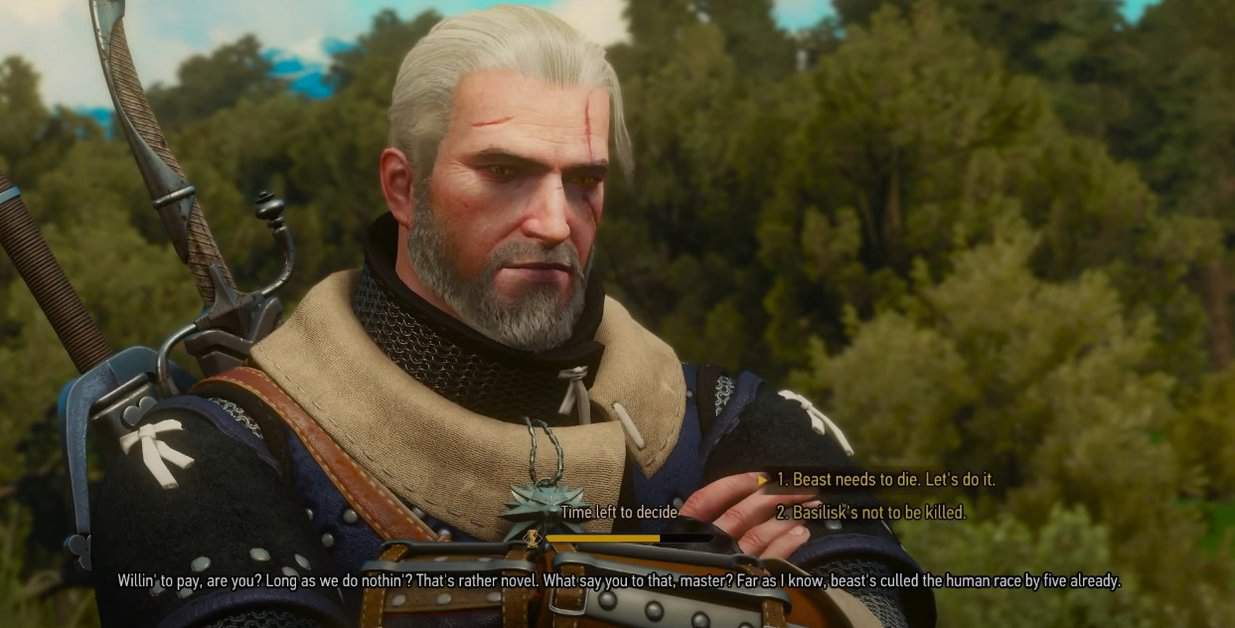
Here, you need to decide how you want to proceed. The Reavers want the beast dead, for it killed their men and is a danger to their existence. They cannot trust the Basilisk. Who is to make sure that it won’t attack again?
On the other hand, Count Borhis wants you to spare locaste’s life. The species of Silver Basilisk is already on the brim of extinction, and killing another member of the species can prove to be catastrophic. You are presented with two choices, kill the silver basilisk locaste or spare its life.
Ideally, the best choice for Mutual of Beauclair’s Wild Kingdom would be to let the basilisk live. Wiping out a whole species just doesn’t feel right even to a witcher. The Count and locaste’s keepers did assure you that the basilisk only attacked when it was threatened and you can hope they will keep it in check in the future.
Let the silver basilisk live
If you decide on letting the basilisk live in TW3, the count will pay blood money to the Reavers as compensation for the people they lost. The Count also offers you extra coins but you can refuse those.
If you refuse them, this will count towards Proof of Generosity for There Can Be Only One quest that rewards you with the Aerondight sword in The Witcher 3.
For sparing the Basilisk in Mutual of Beauclair’s Wild Kingdom, you get the following rewards:
250 XP: 200 XP from Reavers and 50 XP from Iocaste’s keepers
400 Crowns: 350 Crowns from Reavers and 50 Crowns from Iocaste’s keepers
Kill locaste the silver basilisk
If you choose to kill Locaste, Count Borhis can do nothing to stop you and the Reavers. You can either take them to back you up or go alone. If you go alone, you must fight the Basilisk all by yourself and switch between your blade and crossbow to get the Basilisk down and then attack.
If you bring the Reavers with you, they use crossbows and keep shooting at the Basilisk, keeping it from flying away and dealing additional damage as you take the frontal charge. Otherwise, you can invite them to fight with you, and the Reavers will join you in the battle directly using their axes. How you and the Reavers approach the Basilisk is totally up to Geralt and the player.
Once you defeat the Basilisk, you get your reward from the Reavers as decided. Killing the basilisk also counts as Proof of Valor for There Can Be Only One quest.
Additionally, you can loot the Basilisk’s corpse for materials. Defeating the Silver Basilisk in The Witcher 3 Wild Hunt gets you the following rewards:
- Basilisk Mutagen
- Basilisk Venom
- Basilisk Hide
- Greater Blue Mutagen
- Silver Basilisk Trophy
- Squire’s Steel Sword
How to defeat the silver basilisk
If you decide to fight the Basilisk in TW3 Wild Hunt, here is a basic guide to help you fight the beast. Basilisks are flying creatures, and they fight similarly to Griffins. The first thing you need to keep ready is a crossbow so you can shoot the Basilisk down whenever it tries to fly around.
The Basilisk uses venom and poison attacks. Craft Golden Oriole potion to protect yourself from the Basilisk’s venom, or bring plenty of cures for the poison. Basilisk is weak to fire.
You can easily chew through its health using Igni, Dancing Star Bombs, and Grapeshot Bombs. Furthermore, you can use Draconid Oil to increase the damage of your sword attacks.
Depending on your approach when deciding to fight the Basilisk, you will get ample support from the Reavers.
We recommend that you set the Reavers to provide you with the ranged backing because they deal almost no damage in melee attacks and will get in your way when you use bombs or the Igni sign. Using bows, they will keep Basilisk on the ground and still deal damage without getting in the way.