There are a number of collectibles that can be discovered in TLOU 2, as you play through its vast world, infested with zombies. For this The Last of Us Part 2 Artifact Locations guide, we’ll be discussing everything that you need to know about the locations of all 148 Artifacts and help you in finding every single artifact in TLOU 2.
The Last of Us Part 2 All Artifacts Locations
The 9 chapters of TLOU 2 are further divided into multiple sections, each of them jam-packed with Artifacts for you to collect. Below we have listed all 148 Artifacts that you can discover and collect in The Last of Us Part 2.
But before we get started, I would like to say Spoiler Alert. From this point on we are not responsible for any The Last of Us 2 spoilers that you come across in this Artifacts guide.
Chapter 1: Jackson
Waking Up
Volunteer Request
The first Artifact of TLOU 2, Volunteer Request, can be found prior to entering the Tipsy Bison bar; to your right on the walkway, behind a truck, you will discover this document.
The Overlook
Letter from Seth
In The Overlook chapter, as you crawl through the floorboards and kill the enemy, jump through the second window to your left, and you can find the next artifact right in front of you on the table.
Patrol
A Note to Santa
As you mount your horses for a second time, Dina will point out a few houses. Head to the one to your left, climb up, and open the drawer next to the bed to find a Note to Santa.
Supermarket Apology
Dina will have to save you from the infected as you crawl under the truck, after this, head in the door at the back of the store, and into the truck. On a box, you’ll be able to find a Supermarket Apology Artifact.
Good Boy Combo
Once you reach the Supermarket, you will have to squeeze through a gap, and on the other side, you’ll find an Employee of the Month board.
Enter through the door on the right, and look at the table located to the right of the safe. This is where you can find the Good Boy Combo, which also coincidentally has the Safe combination.
Eugene’s Firefly Pendant
After you get into the library, break into the window and you will find yourself in Eugene’s workroom. When you enter the children’s area of the library, you will automatically pick up another artifact.
Eugene’s Ultimatum Artifact
When you enter the children’s area, open the drawer at the back of the bed to find the Ultimatum Artifact.
Photo of Eugene and Tommy
Do a 180 from the Ultimatum Artifact and you will find a photo of Eugene and Tommy on the desk.
Packing Up
Joel’s Watch
Head upstairs into the bedroom and interact with the red shoebox, and you will find Joel’s watch.
Chapter 2: Seattle Day 1
The Gate
Map of Seattle
When you reach the highway with Dina, there will be trailers to your left, enter the trailer, and open the drawer in the backroom to find the Map of Seattle.
Refugee Note
When you reach a gate with graffiti. Head to your left, and you can find a guard post’s trailer. Inside, you can find the Refugee Note.
Infected Infographic
Behind the Refugee Note’s trailer, you can find another artifact sitting on the desk.
Isaac’s Orders
When you climb over the wall, go into the guard tower and look to the left, and you can find a ladder. You can find Isaac’s Orders at the top.
Checkpoint Gate Codes
Head downstairs now and go into the trailer through the glass. You can find Checkpoint Gate Codes in a drawer.
Rooftop Note Artifact
Head out the back of the trailer, and pick up the cable. Aim it above the trailer and land it on the gate at the other side. Climb up the cable and you can find the Rooftop Note on the roof.
Downtown
FEDRA Census Document
The first Artifact can be found in the guard post. It’s in the drawer.
Cache Hunter Note
Head along the 6th Avenue, between Colombia Street and Cherry Street. You can find a bag in a broken building holding the Cache Hunter Note.
Street Drawing
Head to 5th Avenue, between Madison Street and Marion Street. Here, you can find a checkpoint gate, climb it, and head to the second guard post to find the Street Drawing Artifact in The Last of Us 2.
Emergency Protocols Memo
Go to the Synagogue between Marion Street and Colombia Street, you will be visiting this as a part of the story anyway.
Turn right as you enter the gate and go up the letter to the guard post. You can find this Artifact in the drawer of the first post.
Rabbi Saunders’ Letter
In the Synagogue, once you use the rope to jump over to the balcony, enter the door at the end and you can find the letter in the drawer of the desk.
Bank Heist Plans
Head to the Westlake Bank, and head south by one block along the 6th Avenue, between Cherry Street and James Street.
Inside the bank, make your way to the safety deposit box lockers. Interact with the bag to discover Bank Heist Plans.
Bank Robber Letter
Turn left from the Bank Heist Plans and use the code from the artifact 602306. You can find the Bank Robber Letter Artifact.
Engraved Ring
Head to the back right corner of the room, and you can find an Antique Ring in a deposit locker.
Letter from Isaac
Head between Colombia Street and Cherry Street. This block has a tank, and to the left, you can find a corpse with a Letter from Isaac.
Note to Informant
At the center of the area (Check on the map), there is a truck with Fascists written on it. Open up the back to find the Note to Informant document.
WLF Community Supply Chest Note
Head along Madison Street and go around the grey slate building. Climb the stairs, and you can find this document in a bag on the floor.
WLF Safe House Supply Note
The next note can be found in the Ruston Coffee Shop, in the North part of the area right by 5th Avenue. Break into the place using the window and you can find this document on the counter.
Pet Store Key
In the same place you found the WLF Safe House Supply Note, you can also find a key for Barko’s Pet Store, which is actually an artifact in and of itself.
Join WLF Note
Head to Barko’s Pet Store, which can be found between 5th and 6th Avenue. Head up into the room and to your left, there will be a Join WLF Note on the photocopier.
Plea to a Friend Letter
The story will eventually take you to the Courthouse, as you enter it, you will go down a dark tunnel, at the end of which lies the ‘Plea to a Friend’ document right next to the corpses.
List of Known WLF Agitators
Now turn left and enter the room using the window. In the filing cabinet to the back, you can find the ‘List of Known WLF Agitators’ Artifact.
Lt. Torres’ Final Memorandum Artifact
To the right of this place is a dead body, grab a machete from it and it will cause another Artifact to drop from the dead body.
WLF Recruiter Journal
Now, head to Serevena Hotel, and to the upper floor of the hotel. Head into the bedroom, and follow the path to the connecting bedroom; look in the drawer underneath the TV to find the WLF Recruiter Journal.
Eastbrook Elementary
Leah’s Note and Photograph
As soon as the cutscene ends, Leah’s Note and Leah’s Photograph will be added to your list of Artifact automatically.
Isaac’s Mandate
Once you take care of all the encounters, you will be heading inside a room as a part of the story, here you can find Isaac’s Mandate lying on the table right next to a radio.
Capitol Hill
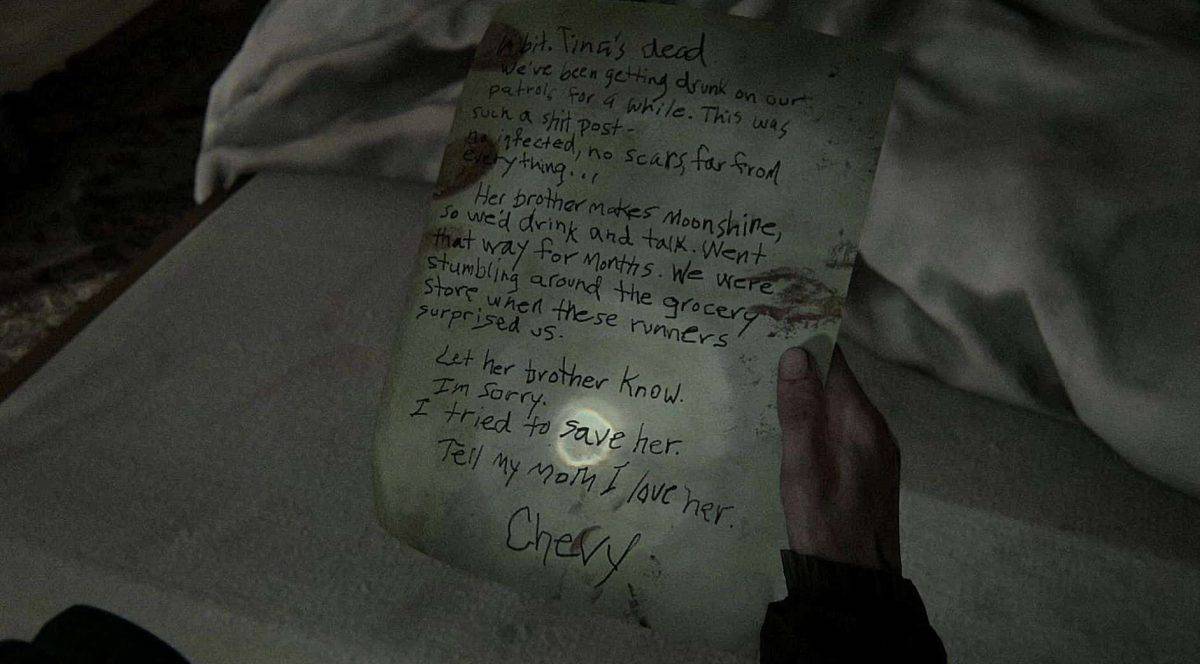
Chevy’s Apology Artifact
When you exit the apartment, go right and as you go down the street, keep an eye to your left for an alleyway. Head down the alleyway once you find it and go to the door on your right.
Beware of the Infected Runner upstairs and enter the bedroom with green walls. On the bed, you can find TLOU 2’s Chevy’s Apology Artifact.
Raul’s Olive Branch
When you’re at the motel, you can find a green dumpster there, pull it from behind the small blockade, and put it against the wall right under the white apartment.
Climb into the apartment and go into the kitchen. Here, search the drawer to find Raul’s Olive Branch Artifact.
Rebecca’s Tip Off
You can find the third artifact at the Gas Station, careful of the enemies patrolling though.
You can find a backdoor next to the Gas Station, use it and take a left once you reach the end of the corridor. Behind the counter, you can find Rebecca’s Tip Off.
Tower Doodles
When you come across the three Infected and explosive traps as a part of your story. You will be asked to slide down the mud afterward, however, before you do that, go to your right and climb up the ladder. Here you will find Tower Doodles Artifact lying on a box.
Raul’s Account
Now, go ahead and slide down the mud. Keep going down the linear path,a nd you will spot a mural, to its right is a brown truck and within it lies our Artifact.
Fran’s Refusal
The next Artifact can be found in the Tae-Kwondo studio (It’s on the street with the explosive traps). You can find the Artifact on the noticeboard in the kitchen.
Thrift Store Reminder
Go into the shop across the street now, and open the backdoor. Look at the noticeboard to find the Thrift Store Reminder Artifact in Last of Us 2.
Channel 13
Dad’s Pep Talk
Go to the top of the station where you find Leah. Go into the room to your left and you can find the Dad’s Pep Talk Artifact on the couch.
The Tunnels
Subway Note
After your encounter with WLF troops and a number of infected. Once you deal with them, you will be entering train carriages.
Head to the end of these carriages, and you can find a Subway Note Artifact on the window.
Whittled Statue
Eventually, you’ll use a chain door to enter a tunnel in the game. Enter the room labeled ‘Lounge’, with the blue door. You can find three Artifacts here, one being the Whittled Statue Artifact just behind you.
Soda Can Note
In the opposite end of the room, you can find the Soda Can Note lying in the red vending machine. Smash the glass to collect it.
Locker Room Code
Turn right from the vending machine to find the Locker Room Note on the table.
Subway Station Note
The next Artifact in this level of The Last of Us Part 2 is found at the very end. You will reach Metro Station.
Once you go through the first train, climb the vending machine and head into the train car on your right, and you can find the Artifact on the wall to your right as you enter.
The Theater
Program for Cassandra
On the ground floor, just left of the counter.
Lone FEDRA Soldier Journal #1
From Cassandra’s Artifact, go upstairs and turn left. It’s next to the camp on the table.
Lone FEDRA Soldier Journal #2
Turn around from where you found the very first journal, and go through the projector room door to find the next journal.
The Sick Habit Flyer/Set List
Go into the Main Auditorium, and you can find the Final Artifact here on the stage.
The Birthday Gift
Suicide Note
When you get separated from Joel, you will come across an exhibit with some wolves. To the left, there are several rooms.
Continue through here and you will eventually get to a crack in the wall. In the butterfly exhibit, you will be able to find the Suicide Note.
Chapter 3: Seattle Day 2 Artifact Locations
Hillcrest
Join WLF Note
As the chapter starts, walk down the path, and count for the third building to your left. Break the glass to get into Majestic Laundromat, and go to the backroom to find the Join WLF Note Artifact.
Boris’ Daughter’s Drawing
Go into the second building on the right side of Rosemont street. Drop through the hole in the back of the store. You can find the drawing next to the foldable bed on a table.
Need a Plan Note
When you spot a truck leaving, and finally jump down. Look to your left and go through the bushes. Use the dumpster and climb into the shop. You can find another collectible Artifact on the counter.
Yolanda’s Note
Go to the main street and look for Ruston Coffee. You can find this Artifact on the cash counter.
Condolence Note
When you climb into a building using a dumpster as a part of the story. To your right, you can find the Artifact sitting on the desk in the room.
Note in Hillcrest Tattoo Parlour
Eventually, after exiting the building, you will be at a new street with many enemies. Once you have dealt with the enemies, go to the Velvet Tattoo shop, the first building on the left. You can find the Artifact in the back room.
Turn in Boris’ Note
Go into the Pet Boutique now across the street. Use the window at the back to get in. You can find the Artifact next to the sink.
Dale’s Combo
Make your way into the main store from the previous Artifact. And, you can find the Artifact to your left pinned to the wall.
Boris’ Confession
As a part of the story, you will spot a black smoke, and climb over a fence into the garden. The first collectible Artifact can be found on the coffee table in the living room.
Rosemont’s Flyer
The Rosemont’s Flyer is on the table to the left in the kitchen.
Finding Strings
Tara’s Invitation
When you finally reach the spore-infested area, and put on your mask. Squeeze through the gap in the hotel’s bedroom and take the door to your left. Head left once more and go into room 107. You can find the Artifact here to your immediate right.
The Seraphites
WLF Target List
When you reach the large street (Open area), go to the left side and enter the Kingsgate Brewing Co. Take care of the infected, and one of them will drop the WLF Target List.
Last Letter to Husband
Go to the right side of the street, and in the very corner, you should be able to find the Conference Center. Go into the elevator shaft at the back, and climb the ladder to the upper floor.
Break the glass to the left of the box, and throw the rope over the metal beams. Use the rope to get to the other room. You can find the Artifact on the floor of the room.
Evacuation Letter
After coming out of the underpass, look to your left to spot some white apartments. Use the truck to get up into the second floor of the house. Smash the glass to get in and find an Artifact on the kitchen table.
WLF Deserter Letter
Now go to the opposite room and interact with the workbench. Enemies will come out and ambush you.
Once you deal with the enemies, a locked room will open in the apartment. You can find the Artifact next to the TV.
Dying Husband’s Plea
For this collectible Artifact, go to the Garden Suites 113 Building in TLoU 2, the one where you first encountered Seraphites. Make your way into the apartment upstairs, labeled room 201.
Jump out the window and go up the staircase. Break the window to get into the next apartment, and you can find the Dying Husband’s Plea Artifact right next to the corpse.
Pharmacy Note
After your fight with the pickaxe miniboss, and when you’ve finally washed ashore after dropping into the water.
You will be able to find Weston’s Pharmacy in the distance. Follow the path to it and find the Pharmacy Note Artifact behind the counter.
Hospital Supply List
When you enter the hospital searching for Nora, a few enemies will attack you on the ground floor. Take them out, and go up to the second floor. Go into the first door to your right to find the list on the countertop.
Chapter 4: Seattle Day 3
Road to the Aquarium
Garage Note
When you’ve dived with Jessie, there will be a parking garage to your left, running with infected. Go to the back and climb the ramp using the car. At the very edge, you can find the Garage Note Artifact.
Bookstore Note
When you drop into the Dark Bookstore, go to the right side of the store, and you can find the Artifact on the table.
Textile Note
After your encounter with a bunch of enemies in a large open area, go to Rachel’s Fabrics Store to the right. Go to the second floor and you can find the collectible Artifact pinned between the windows.
The Flooded City
Stash Note
Before opening the locked chain gate, go up the stairs to your left. You can find the Stash Note next to the corpse.
Shambler Note
When your boat stops working past the Seattle Sleep Warehouse Building. You can spot the Carthy Hotel over the fence. Head in to find the note on a corpse to your right.
Sniper’s Note
Continue forward into the next area from the previous Artifact, and here you will run into combat with several enemies. Simply go past them and keep your boat to the left side.
Park your boat, and go up the train. Throw the rope through the hole in the roof, and jump. Climb the rope up to the roof of the carriage and drop down through the roof hatch. You can find the Sniper’s Note at the end of the carriage.
Encampment Note
Now kill all the remaining enemies and go up the staircase to the left of the central building.
At the top, go left and break the glass. Here, you can find the Encampment Note to the left.
Arcade Flyer
When you reach the Arcade, you can find a Flyer Artifact on a table in the dining area.
Arcade Note
Another note can be found once you defeat the infected in the room underneath. In the Prize Zone, there’s a hatch at the back.
Use the hatch, go up the stairs and turn right to go into the PC Café. To your left, you can find the Arcade Note pinned to the wall.
Chapter 5: 4 Years Earlier/The Park
Tracking Lesson
Owen’s Drawing of Abby and Thank You Card from Mei
Two Artifacts are automatically discovered at the beginning of the chapter.
Zoo Holiday Brochure Artifact
Walking in the park, you will discover a gazebo to your right. On the bench of the gazebo, you can find the Zoo Holiday Brochure Artifact.
Chapter 6: Seattle Day 1 Artifact Locations
On Foot
WLF Gun Cache Note
When you’re back on the ground after climbing the warehouse with Mel, smash the windows of the brown trailer to your left and you can find the WLF Gun Cache Note just by the door.
The Forward Base
WLF Interrogator Letter
After talking to Nora, go into the building and you can find the Artifact right next to the brown box.
Hostile Territory
Manny’s Notes
This can be grabbed during your excavation with Manny, however, he will simply take it back and doesn’t count.
Scar’s Suicide Letter
Go into the shop named Tang Fabrics & Imports using the window and you can find The Last of Us 2’s Scar’s Suicide Note Artifact on the side.
Plea to Seraphite Prophet
When you reach the Chinatown district, go into the third shop to the left, and go up the stairs. Crawl under the table, and beware of the infected on the other side. Jump across from the balcony and go up another set of stairs to find the Artifact on the corpse.
Jasmine Bakery Safe
Head back to where you initially jumped from the balcony and go to the end of the corridor. You can find the artifact to the right on a cardboard box.
Strange Artifact
From the previous document, go through the door, and instead of dropping down the hole, go to the right to find the Strange Artifact on the table, an easter egg to Jak and Dexter.
Seraphite Prayer to Prophet – Peace, Prayer for Victory, Respect, Steed, Prosperity, Pairing
Leaving the Chinatown district, you will come across a large mural at the back of a truck. You can find six artifacts scattered around the mural in The Last of Us Part 2.
WLF Soldier Meets Prophet Letter
Go into the building to your right from the giant mural and you can find the letter on the counter.
Letter from Seraphite Father to Son
After your encounter with the Scars in the wrecked building, crawl under the rubble to get to the large open room. To the left, you can find the Letter from Seraphite Father to Son on the table in the rooftop garden.
The Forest
Failed Truce
When you get your backpack from the lady who stole it, you will enter an auto shop. Head to its back and go through the door in the corner. You can find the Failed Truce Artifact on the table to your left.
The Coast
Infirmary Note
Go to the ground floor of the cruise ship and take a right while walking through the corridor, and another right to find yourself in some sort of dormitory. The artifact can be found on a bed.
Mutiny Note
The next Artifact can be found on the ground floor after picking up the crossbow. Go to the end of the corridor to find the Mutiny Note sitting by a skeleton at the very end.
Ferry Log
Go to the upper floor of the boat (Top) and head to the door at the back. Open it to find the Ferry Log document sitting by the skeleton.
Chapter 7: Seattle Day 2
The Shortcut
Amputation Supplies
Automatically added to your inventory at the start of the chapter.
Survivor Plea
The second Artifact can be found after you’ve jumped over the isles in the river. Go up the stairs in the building and you can find a note on the floor in one of the rooms.
Neighbour Exchange
Jumping from the highway into the apartment’s balcony, you can find the third document on the table in the hallway.
Scavenging List
After jumping over some more isles, you will find yourself in a phone store named as Interbay. You can find the Scavenging List Artifact on the cash register.
Seraphite Truce
Enter the red door on the left after Lev goes across some beams to find the Seraphite Truce Artifact lying on the desk.
Seraphite Orders
Once you get into the elevator and reach the top, you can find a note on the wall prior to entering the very first room.
The Descent
Gym Safe Combo
Go into the Orchards Juice Bar, and on the pinboard, you can find the Gym Safe Code Artifact.
FEDRA Final Note
Repel down with the firehose and look in the room to your right to find the FEDRA Final Note document.
Ground Zero
Annex Letter
As soon as you split from Nora, walk up to the next staircase, and prior to descending downwards, crawl underneath the rubble into the darkroom where you can find the Annex Letter by the corpse.
Soldier’s Letter
Proceed down the staircase we just previously mentioned and drop down to the lower floor. You can find a revolving door with a corpse along with a Soldier’s Letter Document sitting in a bit right next said corpse.
Chapel Note
From the soldier’s letter, head in the opposite direction into the chapel and you can find this note on the altar in TLOU 2.
Patient’s Note
Go through the yellow door and the quarantine tunnel. Smash the windows of the second room at the right. You can find the Patient’s Note Artifact lying on the stretcher.
Doctor’s Note
You will eventually be in the surgery area after squeezing through a gap. The Artifact can be found in the second room on the left.
Chapter 8: Seattle Day 3
The Marina
Marina Note
Finally arriving at a pier, go past the ladder and enter the shop on the right at the end, you can find the note on the counter.
The Island
WLF Scout Journal
After climbing the first ladder, to the right, there will be a WLF Scout Journal on a corpse.
Venison Distribution Note
Go past the waterfall and you will eventually reach a hut. Go in the largest hut and you can find the Venison Distribution Note Artifact on a table.
Mournful Prayer Note
After you spot Isaac’s ship, turn right and go into the hut to find the note on the right.
Young Seraphite’s Journal
Go to the opposite hut from the previous Artifact and you can find the final Artifact for this chapter on the bed to the left.
Chapter 9: Santa Barbara Artifact Locations
2425 Constance
The Rattler’s Note
Go down the street and you can find a greenhouse to your left. Clear out the infected and go in the house. You can find the Artifact in the bathroom.
Pushing Inland
Abby’s Note
Turn left at the very start of the level, TLoU 2 Artifact can be found next to the microwave in the kitchen on the ship.
Mansion Note
Once you climb over a fence and enter the housing estate, turn right to the first house, and enter the garage. You can find the note here.
Runaway Warning
After spotting the clicker on the roof, go inside and head downstairs. You can find the Artifact on the counter in the kitchen.
The Resort
Santa Barbara Slave Note
After going through the train carriage and climbing the ladder, you will be able to see some prisoners in the distance. Stick to the left and you can spot a corpse with the note you’re looking for.
Rattler’s Letter Home
The very last Artifact can be found in the second large enemy encounter within the resort. Keep following where the story’s taking you and you will eventually reach a white spiral staircase to the left of the room. Go up and take a right to find the Artifact near the bed.