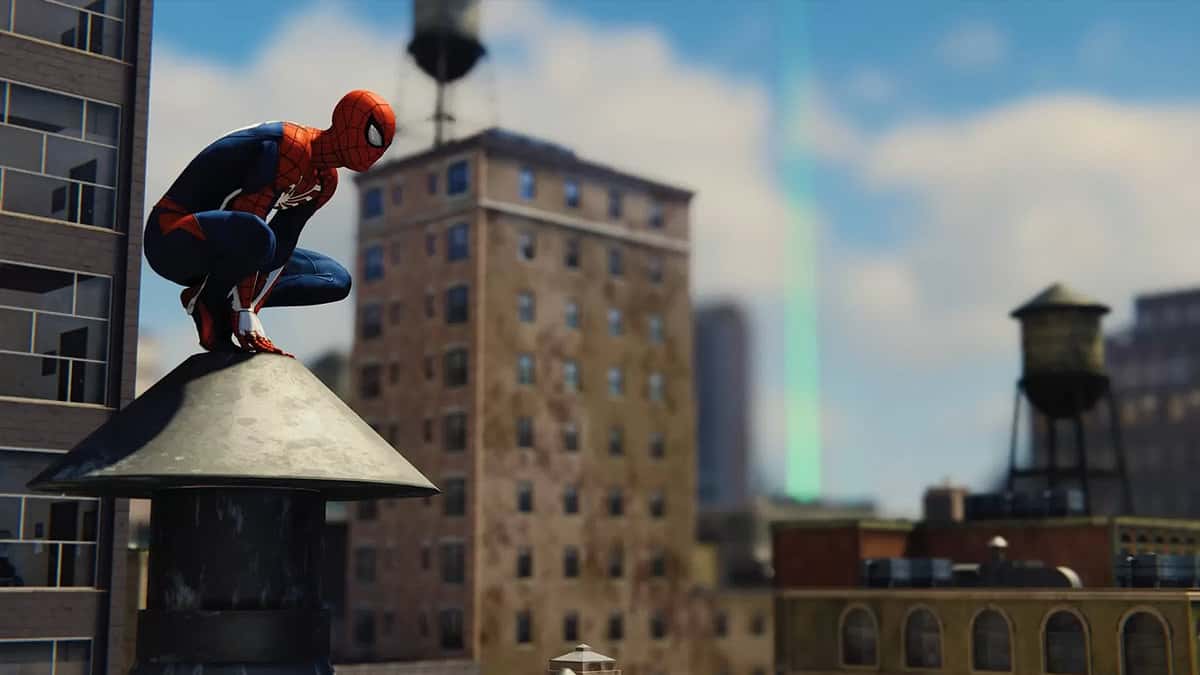
Marvel’s Spider-Man Remastered features a beautiful open world that becomes even more gorgeous as you change the time of day.
The city is filled to the brim with landmarks, monuments, easter eggs, and such. You will not be able to hold yourself back from taking out the in-game camera for a few photographs as memorabilia.
That photography skill of yours is going to be put to the test in Spider-Man Remastered with the Secret Photo Ops challenge. The side activity will have you swinging all over the city because there are over three dozen in-game locations that you need to capture a photo of to unlock a new Spider Suit.
The following guide will mark all the locations you need for the Secret Photo Ops in Spider-Man Remastered.
How To Capture Secret Photo Ops
You are going to use your in-game camera to capture these secret photos just as any other landmark. When you line up the shot at the right location, the camera will flash green to confirm that you have the correct subject in the frame.
There will also be a literate message that says “Subject in Frame” to remind you to press the button.
When a secret photo op is taken, a counter will pop-up to relay how many secret photos have been done in total and how many are remaining.
Take note that you can unlock the Proximity Sensor Mod for your Spider Suit at level 50. With this mod equipped, all nearby secret photo locations will automatically be marked on your mini-map.
Lastly, remember that photography is an art. Hence, you will not be able to capture any secret photo ops if you are combat.
Secret Photo Op Rewards
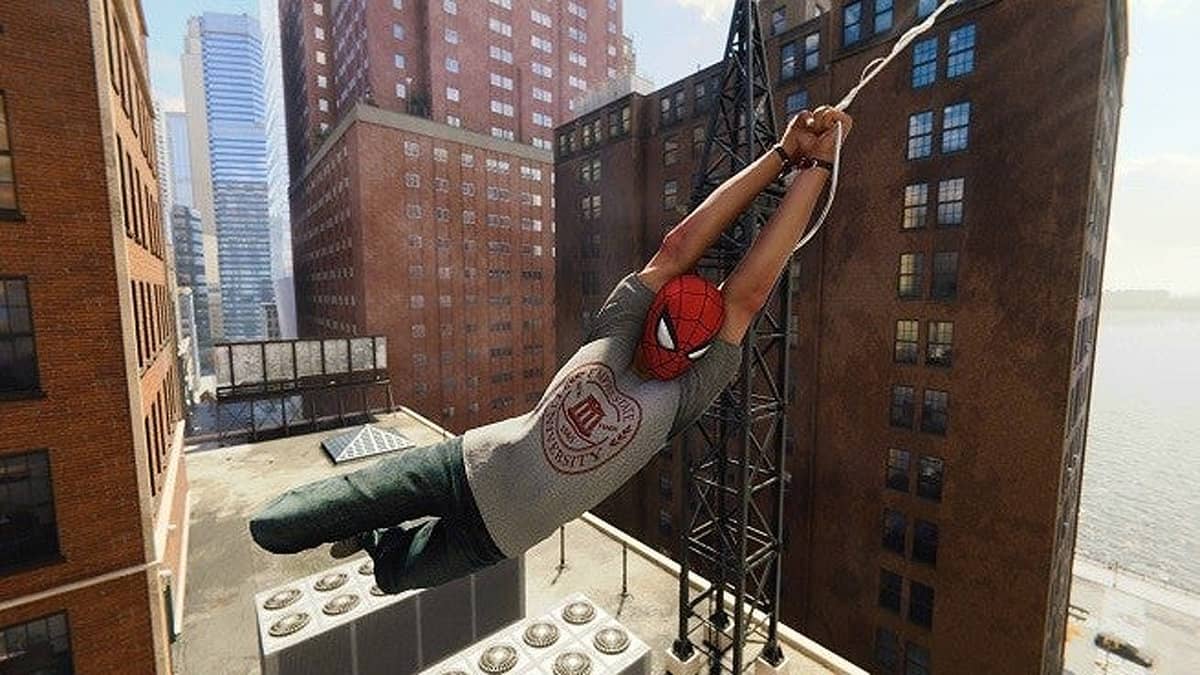
You will unlock the ESU Suit for Spider-Man after completing all available secret photo ops in the game. The ESU Suit is only for show and cosmetic purposes only. It features no special powers or skills.
Secret Photo Op Locations
There are 50 Secret Photo Ops in total in Spider-Man Remastered. That translates to 50 different locations and landmarks that you must track down for a photo. Their locations have been marked below according to their areas.
- Harlem
- Upper West Side
- Upper East Side
- Central Park
- Hell’s Kitchen
- Midtown
- Greenwich
- Chinatown
- Financial District
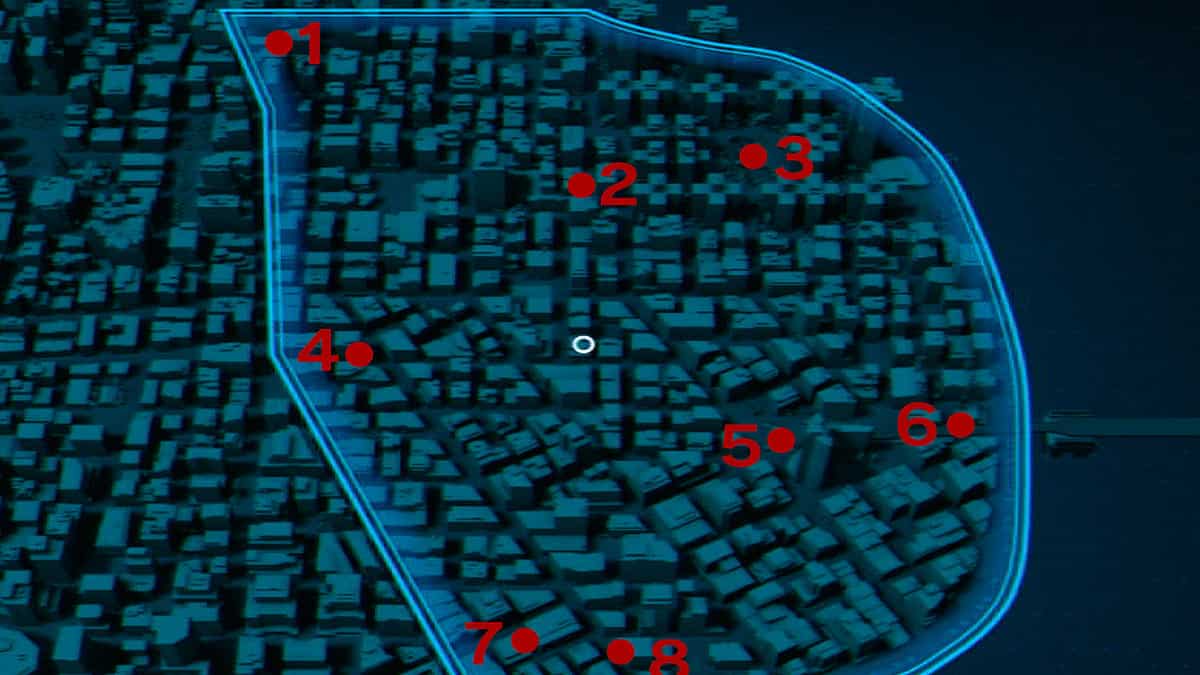
Harlem
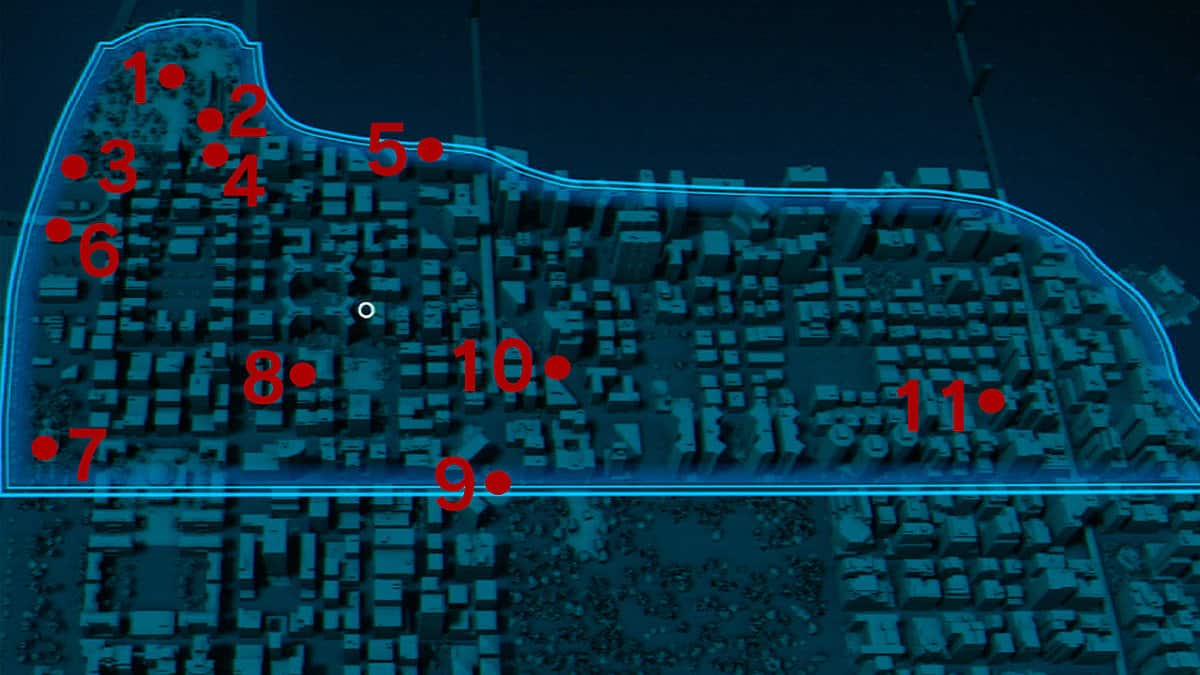
Location #1: The first one is of Uncle Ben’s grave, located in the north of Harlem.
Location #2: Take the picture of the main Spire from the street near the Church right behind Uncle Ben’s grave at location 1.
Location #3: Take the photo of the singular Spire near the trees, just south of Uncle Ben’s grave.
Location #4: Here, you need to take a photo of the graffiti/art which is located on one of the buildings facing the other, if you look between them.
Location #5: Take a photo of the shop at this location, which is in the center of the alleyway.
Location #6: Take a photo of the graffiti/art on the side of the factory, just below the bridge.
Location #7: At the location stated, take a photo of the structure with the large dome on top
Location #8: From the street at the location provided, take a photo of the gate that leads to the Harlem Sanitarium.
Location #9: Take a photo of the statue situated at the center of the roundabout.
Location #10: Take a photo of Osborn’s Campaign Office adjacent to the large intersection.
Location #11: The last picture of Harlem is of the Greenhouse which is located between the buildings and the Prisoner Camp at the location provided.
Upper West Side
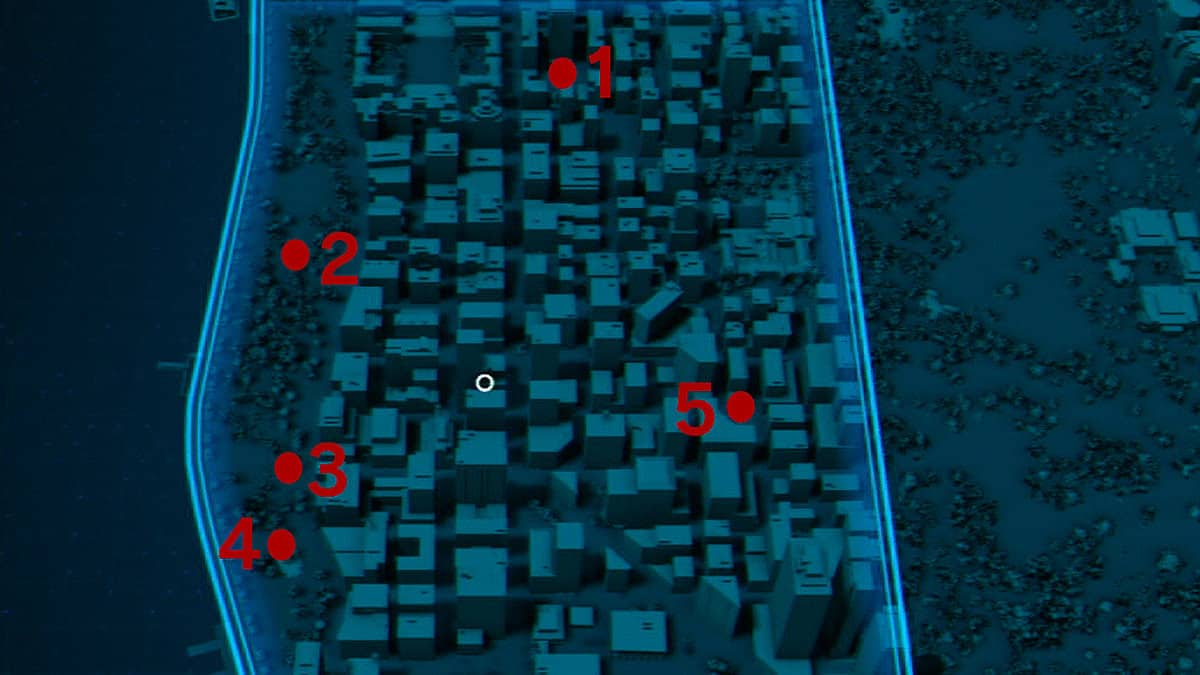
Location #1: The first one is to the north and is an Oscorp Lab.
Location #2: This is a small hexagonal building in the western forest area – near its center.
Location #3: This is a small statue to the south of the building in location #2.
Location #4: This is a large spire, located south of the statue in location #3.
Location #5: Take a photo of the Firetruck backed up into the building in the alleyway.
Upper East Side
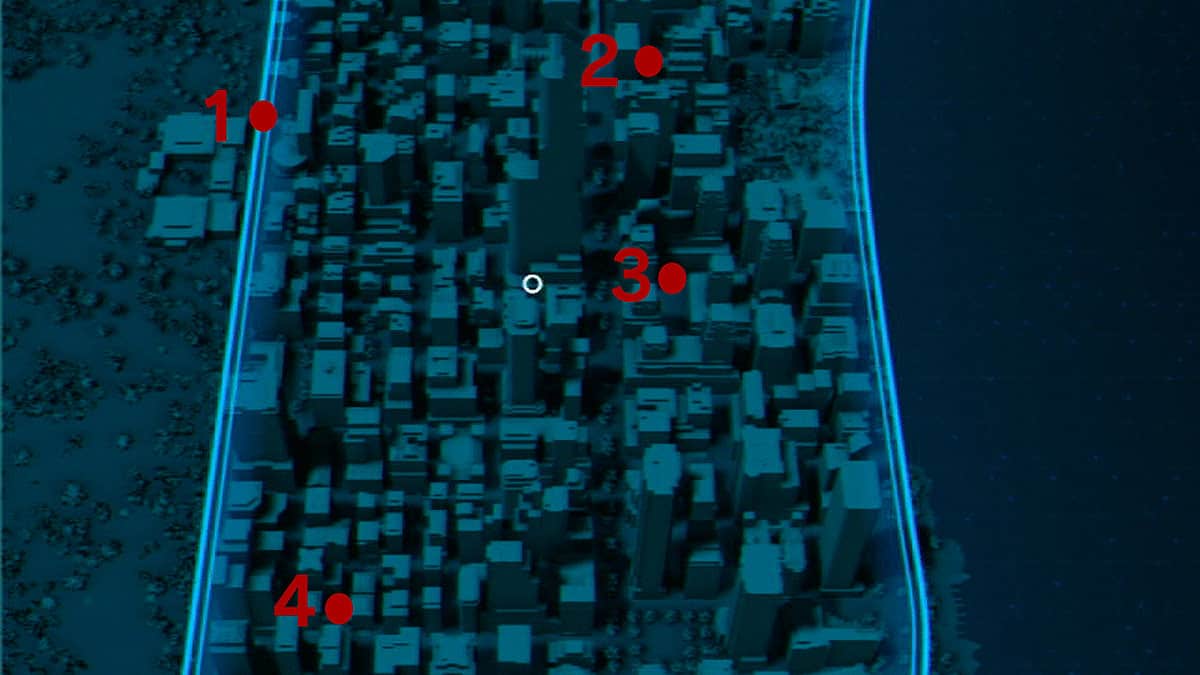
Location #1: Take a photo of the advertisement for the Latin American Museum in the top left corner where Central Park and the Upper East Side are separated.
Location #2: Take one of the Black Wing Tavern’s Ivy Beams in the top right corner of the area.
Location #3: A photo can be taken of the sunken plaza right below the district center.
Location #4: The library with golden posters to the bottom left of the area.
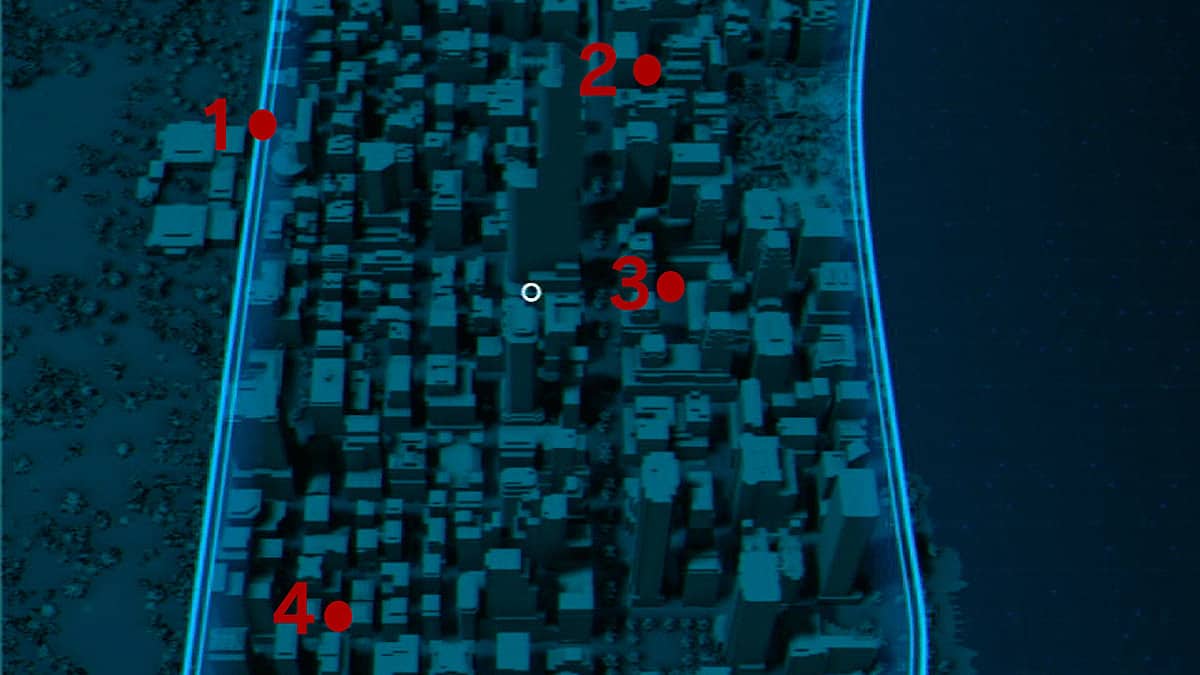
Central Park

Location #1: Take a photo of the historic fort at the northwest corner of Central Park.
Location #2: Take a photo of the old tourist spot located just south of the fort in location #1.
Location #3: Take a photo of the singular tall Spire from the westernmost building to the right of the tourist spot.
Location #4: At the pond in the center of Central Park, take a photo of the building on the opposite end of the bank.
Hell’s Kitchen
Location #1: Take a photo of the pirate flag painted on the side of one building way at the northwestern corner of the docks.
Location #2: Take a photo of the Statue located at the northeastern corner of Hell’s Kitchen.
Location #3: Take a photo of the Nelson & Murdock plaque near the building’s doorway at the center of Hell’s Kitchen
Location #4: Take a photo of the Vulture mural at the end of the elevated walkway.
Midtown
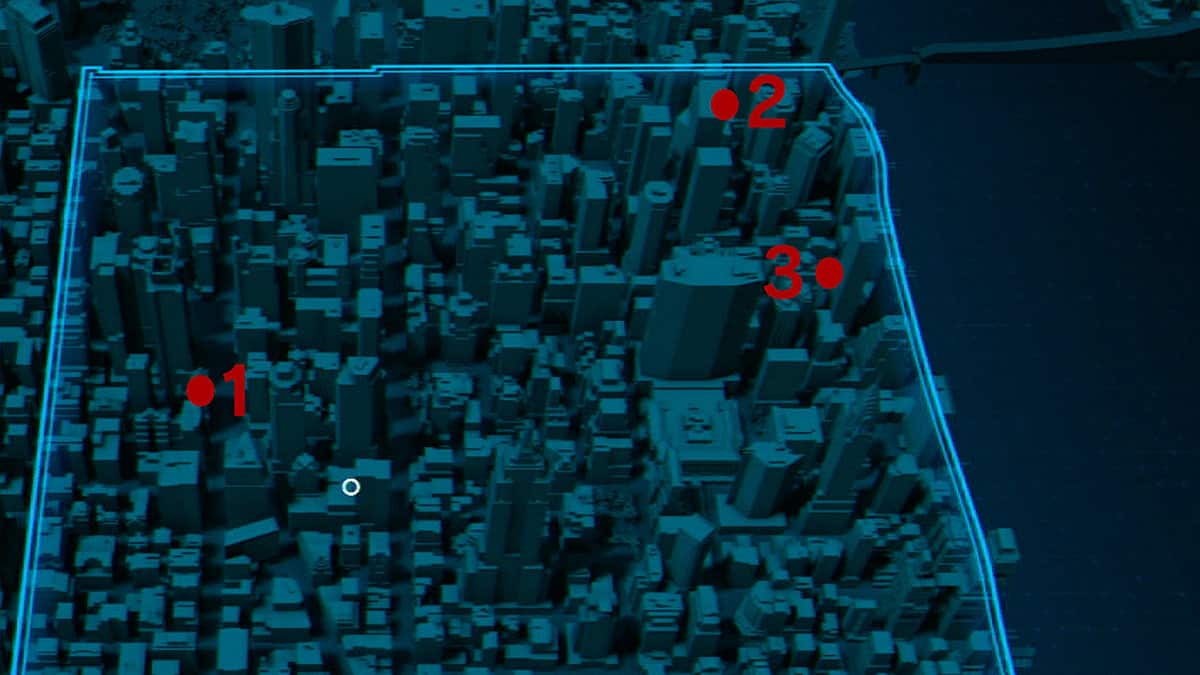
Location #1: The first picture is of the clock tower, but you have to climb the building opposite it and take a picture of it while falling.
Location #2: Take a photo of the central tree between two buildings at the location.
Location #3: Take a photo of the Fish mural at the base of a wide open area on the eastern side of the building.
Greenwich
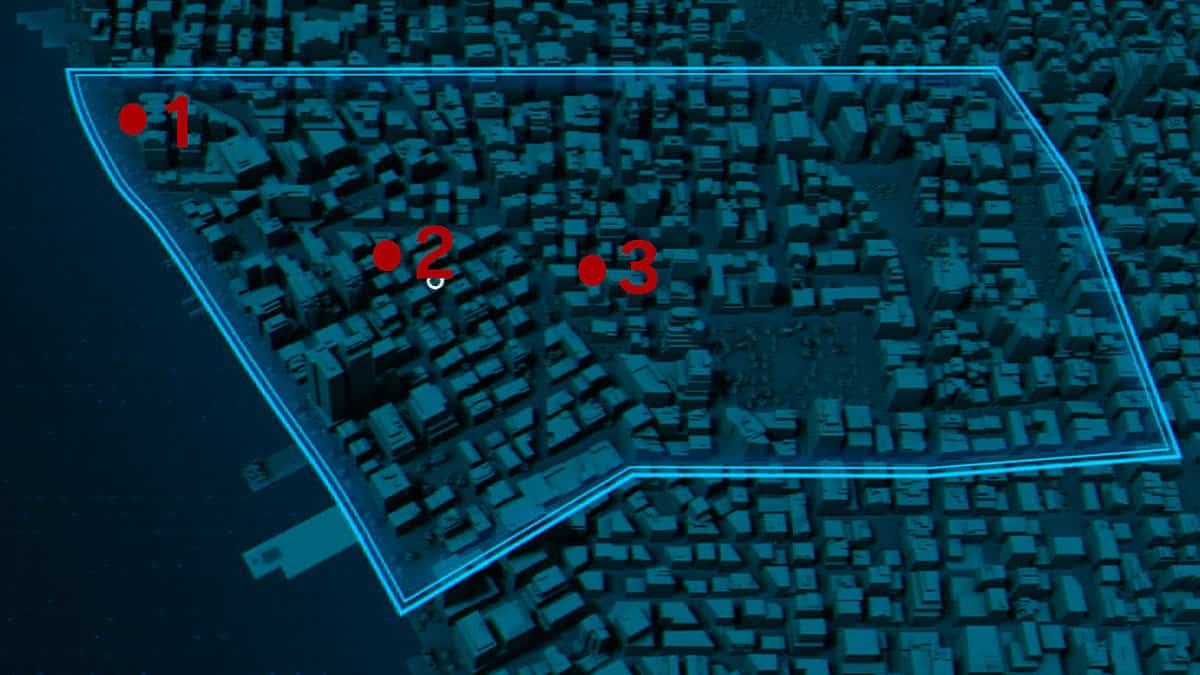
Location #1: The first one is to the utmost left corner of the area. Take a photo of the word ‘Modern’ on the building at the location.
Location #2: Go southeast to the rainbow pride flag to snag a photo of it.
Location #3: Lastly, take a photo of the graffiti near the Roxxon gas station of the J. Jonah Jameson mural almost exactly in the middle of the city.
Chinatown
Location #1: Take a photo of the small central statue inside the residential building complex.
Location #2: Take a photo of the ad for the movie on the edge of a building at the intersection.
Location #3: Take a photo of the large water pool.
Location #4: Take a photo of the “Leo’s” logo above the doorway of the shop on the street.
Location #5: Take a photo of the archway that leads to the bridge up ahead.
Location #6: Take a photo of the skate park situated under the bridge.
Location #7: Take a picture of the mural of a Rhino in the alleyway.
Location #8: Take a photo of the Police station from such an angle that the “Police” words on top is visible on both sides of the building.
Financial District
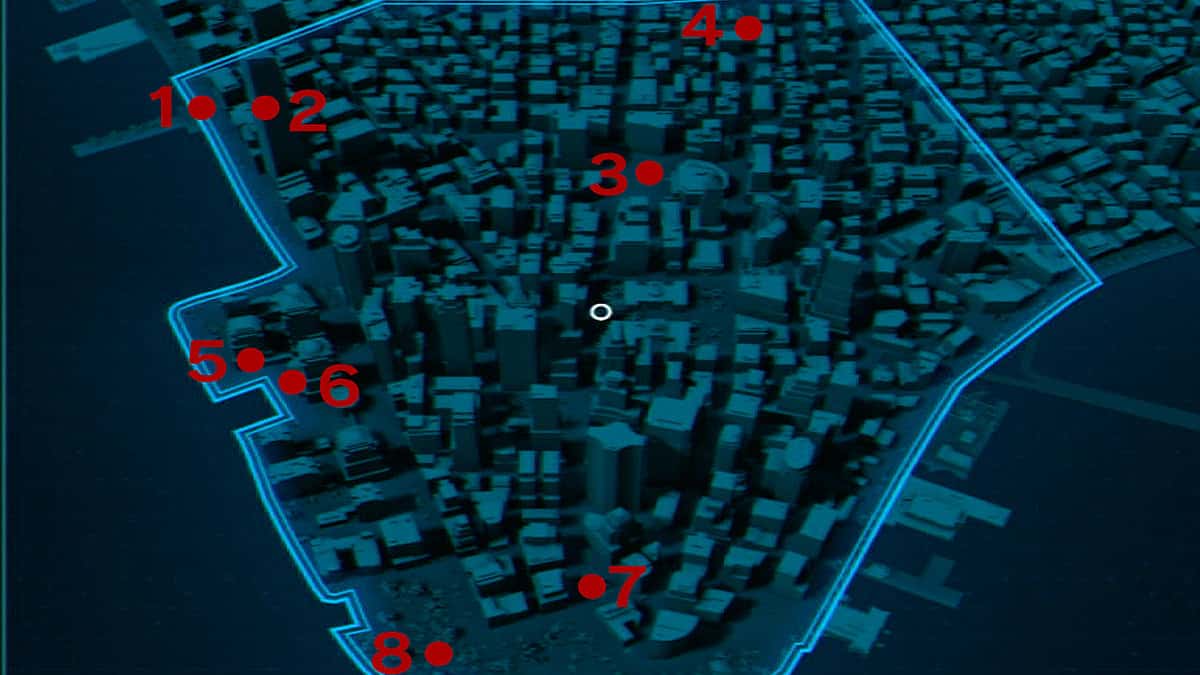
Location #1: Take a photo of the basketball court at the park.
Location #2: At the top of a small building, you should find the signage of Auerbach Theater. Take a photo of the signage.
Location #3: Right next to the building with Greek-style architecture, you should see a small statue. Take a photo of the statue.
Location #4: Take a photo of the small bronze statue situated at a corner of the red-bricked building.
Location #5: Take a photo of the tall art-type architecture as shown in the picture. This should be located on the western side of the district.
Location #6: Take a photo of the facade of the building featuring patterns of roses outside. This should be located south of the previous location.
Location #7: Take a photo of the statue near the southern end of the district.
Location #8: Take a photo of the Statue of Liberty from the coastline.