Having trouble in one of the side quests in FO 76? No problem. We have got you covered! Our extensive Fallout 76 Side Quests Guide will cover all the optional missions that can be accepted in this massive world of Fallout 76.
Fallout 76 Side Quests
Fallout 76 Side Missions Guide will cover all the side quests in the game. There are a ton of side quests and all are unique and filled with adventure.
Some of the side quests that we will cover are Bureau of Tourism, Cold Case, Into the Fire, Death from Above!, Hunter/Hunted, Into the Mystery, Request Government AirDrop, Personal Matters, Tentative Plans, and Initiate of Mysteries.
- Bureau of Tourism
- Cold Case
- Into the Mystery
- Personal Matters
- Tentative Plans
- An Organic Solution
- Falsely Accused
- Mayor For a Day
- Miner Miracles
- Safe for Work
- The Motherlode
- Tracking Unknowns
- Forging a Legend
- Prototypical Problems
Bureau of Tourism
- A Set of Modded Armor Called the Trail Warden
- Components
- Random Ammo
- A Random Aid Item
Bureau of Tourism is one of the many side quests in Fallout 76. In this side quest, all you have to do is find the Grafton’s Mayor, talk to him and follow some of the instructions he might be giving.
He, fundamentally, wants you to fix the four main attractions of the town. These attractions are Wary Wilard’s, the Clarksburg Shooting Range, Prickett’s Fort, and the Black Bear hunting lodge.
There is no time limit for you; you can complete the side-quest any time you wish, without any problems. While you are in Grafton, you can also tune into WGRF Grafton radio to complete the Misc. Quest “Tune into WGRF Grafton Radio”.
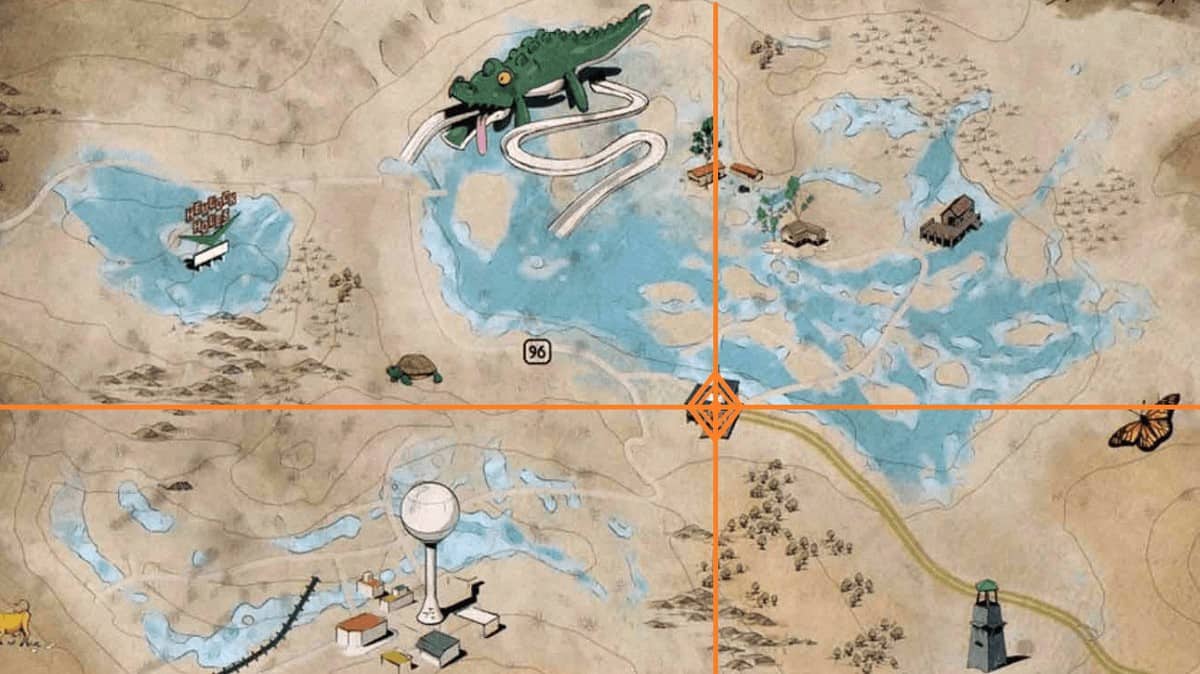
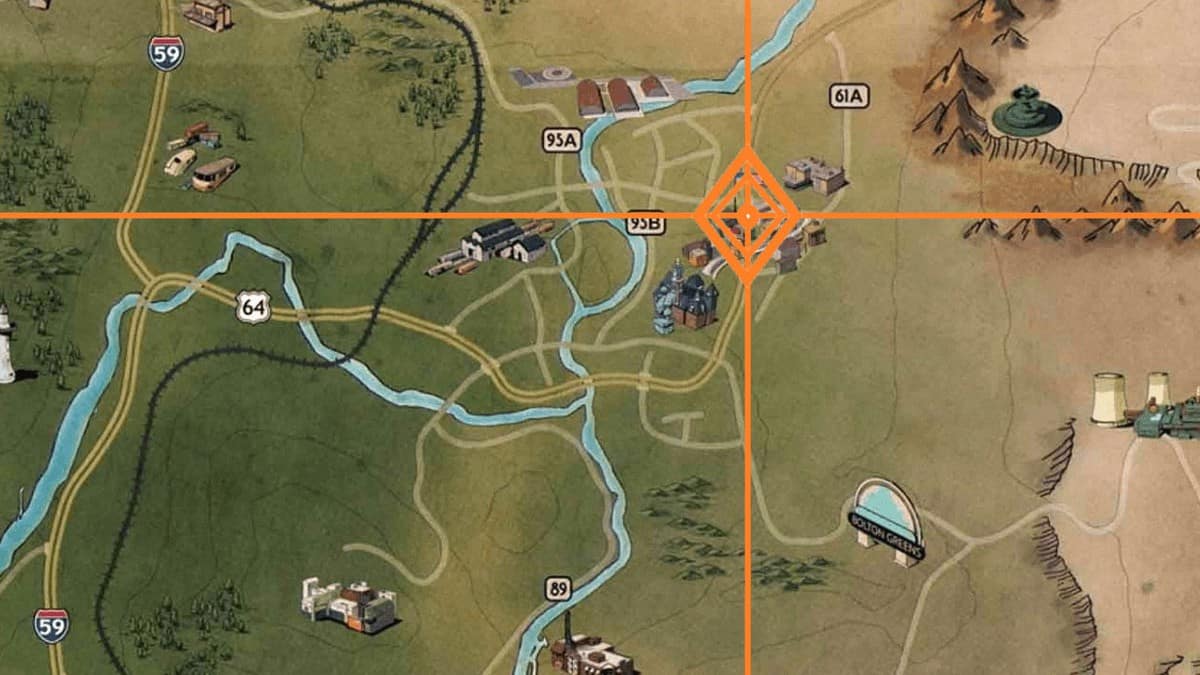
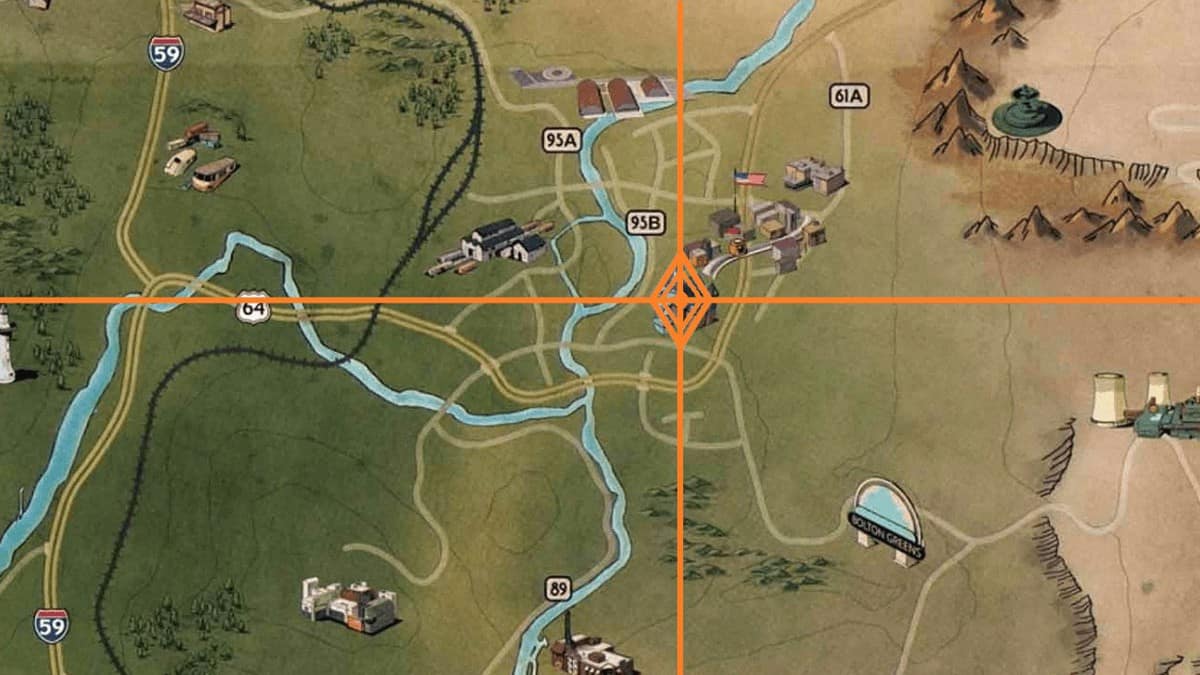
Grafton Town
Grafton is located just northeast of Vault 76, to the direct north of Moundsville Penitentiary. Another thing to note is that you can follow Road 92 towards Road 96 to get here.

There is an ‘Overseer’s Cache’ right beside him, and another locked crate on the first floor, so do loot them when you get the chance.
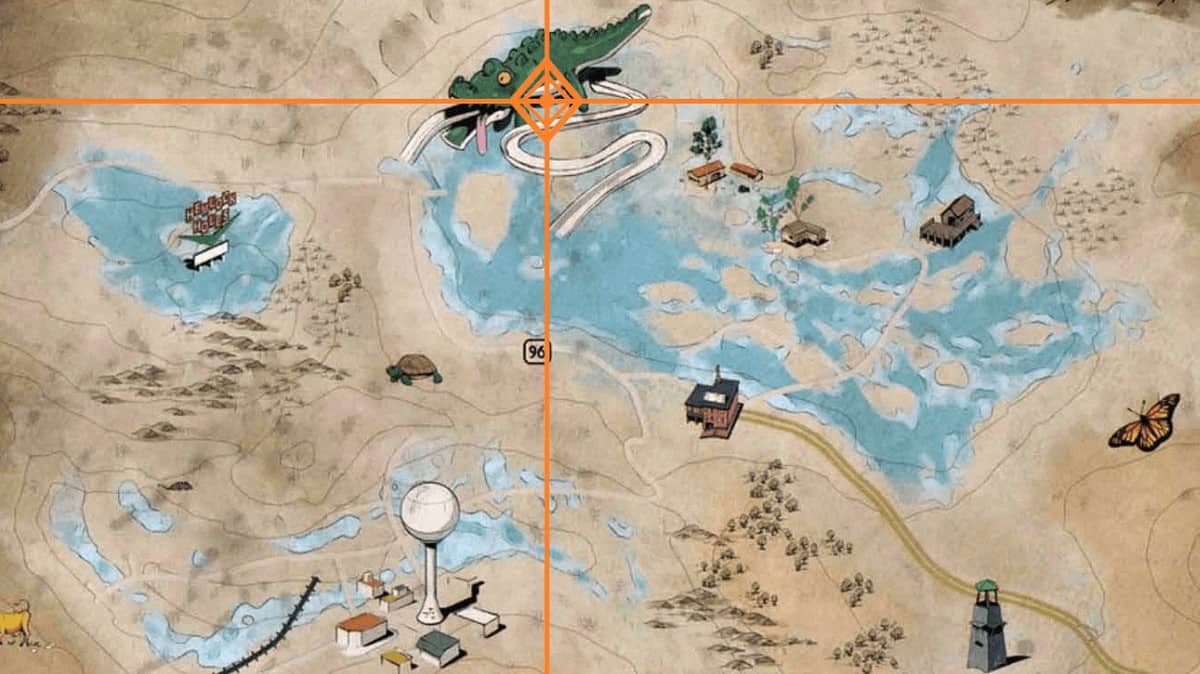
Clarksburg Shooting Range
The closest task here is the Clarksburg Shooting Range. Just head northeast of Grafton and towards the first building.
Black Bear Hunting Lodge
To the northeast of Grafton, even further north of Clarksburg Shooting Range is the Black Bear Hunting Lodge.
You need 1x Screw and 1x Circuitry to repair this terminal. You will also find a Daily Quest “Big Game Hunter” in the basement.
Wary Wilard’s Waterpark
One of the four tasks that the mayor will give you is to “Open the water valve at Wavy Wilard’s Waterpark”.
Head north of Grafton towards the crocodile waterpark on the map. You will find the water valve here. More information will be added later on.
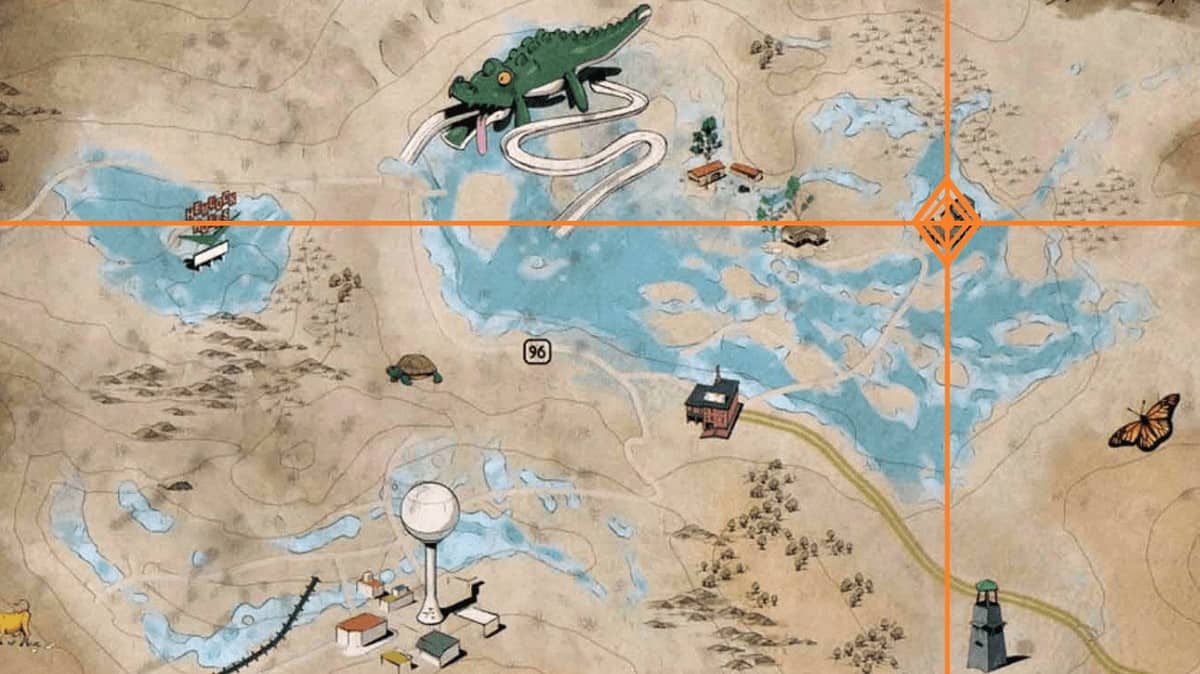
The farthest objective is the Prickett’s Fort. This location is directly east of Wary Wilard’s Waterpark and towards the road 97. Head here and complete the objective “Repair Prockett’s Fort token dispenser”. More information will be added later on.

Cold Case
- A Modded SMG Called the Perfect Storm
- Multiple Random Ammo Types
- A Random Aim Item
Cold Case is a side quest in Fallout 76 given to you by Miss Annie at Wavy Willard’s Water Park. This side mission basically follows the mystery of Grafton Steel and the missing child of Graton Steel’s owner, Mr. Woods.
Your job initially will be to find what happened to the missing child, only to discover that it was much bigger than just an ordinary kidnapping.
This quest is an emotional ride, with family feuds and a man drowning in his own insanity. We highly recommend that you do this side quest when you are in the area.
Finding Annie
Head down towards Way Wilard’s Waterpark and you will find Miss Annie roaming around directly below the Roller-coaster. She is a white painted Handy robot, so you cannot really miss her.
Interact with Annie and she will sing the ballads of one young boi she used to take care of. She believes that he was kidnapped right before the bombings, right here in this area. This will also complete the misc. quest “Contact Miss Annie”.
Security Station
Head to the security station that is located to the south end of the park, near its entrance. The left side of the building will have an opening for you to head inside. Access the Park Security Terminal and select “Holotape Review”.
Finding Holotapes
Upon reviewing the entries, you will quickly be revealed the location of two Holotapes.
One is inside the safe within this same Security room, while the other one is in the basement of the park.
The basement can be entered, through the employee entrance, by roaming around the left edge of the park. You will find the Holotape inside a cabinet.
Letter to the Media
You will find the Letter to the Media inside the mailbox that the Holotapes will then redirect you to. You will learn about the truth of the situation.
KidSecure ID Band
The KidSecure ID band can be found on top of the Slither Slide in the waterpark. Head to the top of the slide and search the wooden crate to find the band.
Clarksburg’s Post Office
It’s time to head to Clarksburg. It is located directly south of the waterpark if you follow road 96. Here, you must find and enter the post office to find a terminal to search for the key for BOX NUMBER 012 (PO Box 012).
It should belong to an “Otis Pike”, who must be living in Grafton.
Grafton on the Hills
Head to Grafton and towards the houses in the hills to the south. You will find Otis’ house next to a bright yellow house.
Otis’ Home
Head to the kitchen and read a note “Notice of Termination”. Afterward, head downstairs to the house’s basement and you will find a wooden crate with some goodies and a personal terminal nearby.
You will find the whole truth here: it was just a family feudal gone wrong.
Grafton Dam
Apparently, Otis kidnapped and took the child we are looking for, to the Grafton Dam. When facing the Dam, walk towards the east of the building until you reach the back, where there is an opening.
Drop down the drainage pipe and you will find five clues leading you to the next location.
Woods Estate
Apparently, the lost child (Freddy) escaped from Otis towards the Woods Estate. Arthur Woods, the master of the house, managed to arrange a Vault-Tec to take Freddy to a vault but it is unclear if the kid survived.
Head upstairs and you will find Freddy’s last note on a desk. Report to Miss Annie and give her the news. The quest is now done. Collect your rewards!
Into the Mystery
Into the Mystery is one of the side-quests of FO76 that involves you finding a dead body at Tygart water treatment plant only to ultimately reveal the secrets of the Riverside Manor. This will be a very eerie but knowledgeable quest.
After accepting the quest by investigating the dead body at the water plant, head to the Riverside Manor. Do note that investigating the dead body will complete the Misc. Quest “Search the Body” too.

Equip the ‘worn veil’ you found before in the quest, and a hidden entrance will become visible behind the black curtain. Follow this path and you will find a full-blown underground facility here. Investigate the area to complete this quest.
Personal Matters
- Ammo
- An Aid Item
Personal Matters is a relatively big side quest in Fallout 76, having you to travel to several locations in the world to find and listen to Overseer’s journals.
Personal Matters is a side quest which involves you basically stalking the late Overseer and the places she has been. You will find many things about the Overseer, her feelings and her aim.
Ultimately, though, you will have ended her now-ghoul fiancé’s life. You will have to visit several areas in the world, including Vault-Tec Agricultural Research Center, Sutton, Morgantown High School, Vault-Tec University, Welch, Mount Blair.
Overseer’s Journal, Entry 1
You will find the Overseer’s journal’s first entry in the Vault-Tec Agricultural Research Center. This area is located in the Forest region of the map.
You will find the journal on the front counter of the research center.
Overseer’s Journal, Entry 2
The second entry in Overseer’s journal can be found at Sutton, southeast of Flatwoods.
Overseer’s journal second entry can be found inside the blue house here, north of Sutton. Head upstairs and you will find the journal on the second floor.
Overseer’s Journal, Entry 3
The third entry in Overseer’s journal can be found in the Morgantown High School, in Morgantown.
The fourth entry in Overseer’s journal will be found in Vault-Tec University, located in Morgantown. It can be found to the south of Morgantown Trainyard, beyond the river.
Overseer’s Journal, Entry 5
Overseer’s journal’s fifth entry can be found in the town of Welch. Head for the Overseer’s fiancé: Evan’s house and the journal can be found inside.

The final entry of the Overseer’s journal can be found in Mount Blair. Mount Blair is a part of Ash Heap and can be found just north of Welch.

End Evan
After finding all the entry journals, you must now eliminate the body of the ghoul Evan. He will be marked on the map.
He should be in the basement of the building with the Overseer’s Journal Entry 6, on Mount Blair. The quest will end when you end Evan’s endless suffering.
Tentative Plans
- A Modded Leather Torso Piece Called “Silver Lining”
- Screws
- Random Ammo
- A Random Aid Item
Tentative Plans is one of the side quests. This quest can be started by heading to the Morgantown Airport and accessing the terminal inside.
You will learn how to make a C.A.M.P by heading to a specific location to find the late Miguel and using his schematics. This will be a rather important side quest, so be sure to do this one.
You will also craft a basic cooking fire and a simple stash box with C.A.M.P through this quest. Be sure to keep your eyes out for the legendary Mr. Fluffy too. He is one cute fellow!
Volunteers: Advanced Training
Find the terminal inside Morgantown Airport and choose the option ‘Volunteers: Advanced Training” when prompted. Follow the instructions further to start this side quest.

Listen to the Tapes, Clay
Head outside the Morgantown Airport and pop out your Pip-Boy. You will have a “Volunteer Training: Camping 101” Holotape. Boot it up.
Miguel’s Campsite
You must now go investigate Miguel’s campsite. You will see a scorched wanderer lying by a tree. He is the Miguel you are looking for. Scan him and the camp nearby.
Investigate the Protection
You must now investigate the Protection. Its location will be visible on the map.
The Protection turns out to be Mr. Fluffy. You must follow him and kill the scorched Miguel who should have woken up by now.
Camp Guide Program
You must now find the Camp Guide Program V3.4. It must be in one of the houses in the town nearby. Enter the house and you will find the program lying on a crate. Pick it up and execute it on your Pip-boy.
Miguel’s Terminal
Miguel’s terminal is located behind Guide Program. Interact with it and search for C.A.M.P’s schematics.
Return Holotape
You must now give the Holotape to the Mr. Fluffy you found before. He will be in the location you found Miguel’s scorched body.
Deploy your C.A.M.P
After interacting with Mr. Fluffy, you must deploy your C.A.M.P in any location you seem suitable. You must build a basic cooking fire and a simple stash box through the C.A.M.P to complete your quest.
An Organic Solution
- Daisycutter (a Modded Fatman)
- Radshield
- Random Ammo
- A Random Aid Item.
The quest is initially a miscellaneous one that directs players to a location called Ella Ame’s Bunker. After using the terminal inside the bunker. Go to the “Research studies” option and then select “Radshield”. This will begin the quest.
After exiting the bunker, the players must traverse through the forest to the North and reach the Southhampton Estate location. Inside, they will find Ella Ame’s body, looting the research data off her corpse is one part of the quest done.
After using the Holotape, a radio tracking prompt will present itself to the player, which will then lead to a scavenger hunt of sorts using the radio-tracking signal that works similar to the Courser Tracker from Fallout 4.
The items presented to the player for finding are bonemeal, nitrogen, phosphorous and potassium. After finding these items in the Dyer chemical facility, take them up to the third floor to input into a terminal.
This is where the Radshield will be crafted, fertilizer then being flushed and dumped into the river.
The player must then jump into the Western river and locate the Strangler Bloom. After retrieving the item, the player will take it to their nearest station and craft Radshield that then completes the quest.
Falsely Accused
- A Modded Shotgun Called Civil Unrest
- Robot Torso Armor
- Random Ammo
- A Random Aid Item
To start this quest, the player needs to have completed the Bureau of tourism side quest first. After which this quest triggers while in the Toxic Valley.
While going through the valley, you will be ambushed and attacked by a group of Protectron Marshalls that have mistaken you for a criminal.
After killing them and looting the warrant off their scraps, the player will head to the Eastern Regional Penitentiary and address the warden.
After that is a simple task of authorizing turret activation at marked map locations. The quest will then be complete.
Mayor For a Day
- A Modded Sledgehammer Named All Rise
- The Mayor’s Hat
- The Mayor’s Clothes
- The Watoga Mayor Safe Combination
- Random Ammo
- A Random Aid Item
The quest is begun by listening to a radio transmission from the mayor of Watoga after entering the area. Going to the office after that will start the quest.
The quest starts off with opening a terminal entry of being the mayor for a day. After reading through, the player heads up route 65 to a marked location. This being the saboteur’s house.
Inside the compound, the player must investigate and gather five pieces of evidence before they can proceed forward. After gathering the evidence, the player must go to the Robco where the saboteur used to work.
They will then obtain a Holotape from his terminal and head to the Watoga Municipal center. After talking to MAIA, the player will be directed to a rooftop terminal to upload the virus Holotape then.
In doing so, the player will need to fight off waves of robots and a Scorchbeast that will last five minutes. After doing so, the quest is completed.
Miner Miracles
- Excavator Power Armor Plans
- A Power Armor Workbench Plan
- Random Ammo
- A Random Aid Item
The quest starts after discovering the Garrahan mining’s innovation.
The player will first head into the GM headquarters. Take caution, however, as the path will be booby-trapped with fragmentation mines.
The player is looking for a pair of terminals to download blueprints and plans from. After downloading the plans, the needed materials for the power armor must be gathered, followed by crafting the Excavator Armor.
Upon registering it by using a quest marked button, the quest will be completed.
Safe for Work
- Bobby Pins
- Random Ammo
- A Random Aid Item
- A Legendary Weapon or Armor
The quest is triggered by completing Tentative Plans and using the terminal on the second floor of the Morgantown airport location.
The quest starts with a Holotape that leads players to guess what, another Holotape after disengaging the lock to the safe terminal’s right.
The player then finds the corpse of Responder Rocky and loots a key off it to enter the Responder Bravo station. After finding and accessing another Holotape inside Rocky’s room, the players will head to the medical center.
Another goddamn Holotape needs to be listened to once found in a crate inside the medical center, after which players head for the traffic control tower of the airport. Once there, they must access a terminal to get, another, Holotape.
Listening to that will then finish this weird-ass quest. What the heck, Todd?
The Motherlode
- Ultracite Ore
- A Random Weapon
- A Random Ore
- And Random Components
This quest is triggered by accessing the archives of a terminal inside the Hornwright Industrial Headquarters.
The quest is essentially simulated business espionage. With the players needing to make it to the position of an executive by taking an automated exam in the building.
The questions of which can be answered either by finding the information in the building. Or by cheating with the aid of your helpful hints from vault boy box.
After managing to forge an executive access card, the players can enter the executive office.
Where they will find a terminal with instructions on how to acquire the motherlode, being an acquisition code that they need to punch into the access terminal.
After placing the acquired repair beacon in its launcher, the motherlode will show itself as a somewhat sentient being, and after a brief appearance will then dig back into the Earth. Leaving the mission rewards in its wake.
Tracking Unknowns
- A Modded Flamer Named Pyrolyzer
- RadAway
- Random Ammo
- A Random Aid Item
The quest is triggered by accessing any of the three marked terminals at Harper’s Ferry, and prying into the missing person’s entries.
The first part of the quest leads players to a marked circle where they find an old Mister Gutsy who was accompanying the missing person hunting party before they vanished.
The gutsy will direct players to one of two locations to boost a tracking beacon. Going to the Valley Galleria is the recommended choice.
After getting the signal booster, take it to a helipad atop Camp Venture. A Cargobot will then show up to take the signal off your hands and lift back off.
The player will then follow the signal strength using their pip-boy until they come upon Randy’s body by the beacon. A Holotape must be looted off his corpse to proceed.
The Holotape will guide you to another body, one belonging to a Nari Samir. Off which the player will loot an ID access card and a Prototype Hazmat Suit.
After using the card to gain access to Dyer chemical. Access the sewers to find Lucy’s body and loot her Holotape off it. Concluding the hunting party’s story and this side quest.
Forging a Legend
- The Blade of Bastet
- Random Ammo
- A Random Aid Item
The quest is triggered by accessing a terminal during the Novice of mysteries quest. And selecting the Blade of Bastet entry.
The fabled sword is found in the Whitespring resort, locked in a display case. The case is accessible via a terminal only.
The password of which is tucked within a Protectron of the resort. After finding and inputting the password, the case will open and the sword up for grabs.
A fabricator to the south of the resort basement can be used then to craft a swing analyzer. After this is added to the sword, the player must take it for a test run by killing six different types of enemies, which can be done at the player’s own pace.
After doing so, return to the Fabricator to create the Blade of Bastet.
Prototypical Problems
- The Voice of Set
- Random Ammo
- A Random Aid Item
This quest, like Forging a Legend, is triggered via accessing the terminal during novice of mysteries. And selecting the Voice of Set entry.
The quest takes players to Sugar Grove for retrieving an EMP device, needed for developing the Voice of Set. After going to the facility’s advanced research terminal, the blank Holotapes act as a giveaway to the player’s next objective.
To download the EMP data onto the blank tape, players will need tools that can be found in Sugar Grove. Players will be tasked with finding the Project Siphon Holotape from an analyst terminal.
This will be used to download the EMP data onto the blank tape. After heading back to the manor, players can upload the Siphon data to the Fabricator and fabricate the Voice of Set to complete this quest.