Seethewater Cave in Elden Ring is a minor dungeon located in the Mt. Gelmir Region. Like all the other minor dungeons in Elden Ring, it contains valuables like Poison Grease, Mushroom Head, Kindred of Rot’s Exultation, and much more.In addition, Kindred of Rot, the mini-boss, can also be found here. Read on to learn everything there is to know about Seethewater Cave in Elden Ring.
How to Get to Seethewater Cave in Elden Ring
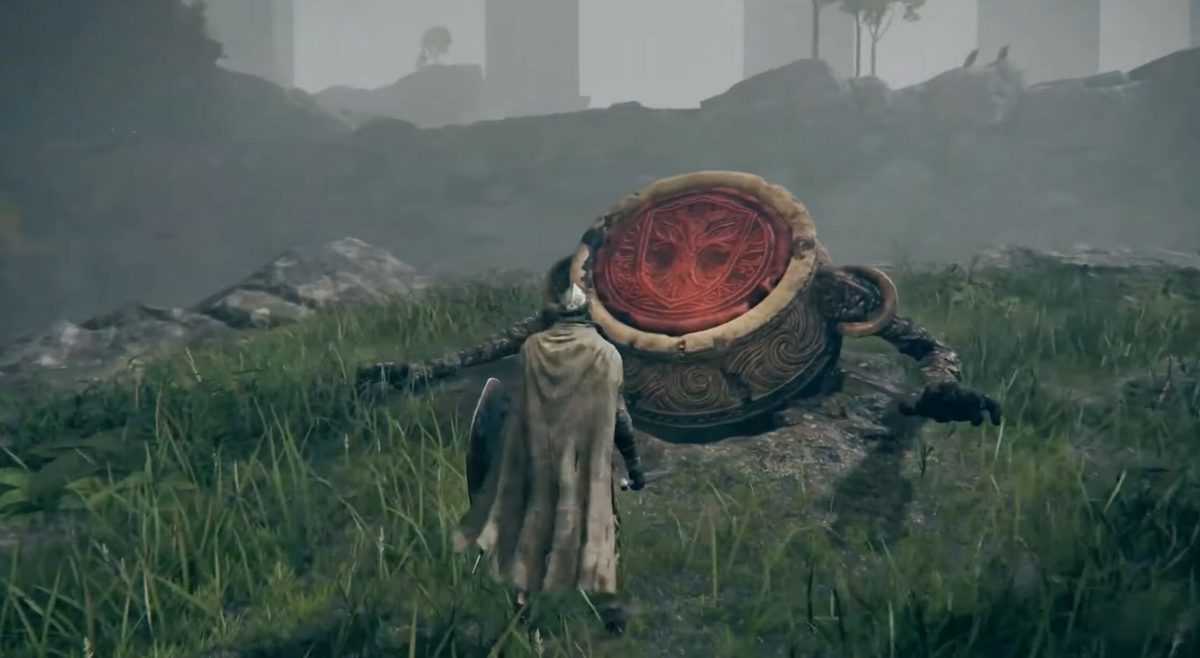
Here’s the easiest way to get to Seethewater Cave. First, Make your way to the Seethewater Site of Grace and head north. Afterward, proceed through the canyon in the south of the Minor Erdtree until you see an Imp Seal nestled into the rocks on a raised slab. If you come across a statue of a soldier holding a torch, you’re on the right track.
One thing to keep in mind as you make your way there is to be cautious of the fire geysers. To unlock the Imp Seal, you’ll need two Stonesword Keys, and beyond that is the entrance to the Seethewater Cave.
Elden Ring Seethewater Cave Walkthrough
This section of the guide will walk you through the Seethewater Cave, assisting you to traverse the cave quickly while making the most of the loot.
First, enter the cave and activate the Site of Grace. Thereafter, descend the ledge to find a Cave Moss. Take it and walk through the opening to the left.
There are two Leyndell Soldiers here. One will be directly ahead of you as you turn left, and the other will be to your right beyond the fork in the path. Eliminate them both and collect the Budding Cave Moss plant on the northern wall.
Continue in the northwest direction, and you’ll eventually come across a few patches of Crystal Cave Moss. Grab them and descend on the ledge beneath, where you’ll eventually end up in a poison river.
If you look directly behind you, you’ll notice two Poisonbloom plants; grab them and move ahead. Here because of the poison, your poison meter will constantly increase. To keep it from reaching its limit, take advantage of the small piece of land in the centre.
Poisonous Skeletal Slimes are another thing to be wary of. They’ll fall from the roof of the area, and if you get caught in them, they’ll absorb you. With this in mind, proceed to the northeastern end of the vicinity, where you will find a corpse. Loot it; it contains Poison Grease x3.
Now make your way up the slope to the southwest. There will be several patches of Cave Moss along the way. Pick them and continue on your way. You’ll eventually come across a corpse guarded by two small and one Giant Rat. Take them out and loot the corpse to find Lump of Flesh x4.
Move deep inside the caverns, and loop around the ridge to the left. You’ll find a Fungal Soldier here, kill him. An alcove can be found directly above holding a corpse. Loot the corpse and grab the Preserving Boluses found inside.
Now you must move outwards and deal with the Fungal Soldiers. Once they’re down, jump off the ledge into the adjacent room. Now you’ll have two paths: one to the southwest and one to the north.
Head to the southwestern tunnel and continue on an upward sloping path. You’ll come across three Rats, take them out, and you’ll be able to exit the previous major caverns through the top.
You’ll encounter three Fungal Soldiers here. Defeat them and look to the left for a corpse holding a Golden Rune (7). Loot it and turn down to the southeast, where you’ll come across a pathway heading to the room containing a few Fungal Soldiers. The soldiers will be busy praying next to the Miranda Flower. Kill them all.
The Miranda Flower holds two corpses. One can provide you with Immunizing White Cured Meat, while the other has the Mushroom Armor set, which includes the Mushroom Head, Mushroom Body, Mushroom Arms, and Mushroom Legs.
Grab the loot and return down the slope, this time to investigate the path leading north. There is a trench in the tunnel to the north. Platform by platform, descend the trench. You’ll be confronted by two small rats; dispatch them and loot the nearby corpse for Poisonbone Dart x10.
Make your way to the bottom and from there head up to the west, you’ll reach a dead end with a small Rat. Kill it and grab Golden Rune (6) from the corpse nearby.
Now backtrack and take the path down east. You’ll eventually arrive in a small area with a mist wall to the right. Kindred of Rot, the boss, awaits you behind this wall.
How to Defeat Kindred of Rot
When you proceed inside, you’ll have to face two Kindred of Rot bosses. Kindred of Rot is not a difficult boss to overcome but provided the circumstances this fight can get tough.
The boss room is filled with poisonous water, so you must stay on the platform in the center to keep the poison meter from filling up. This will restrict your moment during the fight.
To make the fight somewhat easier, use a spirit summon particularly the one that can deal some damage while also having reasonable defense stats. This way you’ll have to deal with one boss at a time. Fair and Square!
The rest is simple. Avoid the approaching attacks and inflict damage when you see an opening. Keep it up until the bosses fall. You’ll receive the Kindred of Rot’s Exultation as a reward for defeating the Kindred of Rot boss.
