
Auriza Side Tomb is a small Dungeon in Elden Ring that you will find in the Leyndell Capital City, Altus Plateau. You will encounter many small pot enemies, and a boss here called Grave Warden Duelist. You have to kill that boss to get the Soldjars of Fortune Ashes.
How to Get to Auriza Side Tomb in Elden Ring
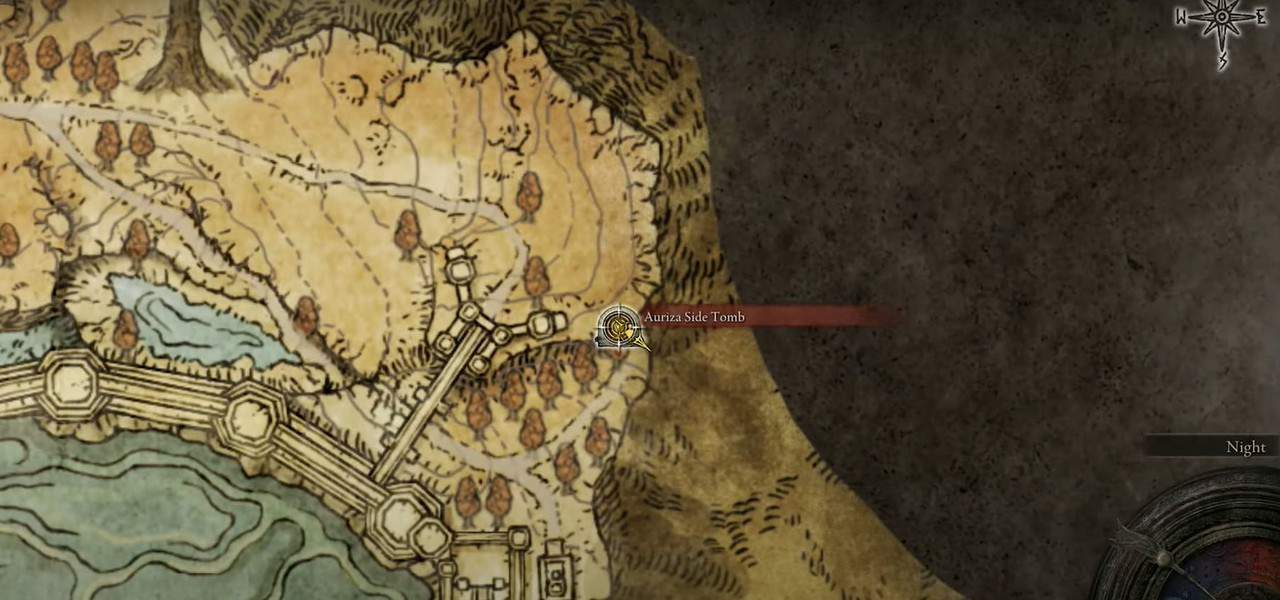
To get to the Auriza Side Tomb, you have to follow the northern Lyndell road towards the east side and explore the cliffs. You may confuse this with the Auriza Hero’s Grave, so watch out for that.
While exploring the cliffs, you will also see a statue pointing towards the Tomb. When you go in the pointed direction, you will find the Auriza Hero Grave on the right side, and on the left side, you can see the door of the Auriza Side Tomb.
A large Runebear protects the entrance to the Auriza Side Tomb, so you can either run past it or try to defeat it.
Elden Ring Auriza Side Tomb Walkthrough
After entering the Auriza Side Tomb, move forward, and you will see a big closed door. That door will take you to the boss’s room, but you need to pull a lever to open it.
Turn to the path on the right side and continue to move forward. Here, you have to open the teleporter trap chest again and again until you reach the desired location.
To find the chest, follow the path going towards the right and then turn left to enter the room with the chest. Opening the chest will teleport you to another chest.
You have to run forward from this location and get down using the stairs and turn left.
You can also collect some Grave Glovewort from the area next to the stairs. Continue to move forward through a small passage, and you will see a big cell in front of you.
From there, you have to turn right and move forward. Now you will enter a Chapel and see a chest in front of you.
Opening the chest in Auriza Side Tomb will take you to a room with water from where you can collect the Cracked Pot, Perfumer’s Cookbook. Open the Teleporter trap chest in the area, and it will take you back to the Chapel.
Enter the room on the right side of the Chapel and open the chest there. Here you will collect some Grave Gloveworts as well.
This will teleport you to a path above. You have to move forward and collect the Golden Rune from there as well. Once you reach the edge, take the stairs on the left side to go further up.
Get down from here and use the big stairs to move forward. There you will enter a room where you can collect the Root Resin from a corpse and Ritual Pot from the ground.
After that, get downstairs again and use the narrow path on the left side of the stairs to go further down. This will take you to the location from where you enter the Chapel first time.
But this time, after entering the Chapel, you have to turn left and go downstairs to open the chest in the room below.
You will be attacked by a couple of exploding pots in that room. So it is better to use a ranged attack to take them out every time.
After opening the chest, you will be teleported to a chest above it. Move forward again and from the edge, take stairs on the left side.
The stairs will take you to a ladder going up. Again, climb the ladder, and you will find a chest in front of a statue.
Open it and explore the area to find some collectibles. After that, get back to the chest, taking you to your previous location.
Go down using the ladder and get to the chest on the upper portion of the Chapel.
Open the chest, and it will take you to the room in the Chapel. Come out and open the chest in the Chapel to travel to the big cell location.
From there, you can collect some Cracked Pot and Grave Glovewort. After collecting them, use the ladder going up.
Once at the top, move forward, and you will see a statue at the end with a lever in front of it. Pull the lever.
Open the chest in the room on the left side and return to the Tomb entrance, where you see a giant closed door. Go through that door to enter the boss’s room.
How to Defeat Grave Warden Duelist at Auriza Side Tomb
Grave Warden Duelist is the boss you’ll be facing off against at the Auriza Side Tomb. He uses two hammers to attack you. This boss also has some living jars that will attack you, so you have to be careful about them.
Try to stay away from the boss as much as possible since he can grab both hammers in one hand and grab you with his other hand.
Once you have dealt some damage to him, he will also unleash the battle cry to increase its damage.
Just try to maintain a distance from him and continue to attack him using your attacks.
After some time, you will be able to defeat the boss, and in reward, you will get the Soldjars of Fortune Ashes.