The following Destiny 2 World Quest guide will discuss EDZ World Quest Enhance. It is divided into 4 smaller missions by the end of which you will have plenty of loot and items to make it worth your while.
If you are playing Destiny 2, you already know by now that apart from story missions and strikes, you can access World Quests. Similar to Strikes, World Quests are multi-stage missions with usually 4 to 5 stages. Complete all to complete the World Quest and save the day!
For more help on Destiny 2, you can check out our Heroic and Hidden Public Events Locations Guide, Lost Sectors Locations Guide and Bright Engrams Farming Guide.
Destiny 2 EDZ Enhance Quest
Mission 1: Odd Symptoms
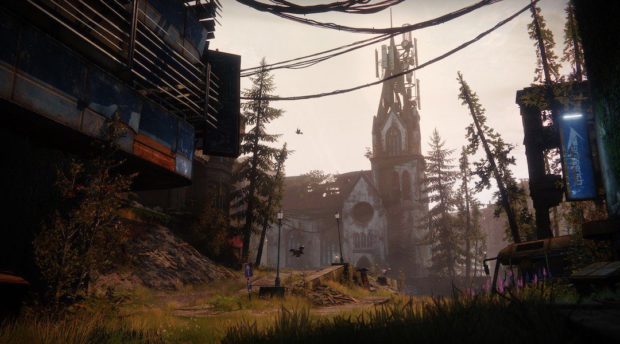
Objective: Locate the source of the odd behavior spreading amongst the House of Dusk.
For this mission, it is best to equip at least one source of Arc damage. Your first goal is to locate the Fallen exhibiting strange glow. Eliminate them and collect the odd sample. Next step is to sweep the area for more of this strange creature. Circle the church and clear the nearby buildings. Take down five glowing Fallen and collect samples.
Now, you need to search the surrounding buildings for the source of a strange signal. Follow the objective marker to the northeast of the church. Go under the half-lowered entrance that marks the entrance to Terminus East.
Here, your objective will update so follow the marker to reach the source of the signal.
Terminus East contains three barriers that need to be deactivated. Eliminate the enemies nearby the first barrier and retrieve a void charge from the marked gadget.
Now once again follow the objective marker and place the void charge into the indicated device. This will deactivate the first barrier, giving you access to the next section. Enemies are waiting here so take them down and retrieve the void charge, place it on the indicated device to bring down the second barrier. Repeat the same process with the third barrier as well.
Now clear all the remaining Fallen from the room. Keep in mind that Canix, the Fallen Captain, is guarding the Lost Sector. Thankfully, he isn’t very hard to take down. It is best to kill his minions before engaging him directly.
Once he’s dealt with, use the marked panel to deactivate the force field and wait to receive your next objective.
Last but not the least, take down the marked Cabel tech in the corner of the room. Move to the opposite room before attacking it to avoid the explosion.
Mission 2 – Show And Intel
Prerequisite: Complete Odd Symptoms
Objective: Report back to Devrim Kay to formulate a plan for tracking down the distributed ether.
Go back to the Devrim Kay to discuss the next phase of his plan. This is all from this mission and part 2 of the main Enhance! World Quest and you will get to the next mission.
Mission 3: Differential Diagnosis
Prerequisite: Complete Show and Intel
Objective: Hack into the Fallen communications network to locate a stash of ether caches and destroy them.
Use the objective marker to reach Maevic Square. Continue moving until you reach a large energy barrier. This barrier needs to be destroyed. Turn back and take down the Fallen gathered in the park.
Your primary target is the Fallen Captain, plant an explosive at the barrier’s source. Move back and shoot the explosive. Follow the market again and kill the enemies in the next area.
Here another barrier is blocking your path. Repeat the process from the previous section and Salvage Guard is the enemy who has the explosives you need and then do the same process to take down the barrier.
Just make sure that when you are disabling the barrier you are outside the blast radius.
You will get access to the next area with another barrier and then you will reach a third barrier But this time you don’t need to take down the power source of the barrier.
There is a device nearby that needs to be hacked. Doing this will call on the Fallen so deal with them.
Enemies will come in waves but the final enemy, a special Servitor is the Network Runner. Take him down and clear the area before using the marked transmit pad to reach the stockpile of enhanced ether. Destroy the cache from a distance and collect the fragments.
Follow the way back to the streets and engage the remaining enemies.
The next area is going to be crawling with enemies and there is a barrier here as well. Defeat the captain and collect the explosive device to use at the barrier.
Once that’s done, use the marker to reach Trostland and Widow’s Walk. Use the flare to lure the Fallen to this area.
Now you have to stay alive and destroy four caches of ether, and they all will have their own advance guard of Empyrean fallen so you need to be ready to take them down.
After taking down the guard, make sure to be on a safe distance from stockpile and destroy it.
Your first stockpile destruction will spawn Commander Kraug and his Red Legion so now is the time to make use of your every ability and complete your objective.
Destroy all the stockpiles and clear the area of all the remaining forces, first take down weaker enemies and then Dusk Captain Maliszan.
When you kill everything in the area the mission will come to its end and you will receive the mission completion reward and will be granted access to next mission.
Mission 4: Experimental Treatment
Prerequisite: Complete Differential Diagnosis
Objective: Kill the Archon Priest distributing the enhanced ether, then the Attendant Servitor who created it.
Follow the marker through the door into the Salt Mines. Here are a few enemies that are easy to take down.
Use the marker to reach Raxes, the Archon Priest, he will be a tough fight as he will spawn some Empyrean Fallen as well.
Just keep a high ground and good cover and keep aiming for the headshots. After taking down the priest and destroy the remaining ether supply. Shoot the containers stashes near the end of the walkway.
Move in and search the wreckage for some ether cores. Collect them to receive the next objective. Follow the market to the Salt Mines and reach back to Trostland.
Clear a path to the marked device and use your cores to lure Attendant Servitor to this area. Takedown mini enemies before facing Servitor. The servitor will try to retreat by teleporting to different locations. Just use your marker to reach him again to resume the fight.
The battle is a drag and many different enemies come to attack including the Empyrean Fallen. Use cover wisely to engage everyone and it should be an easy enough fight. Kill the Servitor to complete this world quest.
With the end of Servitor, return back to Devrim to celebrate the end of a major threat and receive your reward. You will get:
- Encrypted Engram
- 4 Dusklight Shard
- 2,500 Glimmer