Scorestreaks gained popularity back in Call of Duty: Black Ops II. Unlike previous installments including Modern Warfare 3, Pointstreaks were earned using certain number of kills.
However, from Black Ops II, the system of accumulating kills got replaced by earning specific score. This system has also found its way to Call of Duty: Advanced Warfare.
For more help on Call of Duty: Advanced Warfare, read our Best Perks, Exo Suits and Abilities, How to Rank Up Fast.
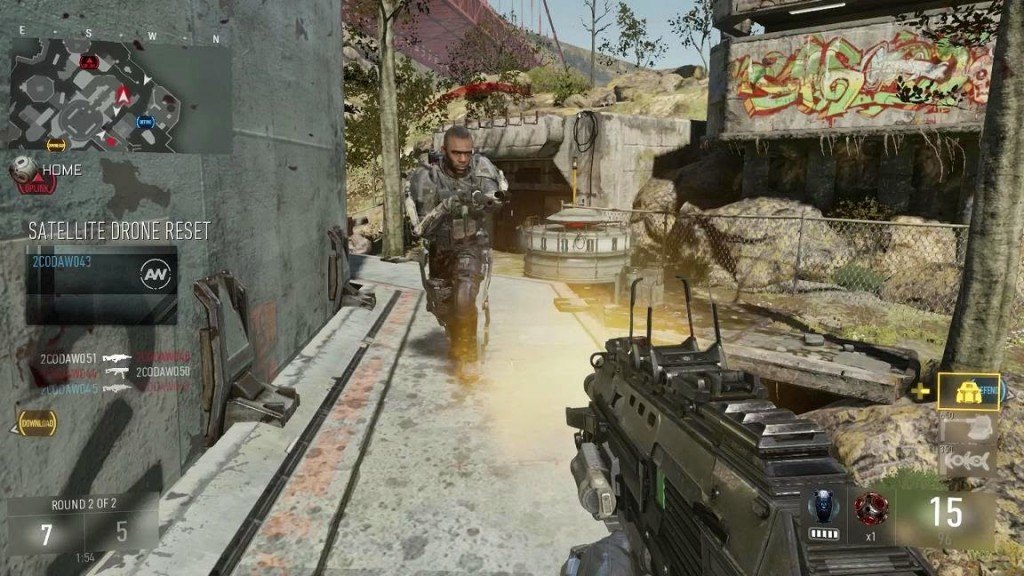
Call of Duty: Advanced Warfare Scorestreaks
In Scorestreak System, everything ranging from assists to kills, capturing objectives to defending them, and providing support with Scorestreaks like Targeting Drone and UAV add to your total score. This system thus allows players to call in these Scorestreaks in a cycle.
Another change that has seen its way to Call of Duty: Advanced Warfare is Customizable Scorestreaks. With Customizable Scorestreaks, players can receive additional benefits from a Scorestreak, but at the cost of additional points required to earn that Scorestreak.
For example, if a normal UAV requires 300 Points and lasts for 30 seconds; you can customize this UAV to last for 60 seconds for 500 Points. Customizing Scorestreaks does not require an additional slot in your Pick-13 Create-a-Class setup.
Similar to previous Call of Duty installments, players can choose to play without any Scorestreaks, but for the first time in Call of Duty franchise, players can take up a Fourth Scorestreak by using Streaker Wildcard.
In this guide, I’m going to talk about every Scorestreak in Call of Duty: Advanced Warfare along with their uses and possible upgrades:
Aerial Recon Drone
Points Needed: 350
This is a manually controlled Scorestreak which allows players to target enemies on the battlefield for their teammates. The targeted enemies appear as threat signature on your teammates’ HUD.
If one of your teammates manages to kill a targeted enemy, you receive Assist Points for that kill. Since Recon Drone lasts about 30-45 seconds in the air and must be manually controlled, it is better to find a safe location before deploying it.
As for destroying this Scorestreak, it can be easily done by simply shooting it with your regular Pistol or SMG.
Cloak
Points Needed: +50
Like its name suggests, Cloak allows you to conceal your Recon Drone to make it stay longer. The cloak for Recon Drone has an internal cooldown time and it is better to use Recon Drone on different enemies instead of staying in one place.
AR HUS
Points Needed: +50
With the AR HUD, you will be able to mark enemies with a threat signature allowing your teammates to identify them in a better way.
Flash Marking
Points Needed: +100
Although Recon Drone is purely a Support Scorestreak, this module allows you to make it even better.
With this module, if an enemy is facing you, you can send out an invisible beam to blind that player for a couple of seconds. This module has an internal cooldown time, but it is extremely small.
EMP Grenades
Points Needed: +100
EMP Grenades module allows your Recon Drone to toss EMP Grenades at your enemies. This is not only useful to destroy different pieces of equipment lying on the ground, but also to render Exo-Abilities of enemies completely useless.
Increased Lifetime
Points Needed: +100
The normal time of a Recon Drone is 30 seconds and with this module, you can increase it to 45 seconds. If you are going with this expensive module, make sure that your drone stays alive.
Support
Points Needed: +400
This allows you to retain all your Assist Points towards this Scorestreak after death.
Aerial Assault Drone
Points Needed: 450
Those of you who have played Call of Duty: Black Ops II can think of this Scorestreak as Dragonfire. This is also a manually-controlled Aerial Drone , but instead of marking targets, it can actually shoot at them. Moreover, you can detonate it at will.
Although detonating it does not has an insanely large blast radius, it can easily take out a player or two. Just make sure to find an objective spot with a lot of enemy activity and detonate the drone near that point.
Unlike Recon Drone, it lasts for 45 seconds and cannot mark targets for your teammates which makes it more of an Assault Scorestreak instead of a Support Scorestreak.
Augmented Reality HUD
Points Needed: +50
This module allows you to better identify your targets hiding behind a cover or at a large distance by placing a targeting reticule around them. I did not find it extremely useful since the normal Assault Drone can also identify the target quite effectively.
Cloak
Points Needed: +50
This is pretty straightforward! One thing that you should bear in mind is that firing a weapon will uncloak your Assault Drone. The best way to utilize the cloak is to remain silent and find the perfect opportunity to detonate the drone.
AI Control
Points Needed: +100
This is also quite self-explanatory! If you cannot risk losing dying by enemies while you are controlling an Assault Drone, this is the perfect module for you!
The AI will certainly not control it the way you will do it yourself, but it gets the job done.
Hardened
Points Needed: +100
This module increases the armour around the Assault Drone so that it is hard to take out, but this comes at the cost of less movement speed. Moreover, even with module, the Assault Drone does not become invulnerable to gun damage.
Machine Gun
Points Needed: +300
This is certainly the best module for the Assault Drone. These machine guns do not have an overheat problem; meaning that you can spray and prey as you go.
Even players with excellent usage of Exo-Abilities and Exo-Movement are not safe from this. The only way to safe yourself is to destroy it as soon as it gets deployed.
Rockets
Points Needed: +300
This is another extremely pricy module which allows you to receive three rockets per magazine. These rockets have a large blast radius and can easily take out enemy players with one direct hit.
UAV
Points Needed: 400
In Call of Duty: Advanced Warfare, UAV returns to the sky. UAV is one of the oldest and certainly one of the most useful Scorestreak in the game. A UAV basically shows the exact location of enemies on your own and your teammates’ radars for 35 seconds.
Like I have mentioned above, this is certainly one of the most useful Scorestreaks in the game and you will see it being used quite often.
Unless you apply Orbital Module to your UAV, it can easily be shot down from the sky using launchers. There are quite a lot of modules for UAV which are provided below:
Speed
Points Needed: +50
Without this module, a UAV sweeps the radar after every two seconds. However, with this module, this process is sped up siginificantly allowing you and your players to constantly check the Mini-Map and pick off targets.
Extra Assist Points
Points Needed: +50
If you customize your Scorestreaks, this module should definitely be a part of your UAV.
With this module, you will get +15 Points for each kill your teammates score while your UAV is up. This not only allows you to rack up Scorestreaks faster, but also gain additional XP to rank up faster.
Extra Time
Points Needed: +100
This is quite straightforward! This module allows you to have your UAV for 45 seconds instead of 30. This means more support and points for you and your teammates.
Scrambler
Points Needed: +200
In previous Call of Duty titles, this module was a separate Pointstreak called Counter-UAV.
This module disrupts your enemies’ radar to give you a huge advantage over them. With this module installed, you can shoot and use your Exo-Movement like crazy and enemies will not be able to see your on their radar.
Enemy Direction
Points Needed: +200
Similar to Scrambler, this module has also been a separate Pointstreak in previous Call of Duty titles called as an Orbital VSAT or Blackbird. With this module, you and your teammates will no longer see enemies as small red dots, but as red directional arrows.
This is an extremely powerful module which justifies its higher cost.
Threat Detection
Points Needed: +300
This module can be considered a legitimate wallhack allowing you and your teammates to see enemies through walls and other structures. If you can manage the higher cost, combine it with Scrambler and you will be unstoppable for complete 30-45 seconds.
Orbital
Points Needed: +300
Like I have mentioned above, a Secondary Launcher can easily destroy a UAV; even with all its expensive upgrades. This module ensures that your hard earned UAV stays for its complete duration. With this module installed, enemies will not be able to shoot down your UAV.
Support
Points Needed: +300
This allows you to retain all your Assist Points towards this Scorestreak after death.
Orbital Care Package
Points Needed: 500
Orbital Care Package is another old Scorestreak that has appeared in most Call of Duty titles. An Orbital Care Package delivers a random Scorestreak to the battlefield.
There are extremely rare chances that it will provide you with a high-cost Scorestreak like Paladin. Most of the times, you will receive less costly Scorestreaks like UAV or Assault Drone.
Now that I think of it, I have never received a Care Package from a Care Package. Is it even possible? What you guys think? Orbital Care Packages are delivered from the sky and takes about 7 seconds to reach the marked position after being called in.
After an Orbital Care Package is called, an announcement is made for both teammates and enemies. Look out for enemies lurking nearby to either steal your Scorestreak or to take you out.
There is a module called Trap which can take care of such enemies. You can call in an Orbital Care Package and leave it there for one of your teammates.
In this case, you will receive a small chunk of points after one of your teammates has acquired the Scorestreak offered by the Care Package.
Fast Pickup
Points Needed: +50
It takes a little while to grab the Scorestreak within the Orbital Care Package and enemies can kill you during this time since you are completely vulnerable.
With this module, you can reduce this time by 50% and speed up the whole process.
Drone Delivery
Points Needed: +50
This is by far the most fun to use module in the entire game. Once you have called in your Orbital Care Package and it has landed on ground, this module will allow it to lift itself and seek you out on the map.
Although enemies will instantly know your location by simply following the Orbital Care Package, you can set them up with an Ambush or using Trap Module.
Hidden
Points Needed: +100
Like I have mentioned above, after an Orbital Care Package is called in, it appears on enemy’s Mini-Map along with an announcement. This increases the chances of enemies intercepting your Orbital Care Package and all the goodies within.
With this module, Scorestreak will not appear on enemy’s radar, but make sure not to call it in open space.
Double Tap
Points Needed: +100
This module allows you to swap one Scorestreak for another if you do not like it. Do note that you will not see the second Scorestreak unless you choose to change the first Scorestreak.
Trap
Points Needed: +150
This module used to be a separate Killstreak back in Call of Duty: Modern Warfare 3 (And I think in Call of Duty: Ghosts too) and has returned in Call of Duty: Advanced Warfare.
With this Scorestreak, you can bobby-trap your Scorestreak to give your enemies a nasty surprise. A jinxed Orbital Care Package appears as normal to your enemies, but different to your teammates.
If a greedy enemy tries to open it up, he/she will certainly get caught in the blast radius along with everyone nearby – Flak Jacket may or may not help.
Better Odds
Points Needed: +200
Like I have mentioned above, Orbital Care Package normally contains low-cost Scorestreaks like Recon Drone or UAVs, but with this module, you can increase your odds of receiving a better item like Paladin.
The best strategy is to combine this with Double Tap Module and you will increase your chances drastically. Since this increases the cost of the Scorestreak greatly, make sure to protect it from enemies.
Support
Points Needed: +600
An insanely expensive module; this allows you to retain all your Assist Points towards this Scorestreak after death.
Remote Turret
Points Needed: 550
This is a Machine Gun sort of thing which covers 180 degrees in the direction it is facing and lasts for 60 seconds. Players who have played previous Call of Duty installments can think of it as Sentry Gun (with a module called Sentry).
Remote Turret should be placed in areas where you need to pin down enemy forces or defend an objective. Furthermore, you can manually control it at will. Destroying Remote Turret is not difficult at all, but you need to make sure that you do not reach it head on.
Bullets deal a great deal of damage, but the best way is to get behind it and destroy it with a couple of melee attacks. Do note that Secondary Launchers are useless against this Scorestreak.
Rocket Turret
Points Needed: +100
This replaces the HMG of the Remote Turret with a hard-hitting rocket launcher. Although it is not as effective to pin down enemies as an HMG, but it guarantees you a couple of kills.
Directed Energy
Points Needed: +100
This module replaces the HMG of the Remote Turret with an energy beam. Although it is hard to aim with a directed energy beam, it certainly has more damage output.
360 Turret Head
Points Needed: +100
Like I have mentioned above, a Remote Turret only covers 180 degrees in the direction it is facing. However, with this module, you can cover complete 360 degrees so that it covers a larger distance and is hard to destroy.
Rippable
Points Needed: +100
If you do not want your Remote Turret to be placed in a fixed location, you can install this module and carry it with you. Be careful though as you will draw quite a lot of attention with this thing in your hand.
Heavy Resistance
Points Needed: +100
A Remote Turret can be rendered useless for a couple of seconds by throwing Stun/Concussion at it. However, you can make your Remote Turret immune to all effects of Stun/Concussion grenades by using this module.
Sentry
Points Needed: +200
This technically transforms the Remote Turret into a Sentry Gun from previous Call of Duty installments. This is a particularly useful module and should be installed by anyone going with a Remote Turret as a Scorestreak.
Support
Points Needed: +600
An insanely expensive module; this allows you to retain all your Assist Points towards this Scorestreak after death.
System Hack
Points Needed: 600
System Hack can be considered as EMP Systems from Call of Duty: Black Ops II.
System Hack not only shuts down enemy’s UAV, Mini-Map, Target Enhancer, but also disables all Exo-Movements and Exo-Abilities making it one of the best Support Scorestreaks out there.
There is no rock solid way to use the System Hack. This is a powerful Scorestreak which puts the team using it on an obvious advantage.
Disable Equipment
Points Needed: +50
Before going with this module, you need to make sure which Class Setups your enemies are using. If they are relying heavily on electronic equipment, it is a good idea to go with this module.
Flash
Points Needed: +50
This module serves as the icing on a cake. While System Hack disrupts enemy radar and HUD for its duration, this module ensures that when it is triggered, all enemies go blind for a couple of seconds.
This should be used while your team is going to capture an objective. With this module on, your enemies has next to no chances of winning a gunfight.
Assist Points
Points Needed: +50
We have already seen this module with UAV. It basically allows you to gain more Assist Points for each kill that your teammates score while your System Hack is online.
Extended Time
Points Needed: +150
This module can be installed twice and increases the duration for which the System Hack stays online. An expensive yet powerful module!
Disable Exo-Suit
Points Needed: +200
Exo-Movements and Exo-Abilities play an important role in Call of Duty: Advanced Warfare. With this module, you can render your enemies’ Exo-Suit absolutely useless.
They will feel like they are playing the Classic Playlist against players with fully functional Exo-Suits.
Disable Streaks
Points Needed: +400
This module should only be installed if you are playing against a strong team which has the capability of calling in multiple Scorestreaks in a match.
Even if there are a gazillion Scorestreaks on the map, this module will destroy them or make them useless instantly.
XS1 Vulcan
Points Needed: 600
This is a manually controlled orbiting satellite energy weapon which directs a high intensity energy beam towards enemy players. This is a powerful Scorestreak if used in correct manner and space.
It is a good idea to use this Scorestreaks in maps which do not have excessive buildings to disturb your shots.
Overcharge
Points Needed: +100
This module increases the radius of the energy beam fired from the sky. Although it is not a must-have with this Scorestreak, it can get you a couple of free kills along the way.
Extra Time
Points Needed: +100
This modules doubles up the duration of the burst fired from the Vulcan. This is a useful module to keep enemies pinned down in one location while your teammates try and capture an objective.
Extra Burst
Points Needed: +150
This module can be taken twice and works best in combination with Extra Time. With this module, you will be able to use Vulcan more than once for a cheap price which is a win-win situation.
Light Show
Points Needed: +200
This module adds two secondary beams in addition to the primary one.
I would not recommend this module due to its high cost, but it will certainly get you a couple of additional kills along the way; especially if it is combined with Overcharge.
Missile Strike
Points Needed: 650
Remember Predator Missile from Call of Duty: Modern Warfare 2 and Call of Duty: Modern Warfare 3, Missile Strike is somewhat similar that.
You manually control this single missile descended from the air which detonates on impact and guarantees you a kill if it lands next to an enemy.
You can also speed up the descending speed and divide it into many small missiles. This is one Scorestreak I personally use along with UAV and Bombing Run due to the fact that it makes it quite easy to defend a Hardpoint or an objective.
Cluster Missile
Points Needed: +50
This module kinds of transforms the Predator Missile into Hellfire Missiles from Call of Duty: Black Ops II.
With this module, the large single missile gets divided into a cluster of missiles that have increased area of impact. This is useful to take out multiple target agglomerated in a single area (may be around a Flag or Hardpoint).
Hellfire Missile
Points Needed: +100
This is pretty much similar to Cluster Missile, but these missiles automatically target enemies in the area and hit them.
Extra Missile
Points Needed: +100
This module works best when combined with either Cluster Missile or Hellfire Missile by letting you add unto two additional missiles to your single Missile Strike.
When combined with Cluster Missile or Hellfire Missile, this allows you to clear out an area or keep enemies from scoring a crucial objective.
Nano Swarm
Points Needed: +150
With this module, a Missile Strike covers the area of impact with a Nano Swarm. A Nano Swarm is a highlighted area which kills any enemy that enters it. This is useful to keep enemies at bay while your team is scoring an objective.
Bombing Run
Points Needed: 725
Bombing Run delivers a bombarding air-strike at the marked location on the map.
You can mark a complete section of the map horizontally or vertically, but be careful as the dropped bombs can also kill you if caught in the blast radius. This is extremely useful if you plan on clearing a path for your teammates in game modes like Uplink and Capture the Flag.
The bombs dropped from the Bombing Run can also be destroyed using Secondary Launchers, but it is extremely hard to do so and requires a great reaction time and accuracy along with a bit of luck.
Flares
Points Needed: +50
If you note that enemies are actively destroying your Bombing Runs using Secondary Launchers, install this module and it will destroy the enemy projectiles.
Stealth
Points Needed: +100
This conceals your Bombing Run from appearing on enemy’s radar. Do note that they will still hear the announcement of an incoming Bombing Run which makes it kind of useless if they take cover inside a building.
Additional Bomber
Points Needed: +300
Although this is one expensive module, it is quite cost-effective if you manage to score a couple of extra kills with it. This module allows you to call in an additional Bombing Run to cover a large area or defend multiple objectives at a time.
Care Packages
Points Needed: +400
Combine it with Additional Bomber module and you will have two Bombing Runs providing you with 3 Care Packages each – a total of six. This is one expensive module, but you can install it to let each player in your team have something worthwhile.
XS1 Goliath
Points Needed: 775
Those of you who have completed the Single-Player Campaign will remember entering an AST in Mission Terminus. This Scorestreak allows you to do the same in Multi-Player Mode.
This AST comes equipped with a HMG (which can overheat with constant usage) and an armour which can be depleted with enemy gunshots or a single hit of a Secondary Launcher.
This is certainly a lethal Scorestreak in right hands and can be self-destructed after taking enough damage. Once you are equipped with an AST, it is better to stick to your team as you will be able to watch each other’s back.
Recon
Points Needed: +50
This module allows your Goliath to gain the ability of Exo-Ping and constantly eliminate enemy threats before they do any damage to you.
Trophy
Points Needed: +50
This is one important module to install if you are worried about enemies using Secondary Launchers to take you out. There is no limit to how many projectiles Goliath’s Trophy can destroy.
Under-barrel Rocket
Points Needed: +100
A single fire from this Under-barrel Rocket can instantly kill enemy players. This is particularly useful for taking out group of enemies gathered near an objective.
Homing Rockets
Points Needed: +100
Like the name suggests, this module fires four rockets that follow enemy players through the map and kill them; even if they are relying heavily on Exo-Movements and Exo-Abilities.
Warbird
Points Needed: 850
This manually-controlled Scorestreak lasts for 30 seconds and allows you to fire HMG at hostile targets. Although it lasts only for half a minute, it is one of the most powerful Scorestreaks in the game.
It is highly recommend only to use this Scorestreak in the maps with a lot of open ground. With Warbird Wingman Module, a player can also join you in and mark targets for you similar to Recon Drone.
Aggressor
Points Needed: +50
This module allows an AI to control the Warbird for you while you stay in the fight. The only couple of times I used this module, it did not score me any kills.
If you could manage it, I would recommend controlling the Warbird yourself!
Defender
Points Needed: +50
This is exactly like AH Overwatch from Call of Duty: Modern Warfare 3. This module makes Warbird to follow you around the map and picking off targets one by one.
You can install this module and either defend an objective or capture it with your guardian roaming above you.
Extra Flare
Points Needed: +100
Since enemies can take out your Warbird with Secondary Launchers, it is extremely crucial to keep it safe.
If you are worried about Secondary Launchers, you can install this module to destroy enemy projectiles and keep your Warbird drifting through the wind.
Cloak
Points Needed: +150
This module camouflages your Warbird to conceal its location from enemies. Personally, I don’t think this module makes any much of a difference since enemies can easily locate it by its shots.
Extra Time
Points Needed: +200
This is pretty self-explanatory! This module allows you to gain additional 15 seconds for your Warbird.
Warbird Wingman
Points Needed: +200
This allows another player from your team to join you in controlling your Warbird. Sometimes it becomes harder to locate every enemy on the field and with this module, you can attain that with an extra pair of eyes.
Rockets
Points Needed: +300
This pricey module adds rockets to your Warbird’s regular HMG. Due to its insanely high cost, I would not recommend this, but you can install it if you need some additional firepower.
Paladin
Points Needed: 950
The last and most expensive Scorestreak of Call of Duty: Advanced Warfare. It allows you to manually control a Paladin Gunship for complete 40 seconds.
This is certainly one of the best Scorestreaks to use in a map which is somewhat open. Whether it is Capture the Flag, Domination, or Hardpoint; this Scorestreak is as lethal as it can be.
Extra Flare
Points Needed: +100
Despite of its 950 Points cost, a single hit from an enemy Secondary Launcher can destroy it. Paladin Gunship comes equipped with a single flare, but with this module, you can add an extra flare to ward off enemy projectiles.
Sleight of Hand
Points Needed: +150
This module allows you to reload your Paladin faster and keep your enemies pinned down.
Laser Guided
Points Needed: +200
This expensive module ensures that even enemies who are hiding inside buildings and behind covers are not safe from this lethal Scorestreak. It adds additional rocket firepower to your Paladin which can be directed inside a building to kill the hiding targets.
Wingman
Points Needed: +200
This is pretty much similar to Wardbird Wingman and allows a second player from your team to join in your hunt for enemy team. The second player controls the MG Turret.
Extra Time
Points Needed: +200
Paladin’s 40 seconds are more than enough to lay waste on the battlefield, but with this module, you can increase this time to around a complete minute.
105MM Cannon
Points Needed: +300
This module adds a lethal 105MM Cannon to your already lethal Paladin. 105MM Cannon contains insane firepower that is deadly to anyone standing in its blast radius.
Although an expensive module, this thing allows you to control engagements through the air and turn tides in a couple of minutes.
Found anything missing or confusing? Let us know in the comments below!