In Zelda: Breath of the Wild, Oman Au Shrine is one of the four shrines in the Great Plateau, and completing each is a way to leave the Great Plateau. Oman Au shrine is one of the earliest shrines and is revolves around getting you a Magnesis Rune and ending the shrine with its help.
With this guide, you will conquer the shrine easily because of the detailed walkthrough of the Zelda Breath of the Wild: Oman Au shrine.
Oman Au shrine location
Oman Au shrine in Zelda BOTW is among those shrines that don’t need any trials or tasks to perform beforehand to reveal. These shrines are already there; you must travel to the area to enter the shrine.
As we mentioned above, it is one of the shrines of the Great Plateau. So head towards it and move to the northeastern side of it. You can also paraglide from the resurrection tower, for it you must jump to the north and paraglide your way to the shrine.
Zelda Breath of the Wild Oman Au shrine walkthrough
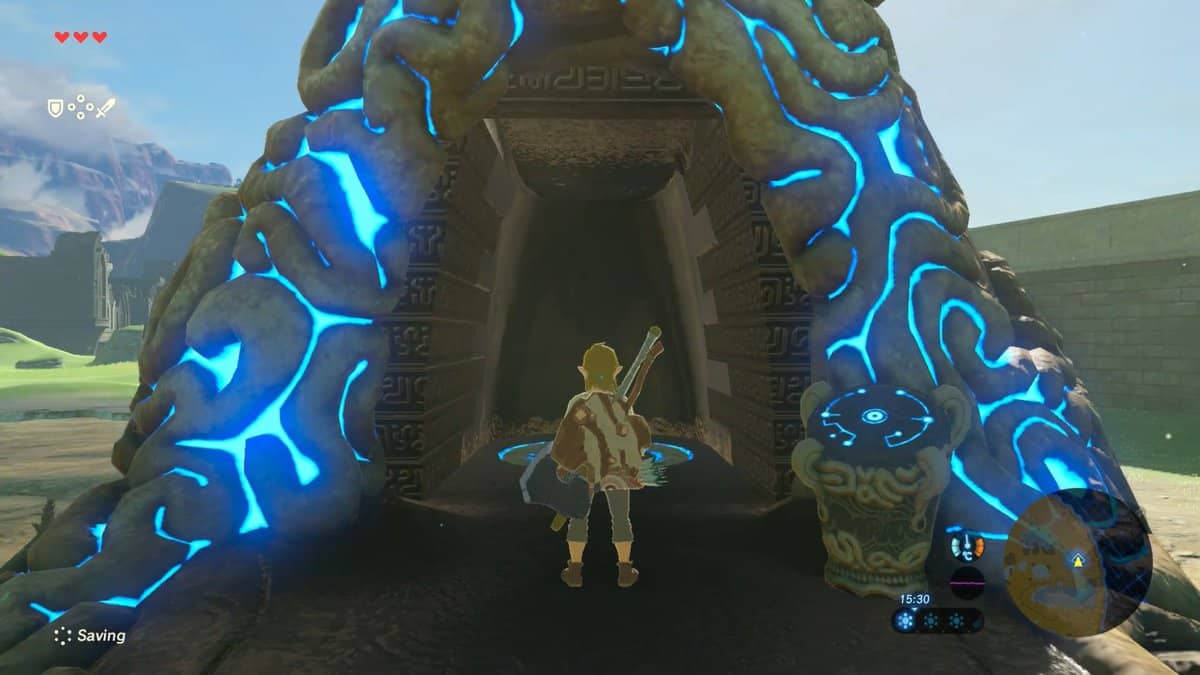
When you are at the Oman Au shrine in Zelda BOTW, you won’t know how to enter the shrine. Because there is no entrance at the front, just a pedestal ahead, no matter how hard you try, nothing moves or opens.
Head to the pedestal, where you must place the Sheikah Slate in the space. The pedestal will check the slate, and a Rune (Magnesis) is added to it. Upon availing yourself of this slate, you will have access to Magnesis. Magnesis will help you manipulate metallic objects; you can pull, push, or move them.
Upon activating the Rune, you will see the metallic objects around you. You will see a metallic door on the floor; pull it to open a pathway to the Oman Au shrine. It is how you enter the Zelda BOTW Oman Au or Magnesis shrine.
Using the pathway, travel to the other side of the area, where you will again find nowhere to go. Activate the Magnesis, and you will see a metallic block on the wall. Move it, and it will dismember the wall, and you will pass through.
As you enter, you will see the Guardian upfront, don’t worry; the Guardian is easy to beat. However, whenever you see a glowing light, just run because it is about to shoot a beam.
After you are done, move to the next platform using a ramp. You could not cross to the final platform because of the missing ramp. Don’t try to jump because you will lose a life. Use Magnesis, move the metallic ramp behind you, and place it before you to cross to the next platform.
Once you are at the final platform, look towards the left, and you will see a Zelda Breath of the Wild Magnesis’ chest. To be able to get your hands on the Magnesis trial chest, you must use Magnesis and pull it towards you and be able to get the Traveler’s bow inside.
Now you are done with the chest, move forward to see the Oman Au monk in Zelda BOTW, and he will reward you with a spirit orb for completing the shrine. And with this, your Magnesis Trial of Zelda’s Breath of the Wild ends.