Riddler Trophies are collectibles in Batman: Arkham City that are part of the Riddler Challenge. To obtain these green question mark devices, you need to overcome the trials set up for Batman and Catwoman.
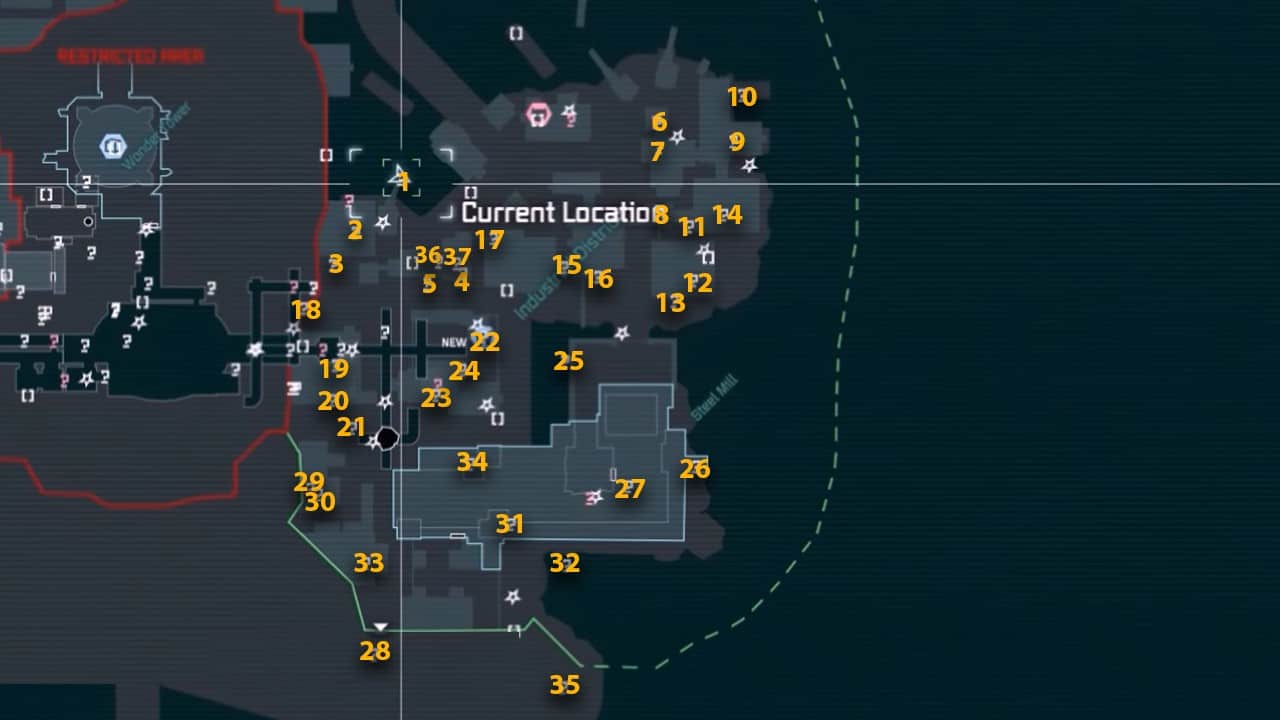
In the Industrial District, you will find 37 of Batman’s Riddler Trophies of the over 200 in total. You can beat up Riddler’s thugs to get their location but we went ahead and marked them on a map for your ease.
Before we start, we recommend you play through the main campaign first since a lot of the collectibles are hidden behind story-locked areas. To avoid backtracking it’s best to start your hunt later in the game.
How to get the Industrial District Riddler Trophies in Batman: Arkham City
Riddler Trophy #1
Requirements: Remote Electrical Charge, Batclaw
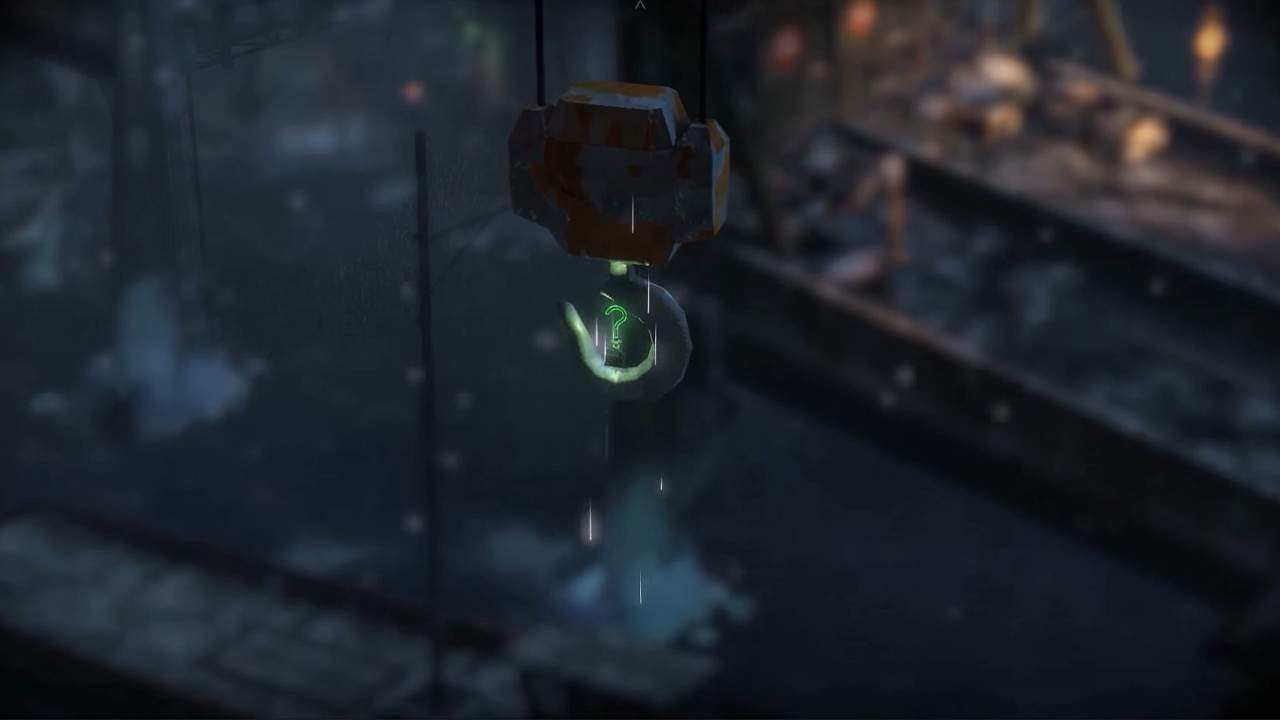
This Riddler Trophy is under the seawater, hanging from the crane in the northwest corner of the Industrial District in Batman: Arkham City. To lift it, power the crane controls box at the base of the crane using the Remote Electrical Charge. Once it’s up to your level, grab it using Batclaw.
Riddler Trophy #2
Requirements: Explosive Gel, Remote Electrical Charge
The Gotham Hardware store behind the Solis Steel Mills, in the southwest area has a destructible wall. It is under the crane tower where you found the previous Trophy.
Break through the wall using Explosive Gel. The collectible is in the metal ball inside the cage. To get it out you need to use the orange and yellow industrial electromagnets.
First, use your Remote Electrical Charge to power the orange one which will make the other one move. Then charge the yellow one to grab the ball and simply drag it to the opening by powering the orange one again.
Riddler Trophy #3
Requirements: Batarang
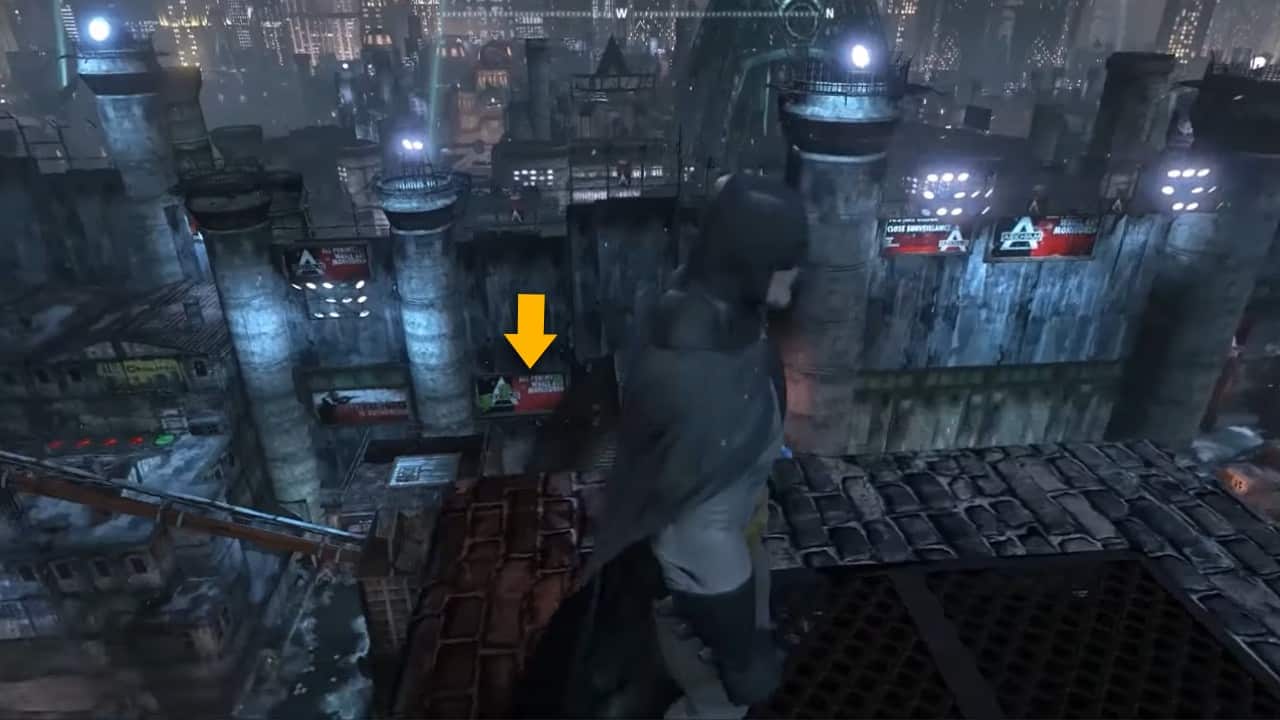
There is a pressure pad puzzle in the alleyway west of the Solis Steel Mills under the “All premier walls are monitored” sign.
Jump from the top of the chimney across the Mills and dive bomb when you are directly above the pads. This will raise the bar up to the question mark and activate the switch. Hit the switch with your Batarang to unlock the Trophy case.
Riddler Trophy #4
Requirements: None
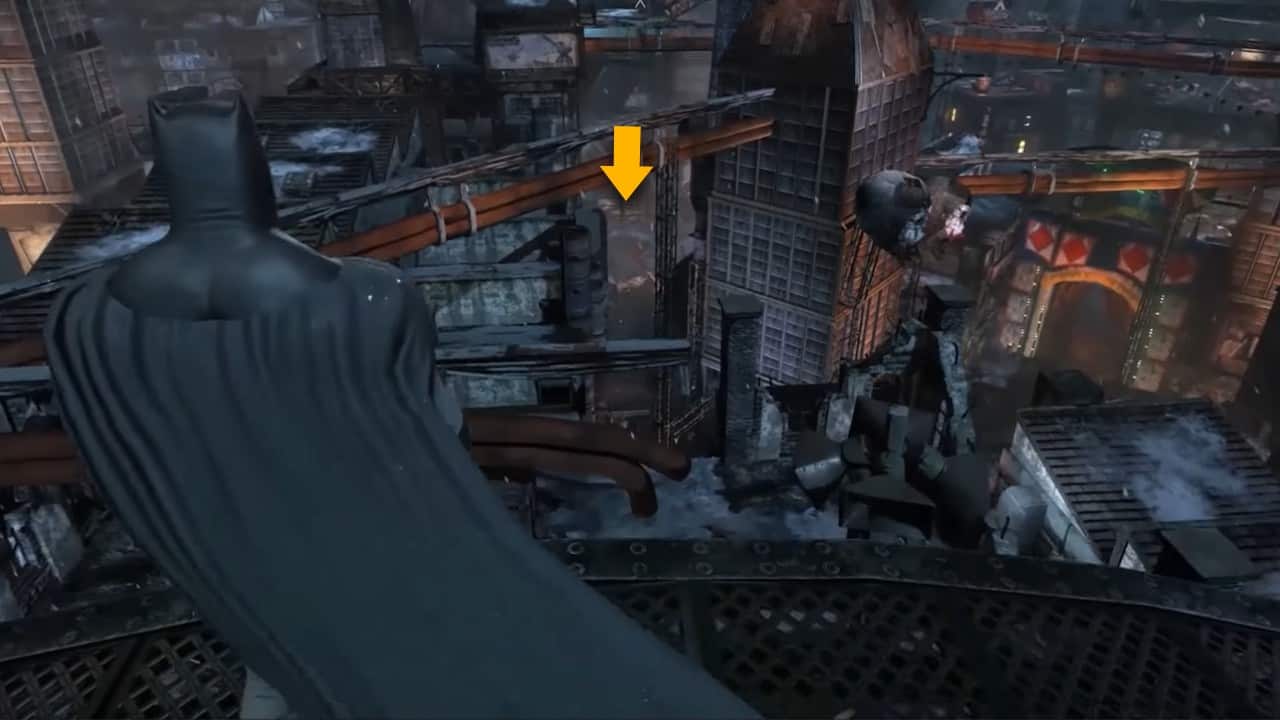
The chimney towers west of the Tricorner Naval have pressure pads on their sides. You need to activate all three without landing anywhere else. Once you are done, grab the Riddler Trophy on the platform in the middle.
Riddler Trophy #5
Requirements: None
There is a row of pressure pads in the lane behind the building southwest of the Tricorner Naval Tower. Press them when they are green to open the collectible’s cage.
Riddler Trophy #6
Requirements: None
There is a destructible wall west of the North Gotham Docks on the side of the building directly east of Joker’s Funland entrance. Just glide from a high place to break through and grab the Riddler Trophy surrounded by pressure pads.
Riddler Trophy #7
Requirements: None
The Trophy is behind a breakable wall next to the Joker’s Funland in the northern Industrial District. From the entrance blocked by the truck, turn left and hop over the metal gate, the wall will be directly on your left. Just punch through them to get the collectible in the back.
Riddler Trophy #8
Requirements: Freeze Blast, Disruptor
This one is just around the corner from where you find the previous Trophy. Instead of turning left, just go straight from the gate, and the collectible will be behind the steam pipes on your right. Block the pipes using Freeze Blast and blow the mines before walking in with the Disruptor. You can now walk in to get the Trophy in the back.
Riddler Trophy #9
Requirements: Explosive Gel
Go behind the building northeast of the Ferris wheel near the edge of the shore. There is a shack on the roof next to the Gotham Hardware. Break through the weakened wall of the shack using Explosive Gel and grab the Riddler Trophy on the other side.
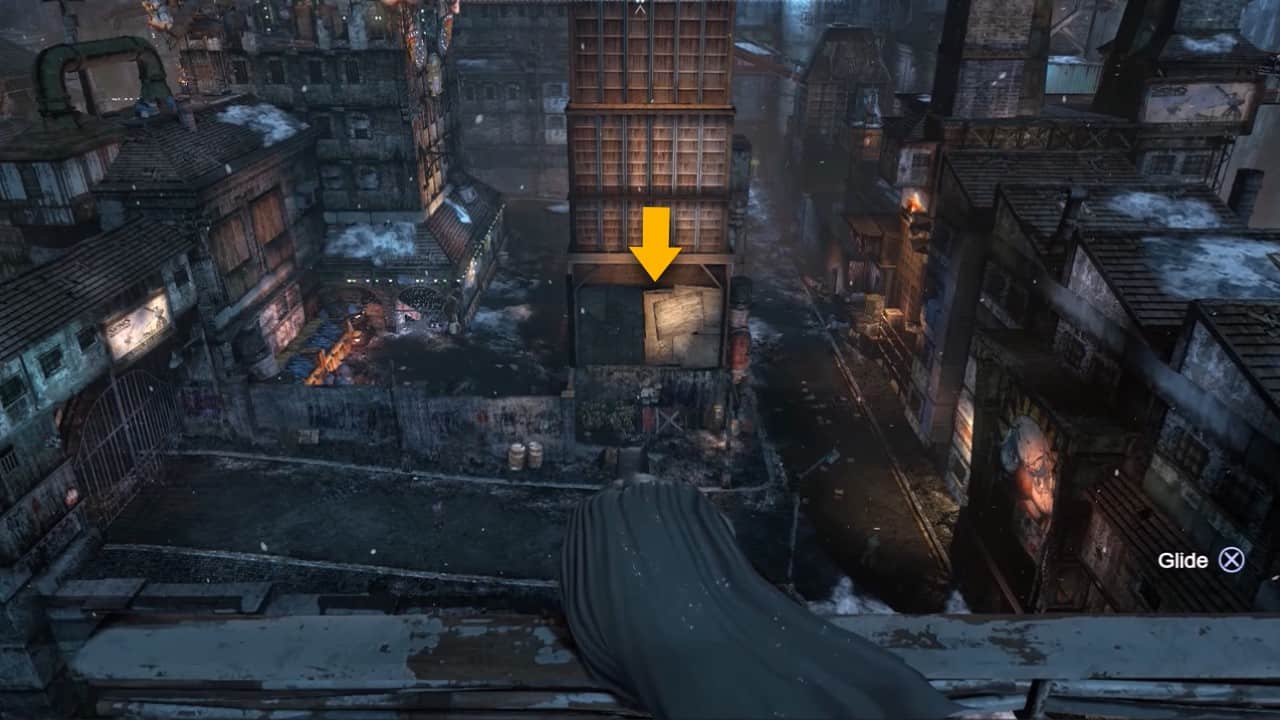
Riddler Trophy #10
Requirements: Line Launcher
There is a cage under the building where you found the previous collectible. There is a green arrow leading into it next to the boat.
Use your Line Launcher on the anchor points and follow the arrows inside. When you reach the fenced wall, turn around and grapple up to the platform and collect the Trophy sitting on top.
Riddler Trophy #11
Requirements: Remote Control Batarang
Also in the same area as the previous collectibles, head straight from the gate, turn right and the pressure pad puzzle will be right in front of you. Step on the pressure pad to open the silver gate with the green question mark and throw your Remote Control Batarang through it. You need to do this twice to hit the switches in the back, on either side of the gate to open the Trophy case.
Riddler Trophy #12
Requirements: Batclaw
This Industrial District Riddler Trophy is in the cart on top of the Ferris wheel in Batman: Arkham City. You need to get up to the nearby carts and grab it using Batclaw.
Riddler Trophy #13
Requirements: Remote Electrical Charge
You will find another metal ball puzzle after you drop down onto the ledge south of the Ferris wheel. Power the industrial electromagnet on the right wall using the Remote Electrical Charge to move the ball through the maze. Grab the Trophy once the ball reaches the exit gate.
Riddler Trophy #14
Requirements: Batclaw
There is an open cage on the rooftop of the building northeast of the Ferris wheel. It has a pressure pad on its top that opens the Trophy case on the underside. Press the pressure pad to start an 8-second timer and simply drop down into the cage to grab the collectible using Batclaw.
Riddler Trophy #15
Requirements: None
The alleyway below the red metal framework southwest of the Tricorner Naval and west of the Sionis Industries has 2 pressure pads. The objective is to activate all the switches on the wall in front of you.
To do this, press the left pressure pad twice and finish it with the right one to unlock the metal box hiding the green question mark.
Riddler Trophy #16
Requirements: Batclaw
You will find this Trophy inside a maze littered with proximity mines west of the Ferris wheel, next to the Funland entrance. Crawl through the cage following the path with no mines to get to the collectible at the end.
Alternatively, you can also use your Batclaw to grab the Trophy. But you will need to aim at it directly from the maze entrance without triggering any mines.
Riddler Trophy #17
Requirements: Cryptographic Sequencer
There is a security terminal on a wall at the end of the lane between the apartment buildings west of the chimneys and south of the Steel Mills. Hack the terminal using your Cryptographic Sequencer to unlock the question mark collectible.
Riddler Trophy #18
Requirements: Cryptographic Sequencer
West of Tricornor Naval Tower, you will find an electrified gate at the base of the Steel Mills building. Hack the security panel behind it using your Cryptographic Sequencer. The gate will drop and you can find the Industrial District Trophy in the back of the room.
Riddler Trophy #19
Requirements: None
Head west of the Tricorner Naval Tower, on the rooftop of the building left of the gate leading to the previous collectible. There is a row of pressure pads that are alternating between green and red that you need to activate to unlock the Trophy cage. You can easily do this if you time it right and run across as the first one turns green.
Riddler Trophy #20
Requirements: None
There is a Joker’s Funland entrance next to the building of the previous puzzle. Left of the entrance, there is another pressure pad trial behind the building at ground level.
To activate all three of them, step on the first one and barrel roll to the others without landing anywhere else. Once you are done, just go up to the now open cage and grab another Riddler Trophy for yourself in the Industrial District.
Riddler Trophy #21
Requirements: Batclaw
There is a big yellow construction vehicle in the street next to the previous puzzle, southwest of the Tricorner Naval Tower. Use your Batclaw to grab the Trophy under it, between its wheels.
Riddler Trophy #22
Requirements: None
You can break through the wooden wall on the side of the orange building in the middle of the street west of the Steel Mills. Make sure to land on the pressure pad on the opposite wall and not on the red ones on the floor to unlock this Riddler Trophy in Batman: Arkham City.
Riddler Trophy #23
Requirements: Explosive Gel
Head down to the Joker’s Funland building northeast of the Tricorner Naval Tower. There is a hole in the wall you can enter through on the right, next to the blocked entrance gate. Turn right and you will find a destructible wall in the back. Burst it open using Explosive Gel and grab your green question mark collectible.
Riddler Trophy #24
Requirements: Cryptographic Sequencer
In the same area as the previous one, go straight instead of turning right from the hole in the wall. Use the Cryptographic Sequencer on the security panel on the wall to unlock the Trophy case.
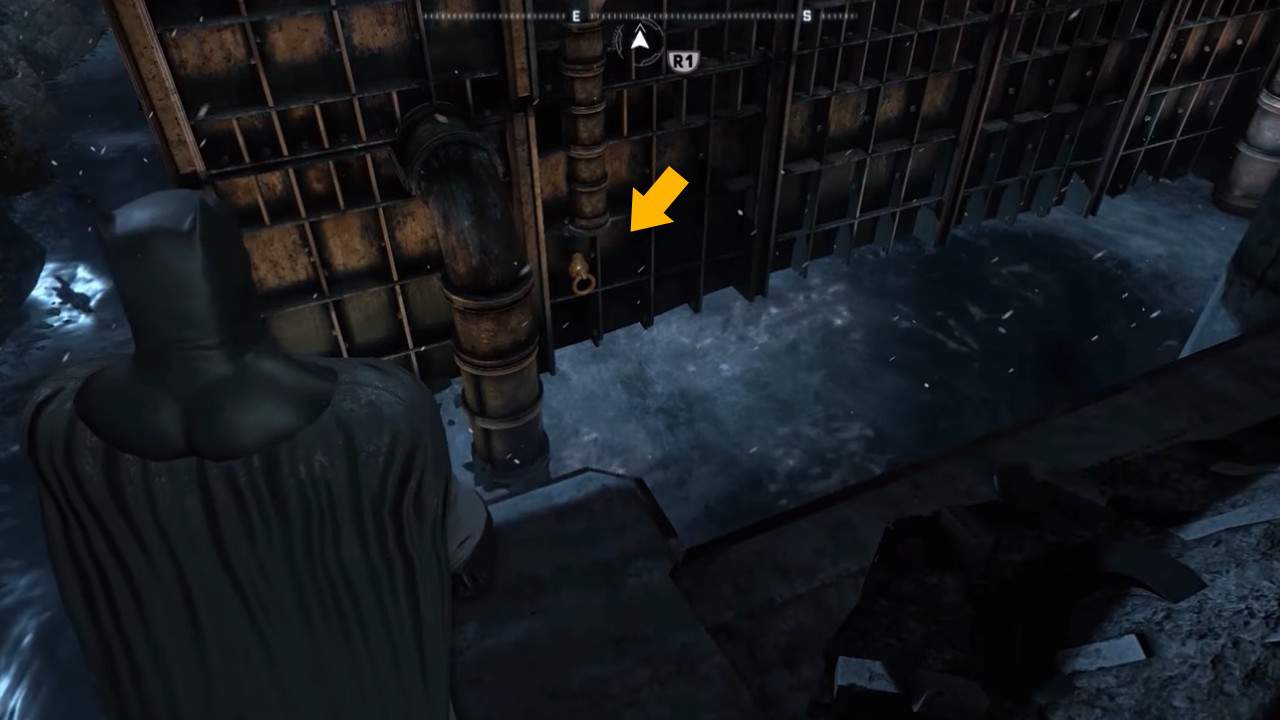
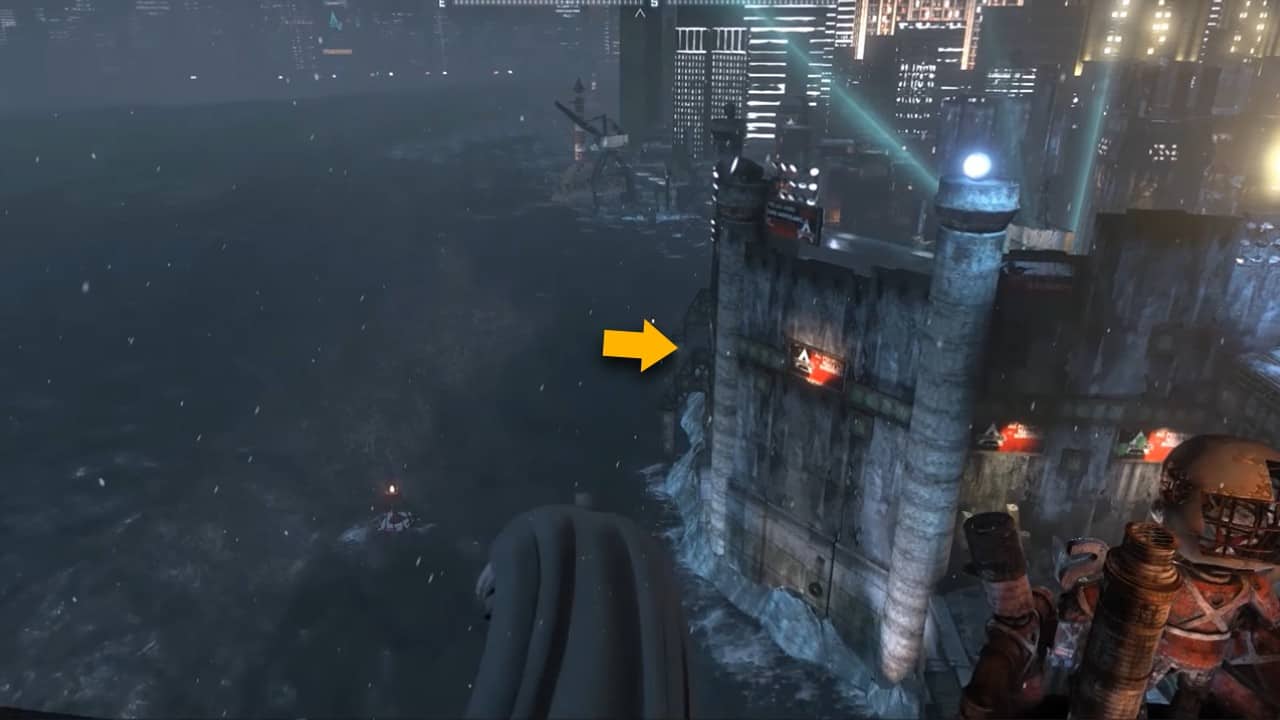
Riddler Trophy #25
Requirements: Freeze Blast, Batclaw
Stand on the eastern boundary wall of Sionis Steel Mills and you will find a hook on the side of the building. Use the Freeze Blast to create a makeshift raft and Batclaw onto the hook to pull yourself closer to it.
The Riddler Trophy is in the closed pipe directly above it. Use the Batclaw to force it open.
Riddler Trophy #26
Requirements: None
This question mark collectible is on the balcony facing the sea, east of the Steel Mills building. You can glide to it from the Ferris wheel.
Riddler Trophy #27
Requirements: Explosive Gel
There is a destructible wall you can break using Explosive Gel on the southeastern edge of the Sionis Steel Mills rooftop. Apply the Gel on the question mark switch on the other side but don’t detonate it yet.
Go back to the door to grapple up and drop down over to the Trophy case. Detonate the Explosive Gel now to activate the switch, which will unlock the case for 5 seconds only.
Riddler Trophy #28
Requirements: Remote Control Batarang
There is an open entrance you need to go through, straight from Joker’s Funland on the southwestern outskirts of the Industrial District. It has a black danger strip in front of it warning you about the electrical field inside the room.
Throw your Remote Control Batarang to hit the switch behind the fence to turn it off. You can now walk up to collect the Trophy without getting hurt.

Riddler Trophy #29
Requirements: None
Go up to the lower rooftop southwest of the Steel Mills for a unique pressure pad puzzle. It’s hard to miss thanks to the multiple question mark switches forming a circle in front of it.
Standing on the pressure pad will light a switch and then spin the wheel. You need to hit the same switch once the wheel stops and the grate lifts. Since it is randomized, it will be different for all players, for us it was the third one.
Riddler Trophy #30
Requirements: Remote Electrical Charge, Cryptographic Sequencer, Explosive Gel
Drop down from the northern edge of the previous building into the courtyard below. On your left, there will be a silver gate with a weakened wall next to it. Power the mechanism above the gate using the Remote Electrical Charge to lift it.
Crawl through and stand on the pressure pad in the room to power the security panel across. Hack the panel using the Cryptographic Sequencer while sitting on the pressure pad. Go back and use Explosive Gel to break through the wall and grab the Riddler Trophy from the Industrial District.
Riddler Trophy #31
Requirements: Remote Electrical Charge, Explosive Gel, Batclaw
Behind the Sionis Steel Mills building, there is a tunnel with the southern entrance of Steel Mills on one end and the Joker’s Fun House on the other. It is littered with Joker’s props and has a large toy train on one side.
You will find a destructible wall hiding the Riddler Trophy on the ceiling near the Steel Mills entrance and an industrial motor inside the ghost train.
To reach it, power the industrial motor in the back of the train so that it lines up with the ceiling. Climb up on it and use Explosive Gel to break the weakened wall. You can now snatch the green question mark collectible with your Batclaw.
Riddler Trophy #32
Requirements: None
In the same area where you got the previous Trophy, there is a cage in the water east of the Sionis Steel Mills tunnel entrance. Glide from a high place, preferably a nearby tower, to land on the pressure pad inside and unlock the Riddler Trophy. The entrance of the cage is facing away from the bridge so you can’t glide from the tunnel.
Riddler Trophy #33
Requirements: Batclaw
Go down to the Joker’s Funland southwest of the Steel Mills. Slide under the gate of the building across the street, the one with carts inside. Use your Batclaw to grab the Trophy on the ceiling.
Riddler Trophy #34
Requirements: None
There is a shack with a breakable wall on a ledge northwest of the Sionis Steel Mills building. Punch through the wall and collect the Trophy on the other side.
Riddler Trophy #35
Requirements: None
Glide from a high place to enter the room at the back of the white building southeast of the Steel Mills. The collectible is just sitting on the floor in plain sight.
Riddler Trophy #36
Requirements: Remote Control Batarang
Head inside Zsasz’s hideout, the apartment building northeast of the Steel Mills. Go through the double doors down the stairs and activate the console in the middle of the room to restore the electric flow. Return to the staircase and jump through the vent on your right.
You’ll find a fusebox inside but you can ignore it for now and exit out to the balcony where you’ll see the locked Trophy case. To unlock it, you need to throw the Remote Control Batarang through the current that you restored before and hit the fusebox you found in the vents.
Riddler Trophy #37
Requirements: Freeze Blast, Line Launcher, Batclaw
From the same balcony where you found the last Trophy, throw a Freeze Blast in the water near the gate on your right. Jump on the bridge and wait for the water level to lower so you can use your Line Launcher to zipline to the platform you made.
Use Batclaw to grab the Riddler Trophy of Industrial District in Batman: Arkham City from the side of the pillar in the middle.