To help you out with finding all the collectibles in the Ledecestrescire region in Assassin’s Creed Valhalla, we’ve prepared this Assassin’s Creed Valhalla Ledecestrescire Collectible Locations guide where we’ll walk you through the exact of every single one.
Assassin’s Creed Valhalla Ledecestrescire Collectible Locations
There are 57 collectibles hidden away in Ledecestrescire for you to find. These include 28 Wealth, 16 Mysteries and 13 Artifacts.
Ledecestrescire Wealth Locations
There are 28 Wealth collectibles to be found in Ledecestrescire region in Assassin’s Creed Valhalla.
If you take a look at the world map, you’ll see some gold icons on it when synchronizing the viewpoints. These icons mark the locations of the Wealth in AC Valhalla that you can find in the area.
Each type of Wealth has a unique golden icon. There are four different types of Wealth: Gear, Ingots, Cargo and Abilities.
Wealth #1 and #2– Cargo
When you raid the Alcestre Monastery in the ‘Settling Down’ mission, you’ll find the first two Wealth in there.
Wealth #3 = Cargo
You’ll find it when you raid the Sudwella Monastery.
Wealth #4 – Cargo
Also in the Sudwella Monastery, inside the main building.
Wealth #5 – Cargo
Demolish the Sudwella Monastery’s entrance by shooting an oil jar to find this cargo.
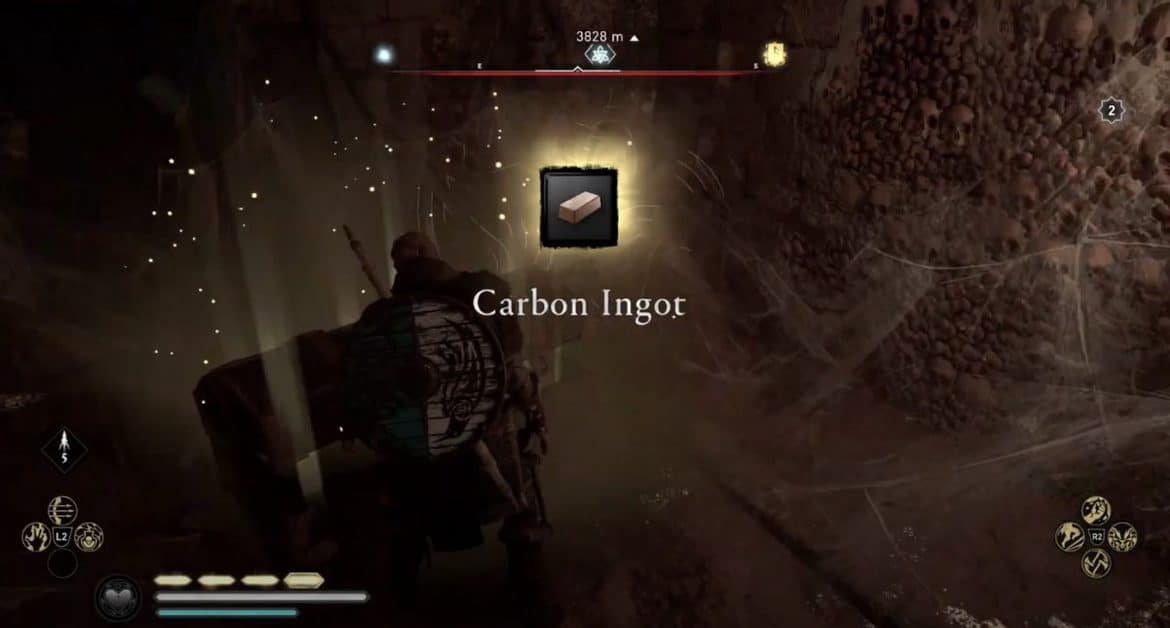
Wealth #6 – Ingot
Head into the Yeoman camp in the Sudwella Monastery and kill the commander. You’ll find this ingot on his corpse.
Wealth #7 – Ingot
Kill the Goliath enemy that’s located to the north-east of Sudwella Monastery and then loot his corpse to get this ingot.
Wealth #8 – Gear (Skadi’s Wrath – Fine Light Bow – Bear Gear)
Go inside the church that’s located to the south of the Sudwella Monastery and run to the backend of the room. Climb up the partition and jump down to the other side of it.
You’ll see a locked door here. Unlock it and then go down the stairs into the basement to find it.
Wealth #9 – Gear (Hidden Ones’ Gloves – Superior Bracers – Raven Gear)
This Wealth is in the basement of the Ratae Bureau. To access it, shoot at the hook that’s holding the block.
This will make an opening in the floor, allowing you to get down into the basement.
Wealth #10 – Ingot
Head to the camp that’s located to the west of Ledecestre. You’ll find it in one of the tents there.
Wealth #11 – Ingot
This ingot is located to the north of the Alcestre Monastery. Shoot at the hook keeping the block up. Then, jump down into the now opened area and get the ingot from the chest behind the shelf.
Wealth #12 – Gear (Hrafn Guard – Fine Light Shield – Raven Gear)
Go inside the temple that’s located to the south-west of Ledecestre and jump onto the platform at the back of the temple that’s fixed to a tree. While standing up there, you’ll see a crack in the wall of the temple.
Shoot an arrow through the crack to break the lock of the door behind it. After that, head through the door, break the partition and get the gear from the chest in the corner.
Wealth #13 – Ability (Melee ABility Harpoon Impalement)
This ability is also located to the south-west of Ledecestre. Go down the ladder and move towards the gate and break the wooden board adjacent to it.
Now, dive into the water and shoot the oil jar to break the wall to uncover the chest containing the ability.
Wealth #14 – Ingot
Kill the Skirmisher that’s located to the south of Tonnastadir and loot his corpse to get this ingot.
Wealth #15 – Gear (Huntsman Helm – Superior Helmet –Wolf Gear)
Head over to Tonnastadir and grab the key from the longhouse. Then, look for a secret passage icon on your map and go to it. When you find it, unlock the door using the key and walk down the passage to get the gear.
Wealth #16 – Ability (Ranged Ability Raven Distraction)
After getting Wealth #15, go into the room that’s adjacent to it to get this ability.
Wealth #17 – Ingot
Kill the Goliath at the marked location and loot his corpse to get this ingot.
Wealth #18 – Ingot
Kill the Murderer that’s located to the west of Repton and loot his corpse to get this ingot.
Wealth #19 – Ingot
Go inside the Templebrough Fort and look for the ingot on the battlements.
Wealth #20 – Ingot
This ingot is also in the Templebrough Fort. To get it, kill the enemy with the crossbow that’s wandering around the battlements. Loot his corpse to get the ingot.
Wealth #21 – Ability (Ranged Ability Piercing Shot)
Climb up the wall of the Templebrough Fort and go through the window to get inside the room where there are a bunch of guards. Kill all of them and then grab the ability from the chest.
Wealth #22 – Ingot
Kill the Pikeman in the Templebrough Fort and loot his corpse to get this ingot.
Wealth #23 – Gear (Huntsman Cloak – Superior Cloak – Wolf Gear)
Go into the watchtower that’s at the north-western corner of Templebrough Fort and break the hooks holding the blocks. Then, jump down into the hole and grab the gear.
Wealth #24 – Ingot
Kill the Murderer that’s located to the south of the Alcestre Monastery and loot his corpse to get this ingot.
Wealth #25 – Ingot
Head down into the crypt of the Offchurch that’s located to the south-west of Alcestre Monastery. Move the shelves to uncover a hidden hole behind them. Go through the hole and get the ingot from the chest.
Wealth #26 – Ability (Ranged Ability Focus Of The Nornir)
You’ll also find this ability in the crypt of the Offchurch as you’re playing through the main story.
Wealth #27 – Gear
As you’re playing through the main story, you’ll go into a room in the Offchurch where you’ll find a Skirmisher with a key in his hands. Kill the Skirmisher and grab the key from him.
Use the key to unlock the room right next to that one and grab the gear from the chest.
Wealth #28 – Gear (Fyrd Spear – Fine Spear – Raven Gear_
Right before you go into the room with the Skirmisher in the Offchurch, smash the wall to your left and then jump down into the water.
There will be a hole under the water which you can swim through to find a chest containing this gear.
Mysteries Locations
There are 16 Mysteries to be found in Ledecestrescire. Mysteries are basically the side quests of the game.
The locations of these Mysteries will be marked by blue icons on the worlds map when synchronizing the viewpoints.
There are 11 different types of Mysteries: Offering Altars, Cairns, Treasures of Britain, Flytings, World Events, Lost Drengrs, Legendary Animals, Daughters of Lerion, Fly Agarics, Standing Stones and Animus Anomalies.
Mystery #1 – Jungulf (Flyting)
This mystery is located nwear Woden’s Eye.
Select the following three insults to win:
- O, to beat such a braggart will surely be fun.
- You’re a weakling, a milksop, a cadger, a louse.
- Your pride is appalling, and your rhyming is worse.
Mystery #2 – Skal to Your Wealth (World Event)
This mystery is located to the south of Repton. For this World Event, you have to search for lichen and bear testicles.
For the lichen, open the well behind you when you’re at the marked location and jump down into it to get the lichen.
To get the bear testicles, travel towards the west until you find a bear den. Kill a bear and castrate it.
Once you have them, go to the Alchemist and drink the potion. Then, fast travel back to him once again and interact with him to complete this World Event.
Mystery #3 – Fly Agaric
This mystery is located to the west of Trent River.
Look at the seal and go through the gate it is facing. After you pass through a gate, it’ll start facing to another one. Go through all 5 gates to complete the Mystery.
Mystery #4 – Standing Stones
This mystery is also located to the west of Trent River.
You have to move your camera so that the three rings all connect to each other.
Mystery #5 – Of Fist-Dances and Sweaty Oaths (World Event)
This mystery is located to the south of Wenloch Abbey.
To go inside the location, you’ll need to say a password. If your Charisma is at level 3, this won’t be a problem. If it isn’t at level, then you’ll have to enter another way.
Run to the backside of the building and go up on the wooden platform.
From there, grab the note on the tree and read the password from it. Then you can talk to the brute at the gate and say the password to enter.
All you need to do to complete the mystery is to defeat three opponents, who won’t put up much of a fight.
Mystery #6 – Offering Altar
This mystery is located to the east of Wenloch Abbey.
Shoot 3 hares using your bow and loot their corpses to get their feet. Then, offer the 3x Hare’s Foot to the altar to finish this mystery.
Mystery #7 – Ledecestrescire Sauce (World Event)
This mystery is located to the east of the Sudwella Monastery.
For this mystery, you need to find an eel so the man can make his sauce. Fortunately, the creek next to the man’s house has a bunch of eels swimming in it.
Shoot the eel using an arrow from the bank and take it back to the man’s house. Put it in the pot in the kitchen to finish the mystery.
Mystery #8 – Cairn
This mystery is located to the south of the Sudwella Monastery.
To get up to the required height and finish this mystery, stack the stones on top of each other.
Mystery #9 – Sisters of the Axe (World Event)
This mystery is also located to the south of the Sudwella Monastery.
Look behind the rock that’s behind the church to get the Church Door Key. Once you have it, talk to the lady inside the church and she’ll take you to a camp.
Kill the guards in the camp and loot the crosier. The lady will then take you to a river close by.
Take out some wolves by the river and then go back to the lady, who’ll now be on the other side of the river. Talk to her again to finish the mystery.
Mystery #10 – The Stink-Brew (World Event)
This mystery is located right in the center of Ledecestrescire.
Go inside the cave and kill all the vipers that you find in there. Loot their eggs from their bodies until you have 4 of them.
Give these 4 eggs to the lady behind the window at the end of the passage to finish the mystery.
Mystery #11 – The Twit Sage, Part I (World Event)
This mystery is located to the south of Tamworth Fortress.
Toss a torch on the roof of the house and then go to the door. From there, go behind the house and get inside by moving the shelf.
Search the table, kegs and bags in that sequence and then open the door using the key. After that, exit the house and talk to the brothers to finish the mystery.
Mystery #12 – The White Lady of Tamworth (World Event)
This mystery is located to the north-west of the Alcestre Monastery.
Beat the man that’s standing on the doorstep until he runs away. Then, stand on the doorstep yourself and wait for a Saxon to come. Kill the Saxon to finish the mystery.
Mystery #13 – Animus Anomaly
This mystery is located near the Ragnarsson Lookout.
Get to the data pack by jumping on the platforms to finish this mystery.
Mystery #14 – A Skald’s Lament (World Event)
This mystery is located near the Alcestre Monastery.
In this mystery, a man will take you to a camp where you have to kill all the hostiles. Then, you have to take the man back to his camp to finish the mystery.
Mystery #15 – The Last Leaf of Fall (World Event)
This mystery is located to the west of Snotingham.
For this mystery, all you need to do is to interact with the woman and then shoot the leaf.
Mystery #16 – The Old Guard
This mystery is located near Woden’s Eye.
Talk to the man and get the house key from him. Open the door to his house, which is located in Repton (next to the massive tree).
Once inside, grab the crate which has the songs in it and give it to the man to finish the mystery.
Artifacts
There are 13 Artifacts to be found in Ledecestrescire. When synchronizing the viewpoints, white icons on the world map will appear which will show you the location of Artifacts.
There are 5 different types of Artifacts: Treasure Hoard Maps, Roman Artifacts, Rigsogur Fragments, Flying Papers, and Cursed Symbols.
Artifact #1 – Rigosugr Fragment: Page 1
The first Artifact is in Repton, which is on the north-west side of Ledecestrescire.
There will be a tall building here which you need to enter. Go through the fence and enter the building using the door.
Once inside, turn left and head down into the basement. You’ll find this artifact on the left side of the basement.
Artifact #2 – Flying Paper – Tattoo Design: Vestri Wind Scheme (Back)
This Artifact is on the western side of Repton. Climb up the watchtower that’s facing the river and you’ll find the artifact on a beam up there. However, you won’t be able to grab it just yet.
The paper will fly away. You’ll have to follow the paper and grab it when it reaches the end of its obstacle course.
Artifact #3 – Cursed Symbol
This Artifact is located to the east of Tonnastadir. The symbol can be found in the middle of a pair of trees that are right in the middle of the area.
Artifact #4 – Flying Paper – Tattoo Design: Midgard Schene (Front)
This Artifact is located in the Tamworth Fortress. Get inside the fortress by climbing up on its wall and then run towards the wooden scaffolding.
The paper is floating right below the scaffolding. From the scaffolding, jump down and land on the haystack below to offset the paper.
The paper will start flying, and you’ll have to catch it just like you did with the first one.
Artifact #5 – Cursed Symbol
This Artifact is located to the north of the Ragrnarsson War Camp. Look for the building that looks like it went up in flames.
You won’t be able to get inside this building. You’ll have to get up on the roof and shoot the symbol through the holes in the building.
Artifact #6 – Treasure Hoard Map
This Artifact is located on the western side of Venonis. Travel to this town and look for a bridge with a walkway beneath it. Hop down from the bridge onto the walkway and run through the hole below the road.
This will lead you to a hidden room. Smash the box and vase at the back of the room (on the left) and then crawl through the hole in the wall to find the map.
Artifact #7 – Roman Artifact
This Artifact is located on the eastern side of Venonis. There will be two towers here. Climb up the tower on the left using the ladder and scaffolding. When you reach the top, you’ll find the Artifact on a pillar.
Artifact #8 – Cursed Symbol
This Artifact is located to the west of the Alcestre Monastery. Look for an area covered with mud where a poisonous gas is looming.
Stand on top of the well that’s in the middle of this area and break the wooden cover by hitting it with your weapon.
When it breaks, you’ll fall down into a recess below and you’ll find the symbol.
Artifact #9 – Roman Artifact
This Artifact is located to the south-east of Ledecestre. Go inside the ruins at the marked location and look for a statue. When you find it, you’ll see a hole in the floor next to it.
Break the wooden cover on the hole and jump down into the area below. There will be another statue down there that will be holding the artifact.
Artifact #10 – Flying Paper – Skraelingi Emblem Scheme (Head)
This Artifact is located to the north of Ledecestre. Go up on the roof of the house that’s surrounded by scaffolding to find the paper. Since this is a flying paper, you’ll have to catch it once again.
Artifact #11 – Roman Artifact
This Artifact is also located to the north of Ledecestre. When you get to the ruins at the marked location, go up the ladder to the right and grab the vase from the platform above.
Throw the vase past the corner of the debris below to get rid of it. Then, jump down to find the Artifact in the debris.
Artifact #12 – Roman Artifact
This Artifact is located to the south of Tonnastadir. There will be a platform on top of the wrecked building.
Get up on top of the platform and then smash the vase in the corner to uncover the Artifact.
Artifact #13 – Roman Artifact
This Artifact is located to the south-west of Repton. Get up on top of the platform that’s on the left side of the broken building using the ladder and then jump to the next platform.
There will be a cart full of wood and rocks on this platform. The final Artifact of Ledecestrescire will be behind this cart.