The Ties That Bind Us is one of the many Stranger missions available to players in Red Dead Redemption 2. This walkthrough will help you complete The Ties that Bind Us RDR2 stranger mission expeditiously, aiding you with an in-depth guide!
A few things to note about this quest: in every other Stranger mission, the objective is marked on the map, however some of the objectives present in this particular quest do not appear on the map until you’re in close proximity; it can be quite the hassle traversing through the giant landscape hoping to find what you’re looking for, hence why this guide will be of great use.
Red Dead Redemption 2 The Ties That Bind Us Stranger Mission
This RDR2 stranger mission, which is comprised of 5 unique objectives, can be accepted once you’ve completed the ‘Joys of Civilization’ Quest in Chapter 4.
First of all, head to the Southern region of Rhodes, and from there you’ll begin the ‘Ties That Bind Us’ Stranger Quest.
Part 1
In Rhodes, make your way over to the train tracks, next to which there is a steep hill. Climb the hill and you’ll find a pair of men partaking in a brawl. The two go by the names ‘Mr. White’ and ‘Mr. Black’ – two escaped convicts who need your help.
They will ask you to aid them in their escape. Their bounty posters are posted all around the nearby town, and they can’t move around with the clothes they have on (obvious prisoner outfits); they need you to go into town and get rid of all the posters so that they can go in and buy civilian clothes.
There are a total of 5 posters you need to find for the first part of The Ties That Bind Us stranger mission, the following locations are where you’ll find them:
- Poster #1: On a notice board inside the Post Office.
- Poster #2: At the end of the Main Road there is a pole with a lantern hanging overhead.
- Poster #3: Next to the Sheriff’s Office, on the Sheriff’s Board.
- Poster #4: On the Main Road, there will be another pole with a lantern hanging overhead, but a man will be leaning on it. This person will prevent you from taking down the poster, so you’ll have to engage him in a fistfight and knock him out.
- Poster #5: On another pole located on the Main Road; it will be grabbed by a bounty hunter. You will have to follow the bounty hunter until he leaves town. Once you’re isolated, attack the bounty hunter and acquire the poster from him.
The following section is determined by what choice you make. Depending on the choice, the quest may end early or it may go on for a bit longer. The next two Parts (Parts 2 and 3) will be based on your decision.
Part 2 (If you choose to arrest them
If you don’t want to assist these two convicts any further, then go to where the Chain Gang is located. You’ll want to knock one of them out with a surprise attack and hogtie the other using your lasso. Call your trusty steed and carry one of them back to the sheriff’s office.
Return to the other and bring him back as well. Doing this will end the Quest and you’ll be rewarded with $80. However, if you wish to help the two out, then you’ll need to do what’s written in Part 3.
Part 3 (Helping the Convicts)
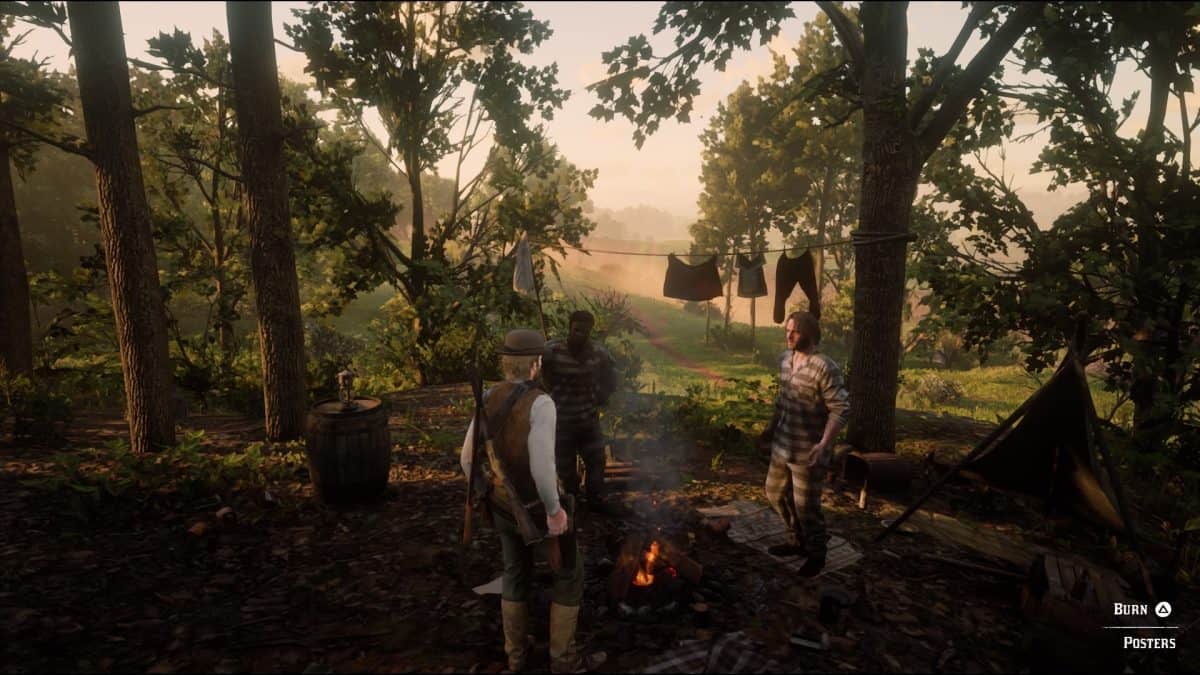
The second option of this RDR2 stranger mission entails you going to meet the two on the marked location, and promptly burning the wanted posters on the campfire.
The two will be quite grateful for your help and will want to meet you again. Once that’s done, you’ll be able to meet the two again once a few days have passed.
A marker will not appear on the map, so you’ll have no way of finding them without randomly scouring the lands for them. Here’s where you’ll find them: head north from Rhodes, specifically Dewberry Creek. Start exploring that area and the marker will appear once you’re in close proximity.
You’ll find that the two are gravely ill and are in desperate need of medical assistance which takes us to the next part of the stranger mission.
Part 4
If you already have some medicine (Health Cure) on you, then hand it over to them. If you don’t, you can either create some by the fire or head into a nearby town to procure some. Either way, you’ll need to heal the two.
The two will recuperate and will be grateful for your help. You’ll advise them to split up and go their own way, to minimize the chance of either of them getting caught; they’ll agree.
Part 5
Part 4 entails the actual end of the Quest, however, if you’re curious about the fate of these two, then you can actually check up on them.
Head to the northern part of Big Valley; once you’re in the area, an icon will appear on the map.
Go to the marked location and you’ll find a rustic treehouse. The two of them have made it their home, despite being advised to go their separate ways, and despite the fact that the two do nothing but bicker, they found it quite difficult to part ways.
That’s all there is to the ‘Ties That Bind Us’ Stranger Quest in Red Dead Redemption 2