The Darksiders 2 crucible is an arena challenge where you are assaulted by numerous enemies in four stages of 25 waves each. It is unlocked once you’ve defeated the Guardian at the end of the Forge Lands. We have prepared a detailed Darksiders 2 Crucible Strategy guide to help you win.
Darksiders 2 Crucible Strategy
You can access the Crucible from any realm. You receive special rewards for reaching milestones within the Crucible, for information about these items, read our guide.
For more help on Darksiders 2, read our Death Tombs, Stones Locations and Boss Strategy Guide – (You will definitely need this).
A Look At The Challenges of The Crucible
- Complete Stage I (Waves 1-25): Heartstone Talisman
- Complete Stage II (Waves 26-50): Abyssal Armor Boots
- Complete Stage III (Waves 51-75): Barbed Defilers
- Complete Stage IV (Waves 76-100): Abyssal Spaulders, Assassin Talisman
- Complete All 100 Waves in One Sitting: Aftermath
- Defeat Wicked Killington: Elemental Talisman
Note. There is a random loot chest that appears every five waves. You can open it and raid the contents, but it ends your current spree in the arena forcing you to restart.
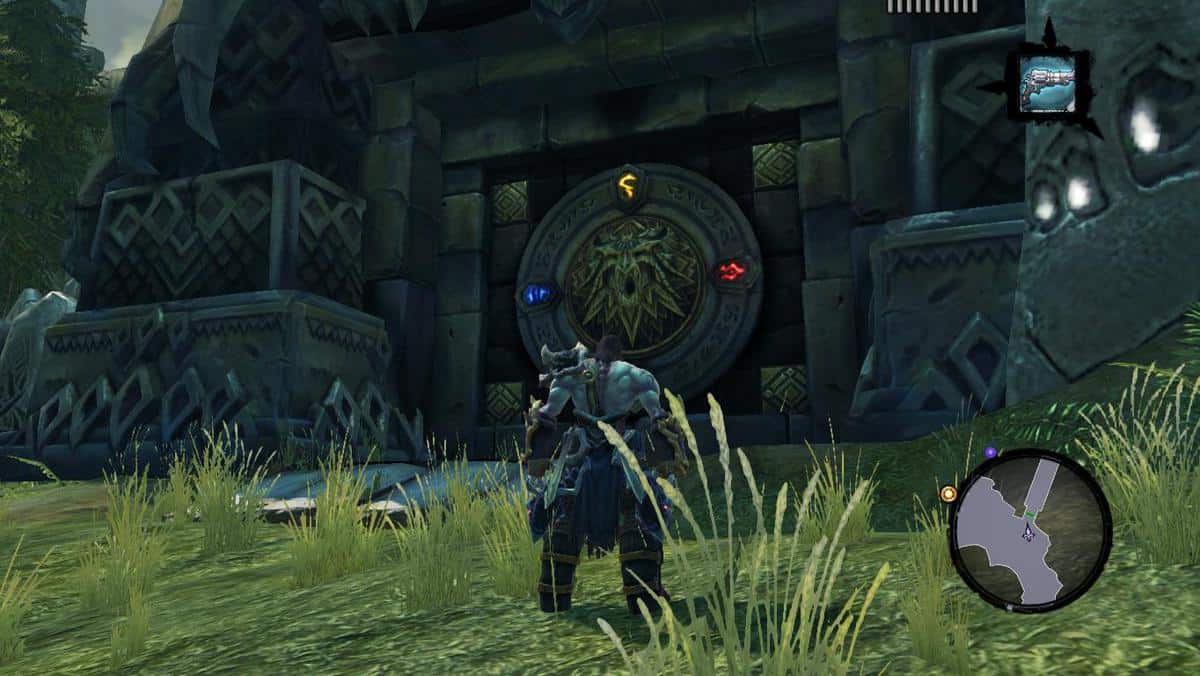
How To Unlock the Crucible
Once you’ve defeated the Guardian, you’ll soon get an anonymous Tome Message. This is the invitation to the Crucible. Inside is a tarot card which will allow you to start the first stage. You get additional Tarot Cards that unlock the next stages at certain milestones.
Tarot Cards
The Fool
It unlocks Waves 1-25 and you get it once you have defeated the Guardian.
The Emperor
It unlocks Waves 26-50 and you get it once you have defeated the Wailing Host.
Strength
It unlocks Waves 51-75 and you get it once you have defeated Samael.
The Devil
It unlocks Waves 76-100 and you get it after advancing your character to Level 25.
Death
It unlocks Wave 101 and you get it after you have cleared Waves 1-100 in a single visit to the Crucible.
The World
You get it after you have defeated Wicked Killington in Wave 101.
Recommended Crucible Builds
If you aim to clear the Crucible, you might have to Respec your character by visiting Vulgrim and create a new character that is capable enough to clear the challenges you will face in this combat arena. Developer, Vigil Games have recommended this build for the Crucible Mode in Darksiders 2 but it shouldn’t stop from experimenting yourself.
- Attributes to Boost: Strength and Critical Damage
- Secondary Weapon: Heavy Hammer or Axe
- Harbinger Skills (13): Teleport Slash (3), Immolation (1), Unending Fury (3), Inescapable (3), Rage of the Grave (3)
- Necromancer Skills (12): Exhume (3), Undying (3), Enervation (3), Death Allure (3)
Read our Skill Tree Builds Guide for more on different skill tree variations you can try in Darksiders 2.
How To Clear The Crucible
As you can see, completing the Crucible is quite a feat. Knowledge is power, so use the following table, along with the in-depth guidelines of fighting tough enemies:
Crucible: Stage I (Recommended Level: 15-20)
- Wave 1 – 3 Construct Warriors
- Wave 2 – 5 Construct Warriors
- Wave 3 – 3 Construct Adjuncts and 3 Construct Warriors
- Wave 4 – 1 Construct Champion and 2 Construct Adjuncts
- Wave 5 – 2 Construct Champions
- Wave 6 – 10 Stingers
- Wave 7 – 4 Prowlers
- Wave 8 – 9 Prowlers
- Wave 9 – 1 Stalkers and 10 Stingers
- Wave 10 – 2 Stalkers and 3 Prowlers
- Wave 11 – 5 Tainted Construct Adjunct
- Wave 12 – 1 Construct Sentinel and 3 Tainted Construct Warrior
- Wave 13 – 1 Tainted Construct Champion and 5 Tainted Construct Warriors
- Wave 14 – 1 Construct Sentinel and 2 Tainted Construct Champions
- Wave 15 – 1 Gharn and 4 Tainted Construct Warriors
- Wave 16 – 30 Stingers
- Wave 17 – 2 Savage Prowler and 4 Tainted Construct Adjuncts
- Wave 18 – 1 Savage Stalker and 5 Stingers
- Wave 19 – 1 Tainted Construct Champion and 1 Savage Stalker
- Wave 20 – 2 Savage Stalker and 1 Tainted Construct Champion
- Wave 21 – 3 Tainted Construct Champions
- Wave 22 – 1 Corrupted Rideable Construct
- Wave 23 – 1 Gorewood
- Wave 24 – 1 Gharn and 1 Ghorn
- Wave 25 – 1 Gorewood and 2 Tainted Construct Champion
From Wave 1 to 5, you’ll be tossed a bunch of Construct enemies of different types (ranging from the basic Construct Warrior to the Construct Champion) to fight against. This shouldn’t be too much of a problem if you have decent enough equipment and good specs.
In these waves try to focus on the lesser threat first. So, in ordinance of preference, you would go like Construct Warrior, then Construct Adjunct, and then Construct Champion in the last. Always focus the Champs in the last so you can pay your full attention. Watch out for the attacks of the Champions – dodge them, deal damage, and then dodge again.
From wave 6-10 you’ll encounter some Stingers, Stalkers and Prowlers. These are fairly easy to get rid of, especially the Stingers. In any relevant wave, you should always focus on the Stalkers first, and then the other enemy types. Note that Stalkers can’t be Deathgripped, so use it instead on the lesser enemies while you slash away at them.
Waves 11 to 15 bring in more Constructs – this time they’re some Tainted ones, and also Sentinels. Again, in any given wave with Champions, try to take out the other Construct enemies first while keeping in view the Construct Champions. Make sure you don’t get overwhelmed; otherwise the combined attacks of lesser enemies and more powerful enemies may finish you off in seconds.
When you encounter the Sentinel, shoot him first and then go to the Champions. For wave 15, Gharn can go kamikaze, so it’s best to force it into doing so; combine it with a witty dodge to save yourself, and then focus on the Tainted Construct.
Waves 18 can be a little difficult because of the overpowered Savage Stalker. Quickly dispatch the Stingers with your Redemption, and then focus on the Stalker as if it were a boss. In wave 20, once one of the Stalkers falls to around 50% health, the Construct Champ (tainted version) will spawn. Deal with the Champ first, and then resume your go with the Stalkers.
For wave 22, the Corrupted Custodian’s only real threatening attack is the whirlwind spin it does. He will turn around clockwise to initiate it, so immediately dodge and run away to avoid getting hurt badly. Once he’s done with that, the rest of its attacks are quite predictable. Be careful of Ghorn and Gharn in wave 24, and watch out for Ghorn’s lava attacks – dodge them when he channels the attack (by pounding the ground), and be very careful from Ghorn’s explosion, as it causes fire-damage afterwards.
Wave 25 is ridiculous because if you are grabbed by Gorewood’s roots while near a Champ, you are doomed. Make sure that DOES NOT happen. Otherwise, it seems to be a fairly easy fight.
Crucible: Stage II (Recommended Level: 20-25)
- Wave 26 – Skeleton 3
- Wave 27 – Skeletal Archer 5
- Wave 28 – Skeletal Warrior 4, Skeletal Archer 2
- Wave 29 – Skeletal Champion 1, Skeletal Warrior 5, Skeletal Champion 1
- Wave 30 – Skeleton Champion 3
- Wave 31 – Nightmare Prowler 5
- Wave 32 – Nightmare Stalker 2, Nightmare Prowler 4
- Wave 33 – Skeleton Champion 1, Nightmare Prowler 4
- Wave 34 – Skeleton Champion 2, Nightmare Stalker 1
- Wave 35 – Undead General 2
- Wave 36 – Wraith 5
- Wave 37 – Lich 1, Wraith 3
- Wave 38 – Scarab 20
- Wave 39 – Lich 3
- Wave 40 – Scarab 8, Scarab Hulk 2
- Wave 41 – Skeletal Champion 4
- Wave 42 – Abomination 1, Wraith 3
- Wave 43 – Abomination 3
- Wave 44 – Scarab Hulk 2
- Wave 45 – Bone Giant 1
- Wave 46 – Undead General 1, Skeletal Champion 2
- Wave 47 – Tormentor 1
- Wave 48 – Bone Giant 1, Skeletal Champion 2
- Wave 49 – Undead General 1, Tormentor 1
- Wave 50 – Tormentor 1, Bone Giant 1
This level is all about skeletons, nightmarish creatures, and a few other baddies like the Wraiths and Liches. The first few waves (26-30) are fairly easy, as you’ll fight Skeleton Warriors, Skeleton Archers, and Skeleton Champions. Make sure to take out the Archers first – this should be a thumb rule for any wave that has them.
This is because the Archers deal a good amount of damage, tend to have a good aim, and they always stay far away. Finish them off, and then concentrate on the melee foes.
From wave 31-35 you’ll come across some Nightmare Prowlers. Deathgrip works great against prowlers, and these variants are no exception. The Nightmare Stalkers on the other hand are something different. These guys do a good amount of damage, and their size can be overwhelming when combined with Skeleton Champions, as is the case with wave 34. Equipment that can freeze your foes is ultra useful here.
On wave 35, you’ll come across two Undead Guardians. These shouldn’t be a problem by themselves, because they are sort of slow and their attacks can be dodged easily.
Wave 36-40 introduces you to the more grotesque enemies, such as the Lich, Tormentors, Scarabs, and their Hulk variants. You should try and focus on Liches first in whichever wave they are encountered. Wave 38 might seem intimidating with 20 Scarabs, but these guys can be shot with Redemption easily.
The real thing to look out for is wave 40. Kill the Scarabs first, and then go after the Scarab Hulks. Avoid their jumps and make sure you don’t get caught by another Scarab Hulk when one blocks your attacks. Just be patient, dodge, attack, and you should be able to get rid of them.
From wave 41-45, you’ll face some more Scarab Hulks, Skeletons, and also Abominations. Be careful of the AoE damage of the Abominations, as that can suck up your health real fast. However, getting close will automatically put you in their AoE radius, so you’ll have to slice your way through while taking constant damage. Thus, it’s best to fight the rest and then focus on the Abominations.
Wave 45 is a joke wave with the solo Bone Giant. The beast shouldn’t be much of an issue at all by itself, so just slice away at it. Waves 46-50 are also ridiculously easy – you’ve faced much meaner stuff than this before, so this should really be a cakewalk.
Crucible: Stage III (Recommended Level: 25-30)
- Wave 51 – Corrupted Angel 3
- Wave 52 – Ayfid 2
- Wave 53 – Corrupted Angel 3, Ayfid 1
- Wave 54 – Corrupted Champion 1, Corrupted Angel 4
- Wave 55 – Corrupted Champion 3
- Wave 56 – Corrupted Construct Warrior 8
- Wave 57 – Sychophant 2, Corrupted Construct Adjunct 3
- Wave 58 – Corrupted Champion 2, Corrupted Angel 4
- Wave 59 – Corrupted Angel 6, Corrupted Angel 3
- Wave 60 – Sychophant 3
- Wave 61 – Undead Scarab 16
- Wave 62 – Undead Prowler 4, Undead Scarab 5
- Wave 63 – Undead Scarab Hulk 1, Nightmare Prowler 3
- Wave 64 – Undead Stalker 3
- Wave 65 – Undead Scarab Hulk 2
- Wave 66 – Legion Soldier 3
- Wave 67 – Legion Champion 1, Legion Soldier 1
- Wave 68 – Legion Soldier 4
- Wave 69 – Maelstrom 1, Legion Soldier 2
- Wave 70 – Maelstrom 1, Legion Champion 1, Legion Soldier 2
- Wave 71 – Ice Skeleton 12
- Wave 72 – Nightmare Prowler 3, Ice Skeleton 5
- Wave 73 – Maelstrom 1, Nightmare Prowler 3
- Wave 74 – Maelstrom 1, Nightmare Stalker 2
- Wave 75 – Argul / The Deposed King 1
Level 4 starts off with some simple waves, but gets more and more difficult, and includes wave 70, which is one of the toughest waves in the Crucible.
Waves 51-55 are quite simple, with Corrupted Angels and a few Ayfid. You’ll fight an Ayfid and a few Corrupted Angels in wave 53, in which you should focus on slaying the Ayfid first. The rest of the waves in this set of 5 are really simple.
Wave 56-60 is also quite simple, though you should be wary of the Sycophants. They generally have low health, but what makes them dangerous is the shock they release after dying, which can be very damaging. Be careful about this especially in wave 57, as after two Sycophants you will also fight three Corrupted Construct Adjunct.
In wave 58, make sure you kill the Angels first, and then go over to the Corrupted Champion. Make sure those Champs don’t deal out too much damage before the Angels fall. Wave 59 is sort of harsh because of the sheer number of the enemies. Just rely on your agility and reflexes and take them out.
From wave 61 to 65 you’ll be revisited by enhanced version of older enemies; try to keep the formula the same as before. Things don’t get hefty until wave 66. Wave 66 gives you 3 Legion Soldiers to fight against. These guys can do a hell lot of damage, so make sure you are avoiding attacks and dealing damage.
Wave 67 is sort of similar, except that it has a Legion Champion, which does even more damage. Take out the Solider first, and then focus on the Champ. Go full-out offensive against the Champ, and when it blocks, use Harvest. Similarly, wave 68 gives you 5 Legion Soldiers to fight against.
Wave 69 and 70 are quite tough. In wave 69, you’ll face the Maelstrom, which is a very deadly enemy. Focus on this guy first before the Soldiers, and make sure you do not get hit by its Fire Orbs ability. This enemy is tough, but what is tougher is wave 70.
Wave 70 is super-difficult because of the combination of the Legion Champion and the Maelstrom, two of the strongest enemies you have faced so far. The Soldier seems like a child in front of these two. The best bet against these guys is the Reaper form.
If you don’t have Reaper energy, then you should look to avoid the Champion’s attacks as much as you can, and destroy the Maelstrom before his Fire ability makes you go nuts. Be patient, be strong, and hopefully you will manage to conquer both of these tough foes.
After that tough wave, you’ll be greeted by some pretty average enemies in wave 71 and 72. Wave 72 can become a little difficult if you aren’t careful about getting frozen. The Nightmare Prowlers do some good bit of damage, so if you are caught frozen you can really have a bad time. Make sure that doesn’t happen.
Wave 73 is another difficult wave because it combines the annoying Maelstrom and the Night Prowlers. If you are frozen, then you can kiss yourself goodbye because the Maelstrom will destroy you in a matter of seconds. Don’t let that happen.
This is by many considered the hardest wave of the Crucible because of this deadly enemy combination. Focus on the Prowlers, and make sure you are not getting hit. Be very speedy and very precise about your movements and attacks, and when (and if) the Prowlers go down, go all out against the Maelstrom.
Wave 74 is not as difficult as 73 or even 70, but it is still quite tough. The Nightmare Stalkers are fairly annoying with the Maelstrom. Focus on killing the Stalkers first, and then dishing damage to the Maelstrom.
Wave 75 has none other than the Deposed King himself. You have to be witty at reading his move patterns, and act accordingly. Below 50% health, he starts doing a random whirlwind move. Be VERY careful of that one. If you are good at dodging (which you should be since you have survived some super tough waves), this guy isn’t all too difficult.
Crucible: Stage IV (Recommended Level: 30+)
- Wave 76 – Skeleton Warrior 3
- Wave 77 – Undead Prowler 5, Skeletal Warrior 5
- Wave 78 – Skeletal Champion 5
- Wave 79 – Skeletal Champion 3, Undead Prowler 4
- Wave 80 – Undead Stalker 3, Skeletal Archer 5
- Wave 81 – Wraith 4
- Wave 82 – Abomination 1, Wraith 3
- Wave 83 – Sychophant 1, Skeletal Champion 3
- Wave 84 – Sychophant 2, Abomination 1
- Wave 85 – Tormentor 3
- Wave 86 – Corrupted Champion 1, Corrupted Angel 3
- Wave 87 – Fleshburster 6
- Wave 88 – Corrupted Champion 2
- Wave 89 – Fleshburster 12
- Wave 90 – Ayfid 3
- Wave 91 – Corrupted Angel 8
- Wave 92 – Maelstrom 2
- Wave 93 – Legion Champion 1, Legion Soldier 3
- Wave 94 – Maelstrom 1, Corrupted Champion 1
- Wave 95 – Legion Champion 1, Maelstrom 1
- Wave 96 – Corrupted Custodian 1
- Wave 97 – Gorewood 1
- Wave 98 – Bone Giant 2
- Wave 99 – Suffering 1
- Wave 100 – Absalom / Avatar of Chaos 1
Now, we’re at the last final set of waves.
Wave 76 and 77 give you some relaxation, throwing in a few average Skeletal Warriors and Prowlers. Things start to pick up by level 80, with the Skeletal Archers and the Skeletal Stalkers. The Stalkers do a hell lot of damage, so be really careful about them while you are eliminating the Archers.
You’ll then be revisited by some older enemies in the next few waves, and things are fairly simple till wave 95, which throws in that nasty Maelstrom + Legion Champion combo again. You don’t have any Solider to worry about here, but the combination of the two is still deadly as before, and you’ll have to be super-careful to not absorb damage from both simultaneously.
Afterwards, you’ll be against some pretty slow enemies in some waves, such as those old Bone Giants and what-not.
But wave 99 will pit you against the Suffering. That is one mean thing there. It’s melee combo will be sending you off to the bottomless pits of hell, so make sure you dodge it at ALL costs. Only attack him after his lunge, but be VERY conservative and careful. This battle can ensue for quite a while because of the patience required. Play safe, and hopefully you will defeat him.
Once you are done with him, prepare to meet The Avatar of Chaos in wave 100. Every attack has the potential to kill you immediately or at least send you to the brink of death, and because of that, you have to be crazy-careful.
First off, make sure you avoid sweeping attacks initially. Wait for him to lunge before doing any damage. Don’t be too greedy with how much health you chop off during your every attempt. When he is down to 80% health, he will start throwing axes and summoning corruption vines. Avoid them with whatever you’ve got. Teleport Slash comes in really handy here. Wait till after the vines and the lunge to do damage.
When he reaches around half health, he will start using all of his attacks, including the most deadly one: Impale. On higher difficulties, this has the potential to kill you immediately, so AVOID IT AT ALL COSTS. Breathe, be patient, dodge like crazy, chip of his health whenever you can (but don’t over-extend your onslaught) and you might just make it.
Wave 101
If you had the patience and the skills to complete all 100 waves in one sitting, you will have the chance to go at the 101th wave, which has the Wicked K.
Mr. Wicked K seems to be immune to melee damage at times – it seems to happen completely randomly. Along with that, he has some ridiculous abilities that can do insane amounts of damage. The downside about this battle is not its difficulty, but the fact that it is stupidly boring.
He can kill you in one or two hits, but if you are looking to survive, the only way that seems to work is using Redemption from a distance and using Teleport Slash and Harvest over and over. You could also consider using Reaper Mode if your Reaper bar is filled, but otherwise this is a terribly tedious and difficult battle, especially on higher difficulties. Good luck!