We have curated this Warhammer: Vermintide 2 Sienna Battle Wizard Guide in which we will guide you on the Battle Wizard build for Sienna.
You can select a hero and then choose any one of the classes in Vermintide 2, which will define their abilities. This works for all heroes and choosing the class will define what sort of abilities you get for you build.
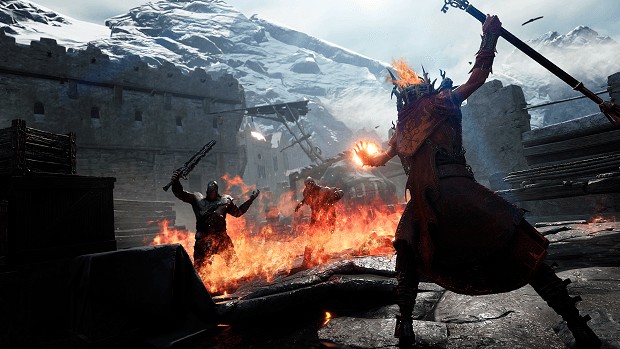
Warhammer: Vermintide 2 Sienna Battle Wizard
Overall, Sienna is one of the most balanced heroes in all her forms. Here, we will be focusing on her Battle Wizard form.
We will tell you which abilities she will be using in her Battle Wizard form and which weapons will work perfectly utilizing her abilities. We have also detailed her passive and career abilities and skills so you can easily understand both abilities.
Sienna has a huge lust for flame and she uses a touch of military discipline in order to tame her lust. She only unleashes a powerful area of effect spells in the battleground, turning incoming hordes into burning ashes.
Here are the main abilities of Sienna:
Abilities
Fire Walk
Sienna will teleport forward leaving a huge blanket of fire in her wake that burns anything within its fold for 6 seconds.
Tranquillity
She will automatically ventilate Overcharge if she doesn’t cast any spells for 6 seconds. It is described in more detail in the following paragraphs.
Reckless Haste
It is a passive ability in which spell charge speed is increased up to 30% by Overcharge.
Pyromantic Surge
A passive ability, again, which increases ranged damage by 10%.
Weapons
Sienna has a huge set of mesmerizing melee and ranged weapons and you should take a look at all the available weapons for her and their respective damage abilities and stats:
| Weapon | Type | Stamina | Unlock Level |
| Sword | Melee | 6 | 1 |
| Mace | Melee | 6 | 2 |
| Fire Sword | Melee | 6 | 12 |
| Dagger | Melee | 6 | 5 |
| Crowbill | Melee | 3 | By Achievement |
| Flaming Flail | Melee | 3 | By Achievement |
| Fireball Staff | Ranged | – | 1 |
| Flamestorm Staff | Ranged | 3 | 10 |
| Bolt Staff | Ranged | – | 7 |
| Beam Staff | Ranged | – | 8 |
| Conflagration Staff | Ranged | – | 4 |
Sienna Talents
Now before we move on towards the best build for Sienna, let us take a look at all her talents for each set of levels:
Level 5
Cofound: Gains health by staggering an enemy with a melee.
Spark Thief: Killing blow of melee grants health
Flame Fettled: Healing yourself with First Aid also heals 20% of nearby allies’ health.
Level 10
Volcanic Force: A fully charged spell gets 50% more powerful.
Famished Flames: Burning damage is increased by 150%.
Lingering Flames: Burning damage lasts until the enemy dies.
Level 15
Bulwark: Staggered enemies take 10% more damage.
Smiter: First enemy hit counts as stagger.
Enhanced Power: Increases total power level by 7.5%.
Level 20
Unusually Calm: Tranquillity cooldown reduces to 3 seconds.
Rechannel: Ranged charge time is reduced by 40% while Tranquillity is active.
Centered: Venting effect of Tranquillity is increased by 100%.
Level 25
Soot Shield: Igniting an enemy reduced damage taken by 10% for 5 seconds.
Fires from Ash: Killing a burning enemy reduced Fire cooldown by 3%.
Immersive Immolation: Hitting 4 enemies in one attack increases attack speed by 20%.
Level 30
Volan’s Quickening: Reduced Fire walk cooldown by 30%.
Kaboom: Increases radius and damage of Fire Walk.
Burnout: Fire Walk can be reactivated within 10 seconds
Overcharge
Overcharge works pretty well for her. It is a good option to use overcharge with her abilities.
After you have upgraded her overcharge to at least second form, it starts to get very good and once you have reached the final form, it is the best. In the Battle Wizard form, overcharge increases Sienna’s spell charge speed and her ranged damage.
This works very well in later forms with her ranged weapons as you can perform more spells due to the increase in spell charge speed and her ranged damage.
Weapons such as staffs are super useful when overcharge is active as the damage dealt is increased. It takes eight seconds for the overcharge to ventilate completely.
During the super overcharge mode, if you look towards the lower left side of the screen, you will see that a meter is loading.
Once it finishes, the overcharge will start to decrease. The speed is pretty high for the overcharge depletion so you must use the ability again if you want to keep it going before the bar depletes completely.
Tranquility
Tranquility is her passive ability and it will boost her ranged attack damage and spell casting speed if you manage to avoid getting any sorts of damage and casting a spell for eight seconds.
Maintain this for eight seconds and your overcharge will be automatically be full. This however, quickly fills the overcharge meter and you can reach the final overcharge level easily with this.
This ability also has an overcharge during which you will be able to cast spells quickly and her ranged attacks will also increase.
This will work perfectly with her weapon selection for this build as well which we will be discussing in this guide later. The main thing here is watching for the meter which when completes, the overcharge will start to deplete. Keep attacking to keep it high.
Fire Walk
Fire Walk is Sienna’s Career skill, which allows her to blink at a chosen location at the front and leaving a fire trail in her path, which damages anything in that path.
This works well specially for crowd control. If you are about to get surrounded by many enemies and want a quick way out with dealing damage to anyone trying to follow you, this skill is the answer.
Once selected, it allows you to choose any location around you. It has a decent range so you can cover quite some distances while using this skill. Press F to choose a location and then blink quickly to the location selected to jump there leaving a trail of fire behind you.
However, if there is any sort of obstacle in your way, it will block the path of the fire behind you.
You will still blink to the chosen location but the fire trail will stop once it touches the obstacle. Therefore, you must keep your surroundings in check before blinking to a location as an obstacle may hinder the fire. You can also blink through all of the enemies.
Best Weapons
Depending on your playstyle, you can choose from a number of weapons to use in your build. For instance, she comes with a mace called Battle Scepter as the main weapon.
Personally, we do not like the weapon as much because it limits her weapon attack and it is slow as well.
However, depending on your own preferences, you can choose from a number of weapons such as swords, maces and staffs. Below we have detailed the best weapons to use for this build.
Sword
The best sword to use with this build is the Regular Wizard Longsword. Although the flame swords look very appealing to use with her, its power attacks are very weak.
The Regular Wizard Longsword works very well in taking down tons of enemies that are close to you. The attacks are quick and they deal quite a decent amount of damage to everyone who comes in the range of your power attacks.
Apart from the power attacks, she also has regular and overhead attacks. Regular attacks are even faster than the power attacks and are good against taking down smaller enemies quickly.
The overhead attack deals massive damage at the cost of splash damage as it deals damage to only the enemy right in front of you unlike other attacks, which have a swish character and will damage any unit near you.
Overhead are also effective against armored units as it helps breaking their armor quickly. In the end, it all depends on your personal preferences. You might be more comfortable using the flame sword and its fire damage but when comes to crowd control and dealing some serious damage, nothing compares to the Regular Wizard Longsword.
Beam Staff
Coming to ranged weapons, Beam Staff is the one you want for this build. It has decent damage and a good knock back affect.
Any enemy that is hit by the Beam Staff will be knocked back so it great for pushing enemies back from you while dealing decent damage at the same time. The only downside to using the Beam Staff is that it very slowly builds up the Overcharge meter.
Using right click, you can use the beam, which continuously attacks an enemy and builds up the Overcharge meter. Keep this in mind that it will take a long time to even reach the first level of Overcharge.
It does insane amount of damage once the overcharge is complete. If you click the left mouse button, you will perform a quick shotgun-like attack that deals good damage but has a very small range.
If you are surrounded by enemies or find yourself in a tight spot, this attack will help you clear out enemies around you quickly to create an escape route. A single left click attack will stagger and make the enemies fall back in front of you.
Beam Staff also features pinpoint firing accuracy. It has no recoil or spread fire. It will focus its fire on exactly the same spot where you are pointing it.
It also has a very long range so you pick off enemies one by one even when they are very far from you.
This comes handy when an ally if far from you and is attacked by something and you cannot reach them in time, you can simply use the Beam Staff to damage them without the need of getting close to them. You can also get headshots with it very easily.
This concludes our Warhammer: Vermintide 2 Sienna Battle Wizard Guide. If you want to add anything to this guide, feel free to use the comments section below!