One of the most fun collectibles to find in Tiny Tina’s Wonderlands is the Lucky Dice. These 12-sided golden dice help increase your loot luck in the game.
The more Lucky Dice you find, the higher your chances of finding high-quality loot during exploration. And on top of that, each Lucky Dice will also give you some valuable loot when you find it.
So to help you out with finding Lucky Dice, this guide will show you the exact location of all 21 Lucky Dice in the Wargtooth Shallows zone in Tiny Tina’s Wonderlands.
Where To Find Wargtooth Shallows Lucky Dice In Tiny Tina’s Wonderlands
There are 21 Lucky Dice hidden around the different areas in Wargtooth Shallows. Below, we’ve listed the location of each one.
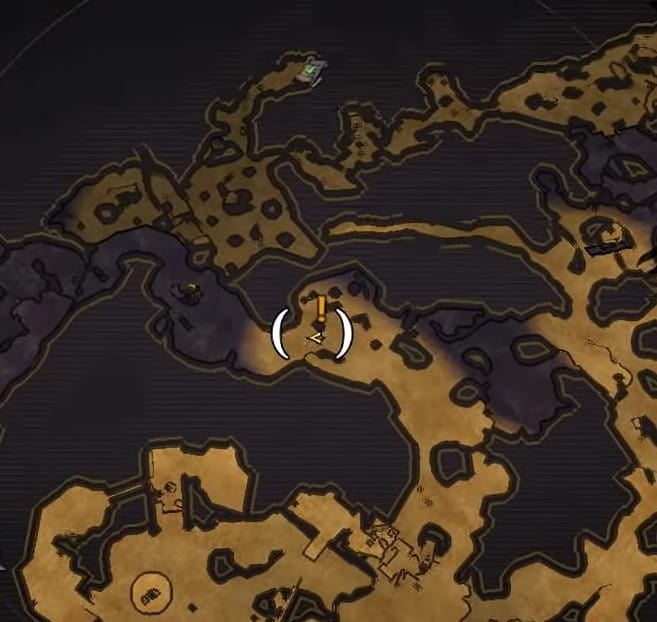
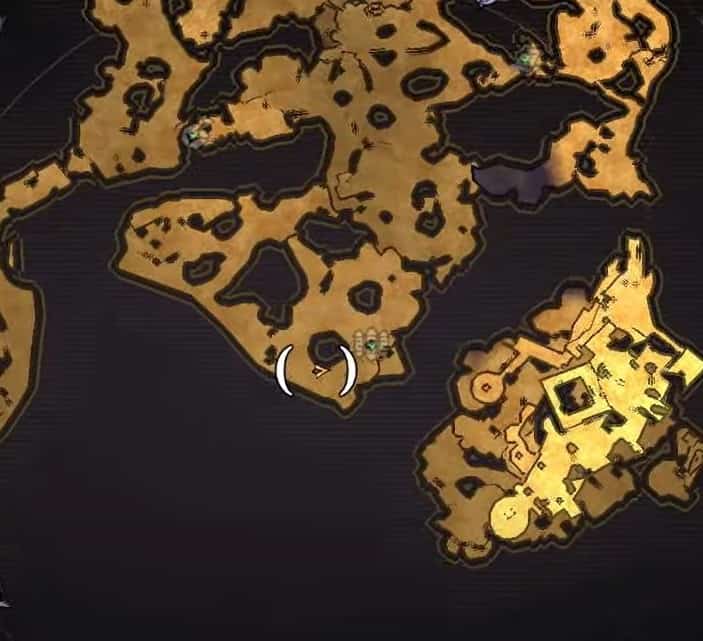
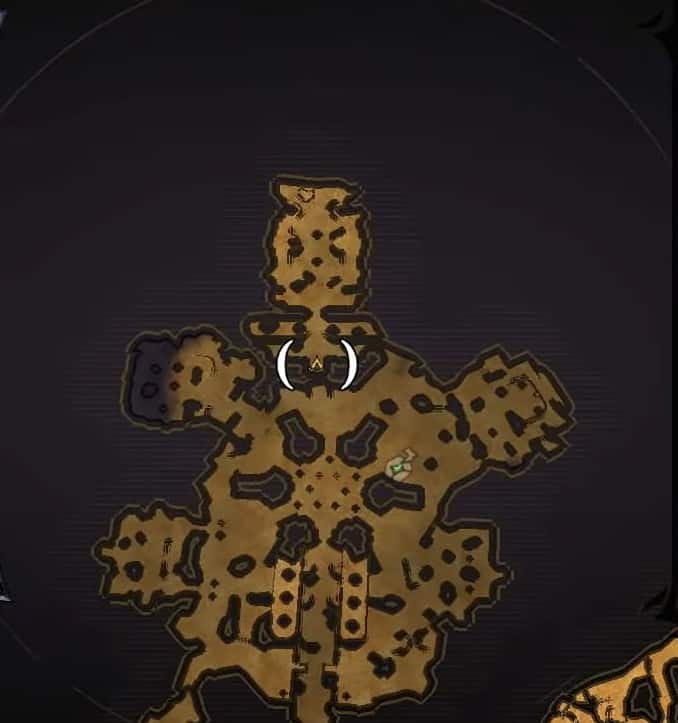
Lucky Dice #1
This Lucky Dice is located in the Recent Beach area. Head over to the location shown in the map image below and drop down into the ravine below you to find the Lucky Dice.
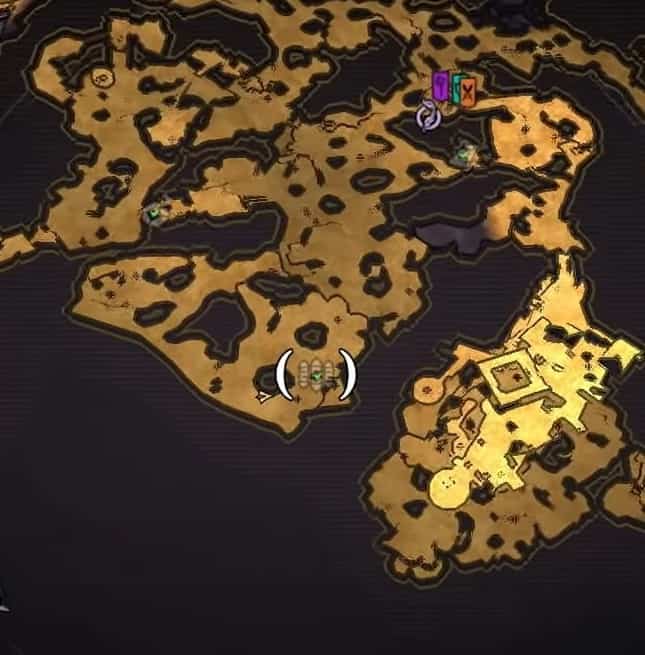
Lucky Dice #2
This Lucky Dice is located in the Recent Beach area. Head over to the location shown in the map image below and climb the wooden structure to find the Lucky Dice.
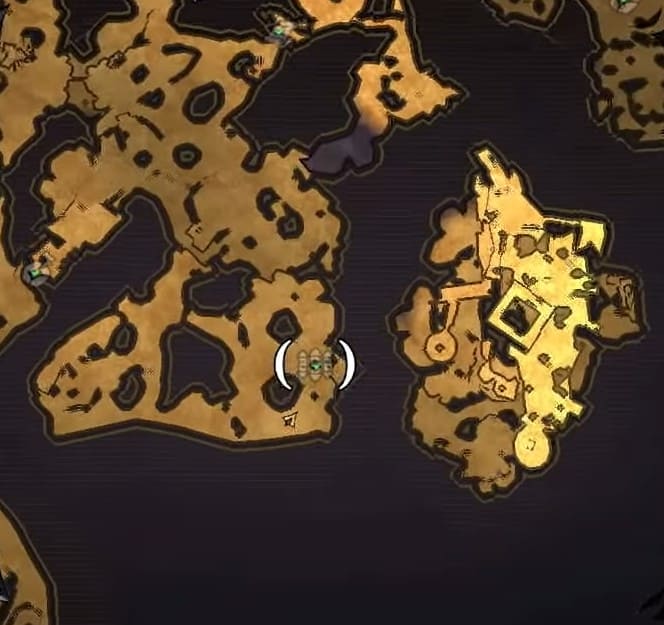
Lucky Dice #3
This Lucky Dice is located in the Recent Beach area. First, go to the location shown in the map image below. Once there, climb the pillar in the middle of this underground area to find the Lucky Dice.
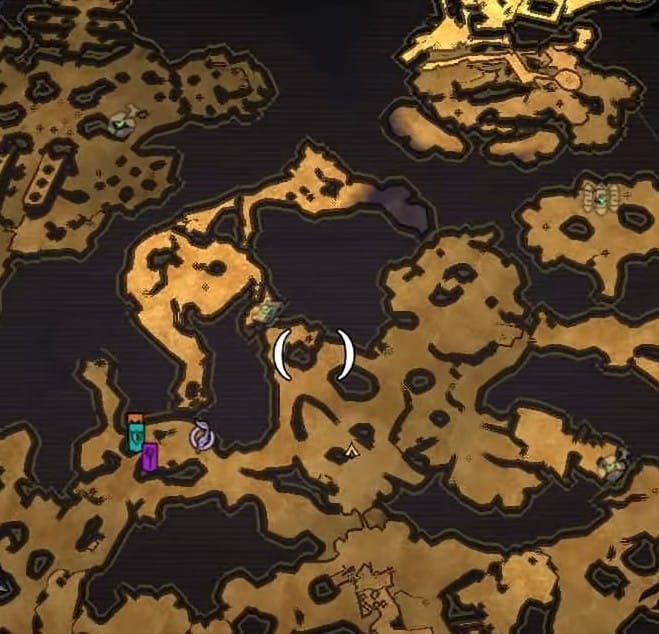
Lucky Dice #4
This Lucky Dice is located in the Dumpstat Trench area. Once you’re at the area shown in the map image below, run forward and start heading up the ramp.
Keep going all the way up until you reach the wrecked ship. Once you’re inside the ship, fire the cannon at the structure up ahead, and it’ll reveal a hidden area where you can find the Lucky Dice.
Lucky Dice #5
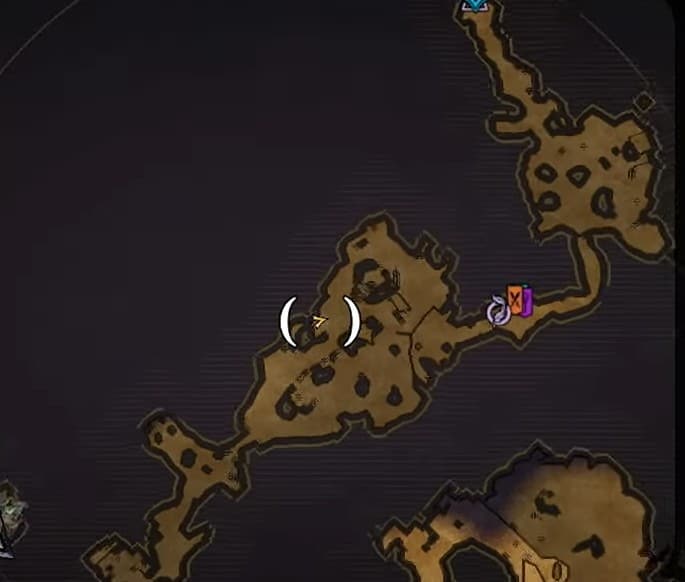
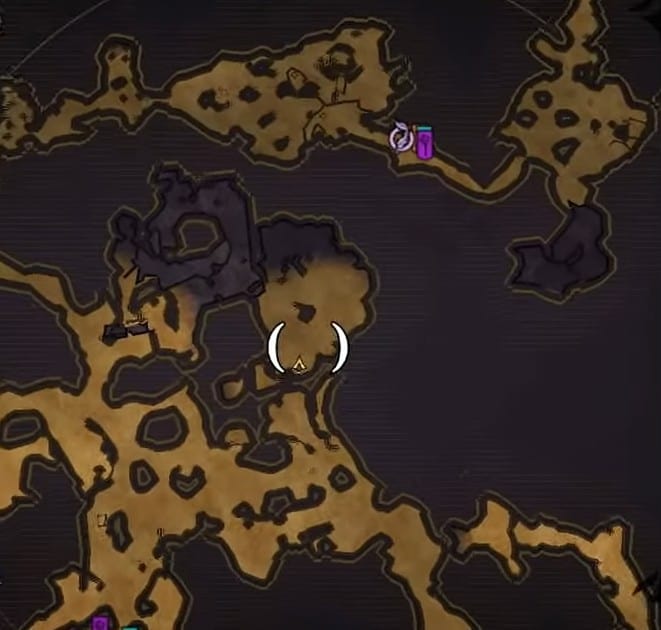
This Lucky dice is located near the center of Wargtooth Shallows. Head to the area shown in the map image below and go through the cave opening behind the purple flame. Break the stone wall in front of you to find the fifth Lucky Dice.
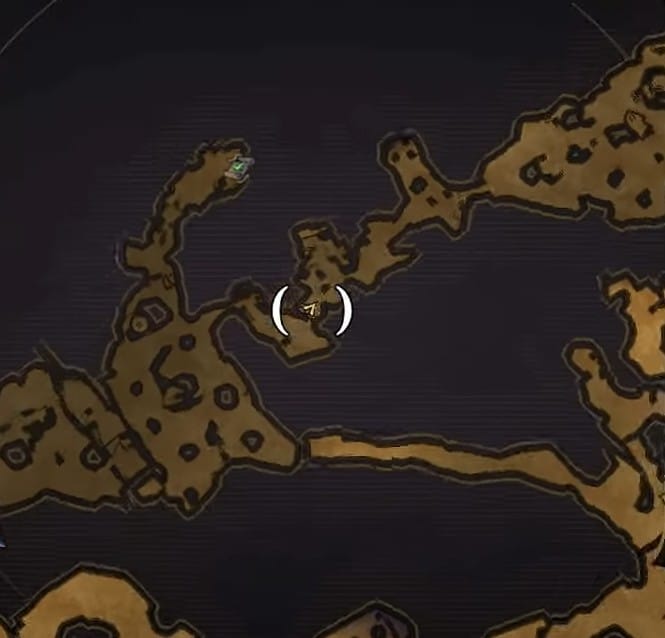
Lucky Dice #6
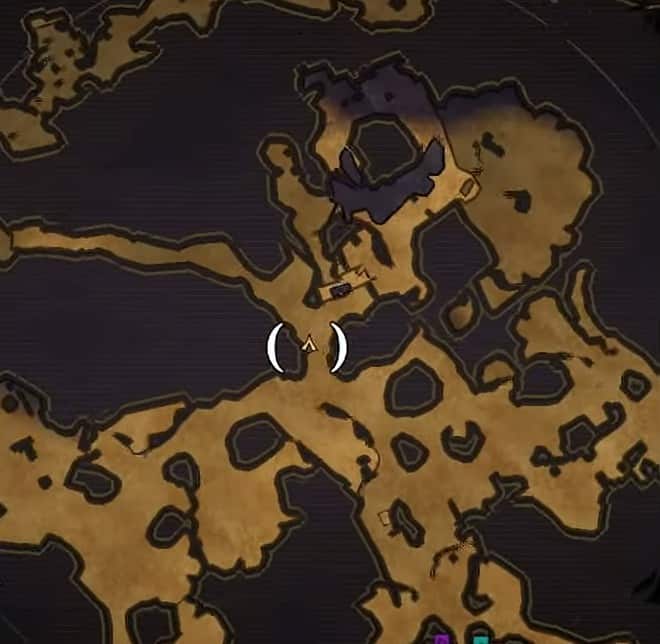
This Lucky Dice is located near the Rune Switch event. First, go to the location shown in the map image below and then go towards the large cave opening to the northeast to find it.
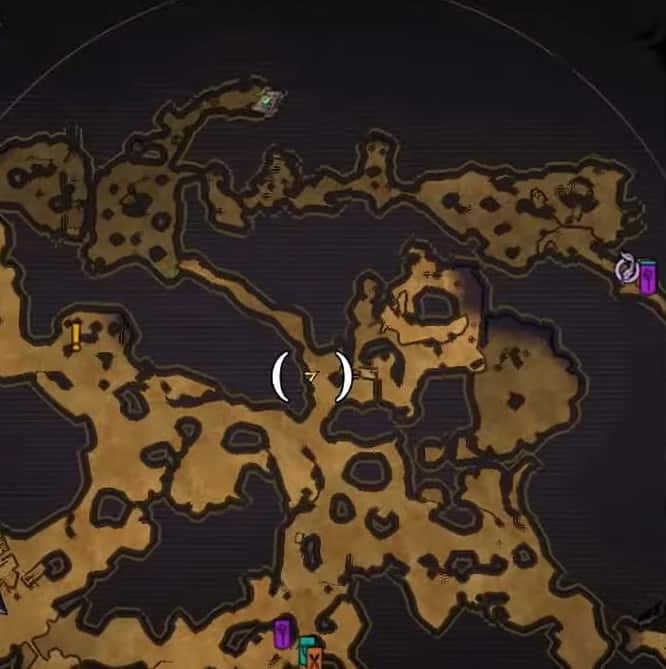
Lucky Dice #7
Head to the area shown in the map image below and use the Launchpad to the south to get to the area ahead. From there, run forward while hugging the wall to the left and go up the stairs.
Turn left after going up the stairs and get up on top of the platform. Drop down from the ramp ahead to find the Lucky Dice.

Lucky Dice #8
After finding Lucky Dice #7, go back up to the ramp you dropped from and then continue heading up.
Use the Launchpad to launch yourself to the platform above and then follow the path to the east. Next, go up the ladder and go into the area to the right.
You’ll see an anchor hanging from above in the middle of this area. Shoot the anchor, and it’ll drop down, breaking open the floor. The Lucky Dice will be in the area below.
Lucky Dice #9
In the same area where you found Lucky Dice #8, go up to the house to the west, and you’ll find the Lucky Dice sitting on the porch of the house.
Lucky Dice #10
After finding Lucky Dice #9, go back to the ladder you climbed and use the Launchpad next to it. It will take you to Splish Splash Path. Follow the water until you see the chest. Turn left from there to find the Lucky Dice.
Lucky Dice #11
Head to the area shown in the map image below and then run towards the wrecked ship to the south.
Go up the ramp adjacent to the ship to find this Lucky Dice, accompanied by a lazy skeleton.
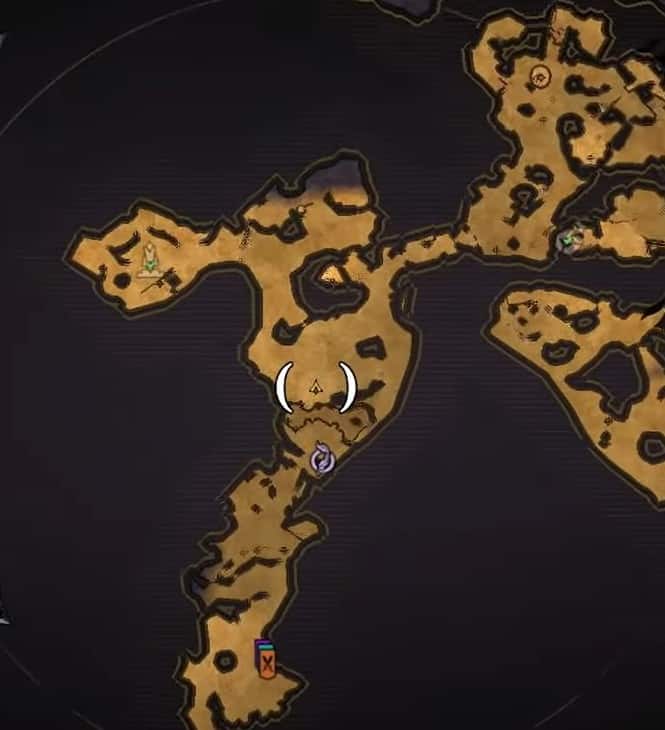
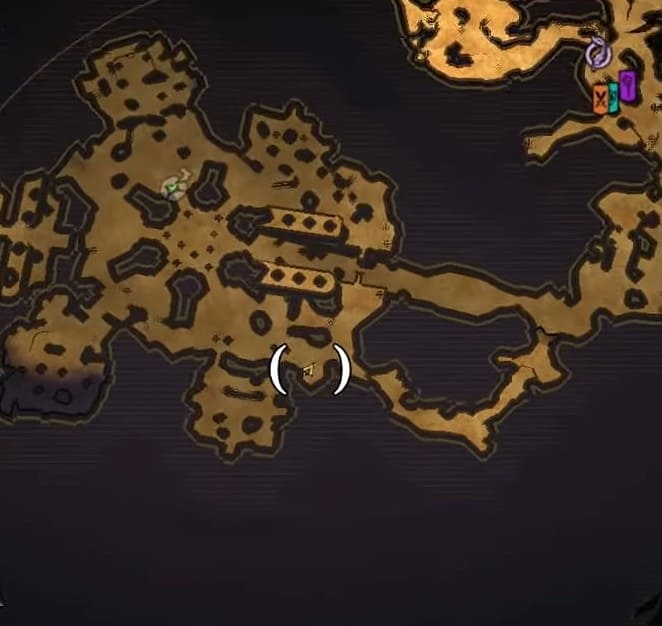
Lucky Dice #12
Make your way over to the area marked in the map image below, and the Lucky Dice will be right in front of you. Be careful, though, as the area is filled with many enemies.
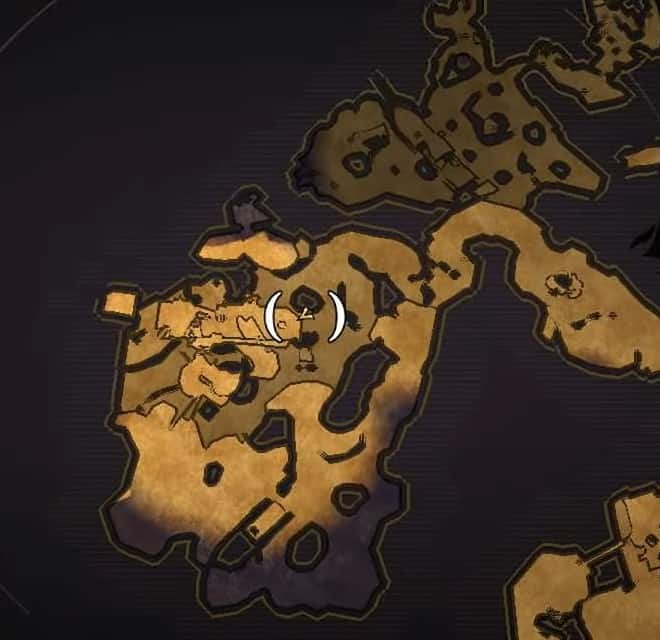
Lucky Dice #13
Head to the area shown in the map image below and then use the Launchpad to the east to launch yourself up to the platform above. Next, follow the path to the left to find the Lucky Dice.
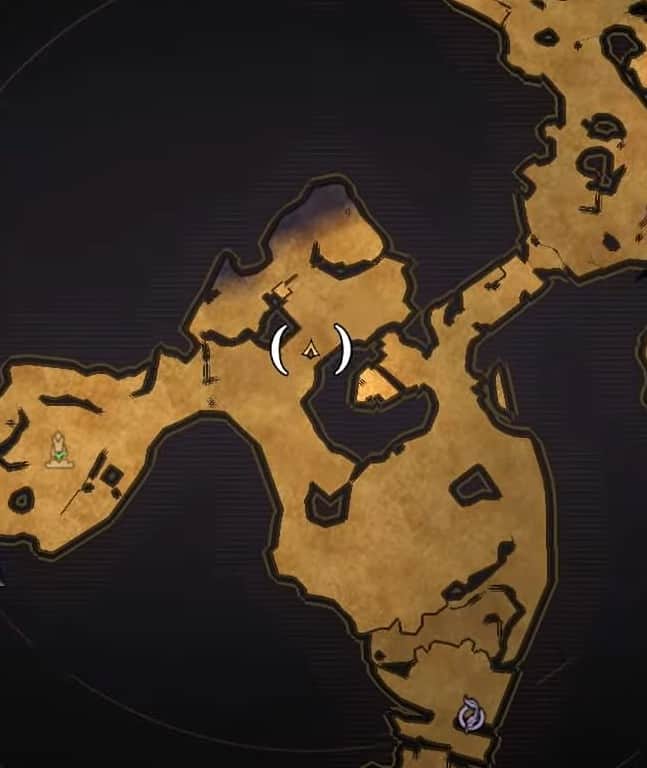
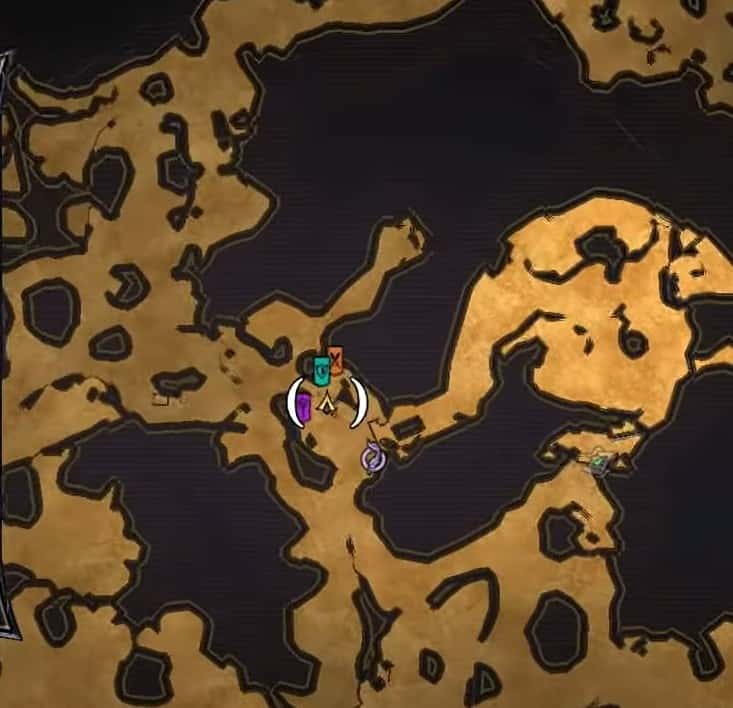
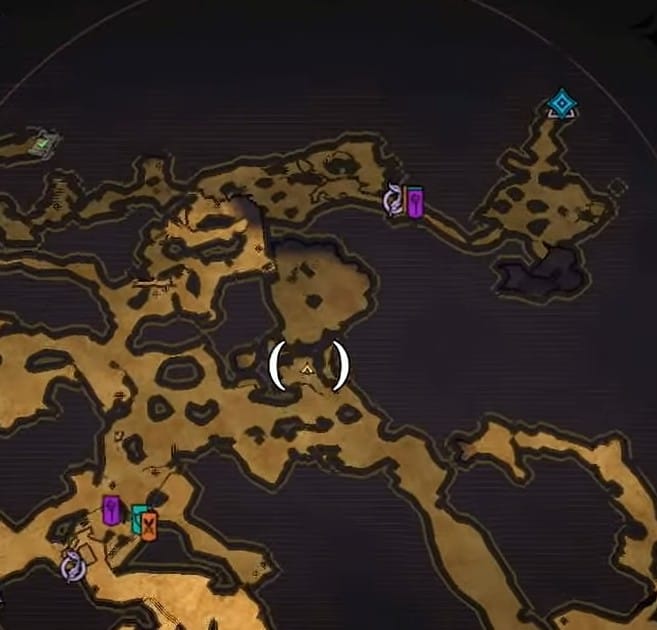
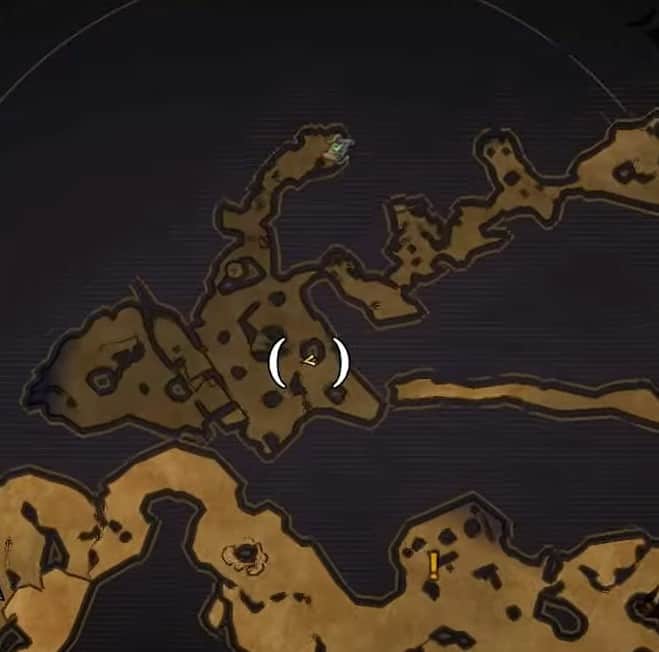
Lucky Dice #14
Head to the area shown in the map image below and then look towards the northwest to find the Lucky Dice.
Lucky Dice #15
To find this Lucky Dice, you’ll need to complete the “Twenty Thousand Years Under the Sea.” Sidequest. Once you’ve done that, a new section of the map will be unlocked where you will find this Lucky Dice.
Head over to the area shown in the map image below and go up the structure to find this Lucky Dice. It’ll be between two of the pillars of the structure.
Lucky Dice #16
Head to the location shown in the map image below and go through the doorway ahead. The Lucky Dice will be floating above you, so you’ll need to do some parkour to reach it.
Get on top of the coral on the backside of the room and use it as a platform to get on top of the fallen pillar. You’ll then be able to reach the Lucky Dice.
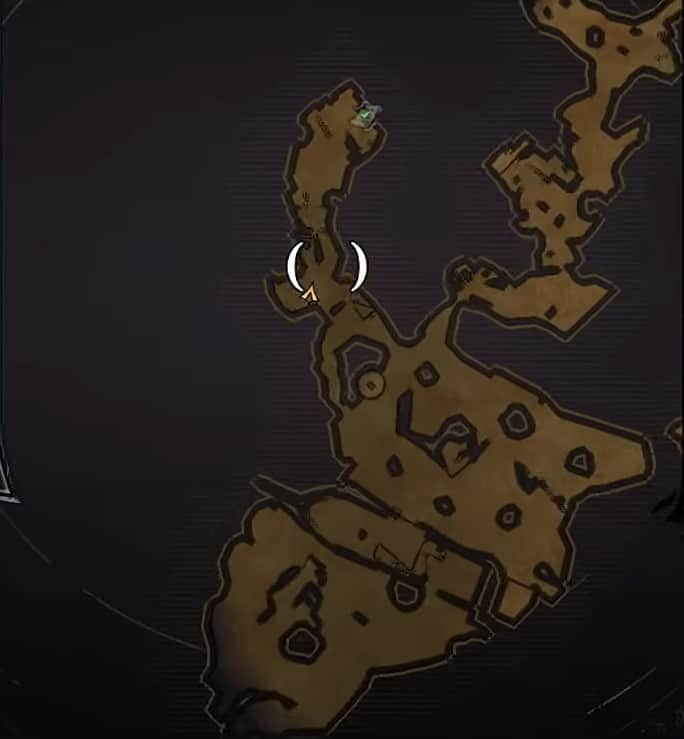
Lucky Dice #17
Make your way over to the location shown in the map image below and go through the cave opening to the north. Keep heading north until you drop down into the Wreck of the Marley Maiden.
After dropping down, turn around and go through the waterfall to find the Lucky Dice.
Lucky Dice #18
Go to the location shown in the map image below and use the Launchpad to get on top of the pirate ship. Drop down to its side and then look behind it to find the Lucky Dice.
Lucky Dice #19
Go to the location marked on the map image below and face towards the east. You’ll see a small house with the Lucky Dice sitting on the porch.
Lucky Dice #20
Make your way over to the location shown in the map image, and you’ll find a house with spirits standing outside. Go up to the house’s second floor, and you’ll find the Lucky Dice on the balcony.
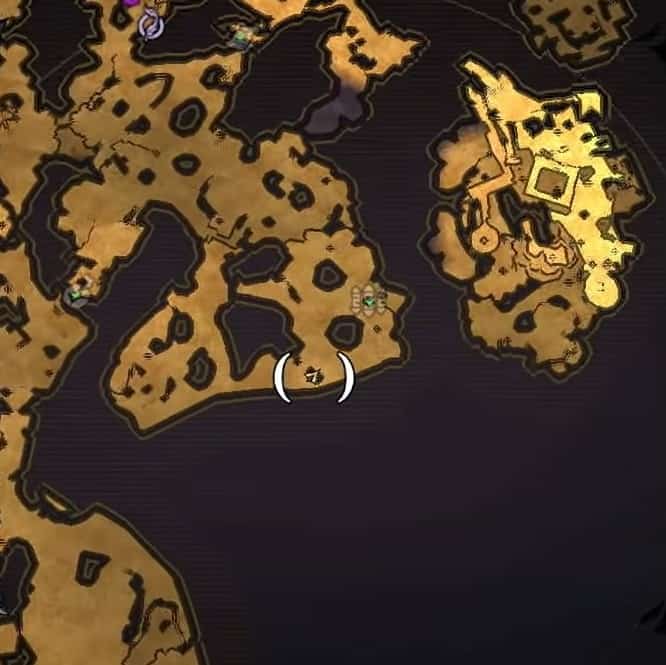
Lucky Dice #21
Head over to the location below and go up the small hill to the south. Use the platforms on your right to reach the ladder up ahead, and then use the sailing ropes to get inside the wrecked ship, where you’ll find the last Lucky Dice.