Entangled is a main story quest where players will have to make life-or-death choices in Starfield. This is one of the game’s most interesting yet confusing quests that can have two different outcomes.
You’ll be forced to transition back and forth between two realities until you come to a point where you’ll have to choose a prime reality to stay in permanently.
It all starts in the Nishina Research Station, where an experiment has gone horribly wrong. As you struggle between two different realities, you’ll be bound to make tough decisions that can change the entire quest storyline.
In the end, all that will matter is which reality or universe to choose or save. Both options will involve fatalities where you will lose companions. But what if there is a way to save all of your companions in Entangled?
This guide will provide a walkthrough of the entire Entangled mission in Starfield. We also inform you about any important items and loot you can grab as you fight against alien and robot enemies.
How to unlock the Entangled mission
You can unlock the Entangled quest in Starfield while progressing through the Final Glimpses main mission in Freya III.
You’ll come here to investigate a distress signal in the Nishina Research Station, where a failed experiment will put you to the test.
As you approach the station, everything will seem fine, but things will take a huge turn after you set foot inside.
How to complete Entangled in Starfield
As you come across Entangled in Starfield, you’ll get to know that a failed experiment has occurred, and you’ll be phased between two different universes, which are actually two realities.
In one reality, you’ll find that everyone in the facility survived except Rafael. Another reality shows the demise of the entire facility, but Rafael Survives. You must fight your way through alternate realities as you aim to complete this quest.
In the end, you’ll decide to make one of these realities your prime reality. You can either choose to save Director Patel and the crew or just Rafael. There, however, is a third option as well where you can save all of them.
Investigate the distress signal
As you’re going through the Final Glimpses mission, you’ll receive a distress signal from a satellite that must be investigated. This broken signal will lead you to the Nishina Research Station on Freya III.
As you land on Freya III, make your way to the Nishina Research Station. You can take either the stairs or the elevator to travel up to it.
Taking the stairs will lead you to a camp with boxes that contain some loot, including a spacesuit and a Weapon Rack. Once done with that, use the Intercom to speak with a security guard, who will claim that everything is right and no distress signal has been put out.
You’ll have to tell him you’re from the constellation, after which he’ll put the call on hold. After some time, you’ll be notified that the director will see you, but only if you leave your companion at the entrance.
This mission will keep you tangled between two different realities, and the choices you make will have a major impact on the storyline.
Enter Nishina Research Station

As you enter the Nishina Research Station, you’ll be confronted by Ethan, who will perform a few routine security measures.
Once he’s done with that, you’ll have to follow him as he takes you to the Director. Things are about to take a huge turn here.
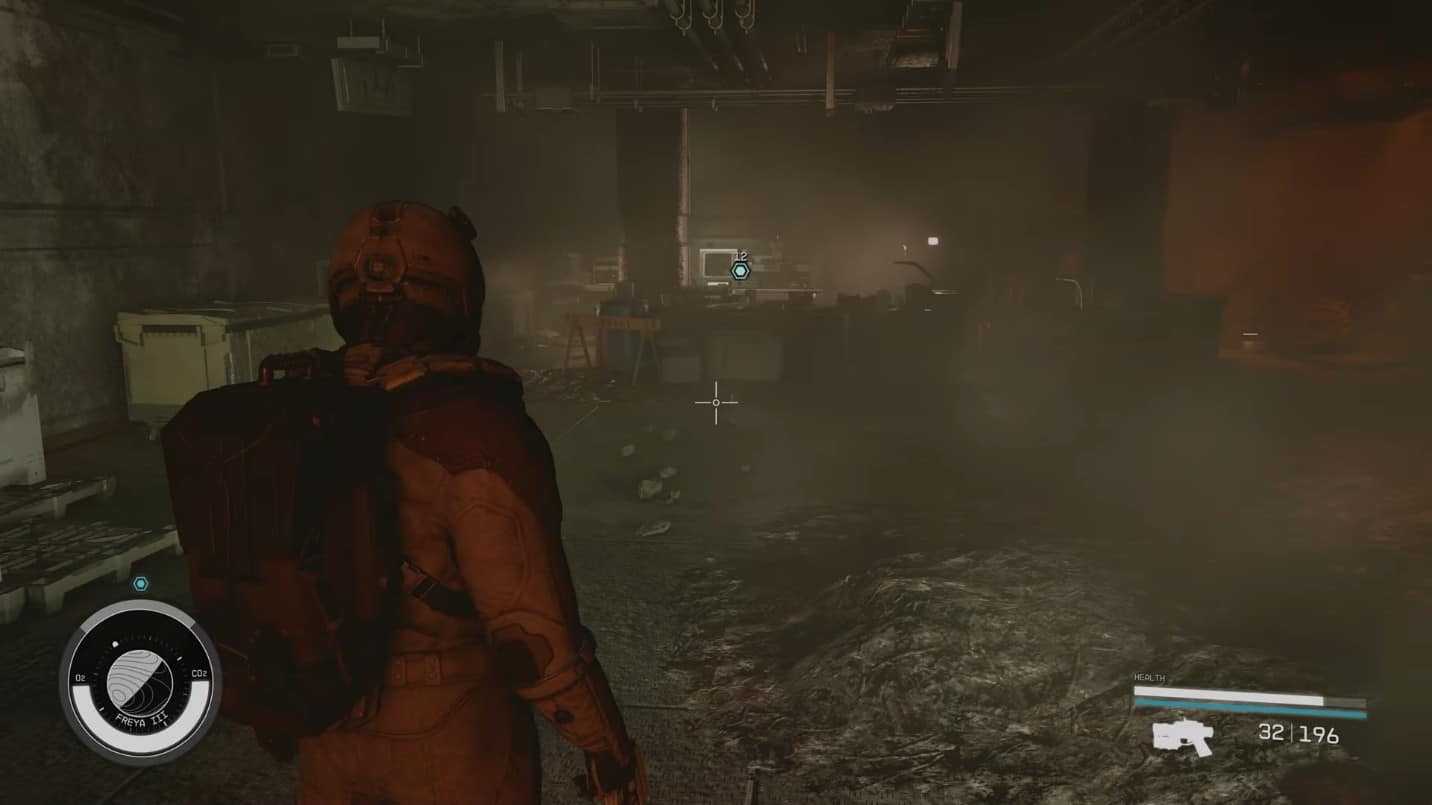
As Ethan takes you through the storage, you’ll be teleported to an alternate universe where you’ll find the Lab in complete ruins.
The ruins will be a great place for exploration, and you can look around to find valuable items in the storage crates. Moreover, weapon cases will also be lying here, and you can find them to collect some weapons.
Going back through the door will return you to the pristine reality you came from, where the Lab is completely fine. As you approach the door, you’ll be attacked by Cataxi Warriors you can fight off.
Going through the door will teleport you back to your reality, where you must continue following Ethan. As you travel through the Work Room, you’ll phase out to a different reality again, which houses the ruins.
Explore the ruins
Now that you’re back in the ruins, you’ll have to find Rafael and converse with him. He’ll tell you how all this destruction occurred, and while conversing with him, you’ll return to your normal reality.
You’ll find Ethan using the Intercom to talk to the Director. After that, he’ll lead you through the door and show you the way to Director Patel’s Office in order to meet him. As you leave through the door, you’ll return to the ruins.
Your mission now is to find Director Patel’s office. As you progress forward, you’ll have to fight off Cataxi to clear your way to the office. As you wander around, you’ll be able to spot a Pharmaceutical Lab. Head inside and find Dr. Barakova’s Journal lying beside a skeleton.
After heading back and ascending the stairs to the office, you’ll transition into the normal reality where Ethan will lead you toward the Director.
Speak to Director Patel
As you enter the office, you’ll find Patel and Maria. Converse with Patel and explain everything that has been going on.
Explain to them how the metal artifact distortion is causing all the chaos, and eventually, they’ll allow you to look around.
Once the conversation is over, you’ll have to follow Maria outside, which will lead to another switch of universes. You’re now back in the ruins.
Find your way to the lab
After finding yourself back in the destroyed universe, you’ll be tasked with finding the Lab. You can perform a few important tasks before heading towards the Lab.
First of all, go to the Director’s Office, where you’ll see a skeleton at the desk. Find the Director’s Incident Report on the desk. Moreover, you’ll find another door in the office, which leads to an area with a safe (Advanced Level) to be unlocked.
Once you collect these items, head out of the office and find Rafael. Conversing with Rafael will allow you to progress further toward the Lab. You’ll be provided with the Nishina Pantry Keycard that can be used to open the door. Rafael’s office houses valuable loot, so make sure to collect it before leaving.
Use the keycard to open the door with the white divine and head inside. Rafael will accompany you as you walk towards the waypoint. You’ll face waves of Cataxi aliens along the way, so be ready to fight them off.
As you approach the cafeteria, you’ll teleport back to the pristine reality. You should be used to going back and forth between realities by this time. Move forward to the other side of the room, and boom, you’re back in the ruins.
Fight off the Cataxi and talk to Rafael. Next, you must make your way to the security office, where you’ll flashback to the normal universe. As this happens, you’ll find yourself popping up behind Ethan.
You can talk to Ethan, and he’ll clear out the directions to the Lab. Moreover, if you keep talking to him, you’ll be able to get a weapon out of him, which you can use to fight off the Cataxi.
This is where your persuasion skills will come into use. After being successful with your persuasion, Ethan will provide you with the Experiment A-7 shotgun that you’ll use to fight off the aliens you’ll encounter.
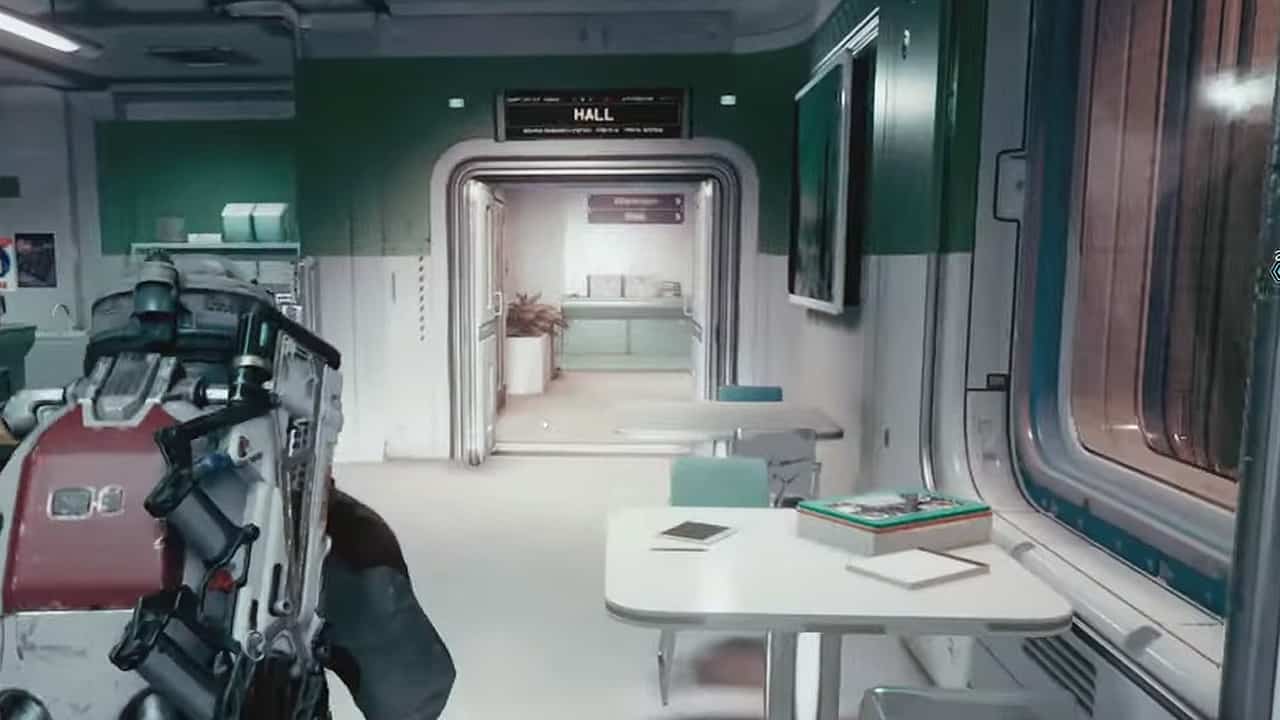
Once done with Ethan, find your way to the main hall. As you reach there, you’ll travel back to the destroyed universe. Head forward, and you’ll see a door to the left which leads to a big room.
Head inside and find the door labeled Emergency. As you enter and climb the stairs, you’ll phase back into the intact lab reality.
The stairs will lead to the Fabrication lab and the Director’s office. Enter the Fabrication lab by accessing the first door to your left.
You’ll find Maria inside, ready to initiate testing, and will be requiring your assistance. As Maria begins interfering with the equipment, she’ll create a Distortion.
As you step into this Distortion, you’ll flash back to the destroyed Lab. Travel in this alternate dimension and you’ll come across a Probe Control Unit that you must equip.
Next, enter the Distortion again and activate it to travel back to the intact lab reality. You’ll meet Maria again, and you’ll show her the Probe Control Unit. She’ll set you off to meet Patel once again.
Head out of the Lab and find Director Patel to talk to her. She’ll complicate things by letting you know you’ll have to choose a reality amongst the two that will become a part of your storyline.
This will become your prime reality, and you’ll have to consider the consequences involved in both. Regardless, you will have enough time to make a sound decision.
There will be a machine that, when shut off, will set a permanent prime reality. You won’t have to worry about phasing from one dimension to the other anymore.
Get out of there and head towards the clinic downstairs, where you’ll meet Dr. Tatiana Barakova. She’ll provide you with free medical supplies you’ll need as you move forward into this quest.
You may also purchase additional aid if you want to stock up on health supplies. Players who collected Dr. Barakova’s Journal earlier in this mission can get extra free medical supplies.
Now that your phasing is over, everything will be straight on from here. You will be using Distortions to travel from one reality to another.
From here on, you’ll have to head to the Elevator, but before you go, make sure you enter it in the Intact Lab dimension. You’ll also need loaded weapons with loads of ammunition as you’re about to enter combat.
Take the elevator down, and you’ll see a distortion on the left. This is the Distortion you must use to get to the Lab.
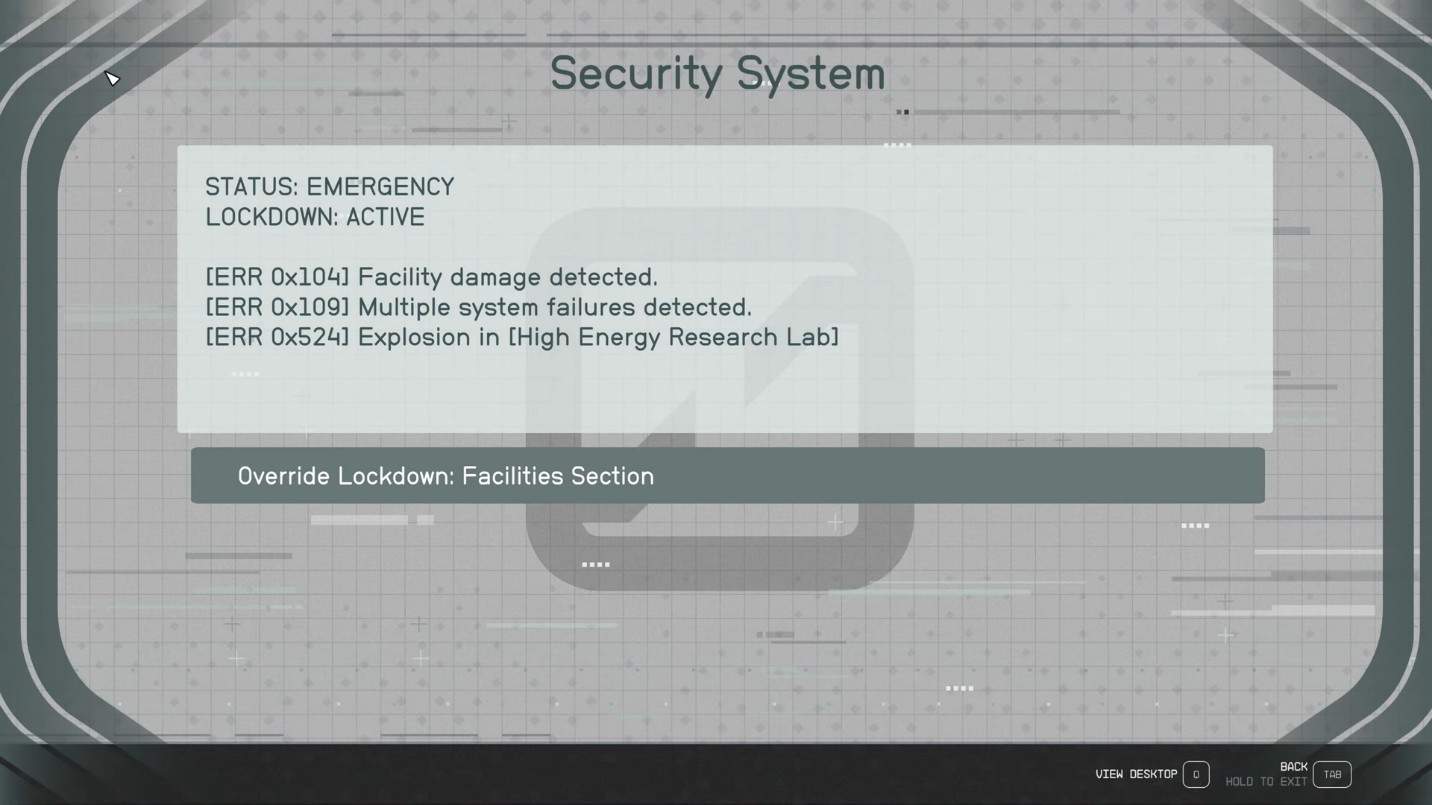
Override the lockdown in the Facilities Section
This section of the Entangled quest can become somewhat tiresome, and you can easily get overburdened in Starfield.
Using the Distortion will flash you to the pristine reality, and you’ll have to override the lockdown in the facilities section now. Proceed forward toward the burnout room, and you’ll find another distortion. Head into it to shift back into the ruined reality.
Next, you must head inside the burnout room and find the Nishina Particle Lab Keycard, which you’ll be needing soon. Search around for any loot and find a distortion to return to the intact Lab.
This is where things get messy, and you’ll have to be on the lookout for Turrets and Robots everywhere. The security system inside here will put you to the test as two robots will attack you if you’re spotted by the security camera. You can either disable the camera or fight the robots.
Once you’re done with this room, unlock the door in the right corner with your keycard and head down a flight of stairs. Turn right and enter the corridor, but be aware that there’s another security camera you must deal with. There are Turrets in this area, and you must take them down before they get the chance to attack you.
Once done, head into the room on your right and step inside the Distortion to beam back into the ruins. Next, you must head to your left and find your way to the computer terminal.
There’s a distortion in this area that will take you back to the pristine dimension. As you approach the computer, you’ll face robots and turrets, so be ready to fight them off.
Once everything is clear, access the computer and override the security lockdown. This will shut down the security system of this area and make it much easier for you to bypass security cameras and the robots and turrets in every corner.
Override the lockdown in the Accelerator Section

You must now head through the door on the west, which will lead you to a corridor labeled Particle Accelerator.
As you travel forward, you’ll find another Distortion you’ll have to go through, which will take you to the destroyed Lab again.
Head down the corridor and travel down the stairs to your left, where you’ll have to go through another distortion. Tired of all these distortions, right?
The next part is pretty intense, as the place is jam-packed with security cameras, robots, and turrets. Open the door, head inside, fight off the enemies, and disable the cameras. Once you’ve cleared the room out, take the stairs up to enter the room on the left.
As you travel up, you’ll encounter the Accelerator Robotics room. This area will have a distortion, so take it to flash into the ruins. You’ll have to battle Cataxi aliens here, and the shotgun you received earlier will come in super handy. Once you clear everything out, travel through the emergency room.
Drop down the broken stairs and search for the Nishina Utility Closet Keycard. Once you grab that, travel back up the stairs and enter the room where you’ll use the Distortion to travel back to the intact Lab.
Follow the waypoint to get to an area with locked doors. You’ll have to search for the utility closet here and use your keycard to open it.
Use the Distortion in the closet to flashback to the ruins. Next, make your way to the burnt room, where you’ll find a computer.
Before you access the computer, you’ll have to return to the pristine reality to interact with the override lock. Look out for security cameras and turrets in this section and clear everything before you proceed forward.
Find the computer in this area and use it to unlock the doors. Once done, head back the way you came through the utility closet using the Distortion and return to the intact Lab.
Now that you have unlocked the doors, you’ll find a pathway to the computer in the Accelerator Control Room. Head towards the computer and clear out any threats as you progress. Use the computer to override the lockdown of this section. This will deactivate all security here.
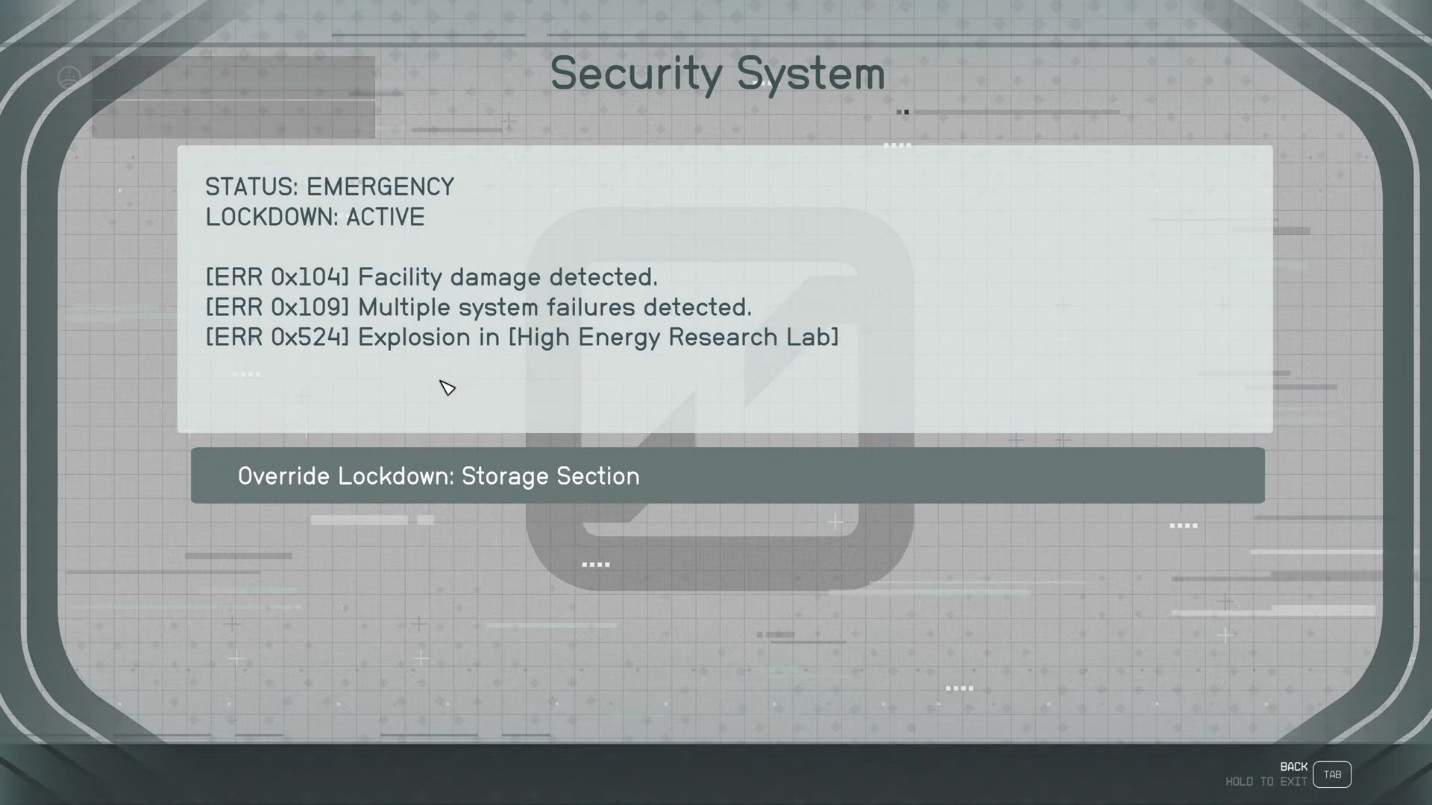
Override the lockdown in the Storage Section
Go back through the big room and down a flight of stairs to travel through the corridor and the Access Tunnel. You’ll come across a distortion in the corridor that will flash you back to the ruined Lab.
Continuing down the corridor will lead you to a Cataxi cave. Be ready to face a bunch of Cataxi as you head inside. Fight off the Cataxi and clear out the area to travel up a rocky slope and over a ledge.
You’ll find a distortion here that will take you back to the intact dimension. Next, you must head left into a lab where you’ll face bots. Clear them out and use the Distortion to return to the ruined dimension. Fight off the Cataxi and enter the next door to find a hole in the wall leading to another Cataxi cave.
Head inside the cave and kill all the Cataxi crawling there. Moving forward will lead you to a distortion that will return you to the intact Lab. You’re now in the storage section, and you must find a computer to override the security here. Use the computer to override lockdown and head out.
After dealing with the security in this section, head upwards on a ramp, and you’ll encounter a very powerful turret. Take it down and head towards the Distortion after traveling down the stairs. After switching realities, head up the stairs and through the door.
Choose a reality
As you further progress in this area, you’ll gain entrance into the main room, where you’ll have to disengage seven locks. You’ll eventually come across the machine and the probe. This is the turning point of the Entlaged mission in Starfield as you’ll have to choose which reality stays permanent.
One reality involves Rafael dying while everyone else remains alive and the Lab stays intact. In the alternate reality, Rafael survives while the other 30 people must die.
The choice is all yours, and you must decide to stay in one of the two realities. Both choices have different outcomes and different rewards, so make a wise choice.
After deciding which reality you will stay in, change to that dimension and head toward the machine. Turn off the switches on this machine. Switch off the probe and grab Artifact Lambda from the wall to end all the menace.
Should you save Director Patel or Rafael’s universe?
In the end, the choice is up to you, and you can decide whether the life of one person weighs more than the life of an entire crew. Both options have their own outcomes and perks, so consider them before you make a choice.
If you choose to save Director Patel and the company, you will be rewarded with a Legendary Spacesuit and the Experimental Nishina Helmet in appreciation of your services. This spacesuit possesses impressive stats and will be very useful to take down aliens as you wander the stars.
On the other hand, if you choose the reality in which Rafael survives, you can get him to be your companion. He will ask you to drop him off at the New Atlantis Viewport and will join you somewhere later on in the game.
How to save everyone in Entangled
Until now, you probably thought that you could only save either Director Patel + the crew or Rafael from a tragic death. Entangled does not make this clear but there is a third option in which you can save everyone in Starfield. This requires some extra effort but it is definitely worth it.
To save both universes in Starfield Entangled, you must find the Lab Control Computer. You can find this computer in both universes, but you must access it first in the destroyed lab reality as it’s blocked off in the Intact Lab.
The procedure is hectic as you’ll have to access multiple Power Nodes to perform a Frequency Calibration. The Power Nodes will have to be switched off, degaussed, and switched back on. Once done, you’ll be all set to perform the Frequency Calibration.
If you look to the right, you’ll find a slate that will help you out in the Calibration test. By hitting 24 GHz as the output frequency, you’ll be able to get 34.5 GHz as your intake frequency, which is the closest we can get to a 34 GHz intake.
Once you’re done doing that, switch back to the Intact Lab reality and repeat the same process. This time, reach 40 GHz in your Frequency Calibration.
Now that you’re done doing that, head back into the ruined reality and set the output frequency to 24 GHz, which will give you an intake of 34 GHz. This will complete the Frequency Calibration Test.
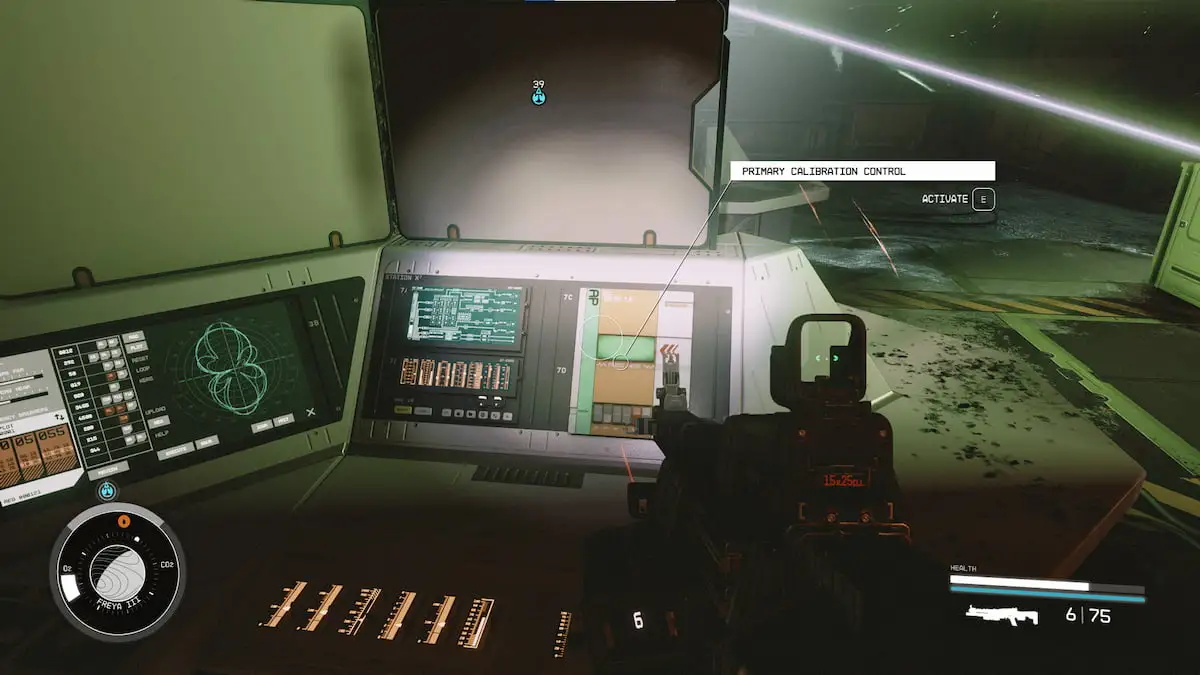
Next, you’ll have to start the Primary Calibration Control. To do this, head to the front left of the experiment. Complete the Primary Calibration Control in both universes, which will lead to your character flashing back and forth between the Intact Lab Reality and the Ruined Reality.
Eventually, all of that will be over, and you will come to your senses in a medical lab where you’ll wake up to Rafael. You’ll find the alternate dead version of Rafael lying in a bed in the medical Lab.
By coming to this point, you will come to know that you have saved everyone in the alternating realities by bringing both realities together.
The rewards for saving everyone in Starfield Entangled are worth all the trouble, and this is the best guilt-free option to go within the mission.
Starfield – Entangled mission rewards
In addition to getting rewards for saving both universes, you will get 17000 Credits and 800 XP upon your completion. Moreover, you’ll be able to find multiple items and loot as you venture through this quest.