Journals of Hiram Shaw are an important lore piece and collectible in Marvel’s Midnight Suns that unveil the back story of the Salem Witch Trials. They also include some other details, like how the Chthon, the Elder God in Midnight Suns, corrupted Lilith.
Finding these 12 journals of Hiram Shaw is also crucial if you want to solve the Hiram Shaw Church mystery in Marvel’s Midnight Suns. That is why we have prepared this guide to help you find all twelve journals of Hiram Shaw across the Abbey and its surrounding areas.
How to complete Hiram Shaw Church Mystery in Midnight Suns
These are all twelve Journals of Hiram Shaw with the location details so that you can find them easily in Midnight Suns.
Journal of Hiram Shaw (1/12): December 04, 1688
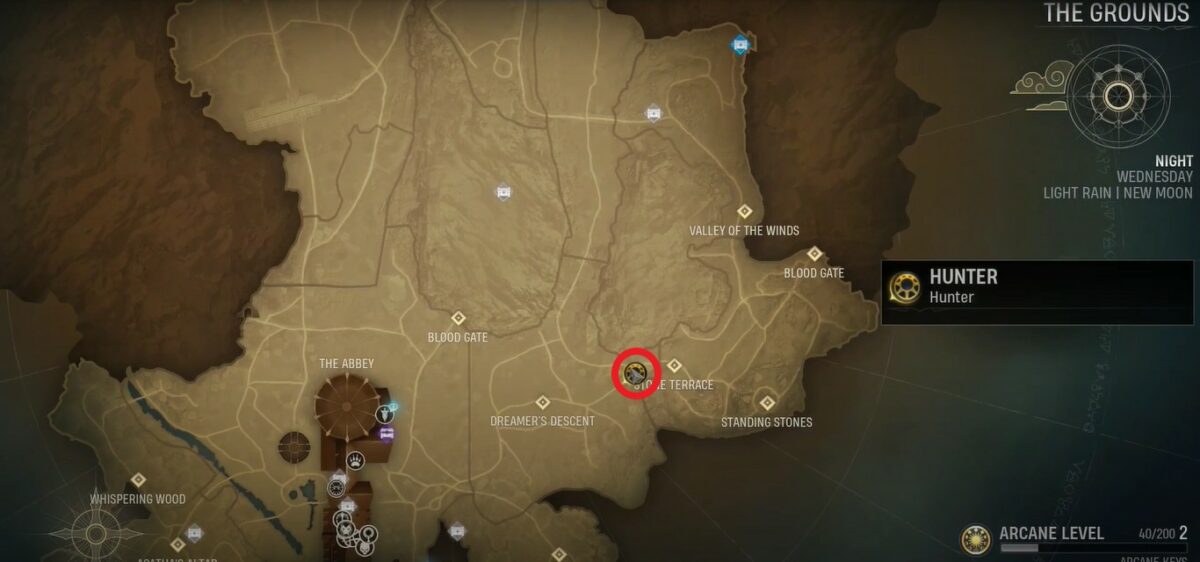
Right after entering the stone terrace from the Dreamer’s Descent, instead of heading right, follow the left path and take another left.
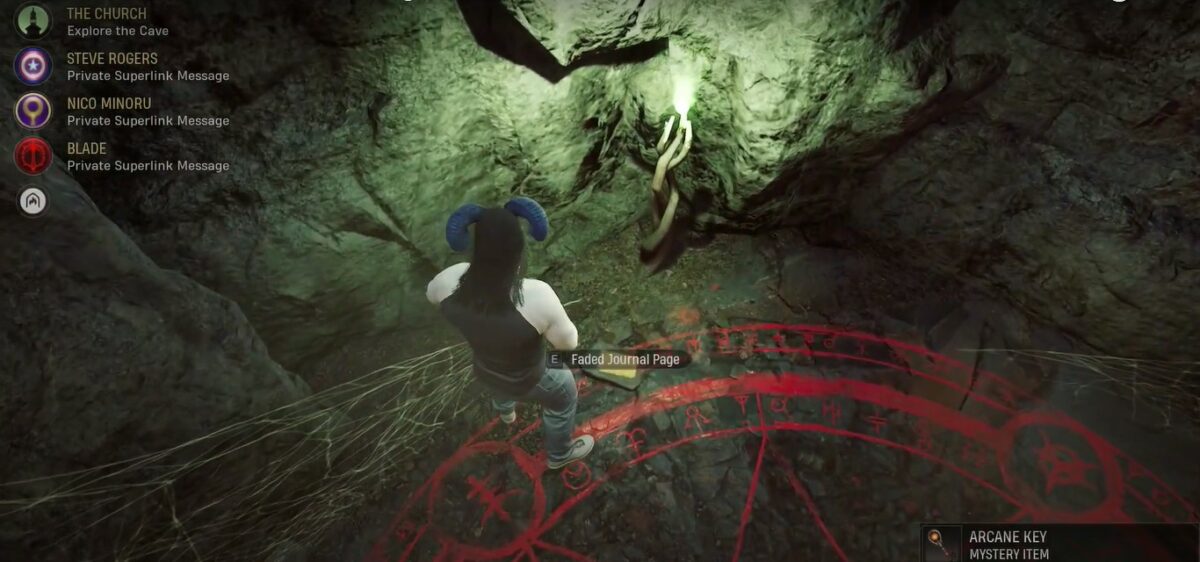
It will put you on a track that leads straight to a small cave that can be entered using Word of Power Open. There you will find this Hiram Shaw Journal on a barrel.
Journal of Hiram Shaw (2/12): October 12, 1688
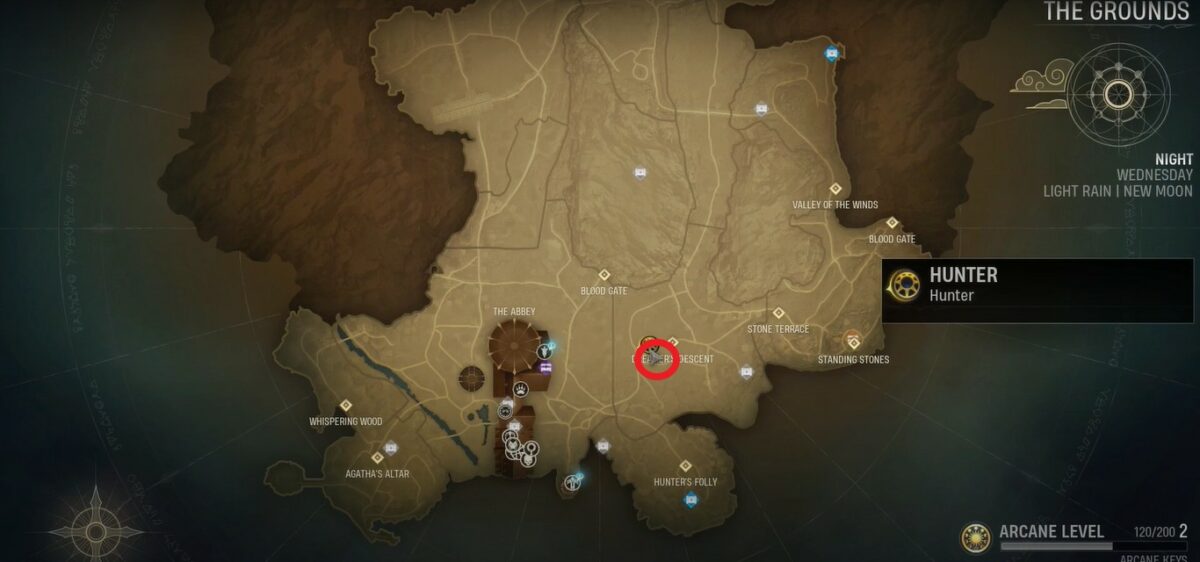
The map location will take you to an entrance just South of Dreamers Descent. But here, instead of going through the doorway, you have to follow the path behind and head toward the right.
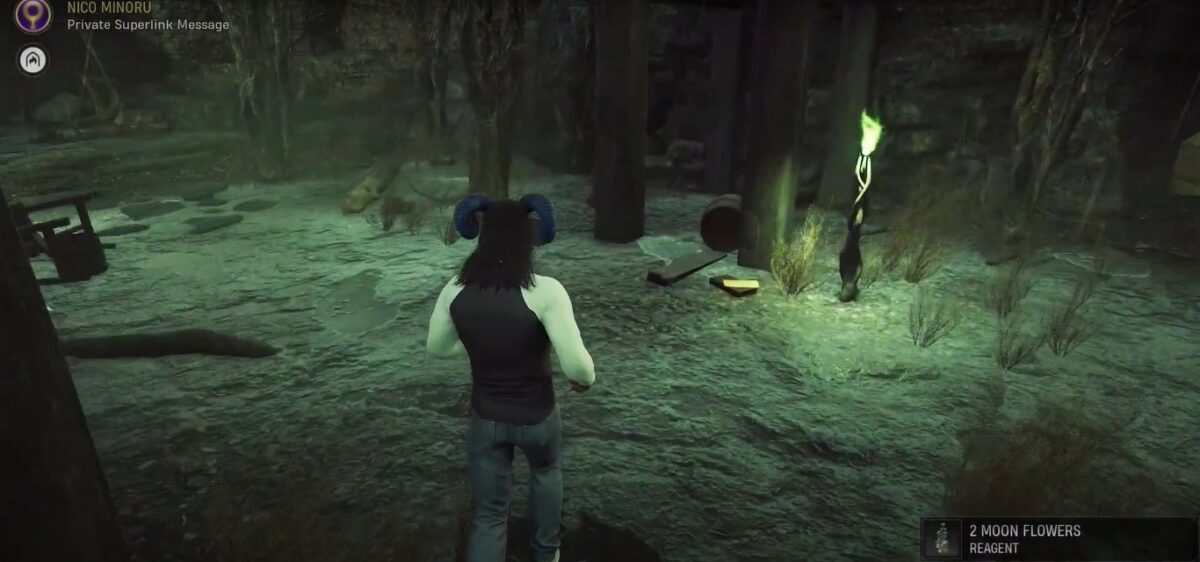
When you see the first blue flame, turn left from there, and you will enter a cave with this Journal on the table in Midnight Suns. Entering the cave will require Word of Power: Open.
Journal of Hiram Shaw (3/12): January 06, 1694
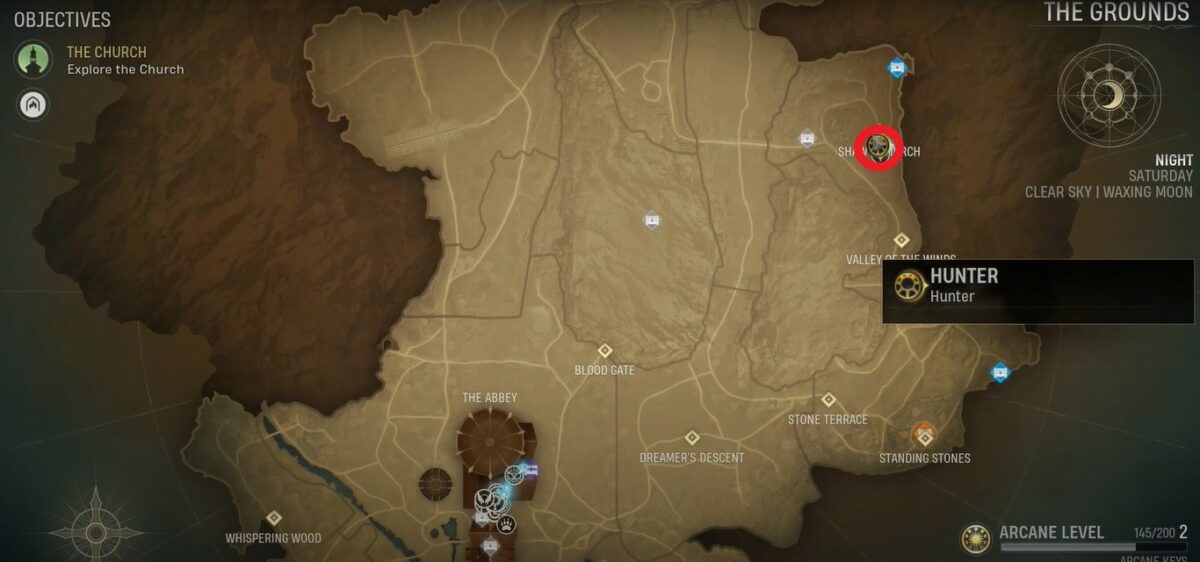
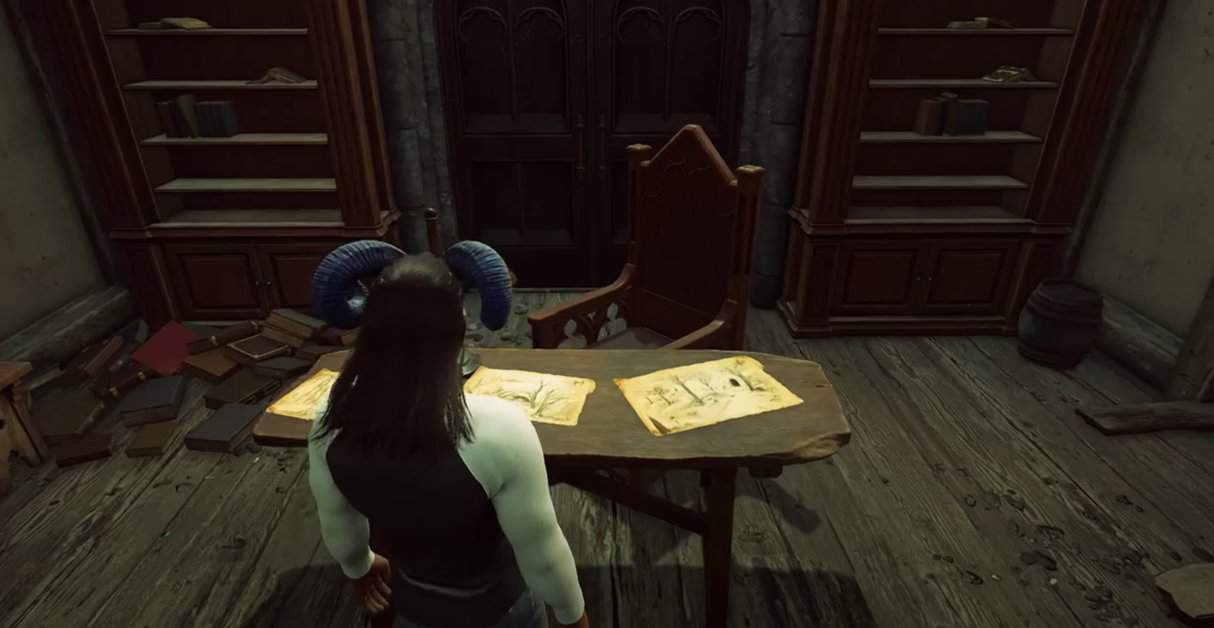
This one is inside the Shaw Church; to reveal it, you first need to have the Word of Power: Reveal. After that, while exploring the Church Grounds, open the locked door, and you will see some pages on the table in the center.
Use Word of Power: Reveal, and you will find the third Journal of Hiram Shaw on the table on the left side.
Journal of Hiram Shaw (4/12): April 23, 1694
Right after collecting the last Journal, move to the table on the right to collect the fourth Hiram Shaw Journal in Midnight Suns. For this Journal, you will need Word of Power Reveal.
Journal of Hiram Shaw (5/12): August 02, 1694
After collecting both journals inside the Shaw Church, enter the area behind the central table where you use the Word of Power: Reveal.
There you will find a Hunter’s Journal. After that, if you follow the right side path, it will take you to a wooden bridge, and below it, you will find this Journal of Hiram Shaw on a plank on the ground.
Journal of Hiram Shaw (6/12): July 21, 1689
Again from the location of the last Journal, if you move right, you will see a cave-type area protected by the ward. Now to Dispel the Ward, you first have to beat Venom Church’s bell boss, so Dr. Strange helps you break it.
So first do that and come back here to Dispel the Ward and enter the cave to collect the sixth Journal of Hiram Shaw. For this Journal to show, you will need Word of Power Reveal.
Journal of Hiram Shaw (7/12): June 13, 1690
You can find this Journal of Hiram Shaw early on in the game. But to enter this area, you will need Word of Power: Break to open a blocked doorway.
After entering, move forward on the path on the left side of the bridge, and you will find it on a tomb-type rock structure next to a couple of benches.
Journal of Hiram Shaw (8/12): November 24, 1689
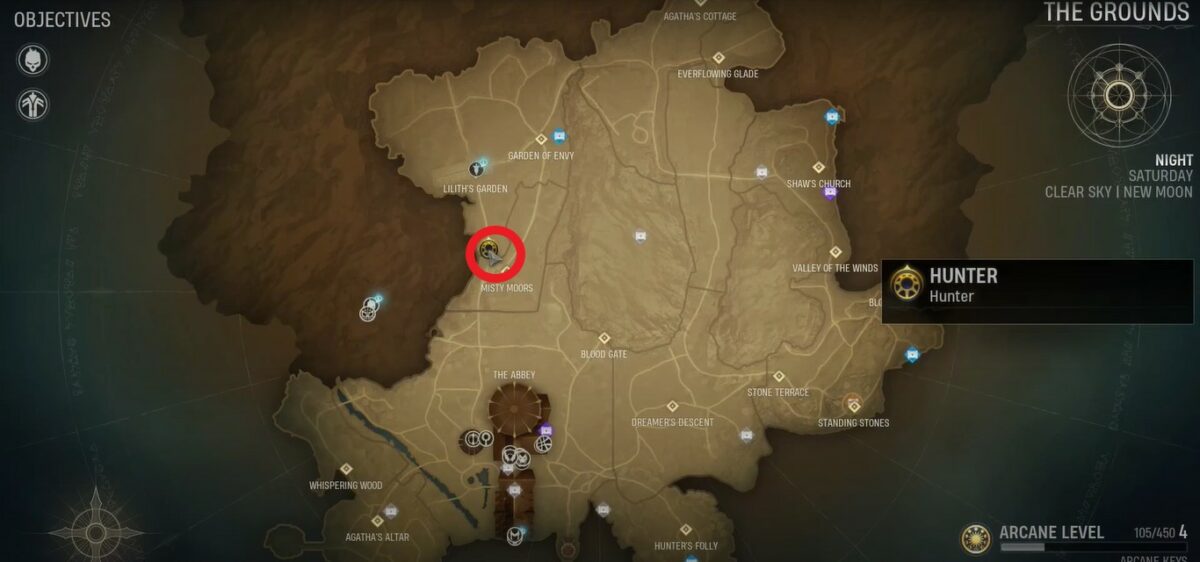
Right after entering the Misty Moors, enter the shop using the Word of Power: Break. Turn left and head towards the wall. You will spot a well close to the wall, and if you move along it, you will find a table with this Journal.
Journal of Hiram Shaw (9/12): April 16, 1689
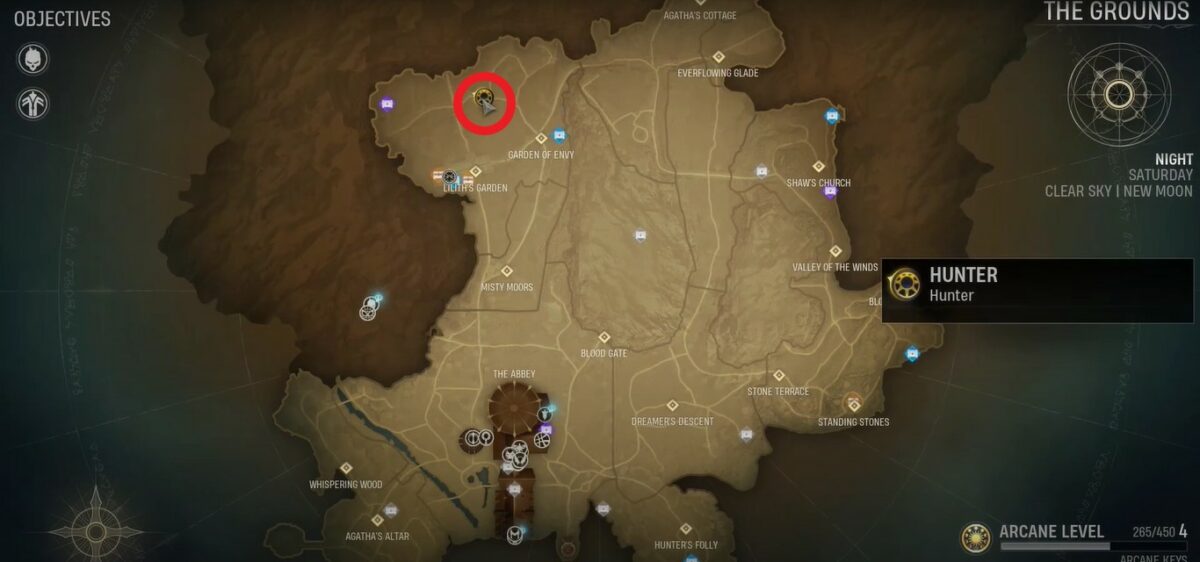
After fast traveling to the Devil’s Den, continue to move straight on the path and don’t turn left or right. It will take you to a dead end that can be cleared with Word of Power: Break where you will find the Hiram Shaw Journal on the rocks in Midnight Suns.
Journal of Hiram Shaw (10/12): July 29, 1692
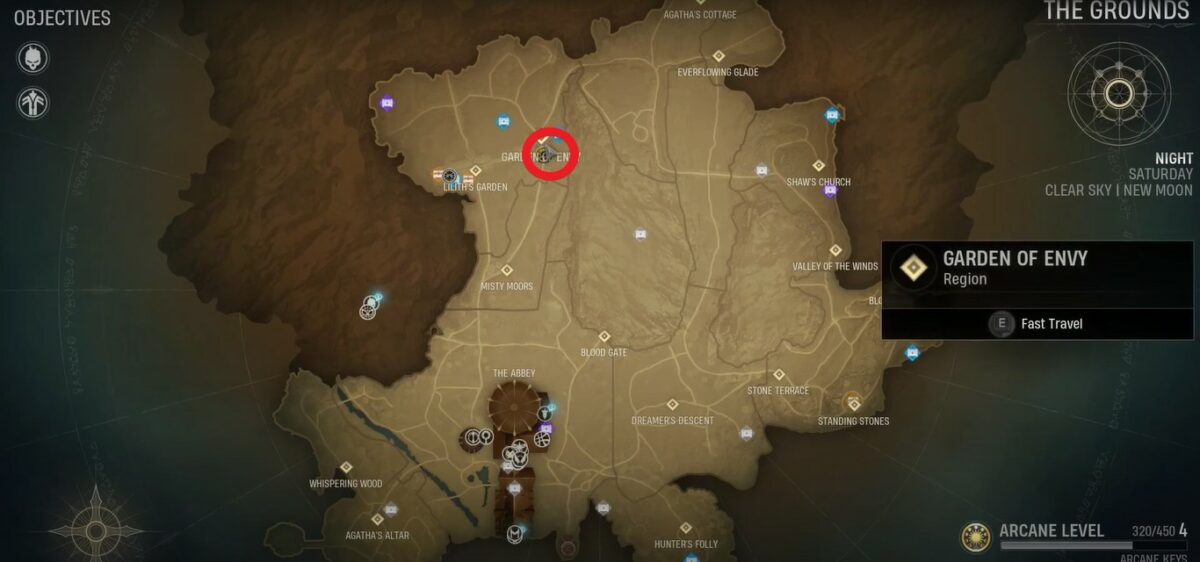
After fast traveling to the Garden of Envy, you will see a blocked path. You can open it using the Word of Power: Break. Right after breaking, turn right, and you will find a table with Lilith’s Journal.
Just continue to move along this edge. After collecting one more Journal on the third table, you will find the Journal of Hiram Shaw.
Journal of Hiram Shaw (11/12): November 21, 1694
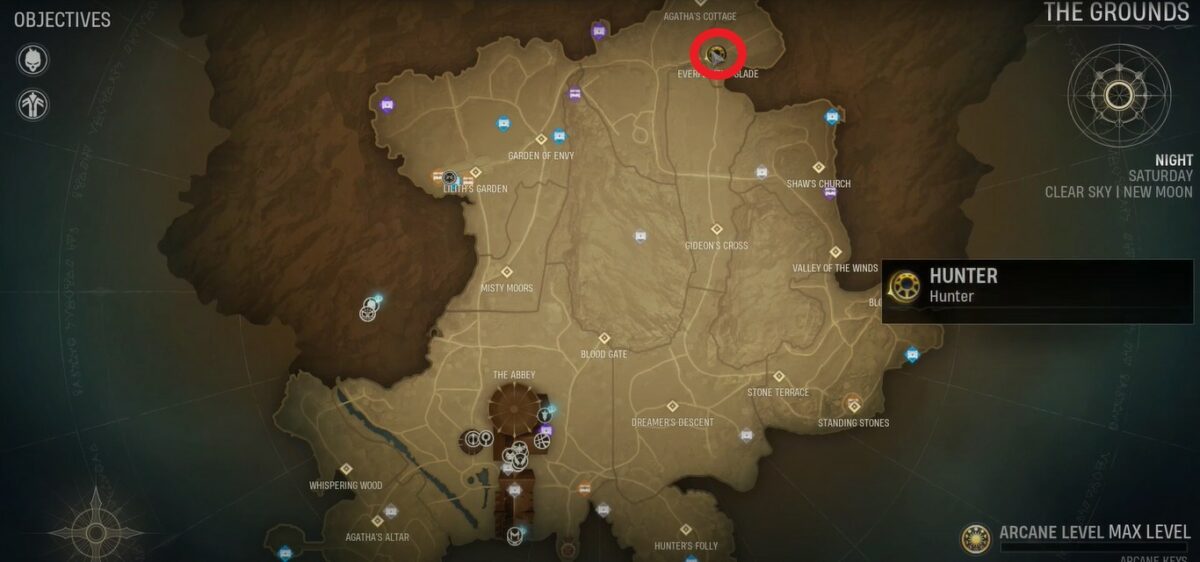
Once you reach the Everflowing Glade location shown on the map, you will see a path heading up. Instead of following it, take the left side path and move forward.
After that, take the first right, and you will see a wall with a crack. Use Word of Power: Break to open it, and you will find the eleventh Journal.
Journal of Hiram Shaw (12/12): August 15, 1689
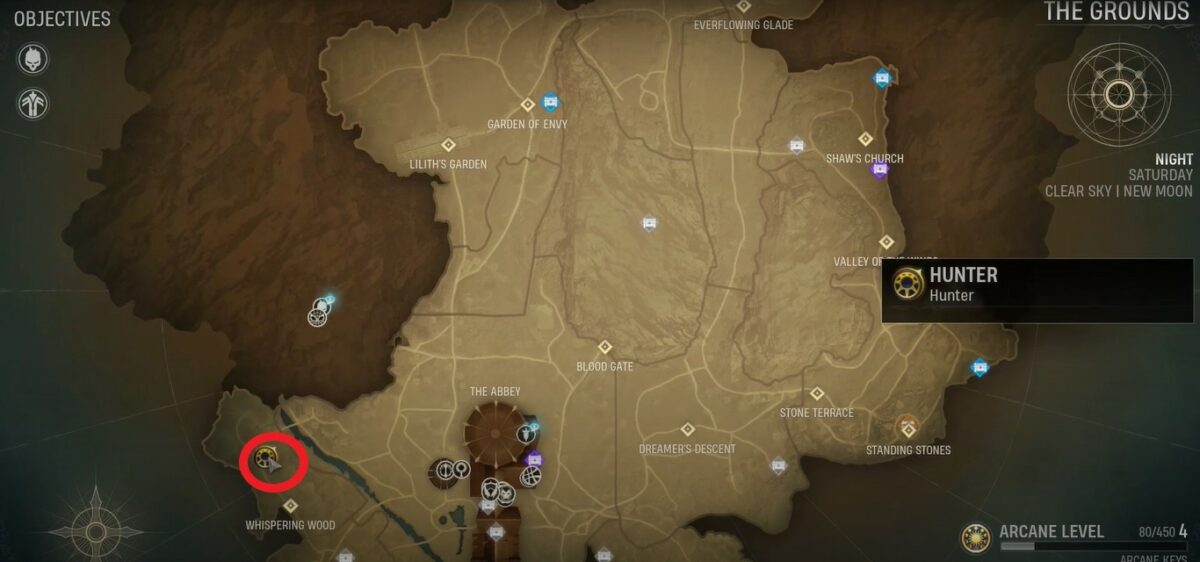
Start from Agatha’s Altar location and enter the Whispering Woods. Continue to move forward and use Word of Power: Break to enter the next area.
Here on the right side, you will spot a bridge that you can cross using the Word of Power: reveal on the symbol on the left side. After crossing the bridge, move a little forward on the right, and you will find the last Journal of Hiram Shaw on a tomb.