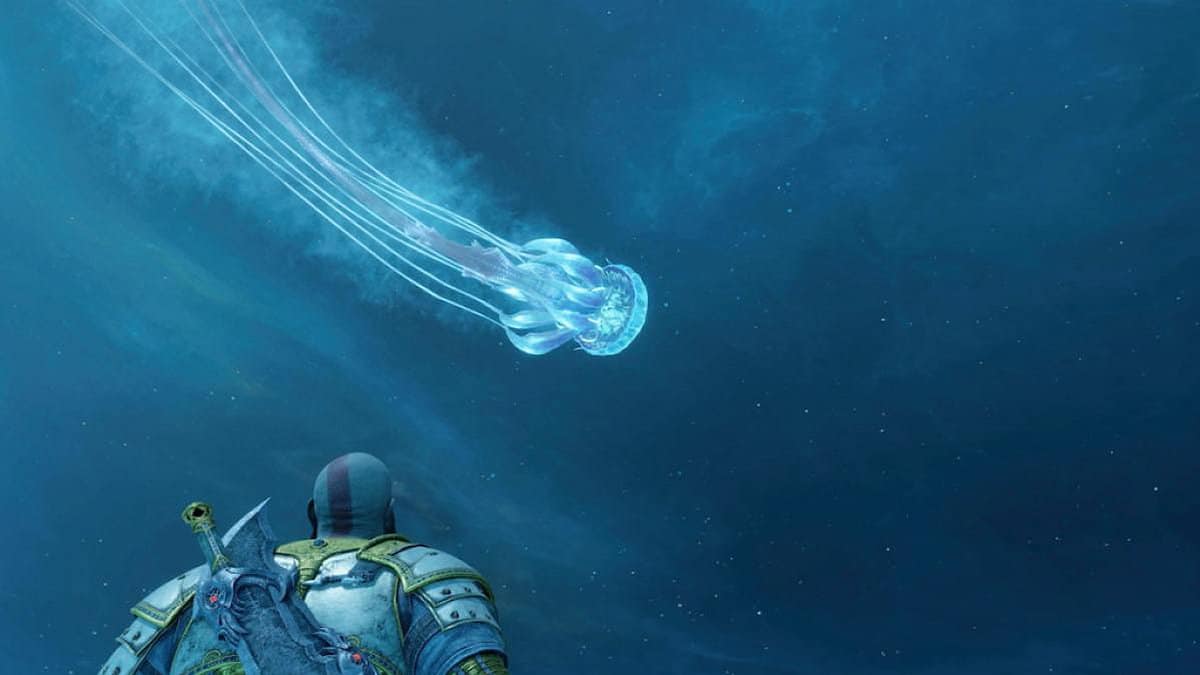
The Secret of the Sands favor requires you to free a Hafgufa, a giant jellyfish that somehow became trapped under the deserts of Alfehim in God of War: Ragnarok. Atreus will mention hearing the cries of pain of a beast after you reach The Strond. The side quest will begin when you decide to head out to the desert to investigate.
Freeing the Hafgufa will clear the storm in The Barrens, allowing you to explore that area for its many collectibles. You will also be able to start the Song of the Sands favor, which requires you to free another Hafgufa to restore the Alfheim ecosystem.
You first need to complete Groa’s Secret, the fourth story quest of God of War: Ragnarok. This will open a new path in Alfheim for you to explore. Remember to speak with Sindri at his shop in The Canyon while making your way to The Barrens. The Secret of the Sands favor will begin automatically when you enter The Barrens.
Open The Mystic Gateway
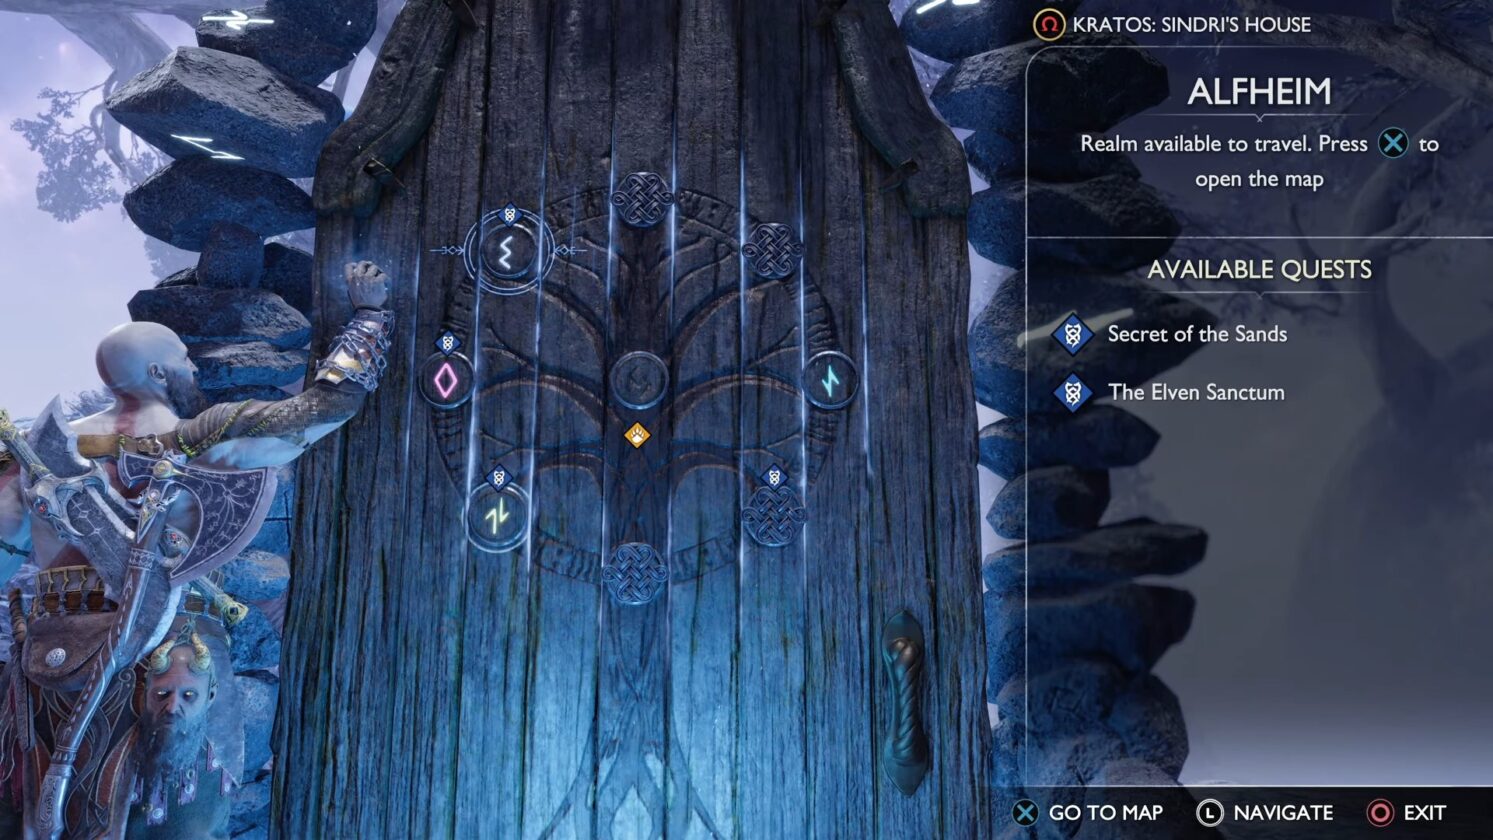
Now that you have started the Secret of the Sands favor you need to firstly open the Mystic Gateway. Then you need to travel deep into the desert until you come across Gulon.
These are basically two blue wolf-type creatures who will be carrying a sled and will be moving in a certain direction. Simply stand in front of them, and it’ll slow them down. Then you need to get on the sledge and follow their lead.
Reach the Cave

The Gulon will continue onwards taking you to the Southeast area of the desert. Head east to find an entrance to a cave that extends underneath the desert. It will resemble a cave-like structure in the middle of the desert. This is the cave that you were set on finding. You need to enter that area.
Defeat the Dark Elves
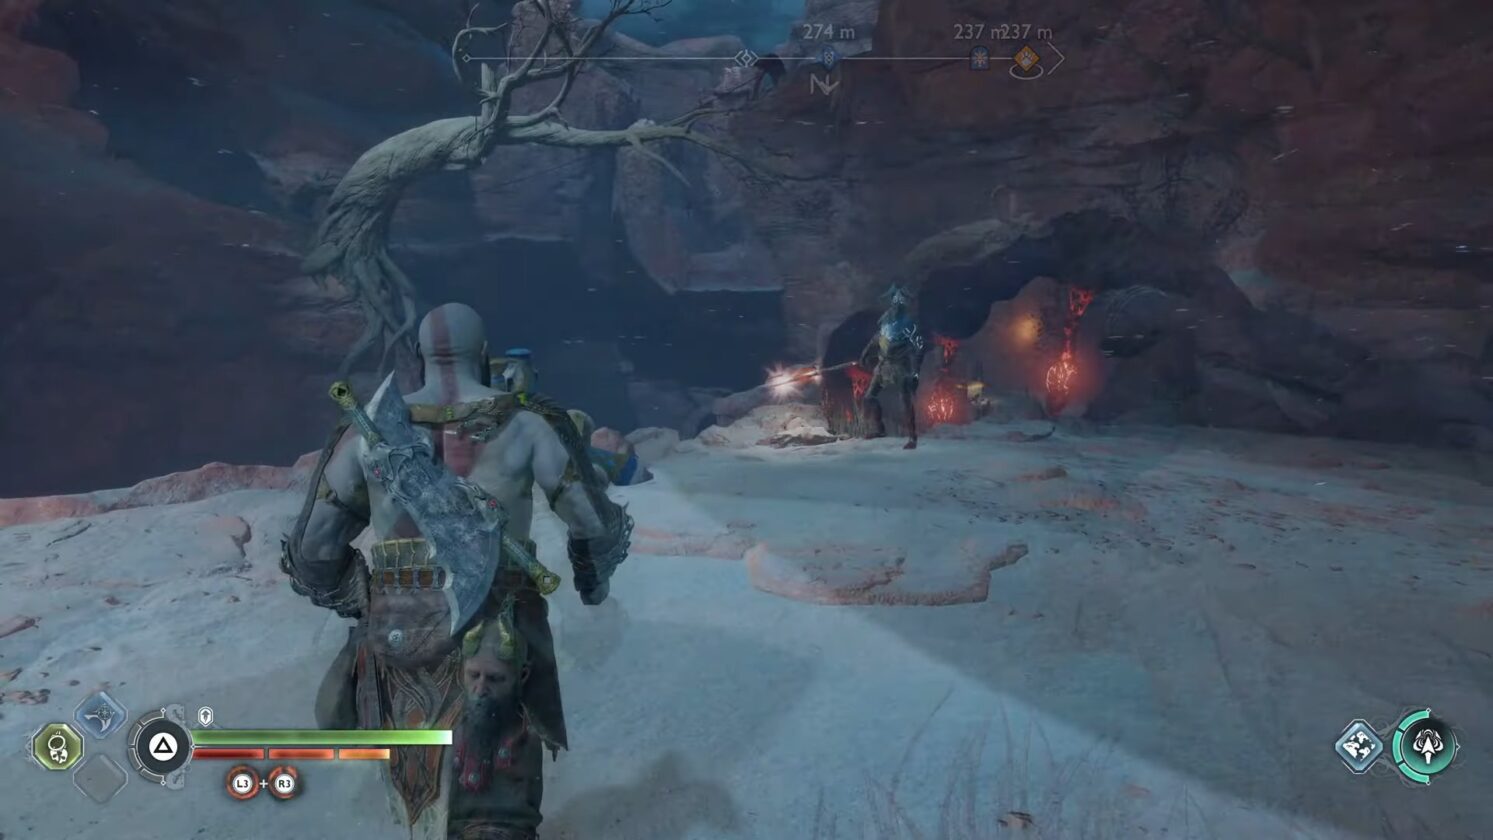
As you enter the cave area, proceed forward. As you make your way along, you will come across a ledge that will block your path. Use your Blades of Chaos to clear the way of further hindrances.
Finally, you will encounter what is known as a “Dark Elf Hive Bulb”. Your Leviathan axe should do the trick here so use it to destroy the hive bulb. Once you clear the path you will then have to face off against a Dark Elf. After defeating the Elf proceed further on and destroy the rest of the five hive bulbs that you come across as well.
Along the way, you will see three hive bulbs in your way. Now, you need to take all three of these hive bulbs in one go by moving towards the twilight stone and throwing your axe at the stone.
Keep an eye out for the pink line that corresponds with the stone. When it turns blue, that will indicate that you should throw your weapon.
As the three hive bulbs are destroyed, you must fight against some dark elves. Kill them and then move on forward. Among the Dark elves, there are also Summoners, so be cautious of them.
Once you have squared off with the elves you will then see two paths. One will lead you towards Nornier Bell, whereas the other will take you towards the East side, but you might face many hive bulbs if you take the south path.
Defeat the Dark Elf Lord
The Dark Elf Lord is a formidable enemy who will have three dark elves alongside him. He can use magical powers to blind you, rendering your movements, and his elves will also keep on attacking you.
To defeat the Dark Elf Lord, you should firstly focus on this main boss himself. Avoid his accomplices and make sure you dodge his attack as he charges up his staff. This will make it efficient for you to deal damage on the boss and your fight will also end quickly.
Once the Dark Elf Lord is defeated you can then finish off the dark elves in whatever manner you wish. You can use the twilight stone to stun them and then finish them off one by one. After that follow Atreus to the north side of the cave. As you go onwards you will then come across a golden ore, destroy it using explosives and proceed further.
Solve the Barrens hive puzzle
Head inside the cave, climb down until you reach an opening on the other side, and swing over. Move along the path while using your Blades of Chaos to swing across the gaps. Now comes the first puzzle of this quest.
These puzzles consist of red glowing nodes called hive matters or Dark Elf Barriers that block your path. You can destroy them by throwing your Leviathan Axe at them.
Hive puzzle #1
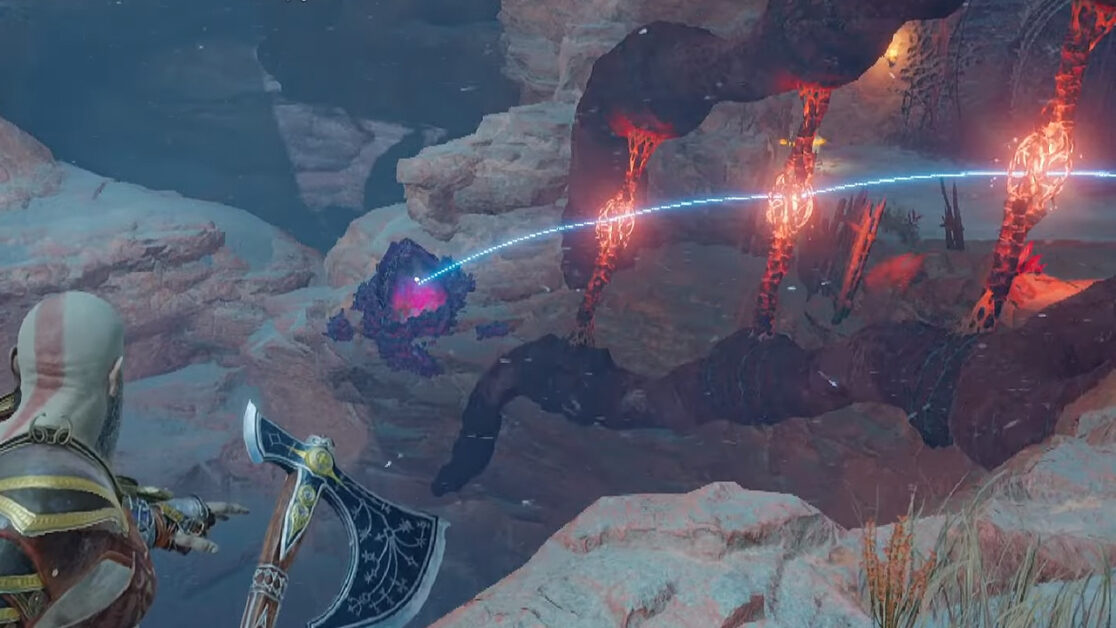
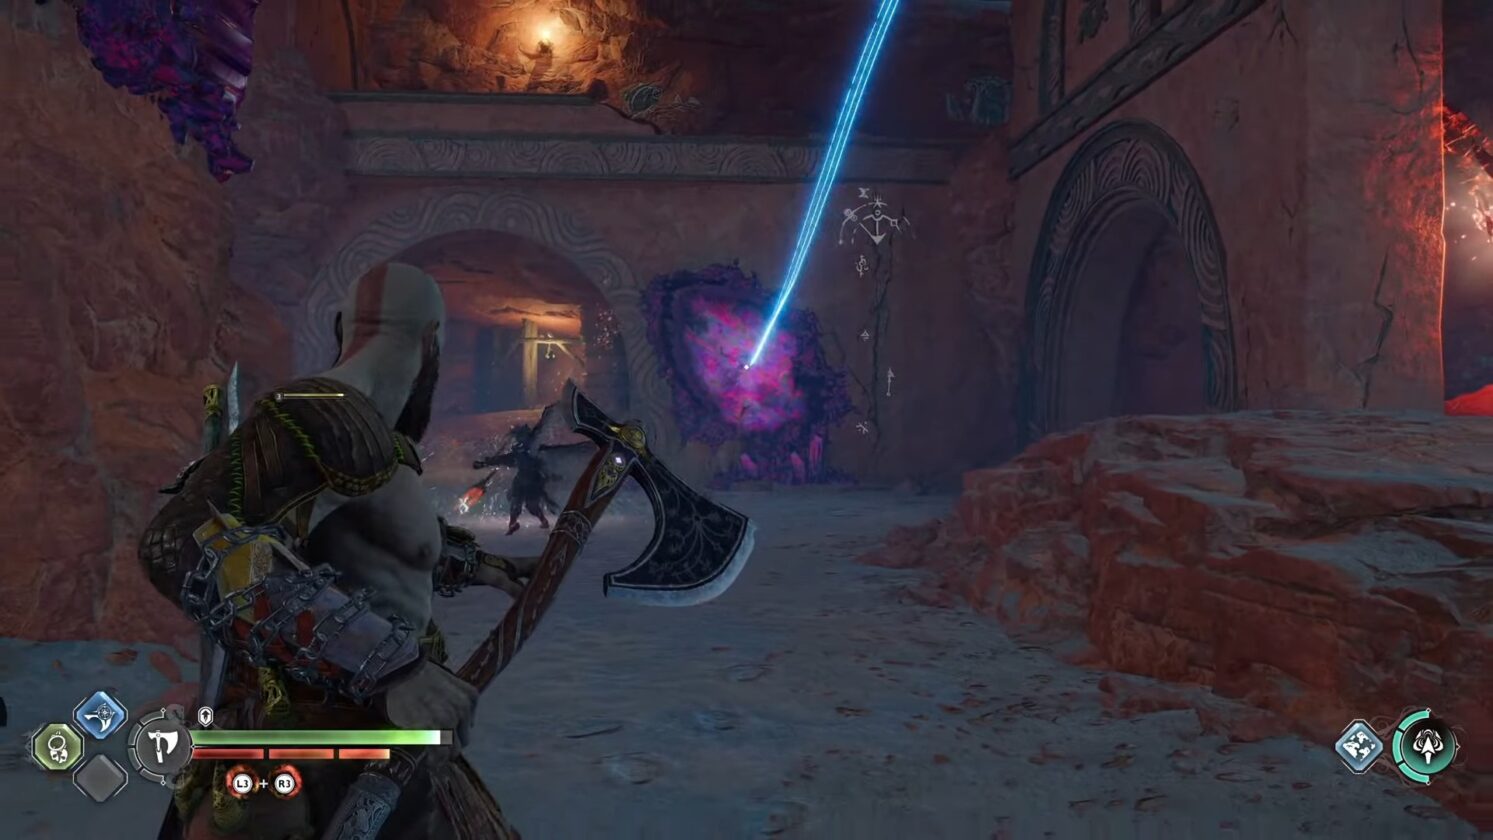
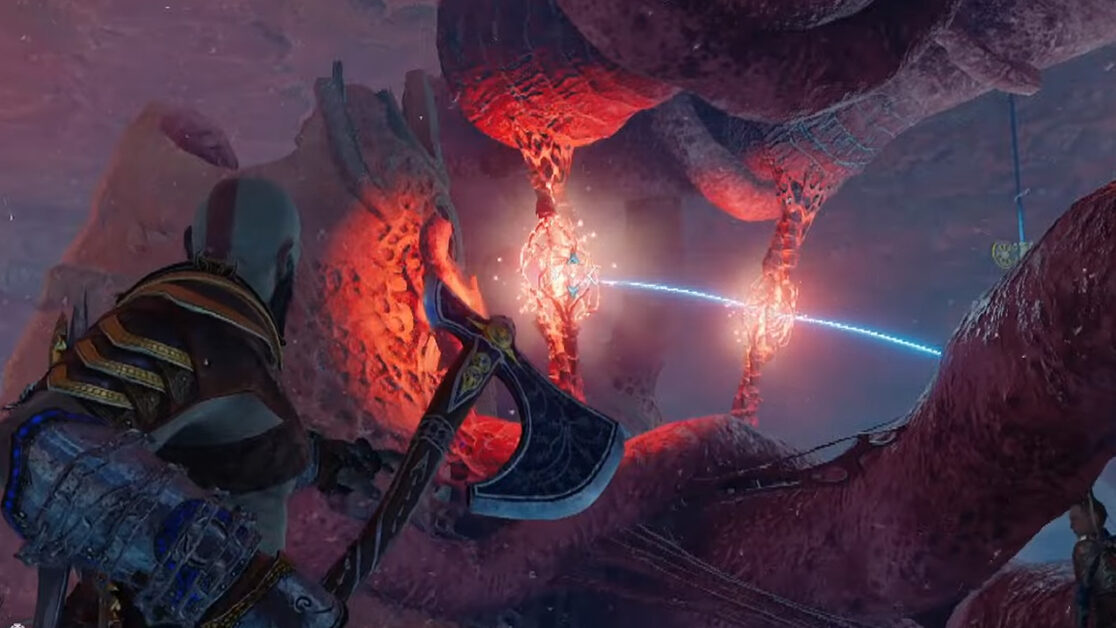
You should see a horizontal red node as you continue along the path. This node can simply be destroyed by throwing your Leviathan axe at it. As you move along, a few enemies and another set of these nodes appear, with three vertical red ones leading down to a purple crystal. The enemies can be defeated with ease.
All you need to do now is pull out your Leviathan Axe and aim for the purple crystal below. This will automatically set a trajectory for your Axe, which allows it to destroy all the red hive matters in a single throw.
You need to set your axe’s trajectory so that it aims for the nodes in sequence. If that is the case, the trajectory line will become blue; if not, it will be purple.
Continue forward and eliminate the wave of enemies that you encounter. Loot the chest at the end and enter the opening on your right to defeat another wave of enemies.
Hive puzzle #2
After defeating the enemies, climb up the wall with scribbles. On a side note, there should be a bucket above you here to throw your axe at to break. Looting this bucket gives you a Rawhide crafting component in Secret of the Sands quest in God of War Ragnarok.
Now, as you move to the edge, you should see your path blocked by another set of obliquely running hive matters. All you need to do is to aim your Leviathan Axe at the red central node and throw it to destroy all of them at once, unblocking the path.
Once that’s done, kick the obstacle at the edge and drop down. Head north forward to discover a chest and some lore beside it.
Grapple your way back up and climb the same wall with scribbles. Now turn left and grapple your way up using your Blades of Chaos.
Use the zipline to make your way across to reach a chest that contains Hacksilver. Then, grapple across the cliffs to leap over the gap. As you grapple, you should see the third hive matter puzzle from the cliffs, but it cannot be destroyed from that position. You need to keep grappling until you reach the other cliff.
Hive puzzle #3
Jump down from the other end of the cliff and defeat the enemies there to get a clearer view of the obliquely running hive matter. Aim for the purple crystal to set a trajectory that would deflect your Leviathan Axe and cause it to destroy the red hive matter in a single throw.
Now climb back up and use the new grapple point, visible after destroying the hive matter. Grapple to the last cliff and climb to its top. Then, slide left to face another ledge. Grapple to this ledge and continue forward in Secret of the Sands quest in God of War Ragnarok.
Grapple your way across to drop on the opposite side of the closed gate. You can now hit all three bells to unlock the Nornir Chest. Do note that this will be a timed thing – you need to hit all three bells quickly to open up the chest. This chest contains a green apple – the Idunn Apple, which will be useful later on.
Enter the cave and drop downwards using the chain. You will now be swarmed by enemies. Defeat them and crawl through the tight space, led by Atreus.
Hive puzzle #4
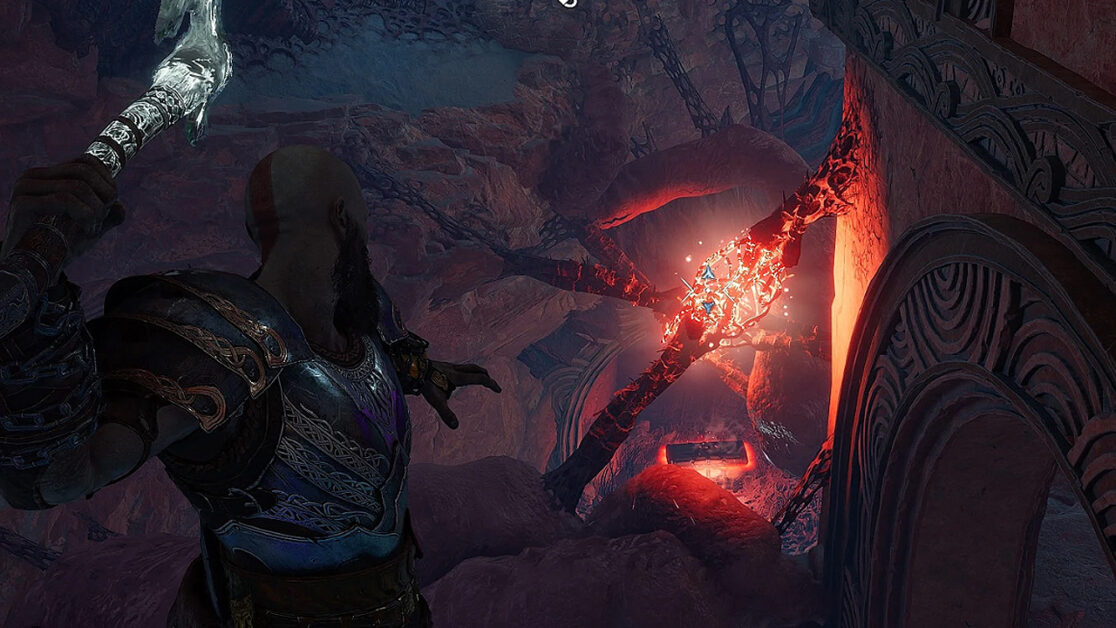
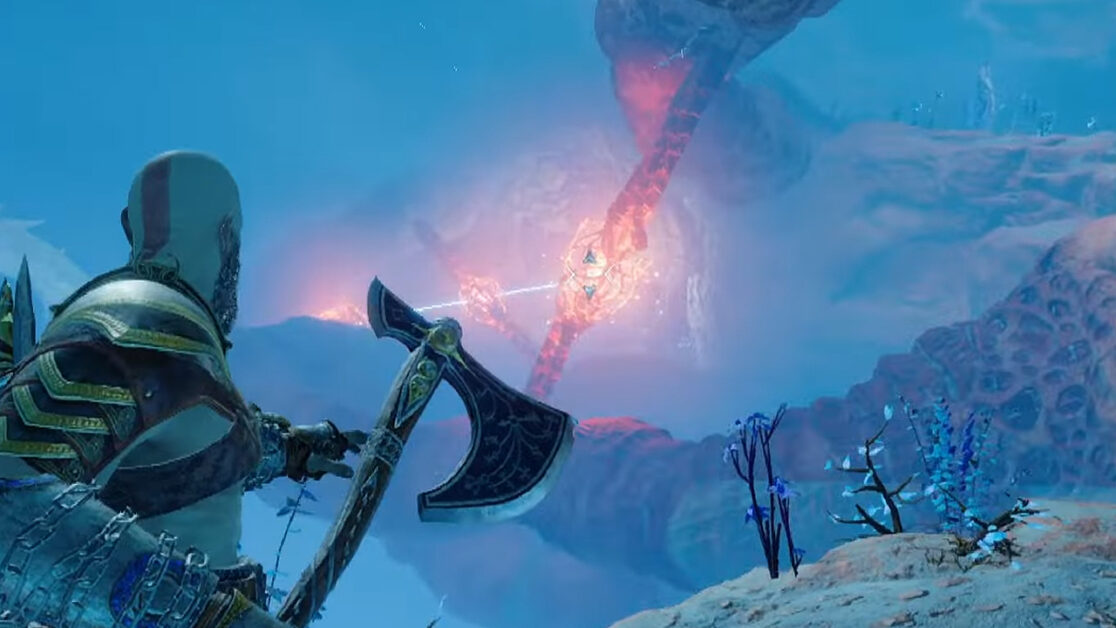
Destroy the first fire vessel to, in turn, destroy the rock-like obstruction, then drop down and head across to find and destroy the second one. The first fire vessel will open up your path to the cliff’s edge, from where you can see the other fire vessel blocking the purple crystal – which you will need to destroy the hive matter.
Next, strike the purple crystals so that the trajectory of your Leviathan Axe is denoted by a blue line, to clear out the hive matter to its right.
This will reveal a red chest that contains Rawhide, Dwarven Steel, and Hacksilver.
Now drop down below and enter the cave-like structure and you’ll encounter another hive puzzle.
Hive puzzle #5
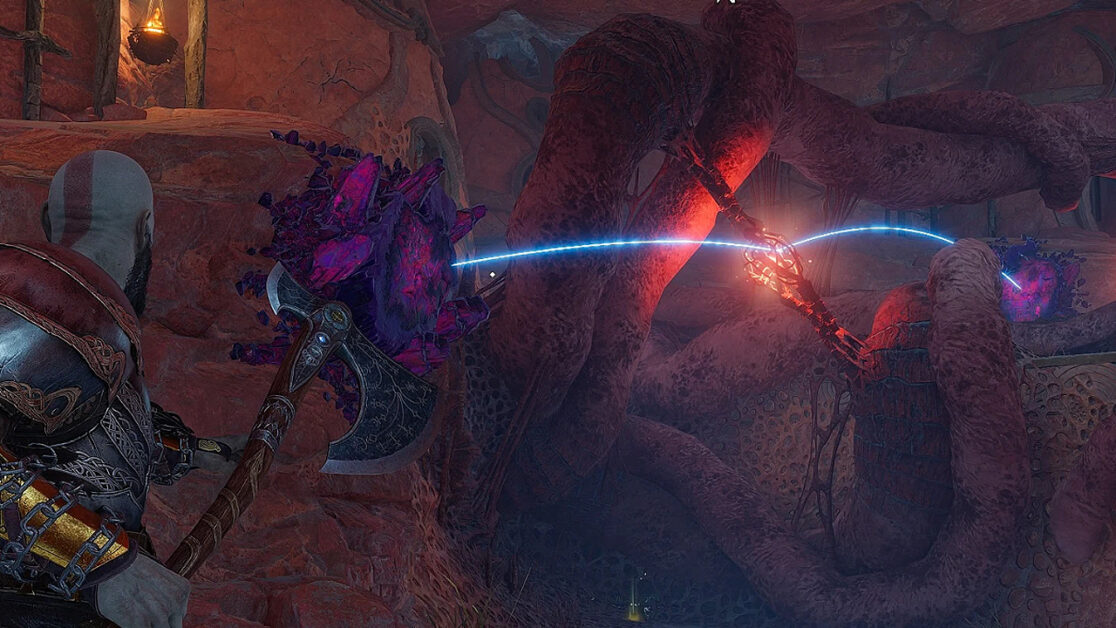
This Hive puzzle is a bit tricky. This time, instead of lining up your Leviathan Axe directly at the purple crystal, you first have to position yourself so that the purple crystal is directly behind the red node in front of you. The Axe will tear through the node, rebound off the purple crystal, and destroy the rest of the hive matter.
Now that the path is free leap over the game. Now, look to your left and shoot at the fire vessel to clear the obstruction next to it.
Continue forward to reach a chest that contains Hacksilver in Secret of the Sands quest in God of War Ragnarok.
Now, you need to go back the way where you came from and, this time, head right from the end.
At this point, you should come across another hive puzzle.
Hive puzzle #6
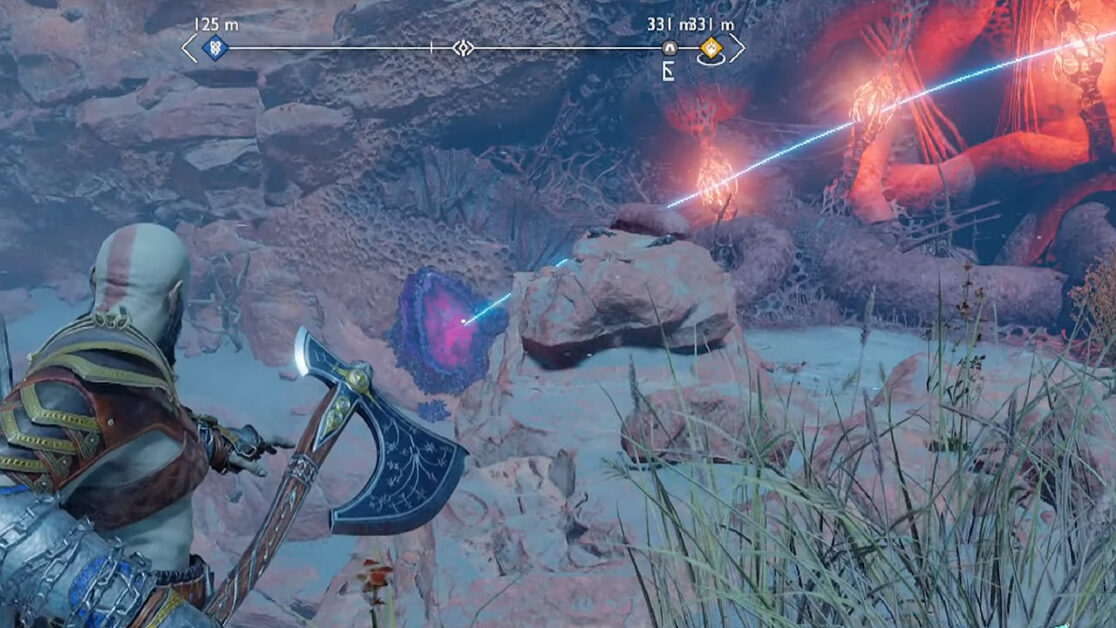
Aim at the purple crystal right to your left and throw your Leviathan Axe at it when the trajectory line turns blue. It will destroy the first hive matter node and then strike another crystal ahead, rebounding off and destroying the other nodes.
Move forward and climb the ledge to find a chest containing Forged Iron, Dwarven Steel, and Hacksilver.
Right in front of you should be another hive matter puzzle in the Secret of the Sands quest in God of War Ragnarok.
Hive puzzle #7

The last bit of hive matter can be clear by adjusting the purple crystal on the giant lantern. Strike your axe at the paddles of the lantern to rotate it. Now using it to clear out the hive matter.
Make your way across, defeating the spawning Nightmares. Now, climb the wall to finally reach the Hafgufa.
Free the Hafgufa
You must now free the Hafgufa and complete Secret of the Sands in God of War Ragnarok. Destroy hive matter, and clear out ore deposits in the area to free it from its bindings.
You must first move a little forward and turn left to see the fire vessel that can be hit to blow up the obstruction. Then, you can go back and drop down to that location.
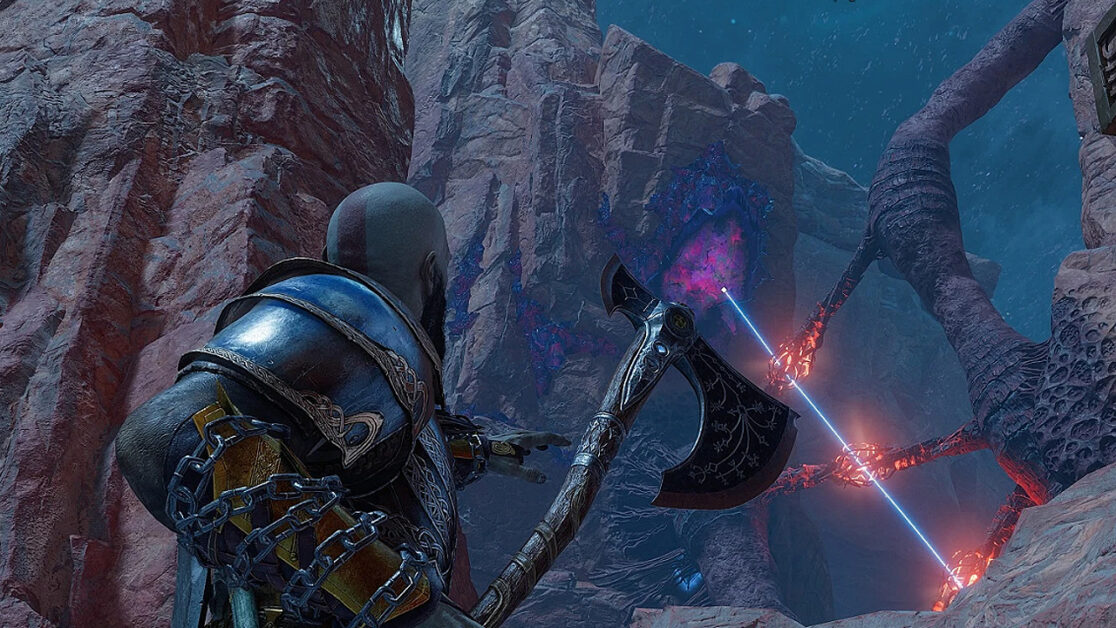
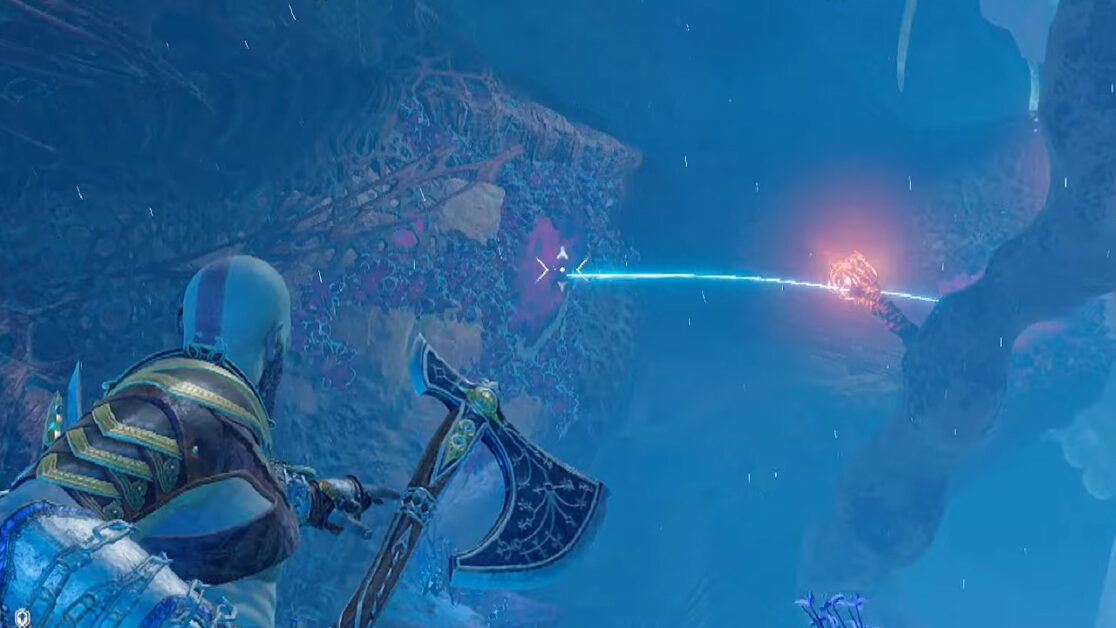
To your right, you should be able to see a hive matter node and a purple crystal right behind it. Aim at the node so that it hits the purple crystal behind it – provided that the trajectory line is blue.
Now, head back up and look at the wall to your left. There should be another purple crystal here. Aim at it and throw your Leviathan axe at it, completing the last hive matter puzzle and freeing the Hafgufa.
Continue your way along till you find yourself next to a legendary chest. Climb the wall next to it and head forward to find a hatch opening, destroy it to get out.
Now clear out the hive matter and grapple out. You must now head northwest to destroy the hive cage. Use the Gulon sled outside to find the cage.
Once the cage is destroyed, the Hafgufa is freed, and the Secret of the Sands quest is completed.