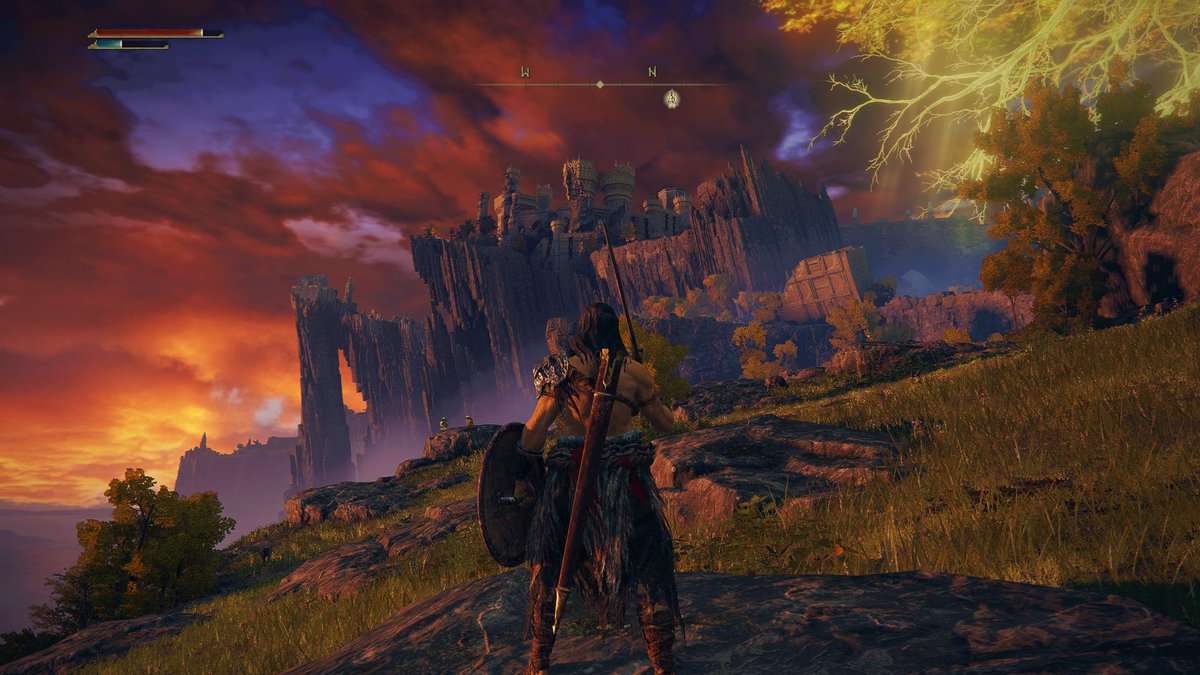
As you reach the end game of Elden Ring, enemies and bosses become increasingly difficult, and you need a good build to survive. Often throwing several phases at you and sometimes even killing you in a single blow. It is pivotal to have a strong build that not only lets you defeat but also progress to the end of the main narrative.
In Elden Ring, the end game generally begins once you leave Leyndell, the Royal Capital, as the difficulty spikes considerably once you do. When you leave Leyndell, make sure you’re at least level 150.
In this guide, we’ll look at four end-game-specific builds for Elden Ring, ranging from pure strength to bleed builds. We’ll cover every facet of each build, including weapons, skills, talismans, armor, and more.
6. Elden Ring End Game Strength Build
| Class | Hero or Vagabond |
| Flask spread | HP only |
| Flask of Wondrous Physick | Strength-knot Crystal Tear and Leaden Hardtear |
| Weapons | Greatsword or Grafted Blade Greatsword |
| Shields | Erdtree Greatshield |
| Armor | Lionel’s Set |
| Stat point distribution | Strength (60), Vigor (60), and Endurance (40) |
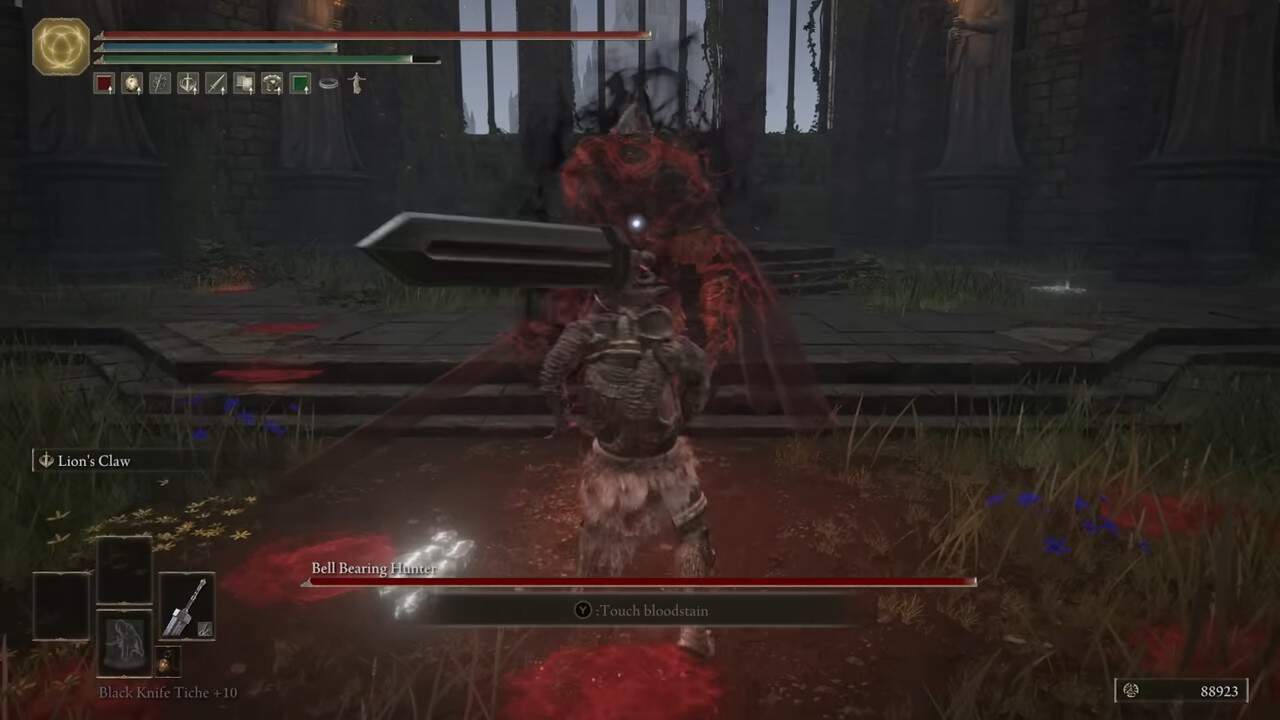
| Spirit Summon | Black Knife Tiche or Mimic Tear |
| Ash of War | Lion’s Claw |
| Spells | none |
| Incantations | Flame Grant Me Strength |
| Talismans | Radagon’s Soreseal, Dragoncrest Greatshield Talisman, Shard of Alexander, and Axe Talisman |
This pure strength end-game build relies heavily on strength and heavy weapons to remove significant damage in a single blow. This build works best if you start with the Hero or Vagabond, though by the time you reach level 150, your starting class means little in the way of your builds.
Regarding the stats, for this build, you’ll primarily put points into Strength, Vigor, and Endurance. When you’re at level 150 (i.e., the late-game character level), make sure these stats are upgraded in the configuration above. You can also add points to Dexterity to increase the pool of weapons you can effectively equip.
Assign all your flasks to HP since this build uses no spells. For your Flask of Wondrous Physick, use the Strength-Knot Crystal, as it increases your strength stat, and the Leaden Hardtear, which increases your Poise, allowing you to take more hits before you are staggered.
The best weapon for this build is the Greatsword or the Grafted Blade Greatsword, both work equally as well, but the Greatsword is much easier to acquire. Use the Erdtree Greatshield for your shield, and for your armor, use Lionel’s Set, as it provides excellent damage negation across all physical damage types.
For the Spirit Summon, the Mimic Tear is the best option overall is it allows you to double down on your damage output by summoning a replica of your character, though Black Knife Tiche is also a good option. The Lion’s Claw Ash of War allows you to execute a strong forward-rolling attack, which goes hand in hand with this build’s main intent.
The strength end-game build does not use any spells, though it does use the ‘Flame Grant Me Strength’ incantation, increasing Physical attack power. Lastly, use Radagon’s Soreseal for the Talismans, as it increases your Strength, Vigor, Endurance, and Dexterity by 5. While you take 15% more damage, it is offset by the armor set highlighted above and the next Talisman for this build, Dragoncrest Greatshield Talisman.
For the last two Talismans, use Shard of Alexander and Axe Talisman. The former increases the attack power of Lion’s Claw by +15%, while the latter increases the damage done through charged attack by +10%.
5. Elden Ring End Game Intelligence/Mage Build
| Class | Confessor |
| Flask spread | 3 to 1 ratio; FP and HP |
| Flask of Wondrous Physick | Magic-Shrouding Cracked Tear and Intelligence-Knot Crystal Tear |
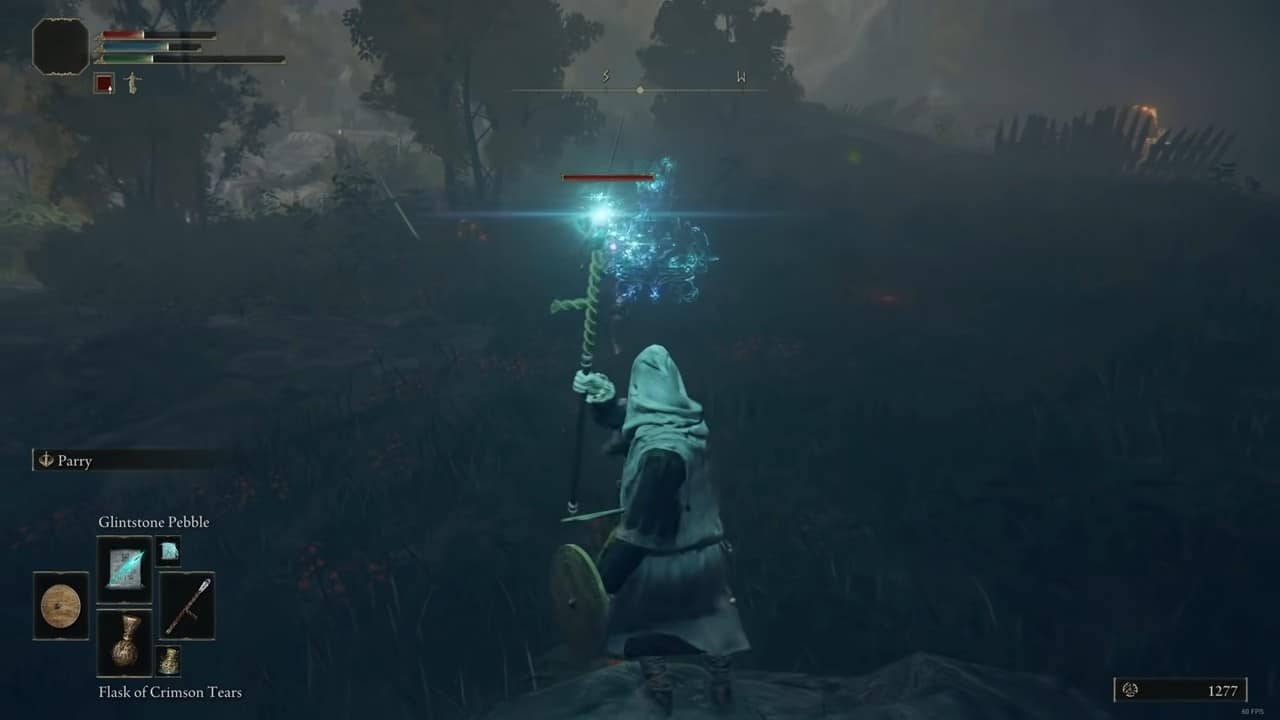
| Weapons | Azur Glintstone Staff |
| Shields | Turtle Shield |
| Armor | Lusat’s Set |
| Stat point distribution | Intelligence (70), Mind (35), and Vigor (50) |
| Spirit Summon | Mimic Tear |
| Ash of War | Spinning Staff |
| Spells | Stars of Ruin, Star Shower, Ranni’s Dark Moon, Cannon of Haima, Gavel of Haima, Meteorite of Astel, and Crystal Barrage |
| Incantations | Golden Vow |
| Talismans | Erdtree’s Favor, Cerulean Amber Medallion, Magic Scorpion Charm |
The Mage/Intelligence end-game build is all about harnessing the power of spells to take out your enemies from a distance. The best class to start this build off with is the Confessor. Like before, by the time you reach level 150, this won’t matter much, but starting with this build will give you a head start on your key stats.
Regarding the stat distribution, the three main attributes you should focus on are Intelligence, Mind, and Vigor. The configuration above will let you maximize the potential of this build. Furthermore, you can add some points to Endurance for more leeway to dodge during big boss battles.
Most of your flask spread will be centered around FP as this build exclusively uses spells, but make sure you have at least some HP flasks on hand. For the Flask of Wondrous Physick, use Magic-Shrouding Cracked Tear and Intelligence-Knot Crystal Tear. The former temporarily boosts your magic attacks, while the latter increases your intelligence for a short time.
For your armaments, you’ll be using the Azur Glinstone Staff, as it scales primarily with Intelligence, and the Turtle Shield, which gives you good mobility and decent damage negation. Use Lusat’s Set for your armor, as it not only increases the potency of all sorceries by +15%, but it also increases the damage of two of the spells in this build (Stars of Ruin and Star Shower) by +10%.
The best Spirit Summon for this build is the Mimic Tear, as it lets you summon a replica of yourself that works exactly like you, while the Ash of War, The Spinning Staff, lets you get out of sticky situations quickly should you find yourself overwhelmed.
The meat of this build is its spells. The following spells deal the most damage and perfectly synergize with this build; Stars of Ruin, Star Shower, Ranni’s Dark Moon, Cannon of Haima, Gavel of Haima, Meteorite of Astel, and Crystal Barrage. While Incantations aren’t important to this build, you can use Golden Vow to increase your damage output by +15% and damage negation by -10%.
Lastly, use Erdtree’s Favor for the Talismans to increase your HP, Stamina, and Equip Load, Cerulean Amber Medallion to increase your maximum FP, and Magic Scorpion Charm to increase magic damage by +12%.
4. Elden Ring End Game Sorcerer Build
| Class | Astrologer / Confessor |
| Flask spread | 3 to 1 ratio; FP and HP |
| Flask of Wondrous Physick | Magic-Shrouding Cracked Tear and Intelligence-Knot Crystal Tear |
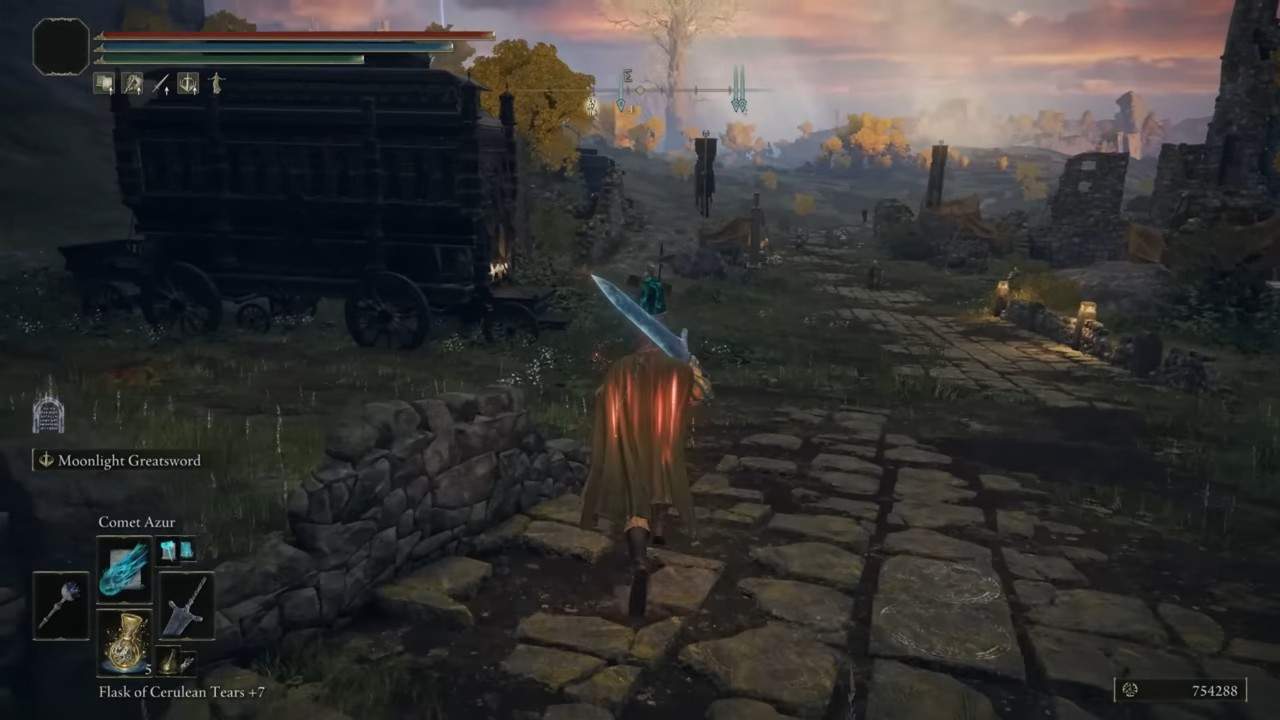
| Weapons | Lusat’s Glinstone Staff and Moonlight Greatsword |
| Shields | Turtle Shield |
| Armor | Royal Remains Set |
| Stat point distribution | Intelligence (70), Mind (35), and Vigor (50) |
| Spirit Summon | Mimic Tear |
| Ash of War | Halfrost Stomp |
| Spells | Comet Azur, Glinstone Arc, Shard Spital, Magma Shot, Ranni’s Dark Moon, and Rock Sling |
| Incantations | none |
| Talismans | Godfrey Icon, Old Lord’s Talisman, Moon of Nokstella, Radagon Icon |
The Sorcerer end-game build is an offshoot of the previous Mage/Intelligence build. It shares many of the same characteristics as the previous build but is a little more flexible regarding combat and spells. You can start with either the Astrologer or Confessor. The Flask Spread and Flask of Wondrous Physick will remain the same.
Stat points distribution will remain the same, but you’ll be putting your extra points into Strength so you can wield both the staff and sword for this build.
For the weapons, you’ll be using a staff and a Greatsword. For the former, use Lusat’s Glinstone Staff, and for the latter, use Moonlight Greatsword, as both scale with Intelligence and Strength. While you can use a shield, the double-wield nature of this build means it will seldom come into use. The Turtle Shield is the best for this build, should you decide to. Use the Royal Remains set for the armor, as it provides excellent physical and elemental damage resistance.
We’ll once again be using the Mimic Tear Spirit Summon to maximize the potential of this build, while for the Ash of War, we’ll be using the Halfrost Stomp, which allows you to stomp the ground to lay down some frost damage that manifests through 100% magic damage.
You’ll use Comet Azur, Glinstone Arc, Shard Spital, Magma Shot, Ranni’s Dark Moon, and Rock Sling for the spells. However, since we’re using the Moon of Nokstella Talisman, which grants an additional two spell memory slots, you’ll have greater freedom to equip many more spells. The other Talisman for this end-game build includes the Godfrey Icon, which increases the power of spells and attacks, and Old Lord’s Talisman, which increases the duration of spells by +30%. The last Talisman, Radagon Icon, reduces the time it takes to cast a spell.
3. Elden Ring End Game Samurai/Bleed Build

| Class | Samurai |
| Flask spread | HP only |
| Flask of Wondrous Physick | Greenburst Crystal Tear and Thorny Cracked Tear |
| Weapons | Bandit’s Occult Curved Sword and Scavengers Occult Curved Sword |
| Shields | none |
| Armor | White Mask, Raptor’s Black Feathers, Blaidd’s Gauntlets and Royal Remains Greaves |
| Stat point distribution | Dexterity (40), Endurance (60) and Vigor (40) |
| Spirit Summon | Mimic Tear |
| Ash of War | Seppuku |
| Spells | none |
| Incantations | none |
| Talismans | Erdtree’s Favor, Viridian Amber Medallion, Claw Talisman, and Rotten Winged Sword Insignia |
The Samurai/Bleed Build uses the bleed status effect in the Elden Ring to quickly defeat enemies. This build is slightly more technical in that it combines bleed with jump attacks, but once you master it, it’ll let you breeze through the later stages and bosses of the game. You can start this build by selecting the Samurai class, as it has the highest starting Dexterity, the most important stat for this build.
Apart from Dexterity, you’ll mainly be focusing on Endurance and Vigor. Flask Spread will be HP only as this build doesn’t use Sorceries or Incantations. Use Greenburst Crystal Tear and Thorny Cracked Tear for the Flask of Wondrous Physick. The former increases your stamina recovery speed by +15%, while the latter increases the intensity of consecutive attacks.
This is a dual-wield build, and the weapons you’ll be using are Bandit’s Occult Curved Sword and Scavenger’s Occult Curved Sword. Shields won’t come into play for this build. This build’s armor setup is slightly convoluted, as you’ll mix elements from several sets. For the helm, you’ll use the White Mask, the chest armor will be Raptor’s Black Feathers, while Blaidd’s Gauntlets will round out the rest of the look. (you can choose whichever greaves you like) The White Mask increases your attack power by +10% once you’ve inflicted bleeding, while Raptor’s Black Feathers increases jump attack damage by +10%. Blaidd’s Gauntlets are mainly used here for their resistance stats.
We’ll once again be using the Mimic Tear as it is one of the best Summons in the game, as for our Ash of War, use Seppuku as it adds +30% bleed buildup to your weapon, however, it does take away 15% of your health.
For the first two Talismans, use Erdtree’s Favor and Viridian Amber Medallion. The former grants you increased HP and Stamina, while the latter further increases your Stamina. The other two talismans you should use are Claw Talisman and Rotten Winged Sword Insignia. The Rotten Winged Insignia increases attack power with each successive blow, while the Claw Talisman increases jump attack damage by +15%.
Note: to properly play this build and maximize its damage output, jump before initiating each attack, and once you do, unleash a flurry of attacks in quick succession. With the items we’ve used above, your damage output will be immense, and you’ll proc blood loss extremely fast.
2. Elden Ring End Game Faith Build
| Class | Hero |
| Flask spread | 2 to 3 ratio; FP to HP |
| Flask of Wondrous Physick | Windy Crystal Tear and Winged Crystal Tear |
| Weapons | Erdtree Seal and Blasphemous Blade |
| Shields | none |
| Armor | Haligtree Knight Set |
| Stat point distribution | Faith (70), Mind (25) and Endurance (50) |
| Spirit Summon | Mimic Tear |
| Ash of War | Sacred Blade |
| Spells | none |
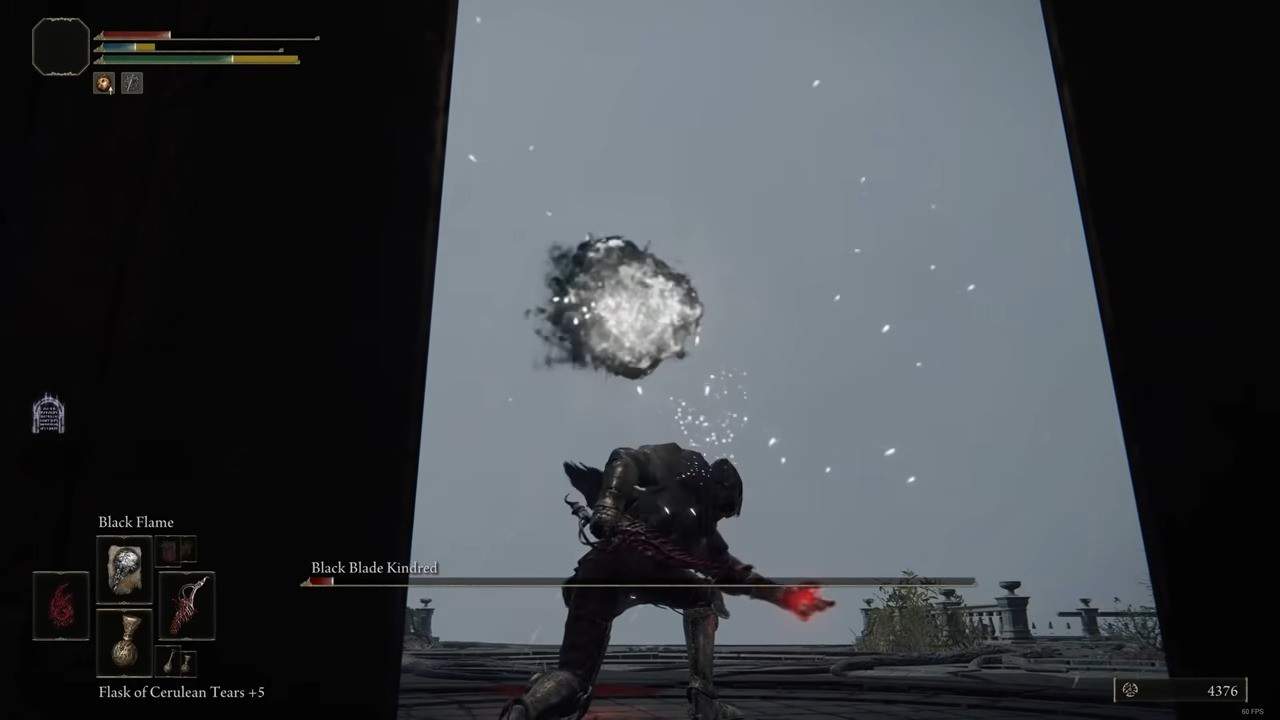
| Incantations | Black Blade, Black Flame, Bloodflame Blade, Beast Claw, Frenzied Burst, and The Flame of Frenzy |
| Talismans | Flock’s Canvas, Godfrey Icon, Fire Scorpion Charm, and Crucible Feather Talisman |
This end-game build is all about incantations. Incantations work slightly differently to Sorceries and require slightly different stat investments. Start this build off by using the Hero Class. The flask spread will be a 2:3 split between FP and HP. Combine Windy Crystal Tear and Winged Crystal Tear for the Flask of Wondrous Physick. Both of these tears help you better maneuver around the battlefield as dodging will be your best defense for this build.
The main stats you’ll be focusing on for this build are Faith, Mind, and Endurance. Additionally, you can add some points to Vigor to increase your maximum HP. The main vessel through which you cast your incantations are Seals and for this build, the Erdtree Seal is the best choice as it scales with Faith. For your off-hand weapon, make use of the Blasphemous Blade, which is a weapon that, once again, scales with faith. For the armor, use the Haligtree Armor.
We’ll once again use the Mimic Tear for the Spirit Summon and for the Ash of War, we’ll use Sacred Blade. This skill imbues your melee weapon with holy essence and also releases a holy essence projectile every time you swing your weapon.
The incantations themselves make up most of this build’s offensive power and strategy. Use the following Incantations: Black Blade, Black Flame, Bloodflame Blade, Beast Claw, Frenzied Burst, and The Flame of Frenzy. All of these incantations will give you an upper hand during the game’s later stages and areas.
Lastly, for the Talismans, use the following: Flock’s Canvas, Godfrey Icon, Fire Scorpion Charm, and Crucible Feather Talisman. Flock’s Canvas buffs all your damage incantations while Godfrey Icon increases the power of incantations and attacks. The Fire Scorpion Charm increases the fire damage you deal by +12% (this talisman works particularly well with the Frenzied Burst and The Flame of Frenzy incantations) Lastly, the Crucible Feather Talisman negates damage and enhances your rolling dodges.
1. Elden Ring End Game Dexterity Build
| Class | Samurai |
| Flask spread | HP only |
| Flask of Wondrous Physick | Dexterity-knot Crystal Tear and Strength-knot Crystal Tear |
| Weapons | Dragon King’s Cragblade |
| Shields | Dragon Claw Shield |
| Armor | White Reed Set |
| Stat point distribution | Dexterity (80), Vigor (50) and Endurance (29) |
| Spirit Summon | Lhutel the Headless |
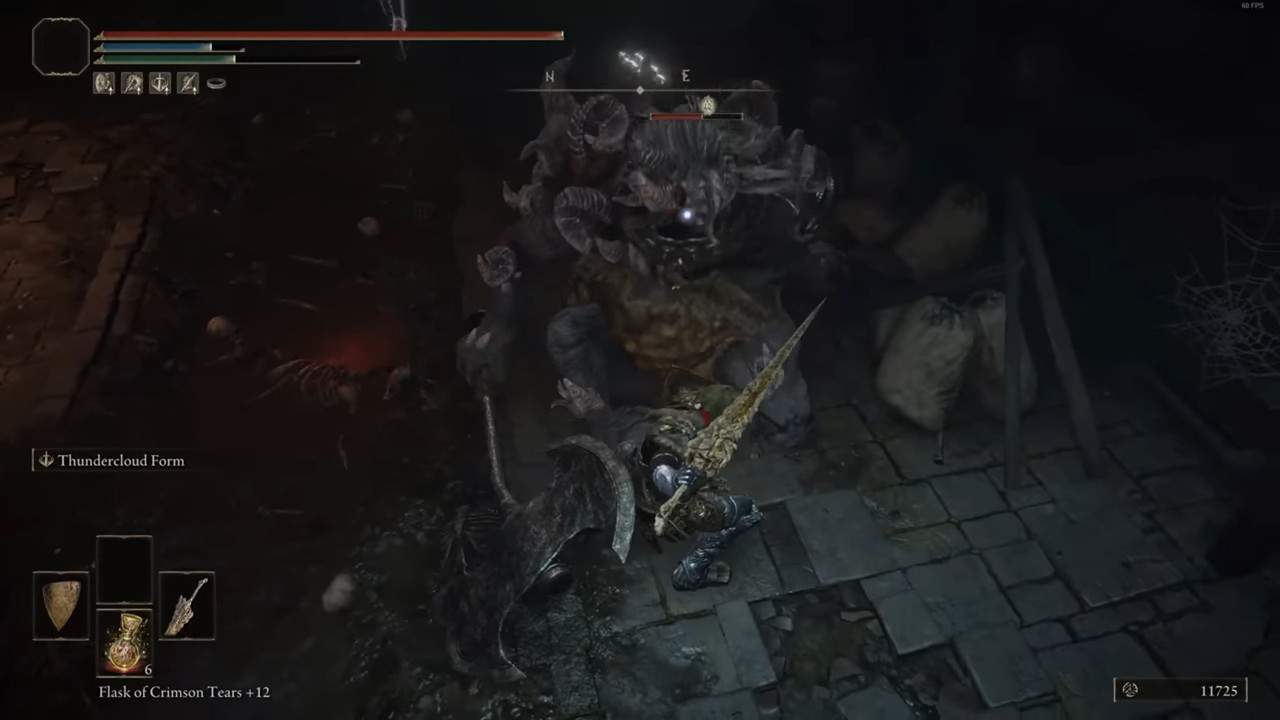
| Ash of War | Thundercloud Form |
| Spells | none |
| Incantations | none |
| Talismans | Prosthesis-Wearer Heirloom, Shard of Alexander, Godfrey Icon and Viridian Amber Medallion |
The last build on our list is a pure Dexterity build. Like the blood loss build, we’ll start with the Samurai, as it comes with the highest Dexterity out of all classes. Though, this won’t matter much when you reach level 150. The Flask Spread will be HP only, as we won’t use any spells or incantations. For the Flask of Wonderous Physick, use Dexterity-knot Crystal Tear and Strength-knot Crystal Tear. The Dexterity-knot Crystal tear temporarily increases your Dexterity, while the Strength-knot Crystal Tear temporarily increases your strength.
The main focus, as far as tats are concerned, are Dexterity, Vigor, and Endurance. Apart from these, put a few points into Strength as well. While you can use several weapons when going for a Dexterity build, The Dragon King’s Cragblade and the Dragon Claw Shield will net you the most utility as not only do they scale with Dexterity, but they also provide some of the best offense and defense in the game. For the armor, use the White Reed Set.
For the Ash of War, use the default one that comes with Dragon King’s Cragblade, Thundercloud Form, as it deals a lot of damage in a very wide AOE, we’ll pair this with Lhutel the Headless as our Spirit Summon, as he can dish out massive damage and distract the enemy while you charge up Thundercloud Form.
We will not be using any sorceries or incantations for this build. For the Talismans, go with the Prosthesis-Wearer Heirloom, which increases your maximum Dexterity, along with Shard of Alexander, which boosts the attack power of your Ash of War. Additionally, use the Godfrey Icon and Viridian Amber Medallion. The former will further enhance your Ash of War and increase your stamina.