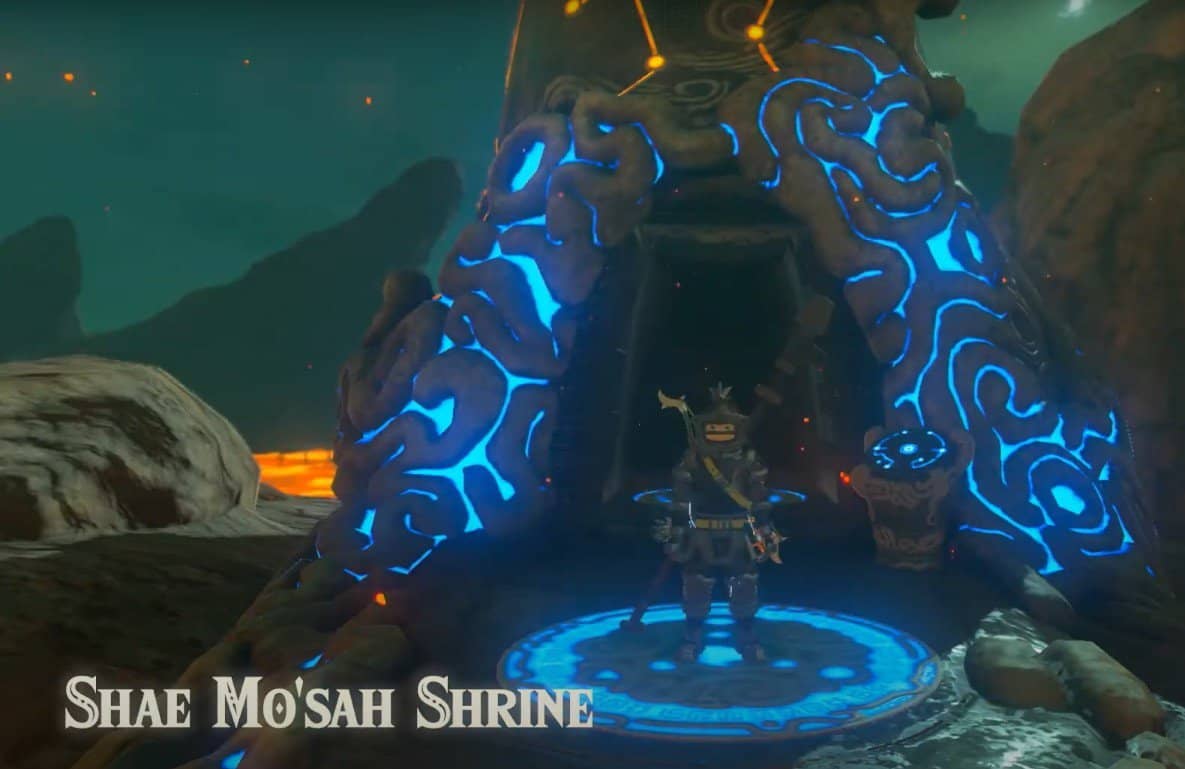
Zelda Breath of the Wild, Shae Mo’sah, is one of the nine shrines in the Eldin region. You must complete a puzzle trial to complete this shrine in Zelda BOTW. Once the trial is completed, you can go to the monk and get your reward in Zelda Breath of the Wild. We have prepared this guide to help you solve the puzzle and complete the Shao Mosah shrine in Zelda Breath of the Wild.
Shae Mo’sah Shrine location
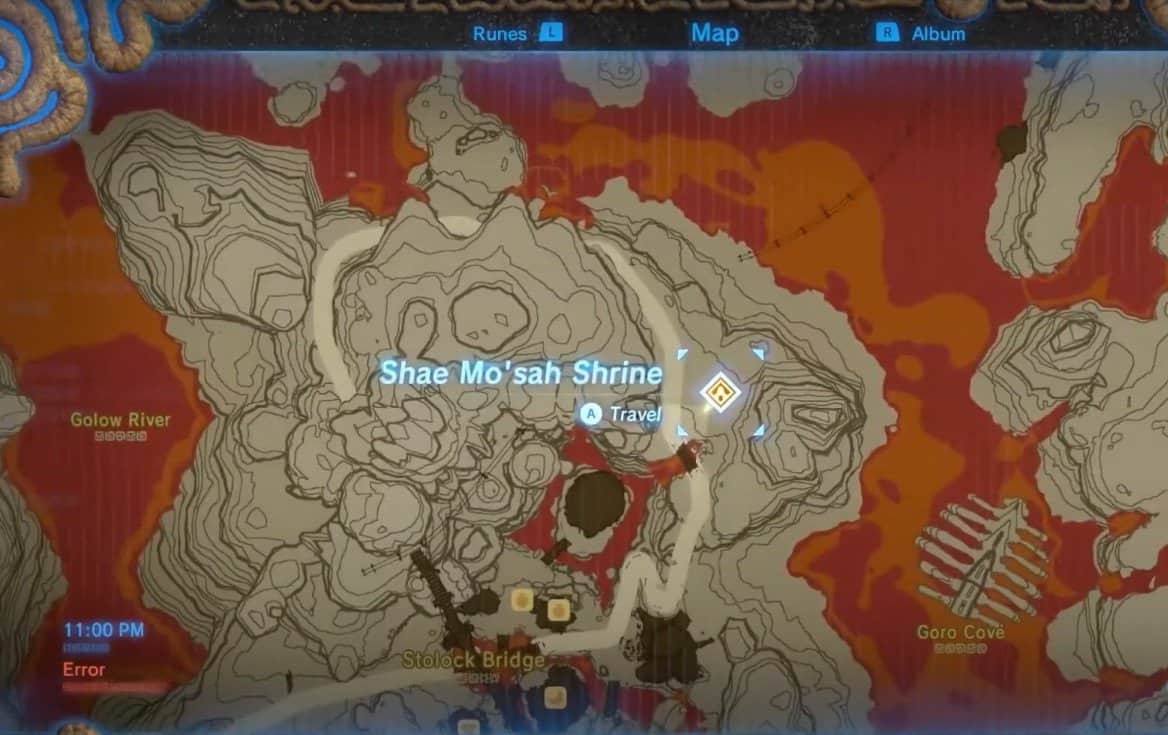
Shae Mo’sah Shrine is on a hill northeast of Goron City. The easy way to get to this shrine is to locate the bridge of the volcano and then paraglide straight towards the hill below death mountain.
Zelda Breath of the Wild Shae Mo’sah shrine walkthrough
After entering the Shae Mo’sah shrine in Zelda BOTW, you must solve the “Swinging Flames” puzzle. At the end of the hall, you can see an unlocked door. Around the door are walls covered with leaves. A few steps behind is a button that opens the door as long as you press it.
You can use an arrow to cut the rope of the lantern hanging in the ceiling to burn the leaves and expose a barrel behind the leaves. You can then use a barrel to place it on the button and unlock the door.
Open all chests
The easiest way to unlock the door is to use Stasis on the button and leave it pressing so you can pass through the door. In the next room on the left side is a chest. Open the chest to acquire a stone smasher in Zelda Breath of the Wild.
Now on the right side of the hall, you will fight some guardians. After killing them, go to the right corner to open a chest containing a ruby. Climb the slope behind the chest and reach the floor. On the right side of the floor, go behind the stairs to open another chest containing 10x Ice Arrows.
Now, climb those stairs and stand on the orange button. A lantern will emerge from the ceiling. Use magnesis and take the lantern to the leaves on the wall next to it. This will burn the leaves and cause the ball on the shelf to drop into a slope.
The ball will slide and stop at the barrier. Go around the slope and stand on the orange button to unlock the barrier. The ball will hit on the mill wheel and open the door to the next room in the Shae Mo’sah shrine in Zelda BOTW.
Inside the room is a chest on the right of the slope. Open the chest to acquire the minor key. Then climb the slope to the next floor.
Go to the right side and open the door with the key. Stand on the button at the top of a ladder causing two lanterns to emerge from the ceiling. You can use the lanterns to burn the leaves and drop the barrel. But, this will be a little difficult as you have to drop the lantern at an angle.
Instead, stand on the button and use Stasis to keep the door open so you can enter the next room. In the next room, interact with the shrine Shae Mo’sah Monk to claim the spirit orb in Zelda BOTW.