Our Outriders Chrysaloid Boss Guide walks you through each step of your way in beating the Chrysaloid, including its weaknesses and moves in the all-new Outriders.
Outriders Chrysaloid Boss
The brand-new RPG shooter, Outriders, hosts an array of dangerous bosses for you to take down. Chrysaloid is the fourth boss whom you’ll encounter in this game.
The fight with Chrysaloid Boss is divided into a couple of phases. So, let’s go ahead and take a look at each of them!
Phase # 1
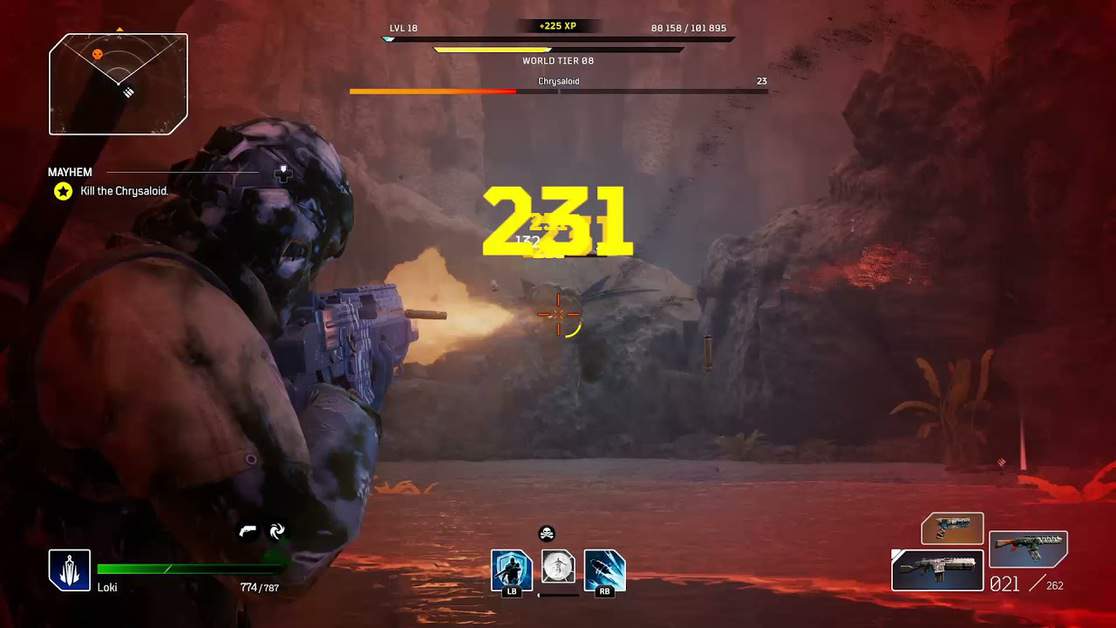
In the first phase of the fight, you’ll find yourself inside some ruins on the top of a mountain with Chrysaloid at its entrance trying to get to you. The stone wall around the entrance will prevent him from getting to you.
Behavior and Moves
Chrysaloid opens up his mouth and lets out a stream of fire in your direction that spreads over a semi-circular arc. Chrysaloid throws huge rock pieces on you. Chrysaloid also attacks you with his claws when in close proximity.
Fight Tips for Phase # 1
The key to this boss fight is for you to stay patient and keep shooting at Chrysaloid with your sniper and DMR rifles.
The first move mentioned above is the one Chrysaloid will use the most often and can dish out some hefty damage.
To avoid it, this is what you have to do: whenever you see him opening up his mouth in a purposeful manner, strode towards the rock towards the east and take cover using it. You won’t get hurt even a bit.
The rocks that Chrysaloid throws at you can also be pretty damaging. Dodging them is simple.
Small circles outlined in red appear wherever these rocks are about to fall. So, just simply avoid being inside any of those circles. As for the third move mentioned above, as long as you stay at a fair distance from Chrysaloid, you don’t have to worry about it.
Throughout the battle, you’ll have to follow the aforementioned tips numerous times while raining bullets onto the boss.
There’ll be a chest for restocking ammo near the boundary of the place. So, whenever you run out of ammo, simply use it to get more. Soon, the ruins will crumble to the ground, and you’ll fall right into the stream of water on the ground.
Phase # 2
In this phase, you’ll be fighting against Chrysaloid out in the open, with no barrier in between.
Behavior and Moves
In addition to the attacks in the first phase, Chrysaloid will also send over his small flying companions in your direction from time to time.
Fight Tips for Phase # 2
In this phase of the battle, you’re completely exposed to Chrysaloid with nothing to use for cover.
Here, you’ll need to react a lot quicker as only the perfect reflexes can help you to come out of this chaotic situation alive.
As for Chrysaloid’s flying companions, don’t underestimate them. They have a very decent HP and shoot out highly destructive fireballs in your direction.
Whenever they come after you, shift your entire focus onto them and bring them down.
Again, there will be an ammo restocking chest for you in the area, so don’t worry about draining your ammo.
All other tactics for this phase are the same as for the first phase, and as long as you adhere to them, it wouldn’t take much longer for you to become victorious.