This guide, Demon’s Souls Remake Tower of Latria, is a walkthrough of the Archstone of the Tower Queen – Tower of Latria. This walkthrough contains of a chronological description of all the events, encounters and items in the location to help you tackle the area effectively.
Demon’s Souls Remake Tower of Latria
There are many locations with traps and holes leading to death by gravity in Demon’s Souls Remake, the Tower of Latria is no exception; As you start and head further into the dark hallway, stay vigilant since there are many pits in the area.
As you head further, you will come across a metal fence from where you will have two options to move further – left and right.
The way to the right is a dead end, but you may go there to collect Augite of Guidance from a corpse.
The way to the left is your way forward. So, go to the left and as you move ahead, you will be passing through a hallway of prison cells with prisoners inside.
You may unlock the gates to fight the prisoners and to investigate the cells for items.
It would be better if you only unlock the third cell to the left since it contains a dead corpse inside. You will find a wooden catalyst, wizard’s clothes, wizard’s shoes and wizard’s gloves from there.
Move ahead further from the area as it leads to a right turn. When it turns right, be ready to encounter the first enemy.
You should be fast enough to hit him before he starts hitting since his attack might slow you down.
Once you have dealt with the enemy, check the wall near you for Prison of Hope and 3F cell key. Also, check the corner to the left for a Renowned Soldier’s Soul.
Now go ahead further along the ledge and grab the keys from the guard that you just defeated.
Instead of going to the path branching down, go ahead straight and hack apart some caskets.
Then search the area around and you will find a Renowned Soldier’s Soul. After that, head through the passage towards the metal fence on the other side.
Just as you arrive here, take an immediate left and hit the guard coming towards you.
Move ahead cautiously then as there is a skeleton in the passageway that is hiding behind the column. Stay vigilant and kill him as soon as he appears to attack you.
Turn right from here and move ahead. You will find another Prison of Hope, 3F Cell Key hanging on the wall. Grab the key and then move ahead towards the path where you can see some skeletons hanging inside the prison cells.
At the end of the same path, you will find a body dangling over a metal fence. Search the body to find another Renowned Soldier’s Soul.
Now head back all the way to the first metal fence where the way to the right was a dead end.
You have now found the key to unlock the door there, so unlock that door and you will find another fog door.
Pass through this door and climb the stairs on the way. Move ahead along the passage and stay on your guard since there is a skeleton that will attack you from behind a pillar.
Now the whole metal fence area is round and there is only one locked door to the left. Ignore that and move ahead round the area to come across a cell with a glowing item inside.
However, there will also be a bunch of insane prisoners who you might not want to take a fight against. So, you may either hack at them as you trot by or massacre them by getting inside.
One way or another, reach the glowing item and you will obtain the Estoc sword.
Exit the cell then and move ahead further. There will be another left turn as you proceed, so take a left and you will come across some statues.
You can open these statues, but you shouldn’t since they are a trap.
Head past the statues and go towards the balcony area. Stay vigilant since there is a guard patrolling over there.
Once you take him down, head to the ledge he was patrolling upon and grab Prison of Hope, 4th floor key as well as Prison of Hope, 4th Floor Cell key.
Now instead of going further to the left, head back through where you saw the trap statues and towards the gate to the right that was locked previously. You can open it now since you have obtained the key.
As soon as you enter through the gate after unlocking it, move quickly as there will be a guard to the right soon going to hit you.
So, deal with him and then you will then find another cell to the right behind him.
Pass through the other side of the cell and another guard will be patrolling near the fence.
Deal with this guard and head towards the right side of the balcony from where you entered.
You will find a Renowned Hero’s Soul along the fence. There will be yet another guard past the metal fence and hitting him will be quite tough. So be quick and avoid him for now since you can’t inflict much damage to him from behind the fence.
Then, head right of the corridor and you will come across another cell.
Step inside the cell to meet a merchant woman who has got a lot of precious items for sale. The Ring of Avarice is a solid investment, but you may choose to buy it later when you can afford to spend a fortune on it.
So, after you have bought what you needed, head back through the metal fence area and then explore the area to the left.
Move fast through this area as that guard past the fence can still fire magic at you if you stay out in the open.
There will be a locked gate by the end of the corridor, but you do have the key to unlock it. So, unlock the door and head through it to reach a staircase going down.
Head down the staircase and you will experience the landing widening and the stairs will continue through a narrow archway.
So before going through the archway, inspect the area around to find Old Spice on a corpse near another archway.
Head through this archway and you will come across another cell with glowing light inside.
However, you will not be able to unlock the cell yet. So just keep the location noted as you will have to come here later, and take the previous archway down the stairs.
Now head forward after climbing down the staircase and grab the keys hanging to the right, beside the locked gate. You will get Prison of Hope 1F Key and Prison of Hope 1F Cell Key.
Continue along the hallway and then go through the door in the end since the door to the door to the right cannot be unlocked yet.
Passing through the door will take you through a short staircase that goes through a wall of fog and keep going until you come across a glowing item that will be a Heavy Crossbow.
However, that very guard who you could not finish due to the metal fence in between will be guarding the Heavy Crossbow.
So be quick and this time act faster than he does and finish him off. Grab the Heavy Crossbow after finishing him.
Go further down the staircase and then through the gate that you can unlock. Just as you enter through the gate, you will see many pillars.
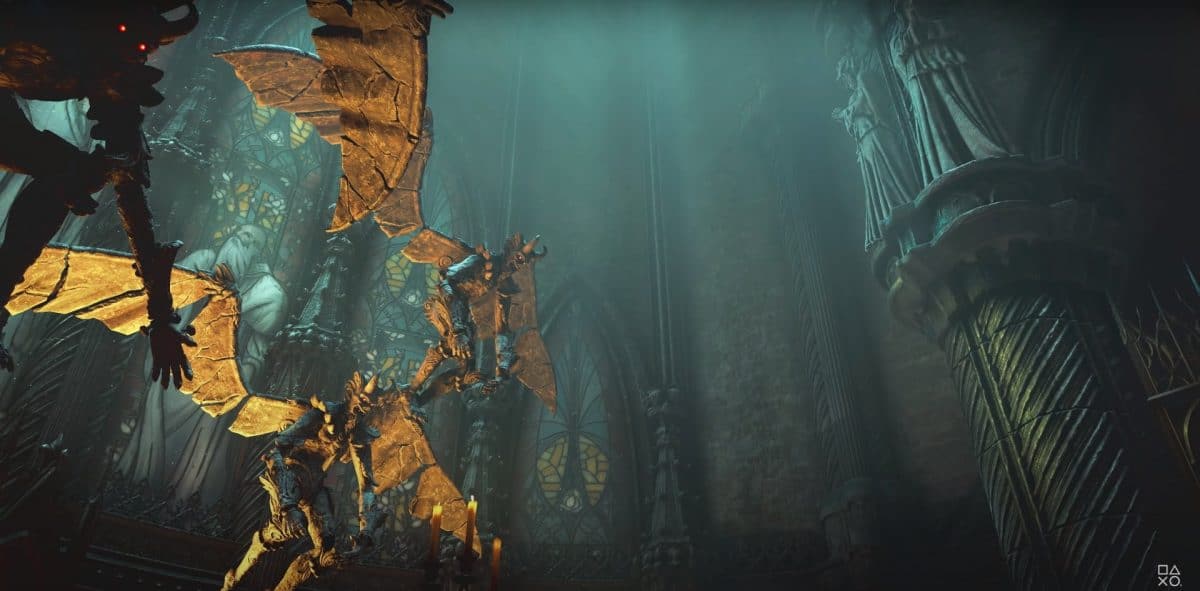
Quickly hide behind a pillar as there is a powerful and fast enemy somewhere to the left who you cannot defeat yet.
So, stay behind the pillars and move tactically across them so that none of the enemy’s arrows hit you.
Now as you move further ahead, though you will be out of the enemy’ arrows range, you will be attacked by yet another prisoner as the area widens.
Finish him off and then investigate the surroundings to grab a Silver Bracelet and other precious items.
From where you obtained the Silver Bracelet, take a right and move ahead.
You will see a cracked wall and some glowing items beyond it. However, approaching it will attract the fast and powerful enemy that you have to avoid.
This time, instead of avoiding, use the pillars as your shields and attack him until he is knocked down.
Once he is down, approach the glowing items and you will get Old Spice and some other items in the surrounding.
Now to the left of where the monster was, is an opening where you need to go next. So, move ahead through it and a cutscene will be triggered, revealing a ballista weapon.
Protecting yourself from the ballista weapon’s shots, head towards where the shots are landing to acquire Prison of Hope Warden’s Key from a corpse.
Once acquired, head back all the way to the area where you had got the 1F keys. There were two locked doors there that you couldn’t open then but can open now.
When you reach there, go through the door that comes first and you will see a guard patrolling in the hallway.
Take him out and then grab the Renowned Hero’s Soul from a body resting by the metal fence nearby.
Go ahead further to the right then and you will enter a wider room. There will be another guard to the right.
Take him out and then go further through the hallway to obtain another Renowned Hero’s Soul.
You may examine the whole area for more items and a Silver Catalyst, or you may directly head towards the ground level. From the left of the entry door, there will a door covered in fog.
Passing through the fog will take you to an open area where there is a tower ahead of you and a ballista weapon to your right.
Walk towards the weapon and pull the level to disable it.
Then, head towards the tower and climb the spiral staircase and through the long ledges. By the end of the area will be a door with a man on a stool and keys hanging by the wall.
Grab the keys and talk to the man who claims to be a humble servant.
However, he is lying and will cause you trouble with the Fool’s idol boss later on if you let him live now. So, kill the man and climb down the tower.
To the right of the tower will be another staircase that you can climb. You will be facing the area’s Boss if you take this way.
So, first, head back all the way to the 1F key’s location to enter through the second door that has not been explored yet.
Unlock the door and you will meet Sage Freke. Talk to the sage and he will reward you with Geri’s Stiletto.
Then head back towards the disabled ballista weapon and go where it was firing. You will obtain a Stone of Ephemeral Eyes.
Then go again to the tower with a spiral staircase. Climb all the way up and you will face another enemy who is invisible at first.
To finish him off, keep the shield on and steps towards him until you can attack him with melees.
Once finished, head back to the Boss’ location and the Fool’s Idol Boss Fight will begin.
The Boss fight for the Tower of Latria in Demon’s Souls Remake is the Fool’s Idol and she can be pretty annoying; but worry not, we have a guide for that.
After taking out the Boss, you will be dragged up to a higher location. Climb the staircase there and then touch Tower of Latria Archstone to obtain Doll Demon’s Soul and finish this area.